
Looking for a modern and stylish addition to your furniture? Learn how to make acrylic table legs and give your table a sleek and contemporary look. With just a few materials and simple steps, you can create custom acrylic table legs that will instantly elevate the aesthetic of your space. Whether you’re a seasoned DIY enthusiast or a beginner, this guide will provide you with all the information you need to create stunning acrylic table legs that are sure to be a conversation starter.
Acrylic table legs are not only aesthetically pleasing but also highly durable and versatile. With their transparent and glossy appearance, they can complement any interior design style, from minimalist to eclectic. By making your own acrylic table legs, you have the freedom to customize their size, shape, and color to perfectly match your table and personal taste. Plus, acrylic is easy to clean and maintain, making it a practical choice for furniture legs.
To make acrylic table legs, you’ll need a few key supplies such as acrylic sheets, a saw, adhesive, and sandpaper. Begin by measuring and marking the desired height and dimensions for your table legs on the acrylic sheets. Use the saw to carefully cut out the legs according to your measurements. Next, sand the edges of the acrylic to create smooth and polished finishes. Finally, assemble the legs to your table using a strong adhesive. Voila! You now have your very own custom acrylic table legs.
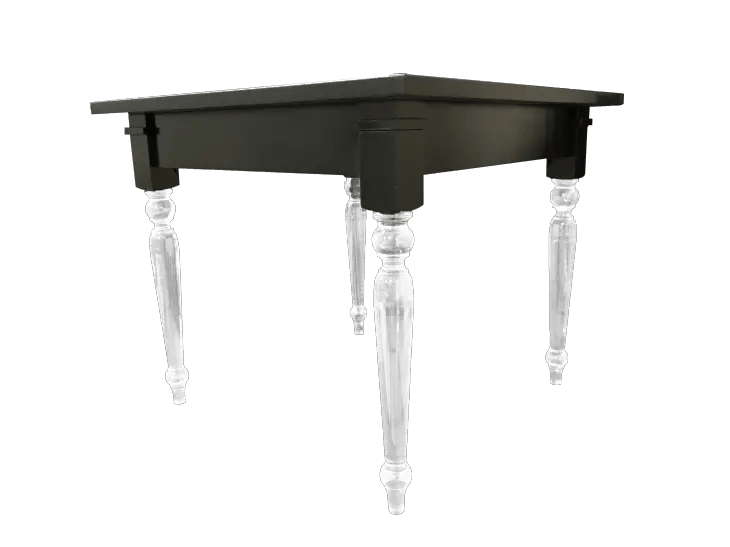
By making your own acrylic table legs

Step-by-Step Guide to DIY Acrylic Table Legs
If you’re looking to add a touch of modern elegance to your furniture, acrylic table legs can be a great choice. Not only are they sleek and stylish, but they also offer durability and stability. In this step-by-step guide, we will walk you through the process of creating your own acrylic table legs.
Materials Needed:
- Acrylic sheets
- Acrylic adhesive
- Clamps
- Measuring tape
- Saw
- Drill
- Sandpaper
Step 1: Measure and Cut
Start by measuring the desired height of your table legs. Keep in mind that the length of your legs will depend on the overall height of your table, as well as your personal preference. Once you have the measurements, mark them on the acrylic sheets.
Use a saw to cut along the marked lines. It’s important to use a saw specifically designed for cutting acrylic to prevent cracking or chipping. Take your time and use steady, even strokes to ensure a clean cut.
Step 2: Sand and Smooth
After cutting the acrylic sheets, use sandpaper to smooth out the edges. Start with a coarse grit sandpaper and gradually work your way up to a finer grit for a polished finish. Make sure to remove any burrs or rough spots.
Step 3: Apply Adhesive
Apply a generous amount of acrylic adhesive to one of the cut edges. Make sure to spread it evenly and cover the entire surface. Align the corresponding edge of another acrylic sheet and press them together firmly.
Use clamps to hold the sheets in place while the adhesive dries. Follow the manufacturer’s instructions for the recommended drying time. Repeat this process for the remaining edges until all four legs are assembled.
Step 4: Drill Mounting Holes
Using a drill, create mounting holes on the top and bottom of each leg. The number of holes will depend on the size and weight of your table. It’s important to ensure that the holes are evenly spaced and aligned.
Make sure to use a drill bit that is appropriate for acrylic to prevent cracking. Take your time and apply gentle pressure to avoid any mishaps.
Step 5: Attach to Tabletop
Once the adhesive has fully dried and the holes have been drilled, you can attach the acrylic legs to your tabletop. Place the table upside down and position the legs at the desired locations.
Insert screws through the mounting holes and into the tabletop. Make sure the screws are tight enough to secure the legs, but be careful not to overtighten and crack the acrylic.
Step 6: Finishing Touches
After securing the legs, inspect the table for any unevenness or wobbling. If necessary, adjust the screws or add additional support to ensure stability.
Finally, clean the acrylic legs with a mild soap and water solution, or an acrylic cleaner, to remove any fingerprints or smudges.
Summary
Creating your own acrylic table legs is a rewarding DIY project that can elevate the look of your furniture. By following this step-by-step guide, you can achieve a sleek and modern aesthetic while enjoying the durability and stability that acrylic legs offer. Remember to take your time, use the appropriate tools, and exercise caution when working with acrylic.
Choosing the Right Acrylic Material for Table Legs
When it comes to choosing the right material for table legs, acrylic is becoming an increasingly popular choice. Acrylic is a versatile and durable material that can add a touch of modern elegance to any table design. However, not all acrylic materials are created equal. In this section, we will explore the various factors to consider when choosing the right acrylic material for table legs.
1. Thickness
The thickness of the acrylic material is an important consideration when selecting table legs. Thicker acrylics provide more stability and support, especially for larger and heavier tables. On the other hand, thinner acrylics can give a more delicate and sleek appearance to smaller tables. It is important to assess the weight and size of your table to determine the appropriate thickness for the acrylic legs.
2. Transparency
Transparency is another crucial factor to consider when choosing acrylic table legs. Acrylic comes in a range of transparency levels, from fully transparent to translucent or frosted. The level of transparency you choose will depend on the overall aesthetic you want to achieve. If you want the table legs to be the focal point, opt for fully transparent acrylic. If you prefer a softer and more diffused look, go for translucent or frosted acrylic.
3. Color
Acrylic can be produced in a variety of colors, offering endless design possibilities. Whether you want bold and vibrant colors or subtle and neutral tones, there is an acrylic color option for every style. Consider the color scheme of your space and the overall design concept of your table when selecting the color of your acrylic legs.
4. Finish
The finish of the acrylic material can greatly impact the final look of your table legs. Acrylic can be polished, matte, or even textured, allowing you to customize the appearance to fit your desired aesthetic. Polished acrylic offers a glossy and reflective finish, while matte acrylic provides a more subdued and elegant look. Textured acrylic can add an interesting tactile element to your table legs.
5. Durability
When choosing acrylic table legs, it is essential to consider their durability. Acrylic is known for its strength and resistance to impact, making it an excellent choice for table legs. However, different acrylic materials may have varying durability levels. Look for acrylic that is specifically designed for furniture applications, as it is likely to be more robust and long-lasting.
6. Maintenance
Another important factor to consider is the maintenance required for acrylic table legs. Acrylic is relatively easy to clean and maintain, but different finishes may require different care. Polished acrylic may show fingerprints more easily and may require frequent cleaning, while matte or textured acrylic may be more forgiving in terms of maintenance.
7. Budget
Lastly, consider your budget when choosing the right acrylic material for table legs. Acrylic can vary in price depending on factors such as thickness, transparency, color, and finish. Set a budget and prioritize the features that are most important to you to ensure you find the perfect acrylic material within your price range.
In summary, when choosing acrylic material for table legs, consider factors such as thickness, transparency, color, finish, durability, maintenance, and budget. By carefully evaluating these factors, you can select the right acrylic material that not only enhances the overall design of your table but also meets your practical needs.
Tips and Tricks for Installing Acrylic Table Legs
If you want to add a touch of modern elegance to your furniture, acrylic table legs are a great option. These transparent legs can give your table a sleek and contemporary look. Installing acrylic table legs may seem intimidating, but with the right tips and tricks, it can be a straightforward process. In this section, we will share some useful tips to help you successfully install acrylic table legs.
1. Measure and Mark
The first step in installing acrylic table legs is to measure and mark the position where the legs will be attached to the table. Use a measuring tape to ensure accurate measurements. Place the table upside down on a flat surface and mark the exact positions where you want to attach the legs. This will help you align the legs correctly during installation.
2. Drilling Holes
Next, you’ll need to drill holes into the table for attaching the acrylic legs. It’s important to use the right size drill bit to prevent any damage to the table. Measure the diameter of the screws that came with the legs and select a drill bit that matches that size. Start drilling slowly and gradually increase the speed to avoid splintering the wood or damaging the tabletop.
3. Adding Threaded Inserts
To ensure a secure attachment, it’s recommended to use threaded inserts. These inserts act as anchors for the screws that will hold the acrylic legs in place. Align the inserts with the drilled holes and gently tap them in using a hammer. Make sure they are flush with the surface of the table.
4. Attaching Acrylic Legs
Now it’s time to attach the acrylic legs to the table. Begin by inserting the screws into the threaded inserts. Align the legs with the marked positions on the table and start tightening the screws using a screwdriver or a drill with a Phillips head bit. Be careful not to overtighten the screws, as this could crack or damage the acrylic legs. Tighten the screws until the legs are securely fastened to the table.
5. Checking Stability
Once you have installed all the acrylic table legs, it’s essential to check the stability of the table. Gently try to wobble the table and see if it feels sturdy. If there is any wobbling or instability, double-check the tightness of the screws and make any necessary adjustments. Ensuring the stability of the table will prevent accidents and prolong the lifespan of the acrylic legs.
6. Regular Maintenance
To keep your acrylic table legs looking their best, regular maintenance is important. Clean the legs with a soft cloth and mild soap or acrylic cleaner. Avoid using abrasive cleaners or rough materials that could scratch the surface. Regularly check the screws for any loosening and retighten if necessary.
By following these tips and tricks, you can easily install acrylic table legs and enhance the appearance of your furniture. Remember to measure and mark accurately, use the right drill bit, add threaded inserts for stability, and securely attach the legs to the table. Regular maintenance will help keep your acrylic legs in excellent condition for years to come. Enjoy your stylish and modern table!
Enhancing the Durability of Acrylic Table Legs: Maintenance Tips
Acrylic table legs provide a sleek and modern touch to any living space. These durable legs are known for their strength and versatility, making them a popular choice among homeowners and interior designers alike. To ensure that your acrylic table legs maintain their beauty and functionality for years to come, it is important to follow some maintenance tips. In this section, we will explore some effective ways to enhance the durability of acrylic table legs.
1. Regular Cleaning
One of the key maintenance practices for acrylic table legs is regular cleaning. Dust and dirt can accumulate on the surface, causing the legs to lose their shine. To clean the legs, use a soft cloth or sponge and mild soap mixed with water. Gently wipe the surface in circular motions without applying too much pressure. Avoid using abrasive cleaners or rough materials that can scratch the acrylic.
2. Avoid Harsh Chemicals
When cleaning acrylic table legs, it is important to avoid using harsh chemicals such as bleach, ammonia, or acetone. These chemicals can cause the surface to deteriorate and become discolored. Stick to mild soaps or specialized acrylic cleaners that are specifically designed for cleaning acrylic surfaces. Always read the label and follow the manufacturer’s instructions.
3. Prevent Scratches
Acrylic table legs are susceptible to scratches, which can detract from their appearance. To prevent scratches, place felt pads or rubber bumpers on the bottom of the legs. This provides a protective barrier between the legs and the floor, reducing the risk of scratches caused by friction or movement. Additionally, avoid dragging heavy objects across the table surface, as this can also lead to scratches.
4. Avoid Direct Sunlight
Exposure to direct sunlight can cause acrylic table legs to fade or discolor over time. To protect the legs, avoid placing the table in areas that receive direct sunlight for extended periods. If sunlight exposure is unavoidable, consider using curtains or blinds to block out the UV rays. Alternatively, you can use UV-resistant coatings or films to protect the legs from the harmful effects of the sun.
5. Handle with Care
When moving or rearranging your acrylic table, it is important to handle the legs with care. Avoid gripping or pulling the legs forcefully, as this can lead to damage or breakage. Instead, lift the table from the top surface or use additional support to distribute the weight evenly. By handling the table legs gently, you can prevent unnecessary stress and maintain their structural integrity.
6. Inspect for Damage
Regularly inspect your acrylic table legs for any signs of damage, such as cracks, chips, or loose fittings. If you notice any issues, address them promptly to prevent further damage. Minor cracks or chips can be repaired using specialized acrylic repair kits, while more serious damage may require professional assistance. By regularly inspecting and maintaining your acrylic table legs, you can extend their lifespan and keep them looking their best.
7. Avoid Extreme Temperatures
Extreme temperatures can impact the durability of acrylic table legs. Avoid placing the table in areas with excessive heat or cold, as this can cause the legs to warp or crack. Additionally, avoid placing hot objects directly on the acrylic surface, as this can cause it to soften or melt. Use coasters or trivets to protect the legs from heat damage.
8. Store Properly
If you need to store your acrylic table legs temporarily, it is important to do so properly. Clean the legs thoroughly and wrap them in soft cloth or bubble wrap to protect them from scratches. Store them in a cool, dry place away from direct sunlight and extreme temperatures. Avoid stacking heavy objects on top of the legs, as this can lead to deformation or breakage.
In summary, maintaining the durability of acrylic table legs involves regular cleaning, avoiding harsh chemicals, preventing scratches, protecting from direct sunlight, handling with care, inspecting for damage, avoiding extreme temperatures, and storing properly. By following these maintenance tips, you can ensure that your acrylic table legs remain in excellent condition, enhancing the aesthetic appeal of your living space for years to come.
How can I make acrylic table legs?
To make acrylic table legs, you will need acrylic sheets, a table saw, drill, screws, and adhesive. Measure and cut the acrylic sheets into desired leg shapes using the table saw. Drill holes for screws to attach the legs to the table. Apply adhesive to the bottom of the legs and attach them securely to the table.
Conclusion
In conclusion, creating your own acrylic table legs can be a rewarding and cost-effective way to add a modern touch to your furniture. By following a few simple steps and utilizing the right tools and materials, you can achieve professional-looking results. Remember to measure accurately, use a sturdy acrylic material, and employ proper safety precautions during the cutting and shaping process. With a little patience and practice, you’ll be able to make unique and stylish table legs that perfectly complement your interior design. So go ahead, unleash your creativity, and enjoy the satisfaction of crafting your own acrylic table legs.