
Wondering how to clean an acrylic painting that has been affected by cigarette smoke? Look no further! Cleaning an acrylic painting requires gentle yet effective methods to ensure its longevity. With the right techniques and materials, you can easily remove the unsightly residue left behind by cigarette smoke without damaging the artwork. In this guide, we will walk you through the step-by-step process of safely cleaning and restoring your acrylic painting to its original beauty.
Before diving into the cleaning process, it is crucial to understand the delicate nature of acrylic paintings. Unlike oil paintings, acrylics are less forgiving to harsh cleaning methods. Therefore, it is essential to approach the cleaning process with care and patience. This will help prevent any accidental damage or discoloration of the artwork.
The first step in cleaning an acrylic painting affected by cigarette smoke is to remove any loose dirt or dust from the surface. Start by gently brushing the painting with a soft-bristled brush or using a clean, lint-free cloth. This will help eliminate any loose particles that may have settled on the surface of the painting.
Once the loose dirt has been removed, it’s time to tackle the smoke residue. Create a mild cleaning solution by mixing a few drops of mild dish soap with lukewarm water. Dampen a clean cloth or sponge with the soapy solution, making sure it is only slightly damp and not dripping wet.
Gently dab the damp cloth or sponge

Preserving the Beauty: Proven Methods to Clean Smoke-Stained Acrylic Paintings
Acrylic paintings have gained immense popularity over the years for their vibrant colors, durability, and versatility. However, even the most well-maintained acrylic paintings may fall victim to smoke damage. Smoke stains can quickly dull the vibrancy of a painting and detract from its beauty. In this section, we will explore proven methods to effectively clean smoke-stained acrylic paintings and restore them to their original glory.
Understanding Smoke Stains on Acrylic Paintings
Before diving into the cleaning methods, it’s essential to understand the nature of smoke stains on acrylic paintings. When exposed to smoke, the particles can settle on the painting’s surface, creating a layer of grime. This layer can be particularly stubborn to remove due to the porous nature of acrylic paint. Therefore, it’s crucial to use gentle cleaning techniques that won’t damage the artwork.
Gentle Cleaning Supplies
When it comes to cleaning smoke-stained acrylic paintings, using the right supplies is key. Here are some gentle cleaning supplies to gather:
- Soft, lint-free microfiber cloths
- Mild dish soap or art conservation cleaner
- Demineralized water
- Soft-bristle brushes
It’s important to avoid harsh chemicals or abrasive materials, as they can cause irreversible damage to the acrylic paint.
Step-by-Step Cleaning Process
Follow these steps to clean smoke-stained acrylic paintings:
- Gently dust off the painting’s surface using a soft-bristle brush or a clean microfiber cloth. This step helps remove loose dirt and debris.
- Prepare a cleaning solution by mixing a small amount of mild dish soap or art conservation cleaner with demineralized water.
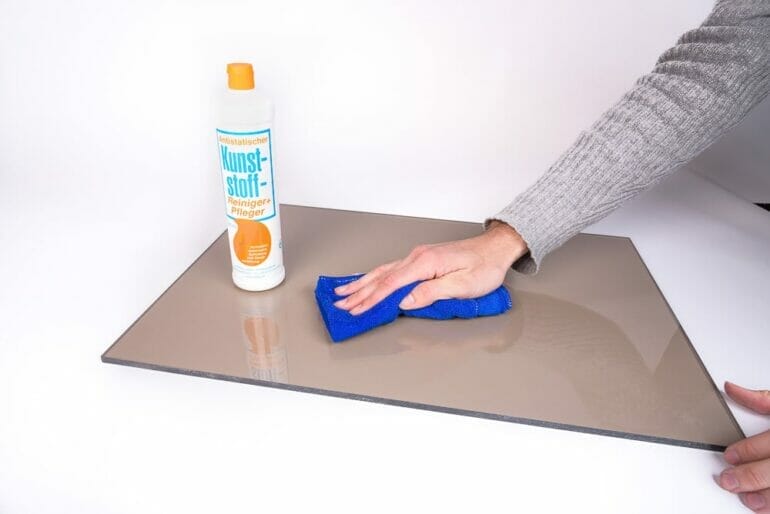
- Dampen a soft microfiber cloth with the cleaning solution and wring out any excess liquid to avoid saturation.
- Lightly blot the smoke-stained areas of the painting with the damp cloth, applying gentle pressure. Avoid rubbing, as it may smear the stains and worsen the damage.
- Rinse the cloth with clean demineralized water and gently wipe away any residue left behind by the cleaning solution.
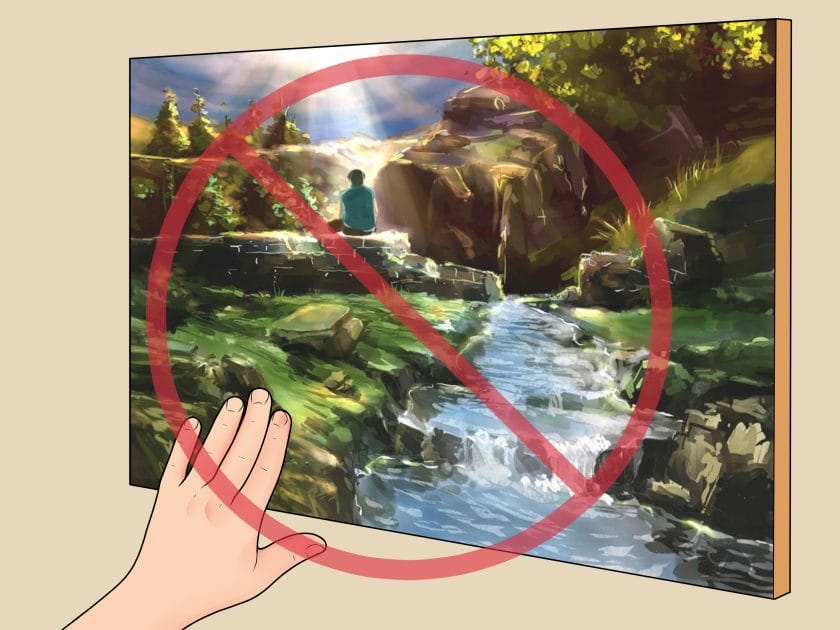
- Allow the painting to air dry completely in a well-ventilated area, away from direct sunlight or heat sources.
It’s important to note that each painting is unique, and the severity of smoke stains may vary. If the stains persist after the initial cleaning, it may be necessary to repeat the process or seek professional help from an art conservator.
Preventing Future Smoke Damage
Prevention is always better than restoration. Here are some tips to help prevent future smoke damage to acrylic paintings:
- Display your acrylic paintings in areas away from smoke sources, such as fireplaces or smoking areas.
- Regularly dust your paintings using a soft microfiber cloth or a soft-bristle brush to prevent the build-up of grime.
- Consider using a protective varnish on your acrylic paintings. A varnish creates an additional barrier against smoke particles and makes cleaning easier.
- Keep your paintings covered or properly stored when not in display to minimize exposure to airborne particles.
Summary
Acrylic paintings can be truly mesmerizing, but smoke stains can dim their beauty. By following gentle cleaning methods and using the right supplies, it’s possible to restore smoke-stained acrylic paintings to their original glory. Remember to be patient and take the necessary precautions to prevent future smoke damage. With proper care, your acrylic paintings will continue to showcase their vibrant colors for years to come.
Say Goodbye to Smoke Damage: Expert Tips for Restoring Acrylic Paintings
Acrylic paintings are prized possessions that can beautify any space. However, accidents can happen, and one such unfortunate incident is smoke damage. Smoke damage can leave behind unsightly stains, discoloration, and a strong odor on acrylic paintings. But fret not! With the right knowledge and techniques, you can restore your smoke-damaged acrylic paintings to their former glory. In this section, we will provide you with expert tips on how to effectively remove smoke damage from acrylic paintings.
1. Assess the Damage
The first step in restoring a smoke-damaged acrylic painting is to assess the extent of the damage. Carefully examine the painting for any signs of soot, discoloration, or warping. Take note of areas that require the most attention and make a plan of action.
2. Handle with Care
Before starting the restoration process, it is crucial to handle the smoke-damaged painting with utmost care. Wear clean gloves to avoid transferring oils and dirt from your hands to the painting. Additionally, ensure that the painting is placed on a clean and stable surface to prevent any further damage.
3. Remove Loose Soot
To remove loose soot from the surface of the painting, gently brush it off using a soft-bristled brush or a clean, dry cloth. Be careful not to apply too much pressure, as it can smudge the paint or cause further damage.
4. Test Cleaning Solutions
Before applying any cleaning solution to the entire painting, it is essential to test it on a small, inconspicuous area. Dilute the cleaning solution according to the manufacturer’s instructions and apply it using a soft sponge or cloth. Gently dab the solution onto the test area and observe any adverse reactions. If there are no negative effects, proceed with the cleaning process.
5. Clean the Surface
Once you have identified a suitable cleaning solution, it’s time to clean the entire surface of the smoke-damaged acrylic painting. Start from the top and work your way down, using gentle circular motions. Avoid scrubbing the painting aggressively, as it can damage the paint layers. Rinse the sponge or cloth frequently in clean water to prevent cross-contamination.
6. Address Discoloration
If smoke damage has caused discoloration on the painting, there are a few techniques you can try to restore its original color. One method is using a gentle bleach solution, but caution must be exercised as bleach can be harsh on acrylic paint. Another option is to use a specialized artist’s varnish with UV protection to even out the discoloration.
7. Remove Lingering Odors
Smoke damage often leaves behind a strong odor on acrylic paintings. To eliminate these lingering odors, place the painting in a well-ventilated area or near a gentle fan. You can also try placing odor-absorbing materials, such as activated charcoal or coffee grounds, near the painting to help neutralize the smell.
8. Seek Professional Help
If the smoke damage is extensive or the restoration techniques mentioned above do not yield satisfactory results, it is recommended to seek professional help. Professional art restorers have the expertise and specialized equipment to tackle even the most severe smoke damage on acrylic paintings.
9. Prevent Future Damage
After successfully restoring your smoke-damaged acrylic painting, take preventative measures to avoid future damage. Keep the painting away from areas prone to smoke or other pollutants. Regularly dust the painting using a clean, soft brush or cloth to prevent the build-up of dirt and debris.
Summary
Smoke damage can be a distressing ordeal for acrylic painting owners. However, with the right techniques and precautions, you can restore your smoke-damaged acrylic paintings to their original condition. Remember to assess the damage, handle the painting with care, remove loose soot, test cleaning solutions, clean the surface gently, address discoloration cautiously, eliminate lingering odors, seek professional help if needed, and take preventative measures to protect your artwork. By following these expert tips, you can bid farewell to smoke damage and preserve the beauty of your acrylic paintings for years to come.
Cleaning and Refreshing Smoke-Contaminated Acrylic Artwork: A Step-by-Step Guide
Acrylic artwork can be a beautiful addition to any home or art collection, but it is important to properly care for and maintain these pieces to ensure their longevity. One common issue that acrylic artwork can face is smoke contamination, which can occur due to exposure to smoke from cigarettes, fire, or other sources. In this guide, we will walk you through the step-by-step process of cleaning and refreshing smoke-contaminated acrylic artwork.
1. Assess the Damage
The first step is to carefully assess the extent of the smoke contamination on the artwork. Examine the surface for any visible stains, discoloration, or residue. Take note of the areas that require the most attention.
2. Dusting and Removing Loose Particles
Before starting the cleaning process, gently dust the surface of the artwork using a soft, lint-free cloth or a soft brush. This will help remove any loose particles or dirt that may be present on the surface.
3. Prepare the Cleaning Solution
Next, prepare a mild cleaning solution by mixing a few drops of a gentle dish soap or acrylic cleaner in a bucket of lukewarm water. Avoid using harsh chemicals or abrasive cleaners, as they can damage the artwork.
4. Test the Cleaning Solution
Before applying the cleaning solution to the entire artwork, it is important to conduct a patch test on a small, inconspicuous area. Apply a small amount of the solution using a soft cloth and gently blot the area. Wait for a few minutes and check for any adverse reactions such as color fading or damage. If there are no negative effects, you can proceed with the cleaning process.
5. Cleaning the Artwork
Dip a soft, lint-free cloth or sponge into the cleaning solution and wring out any excess liquid. Gently wipe the contaminated areas of the artwork in a circular motion. Take care not to apply excessive pressure, as this can cause damage. Repeat this process until the smoke contamination is removed.
6. Rinsing the Artwork
After cleaning, rinse the artwork thoroughly with clean water to remove any residue from the cleaning solution. Use a fresh cloth or sponge dampened with clean water and gently wipe the surface in a circular motion. Ensure that all traces of the cleaning solution are removed.
7. Drying the Artwork
Allow the artwork to air dry in a clean, well-ventilated area. Avoid using heat sources such as hair dryers, as they can warp or damage the acrylic. Patience is key during this step, as rushing the drying process can lead to water spots or other issues.
8. Applying a Protective Finish
Once the artwork is completely dry, you may consider applying a protective finish to help enhance its longevity and protect it from future smoke contamination. There are various acrylic-safe protective sprays or varnishes available in the market. Follow the instructions provided by the manufacturer to apply the protective finish evenly over the artwork.
9. Displaying and Maintenance
Finally, once the protective finish is dry, you can safely display your refreshed acrylic artwork. To maintain its condition, avoid exposing it to direct sunlight or extreme temperature changes. Regularly dust the artwork with a soft cloth or brush to prevent the build-up of dirt and debris.
Summary
Cleaning and refreshing smoke-contaminated acrylic artwork is a straightforward process that requires careful assessment, gentle cleaning techniques, and protective finishes. By following this step-by-step guide, you can restore the beauty of your acrylic artwork and enjoy it for years to come.
Restoring Brilliance: Reviving Acrylic Paintings Affected by Cigarette Smoke Residue
Acrylic paintings are known for their vibrant colors and durability. However, they can suffer from various forms of damage over time, one of which is the accumulation of cigarette smoke residue. This residue can dim the brilliance of the colors, leaving the painting looking dull and lifeless.
Understanding the Impact of Cigarette Smoke Residue
Cigarette smoke residue contains a complex mixture of chemicals, including nicotine, tar, and various toxins. When this residue settles on the surface of an acrylic painting, it can create a yellowish-brown layer that acts as a filter, distorting the original colors of the artwork.
Over time, the smoke residue can penetrate the layers of the painting, making it difficult to remove without causing further damage. It is essential to approach the restoration process with care and precision to revive the painting’s brilliance without compromising its integrity.
Restoration Techniques
Restoring an acrylic painting affected by cigarette smoke residue requires a combination of cleaning and color correction techniques. Here are some effective methods used by professional art restorers:
- Surface Cleaning: The first step is to gently remove the surface layer of smoke residue without damaging the paint. This can be achieved by using a soft brush or a soft, lint-free cloth. It is crucial to avoid using abrasive materials or harsh chemicals that can cause further damage to the painting.
- Consolidation: In some cases, the smoke residue may have caused the paint to become fragile or flaky. To prevent further deterioration, an art conservator may apply a consolidant, a specialized adhesive, to reinforce the paint layers and minimize the risk of flaking.
- Color Correction: Once the surface is clean and stabilized, the next step is to restore the original colors of the painting. This process involves carefully removing the yellowish-brown smoke residue using solvents specifically designed for acrylic paintings. The restorer may also employ color-matching techniques to recreate any lost or faded colors.
- Protective Coating: After the color correction, it is essential to apply a protective coating to the painting to safeguard it from future damage. A conservation-grade varnish can be used to seal the surface and enhance the colors, while also providing UV protection.
Seeking Professional Assistance
While it is possible to attempt restoration techniques at home, it is highly recommended to seek professional assistance for valuable or sentimental acrylic paintings affected by cigarette smoke residue.
Art restorers and conservators have the expertise, experience, and access to specialized materials necessary for restoring paintings to their former glory. They can assess the extent of the damage, determine the most suitable restoration techniques, and ensure the preservation of the artwork for years to come.
Prevention and Maintenance
Preventing cigarette smoke residue from affecting acrylic paintings is crucial in maintaining their brilliance. Here are some preventive measures to consider:
- Smoking-Free Environment: Avoid smoking near valuable artwork and ensure that the painting is displayed in a smoke-free environment.
- Proper Display: Hang the painting away from areas prone to smoke, such as windows, fireplaces, or smoking areas.
- Regular Cleaning: Dusting the painting regularly with a soft brush or cloth can help prevent the buildup of smoke residue.
By implementing these preventive measures and regularly maintaining your acrylic paintings, you can preserve their brilliance and protect them from the harmful effects of cigarette smoke residue.
Summary
Cigarette smoke residue can significantly impact the brilliance of acrylic paintings, leaving them looking dull and discolored. However, with the right restoration techniques and professional assistance, it is possible to revive these artworks and restore their original vibrancy. Preventive measures and proper maintenance can also help protect acrylic paintings from the damaging effects of cigarette smoke residue, ensuring their longevity and beauty for years to come.
FAQs
How can I clean an acrylic painting that has been exposed to cigarette smoke?
To clean an acrylic painting that has been exposed to cigarette smoke, mix a solution of warm water and mild dish soap. Dampen a clean, soft cloth with the solution and gently wipe the surface of the painting in small, circular motions. Avoid applying too much pressure to prevent damage to the paint layers. Rinse the cloth frequently and repeat until the smoke residue is removed.
What should I avoid when cleaning an acrylic painting affected by cigarette smoke?
Avoid using harsh chemicals, abrasive materials, or excessive water when cleaning an acrylic painting. These can cause damage to the paint layers and the canvas. Additionally, avoid rubbing the surface vigorously, as it may remove the paint or alter the texture.
Can professional art restoration services help in cleaning acrylic paintings affected by cigarette smoke?
Yes, professional art restoration services have expertise in cleaning and preserving artwork. If you are uncertain about cleaning the acrylic painting yourself or if the smoke damage is severe, it is recommended to consult a professional conservator who can provide appropriate treatment and ensure the artwork’s long-term preservation.
Conclusion
In conclusion, cleaning an acrylic painting affected by cigarette smoke can be a daunting task, but with the right techniques and materials, it is possible to restore its original beauty. Remember to always test any cleaning method on a small, inconspicuous area of the painting first to avoid any further damage. Gentle wiping with a soft, lint-free cloth and a mild detergent solution can help remove surface dirt and smoke residue. For more stubborn stains, professional conservation services may be necessary. Regularly dusting and proper storage can also prevent future smoke accumulation and keep your acrylic paintings looking vibrant and fresh for years to come.