
If you’re looking to create a mesmerizing lunar scene with acrylic paints, you’ve come to the right place. Painting a moon in acrylic can be a captivating and rewarding experience, allowing you to explore your creativity while capturing the ethereal beauty of Earth’s celestial companion.
When it comes to painting a moon with acrylics, it’s all about layering and blending. Start by applying a base color for the moon, then gradually build up the shades and highlights to achieve a realistic three-dimensional effect. Don’t forget to experiment with different brush techniques and textures to add depth and dimension to your artwork.
Creating the perfect moon involves using a combination of colors, such as blues, grays, and even hints of purple, to give it a sense of depth and authenticity. Remember to use a light hand when applying the paint and gradually build up the layers to achieve a seamless transition between the different shades.
One important technique to consider when painting a moon in acrylic is dry brushing. This technique involves using a dry brush and lightly dragging it across the surface of the canvas to create subtle textures and highlights that mimic the moon’s craters and rugged terrain.
To enhance the realism of your moon painting, consider adding some surrounding elements such as stars or clouds. These additional details can help create a sense of atmosphere and make your artwork truly come to life.
Whether you’re an experienced artist or a beginner, painting a
Preparing Your Canvas for Acrylic Moon Painting
Before you begin painting a beautiful moonlit scene with acrylics, it’s important to properly prepare your canvas. Taking the time to prepare the surface will ensure that your painting turns out just the way you envision it. In this section, we will discuss the step-by-step process of preparing your canvas for acrylic moon painting.
Gather Your Materials
First, gather all the necessary materials for preparing your canvas. You will need:
- A canvas board or stretched canvas
- Gesso
- Paintbrushes
- A palette knife
- A palette
- Water for cleaning brushes
Clean the Canvas
Start by cleaning the canvas to remove any dust or debris. Use a soft cloth or brush to gently wipe the surface of the canvas. This will ensure that there are no particles that could interfere with your painting.
Apply Gesso
Next, apply a layer of gesso to the canvas. Gesso is a primer that creates a smooth and even surface for your paint to adhere to. Use a paintbrush or a palette knife to apply the gesso in thin, even strokes. Make sure to cover the entire surface of the canvas, including the edges.
Allow the gesso to dry completely before proceeding to the next step. This usually takes about 1-2 hours, but it’s best to check the instructions on the gesso container for specific drying times.
Sand the Surface
Once the gesso is dry, lightly sand the surface of the canvas with fine-grit sandpaper. This will help smooth out any rough areas and create an even texture for your painting. Be gentle and use light pressure while sanding to avoid damaging the canvas.
Apply a Second Coat of Gesso
After sanding, apply a second coat of gesso to the canvas. This will further strengthen the surface and provide additional texture for your paint to adhere to. Repeat the same process as before, making sure to cover the entire canvas evenly.
Allow the second coat of gesso to dry completely before starting your acrylic moon painting. This may take another 1-2 hours, depending on the drying time specified on the gesso container.
Prime the Palette
While waiting for the gesso to dry, take this time to prime your palette. Use a clean palette and squeeze out small amounts of the acrylic paints you will be using. Arrange the colors in a way that allows easy access and mixing.
Remember to clean your brushes and prepare any additional materials you may need for your painting.
Summary
In summary, preparing your canvas for acrylic moon painting involves cleaning the canvas, applying gesso, sanding the surface, applying a second coat of gesso, and priming the palette. These steps will ensure that your canvas is ready for your artistic masterpiece. Take your time with each step and enjoy the process of preparing your canvas for painting. Once your canvas is prepped, you can begin creating a stunning moonlit scene with acrylics.
Techniques for Creating Realistic Moon Texture with Acrylic Paints
Creating a realistic moon texture with acrylic paints can add a touch of mystery and beauty to your artwork. Whether you’re painting a celestial-themed piece or incorporating the moon into a landscape, mastering the techniques for creating a realistic moon texture can bring your painting to life. In this section, we will explore various techniques that can help you achieve a realistic moon texture using acrylic paints.
1. Layering Technique
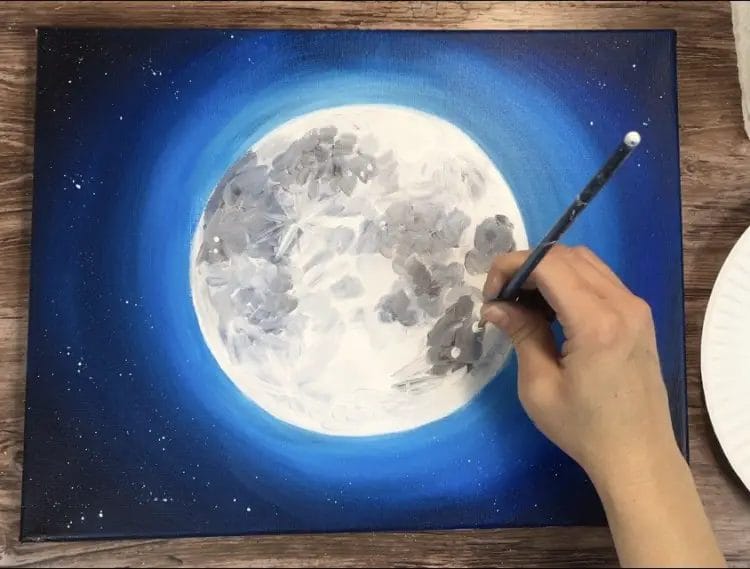
One of the fundamental techniques for creating a realistic moon texture is layering. Start by applying a base layer of white paint to represent the moon’s surface. Then, using a smaller brush, layer different shades of gray to mimic the craters and shadows on the moon’s surface. Add depth and dimension by gradually building up the layers, blending the colors together as you go. This technique allows you to achieve a realistic texture by capturing the subtle variations in the moon’s surface.
2. Dry Brushing
Dry brushing is another effective technique for creating a realistic moon texture. Dip your brush into a small amount of white paint and remove most of the paint by wiping it on a paper towel. This leaves only a minimal amount of paint on the brush, which allows for a dry brush effect. Lightly brush the surface of your painting in circular or sweeping motions, focusing on the areas where you want to create texture. This technique can mimic the rough, textured surface of the moon and give your painting a realistic look.
3. Sponging
Sponging is a versatile technique that can be used to create a realistic moon texture. Start by applying a base layer of white paint using a brush. Then, take a natural sea sponge and dip it into a small amount of gray paint. Dab the sponge onto the painting, focusing on the areas where you want to create texture. This technique creates a mottled effect on the surface, similar to the craters and variations on the moon’s surface. Experiment with different sponge sizes and colors to achieve the desired texture.
4. Splattering
Splattering is a fun technique that can add an element of randomness to your moon texture. Load a small brush with white paint and tap it against a larger brush or your finger to create splatters of paint on the painting. This technique can mimic the impact craters and small particles on the moon’s surface. Adjust the intensity of the splatters by varying the force and distance of the tap. Be sure to protect the surrounding areas of your painting from the splatter by using a mask or covering them with a protective sheet.
5. Texture Mediums
If you want to enhance the texture of your moon even further, you can consider using texture mediums with your acrylic paints. Texture mediums are gel-like substances that can be mixed with acrylic paints to create various textures and effects. For a moon texture, you can mix a texture medium with your white paint to achieve a grainy or rough surface. Apply the mixture using a brush or palette knife to add depth and realism to your moon painting.
In summary, creating a realistic moon texture with acrylic paints requires attention to detail and the use of appropriate techniques. Experiment with layering, dry brushing, sponging, splattering, and texture mediums to achieve the desired texture and depth for your moon painting. Remember to take your time and practice these techniques to refine your skills. With patience and perseverance, you can create stunning moon textures that will captivate viewers and add a touch of celestial beauty to your artwork.
Mastering the Art of Blending Colors for a Stunning Acrylic Moon Painting
When it comes to creating a stunning acrylic moon painting, one of the key techniques you need to master is blending colors. Blending allows you to create smooth transitions between different shades, giving your painting a realistic and ethereal look. In this section, we will explore the step-by-step process of blending colors to create a captivating moon painting.
1. Selecting the Right Colors
The first step in the color blending process is to select the right colors for your moon painting. For a realistic moon, you will need shades of white, gray, and blue. Consider using variations of these colors to add depth and dimension to your painting. Experiment with different combinations to find the perfect blend that suits your artistic vision.
2. Preparing Your Materials
Before you begin blending colors, make sure you have all the necessary materials at hand. You will need acrylic paints in your chosen colors, a palette or mixing surface, brushes, and a canvas. Ensure that your brushes are clean and in good condition to achieve smooth and seamless blends.
3. Understanding Color Mixing
Color mixing is an essential skill for blending colors effectively. It involves combining different hues to create new shades. For a moon painting, you will be mixing various tones of white, gray, and blue. Keep in mind that adding a tiny amount of a darker color to a lighter one can help achieve a gradual and seamless blend.
4. Starting with the Base Layer
Begin by applying a base layer of paint on your canvas. This layer will serve as the foundation for the subsequent layers and blends. Use a flat brush to cover the canvas with a thin coat of white paint. Ensure the surface is evenly covered, and let it dry completely before moving on to the next step.
5. Layering and Blending
Once the base layer is dry, start layering different shades of gray and blue over the white base. Use a clean brush for each color to prevent unwanted mixing. Apply the paint in small, controlled strokes, gradually blending the colors together. Keep blending until you achieve a smooth transition between the shades.
Remember to work slowly and patiently during the blending process. It takes practice to achieve the perfect blend, so don’t rush it. Take breaks if needed and step back to assess your progress. Adjust the colors accordingly to achieve the desired effect.
6. Adding Highlights and Shadows
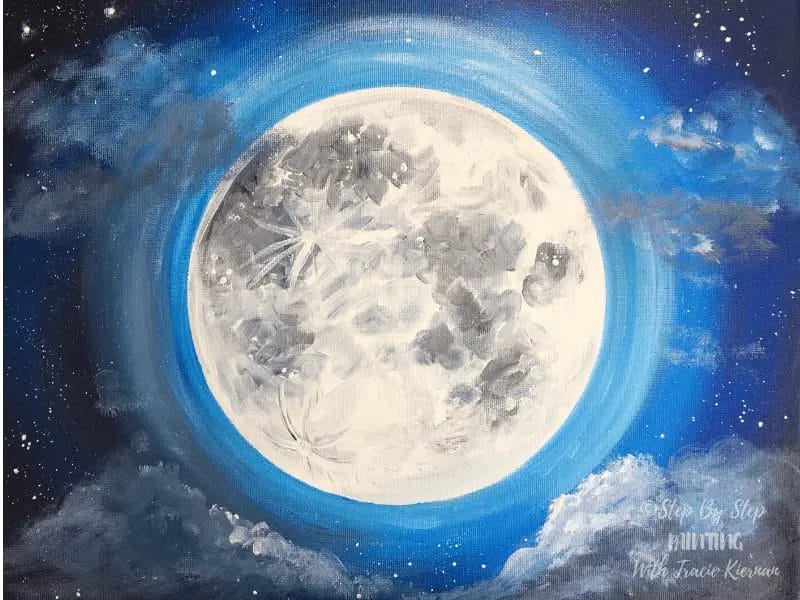
To enhance the realism of your moon painting, add highlights and shadows. Use a lighter shade of gray or white to create highlights on the moon’s surface and a darker shade of gray or blue for the shadows. Apply these accents sparingly to maintain the overall softness and subtlety of the painting.
7. Finishing Touches
Once you are satisfied with the blending and overall appearance of your moon painting, let it dry completely. Assess the painting and make any necessary adjustments. Consider adding additional details like stars or clouds to complement the moon. Seal your artwork with a varnish to protect and enhance its longevity.
Summary
Mastering the art of blending colors is crucial for creating a stunning acrylic moon painting. Selecting the right colors, preparing your materials, understanding color mixing, and layering and blending are key steps in the process. Adding highlights and shadows, as well as finishing touches, will enhance the realism and overall impact of your artwork. With practice and patience, you can achieve breathtaking results and create a mesmerizing moon painting that captivates viewers.
Adding Detail and Depth to Your Acrylic Moon Painting with Highlighting and Shading Techniques
In this section, we will explore how to add detail and depth to your acrylic moon painting using highlighting and shading techniques. These techniques will help bring your moon to life and create a more realistic and three-dimensional effect.
1. Creating a Basic Moon Shape
To begin, start by creating a basic moon shape on your canvas using a light gray or white acrylic paint. Use a circular motion to form the outline of the moon, and fill it in with your chosen color. This will serve as the base for your painting.
2. Adding Highlights
Next, identify the light source in your painting. This will determine where the highlights should be placed. For example, if the light is coming from the right side, the left side of the moon will be darker and the right side will be brighter.
Using a lighter shade of gray or white, apply highlights on the areas of the moon where the light hits directly. Use a small brush and gentle strokes to create a soft, glowing effect. Focus on the edges and curves of the moon, as well as any raised features you want to emphasize.
3. Creating Shadows
To add depth to your moon painting, you will need to create shadows. Identify the areas of the moon that are farther away from the light source and would naturally be darker. Typically, this would be the opposite side of the moon where the highlights are.
Using a darker shade of gray or black, carefully apply shadows to these areas. Use a light touch and build up the shading gradually to avoid creating harsh lines. Blend the shadows with the base color and highlights to create a smooth transition and a more realistic look.
4. Blending and Smudging
Once you have added the highlights and shadows, it’s time to blend and smudge the colors to create a seamless transition. Use a soft brush or a dry brush technique to gently blend the colors together. This will soften the edges and create a more natural appearance.
5. Adding Texture
To add texture to your moon painting, you can use various techniques such as dry brushing or stippling. Dry brushing involves using a small amount of paint on a dry brush and lightly brushing it over the surface to create a rough texture.
Stippling, on the other hand, involves using a stippling brush or a small, stiff-bristled brush to create small dots or stippled marks. This technique can be used to mimic the rough, cratered surface of the moon.
6. Final Touches
Once you are satisfied with the highlights, shadows, and texture of your moon painting, take a step back and assess the overall effect. Make any necessary adjustments or final touches to enhance the depth and detail.
You can also consider adding additional elements to your painting, such as stars, clouds, or a landscape, to further enhance the composition and create a more visually appealing artwork.
In summary, adding detail and depth to your acrylic moon painting can be achieved through highlighting and shading techniques. By carefully applying highlights and shadows, blending and smudging the colors, and adding texture, you can create a realistic and three-dimensional effect. Remember to assess your painting and make any final adjustments to achieve the desired result. Happy painting!
FAQs
1. How can I paint a moon using acrylics?
To paint a moon using acrylics, start by choosing a background color for your canvas. Then, use a round brush to create the basic shape of the moon using a light gray or white color. Next, add shadows and details to the moon using darker shades of gray or black. Finally, blend the colors together, add highlights, and incorporate any additional elements to complete the painting.
2. What brushes are best for painting a moon with acrylics?
For painting a moon with acrylics, it is recommended to use round brushes of different sizes. A larger round brush can be used to block in the basic shape of the moon, while smaller round brushes can be used for adding details and blending colors.
3. Can I use other colors besides gray and white for painting a moon?
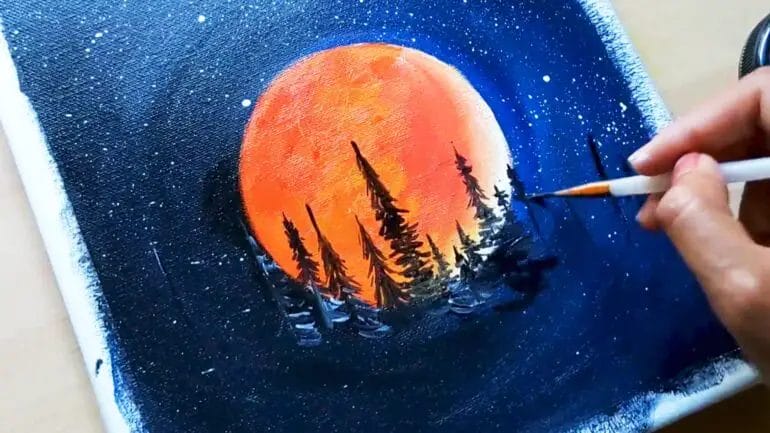
Yes, you can use other colors besides gray and white to paint a moon. While gray and white are commonly used to depict the moon’s surface, you can experiment with different colors. For instance, you can add hints of blue for a moonlit effect or incorporate warm colors like yellow or orange for a more surreal look.
Conclusion:
In conclusion, painting a moon with acrylics can be a rewarding and creative experience. By following the right techniques and using the right materials, you can achieve stunning and realistic results.
Remember to start with a proper sketch to guide your painting and use layers of paint to create depth and dimension. Experiment with different brush strokes and blending techniques to capture the moon’s unique textures and shadows.
Don’t forget to add highlights and details to make your moon painting truly shine. Practice regularly and don’t be afraid to make mistakes – each attempt will make you a better artist. So, grab your brushes, set up your palette, and let your imagination soar as you paint a beautiful moon with acrylics!