
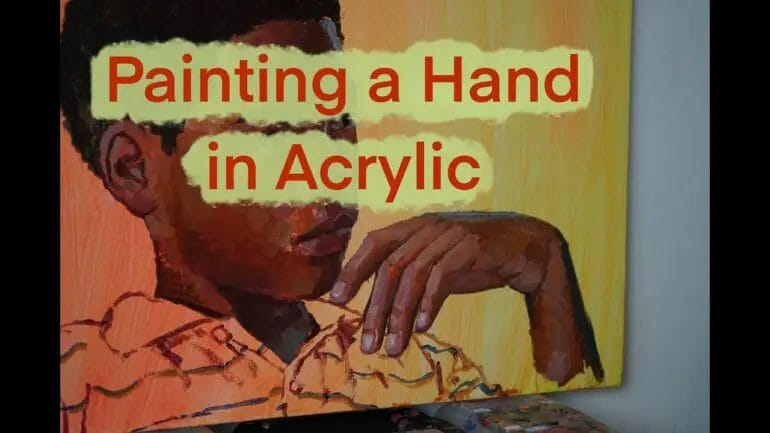
Looking to master the art of painting hands with acrylic? You’ve come to the right place! Painting hands can be challenging, but with the right techniques and a little practice, you can create stunning and lifelike hand paintings in no time.
Acrylic paints are a versatile medium that allows for easy blending, vibrant colors, and quick drying time. Whether you’re a beginner or an experienced artist, this guide will provide you with step-by-step instructions and valuable tips to enhance your hand painting skills.
From capturing the intricate details of fingers and nails to achieving realistic skin tones and textures, we’ll cover all the essential techniques to bring your hand paintings to life. So grab your brushes, acrylic paints, and let’s dive into the fascinating world of painting hands!
Choosing the right colors for a realistic hand painting
When it comes to hand painting, one of the most important factors to consider is the choice of colors. The right selection of colors can make all the difference in creating a realistic and visually appealing painting. In this section, we will explore some tips and techniques for choosing the right colors for your hand painting.
Analyze the subject
Before you start painting, it is important to analyze the subject and understand the colors involved. Take a close look at the object or scene you are painting and observe the different shades and hues present. Pay attention to the highlights, shadows, and midtones. This analysis will give you a better understanding of the color palette you need to create a realistic representation.
Understand color theory
Having a basic understanding of color theory is essential for choosing the right colors for your hand painting. Color theory helps you understand the relationships between colors and how they interact with each other. It involves concepts such as primary colors, secondary colors, complementary colors, and color harmonies.
For example, complementary colors are colors that are opposite each other on the color wheel. Using complementary colors in your painting can create contrast and make certain elements stand out. Understanding these color relationships will help you create a more harmonious and balanced composition.
Use a limited color palette
Using a limited color palette can be an effective technique for creating a realistic hand painting. Instead of using a wide range of colors, choose a few key colors that capture the essence of your subject. This approach helps maintain color harmony and coherence throughout your painting.
Start by choosing a primary color that represents the dominant color in your subject. Then select a few secondary and tertiary colors that complement the primary color. By using a limited color palette, you can create a harmonious and cohesive painting that appears more natural and realistic.
Consider the lighting
Lighting plays a crucial role in creating realistic hand paintings. The way light interacts with objects affects the colors we perceive. Consider the lighting conditions of your subject and replicate them in your painting.
Observe whether the lighting is warm or cool, and how it affects the colors. For example, warm sunlight can create vibrant and saturated colors, while cool lighting may result in more muted and desaturated tones. By accurately capturing the lighting conditions, you can add depth and realism to your hand painting.
Experiment and blend colors
Don’t be afraid to experiment and blend colors to achieve the desired effects in your hand painting. Mixing colors directly on the canvas can create unique shades and tones that add depth and dimension to your artwork.
Start by mixing small amounts of paint on your palette and test them on a separate piece of paper or canvas. Play around with different color combinations and observe how they interact. This experimentation will help you develop a better understanding of color mixing and enable you to achieve more realistic results.
Take inspiration from reference materials
Reference materials such as photographs or real-life objects can provide valuable guidance when choosing colors for your hand painting. Study and analyze these references to understand the color palette used in the original scene.
Pay attention to the subtle variations and nuances in color and try to replicate them in your painting. Reference materials can serve as a visual guide and help you achieve a more accurate and realistic representation of your subject.
Practice and refine
Choosing the right colors for a realistic hand painting requires practice and experimentation. Don’t be discouraged if your initial attempts don’t turn out as expected. Keep practicing and refining your technique.
Experiment with different color combinations and techniques to find what works best for you. As you gain more experience, you will develop a better understanding of color selection and be able to create more realistic and visually stunning hand paintings.
In summary, choosing the right colors for a realistic hand painting involves analyzing the subject, understanding color theory, using a limited color palette, considering lighting, experimenting with color blending, taking inspiration from reference materials, and practicing. By following these tips and techniques, you can elevate your hand painting skills and create stunning works of art.
Creating Texture and Depth in Acrylic Hand Paintings
Acrylic hand paintings are a popular form of art that allows artists to express their creativity and create stunning works of art. One way to enhance these paintings is by adding texture and depth to them. By incorporating various techniques and materials, artists can bring their paintings to life and make them more visually appealing. In this section, we will explore different methods to create texture and depth in acrylic hand paintings.
1. Impasto Technique
The impasto technique involves applying thick layers of paint onto the canvas, creating a textured surface. This technique is achieved by using a palette knife or a brush to apply the acrylic paint in a thick, sculptural manner. By building up layers of paint, artists can create three-dimensional effects and add depth to their paintings.
When using the impasto technique, it is essential to choose the right consistency of paint. Thick, heavy body acrylic paints work best as they hold their shape and retain texture. Artists can also mix acrylic gel mediums or texture paste with the paint to further enhance the texture.
2. Dry Brushing
Dry brushing is a technique where the artist uses a dry brush, almost devoid of paint, to create subtle texture and depth. By using a small amount of paint on the brush and gently dragging it across the canvas, artists can create delicate lines, scratches, or rough textures. This technique is ideal for adding fine details or highlighting specific areas in the painting.
When dry brushing, it is vital to use a stiff-bristled brush and apply minimal pressure to achieve the desired effect. Experimenting with different brush sizes and textures can create unique and interesting effects in the painting.
3. Collage and Mixed Media
Collage and mixed media techniques involve incorporating various materials into the acrylic painting to add texture and depth. Artists can use items such as fabric, paper, sand, or even natural objects like leaves or twigs to create interesting textures.
To incorporate collage or mixed media elements into the painting, artists can apply a layer of acrylic gel medium or adhesive onto the canvas and then press the desired material onto it. Once it is dry, they can paint over it or around it to seamlessly blend it into the overall composition.
4. Sgraffito
Sgraffito is a technique that involves scratching or scraping through layers of paint to reveal underlying colors or create textural marks. This technique adds visual interest and depth to the painting.
To achieve the sgraffito effect, artists can use a pointed tool, such as the end of a brush or a palette knife, to gently scrape away the top layer of paint. By varying the pressure and angle, they can create different textures and patterns.
5. Glazing
Glazing is a technique that involves applying thin, transparent layers of paint over dry layers of acrylic paint. This technique can create a luminous effect and add depth to the painting.
Artists can mix acrylic glazing medium with their desired colors and apply it using a soft brush. By layering multiple glazes, they can achieve a sense of depth and dimension in their paintings. It is essential to let each glaze layer dry before applying the next to ensure proper transparency and color saturation.
By incorporating these techniques and exploring different materials, artists can elevate their acrylic hand paintings and create visually captivating artworks with texture and depth. Whether it’s using the impasto technique, dry brushing, collage, sgraffito, or glazing, each method offers unique possibilities to enhance the visual appeal of acrylic hand paintings.
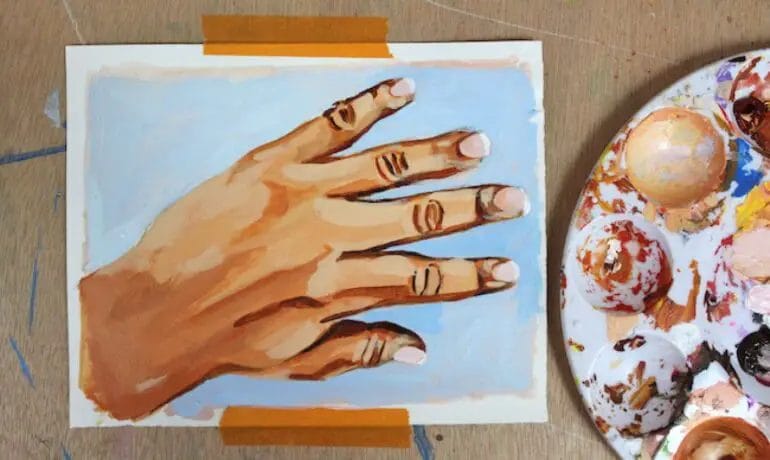
Adding Shadow and Highlights to Bring Hands to Life in Acrylic
In this section, we will explore how to add shadow and highlights to a painting of hands in acrylic. Shadows and highlights are essential elements in creating a realistic and three-dimensional effect in artwork. By understanding the play of light and dark on the contours of the hands, we can bring depth and life to our acrylic paintings.
Here are some techniques and tips to help you master the art of adding shadow and highlights to your hand paintings:
1. Observe the Light Source
Before you start adding shadows and highlights, it is crucial to study the light source in your painting. Identify where the light is coming from and how it interacts with the hands. This will determine where the shadows will fall and where the highlights will be brightest.
2. Use a Limited Color Palette
When adding shadows and highlights, it is best to work with a limited color palette that complements the overall color scheme of your painting. Darken your base color with a touch of black or add a bit of white to lighten it for highlights. Mixing colors directly on the canvas can create more realistic and varied shades.
3. Build Up Layers
Creating depth and dimension in your painting requires layering. Start by applying a base color to the hands, covering the entire area. Then gradually add darker tones to the areas that will be in shadow, using a small brush or a thin glaze. Blend the colors carefully to avoid harsh lines.
4. Pay Attention to Form
To make the hands appear three-dimensional, pay close attention to the form and contours of the fingers and palm. Study the way light hits each surface and replicate it with your brushstrokes. Highlight the areas that catch the light and deepen the shadows in recessed areas.
5. Create Soft Transitions
Avoid sharp and abrupt transitions between colors. Use soft brushstrokes and blend the colors together to create seamless gradations. This will make the shadows and highlights appear more natural and realistic.
6. Experiment with Different Brush Techniques
There are various brush techniques you can explore to enhance the texture and realism of your hand painting. Try stippling, cross-hatching, or dry brushing to create different effects. Experimentation will help you find the technique that works best for the desired result.
7. Study References and Practice
Improving your skills in adding shadows and highlights to hand paintings requires practice and continuous learning. Study photographs or real-life hand references to understand the nuances of light and shadow. Take time to observe the interplay of highlights and shadows on different hand poses and practice incorporating them into your artwork.
8. Step Back and Evaluate
Throughout the process, step back from your painting to evaluate how the shadows and highlights are working together to bring the hands to life. Make adjustments as needed and continue refining until you achieve the desired effect.
In summary, adding shadow and highlights is crucial in creating a realistic representation of hands in acrylic painting. By observing the light source, using a limited color palette, building up layers, paying attention to form, creating soft transitions, experimenting with brush techniques, studying references, and evaluating your progress, you can master the art of bringing hands to life on canvas.
Tips for achieving a professional finish in acrylic hand paintings
Acrylic painting is a popular form of artistic expression that allows artists to create vibrant and dynamic artwork. Whether you are a beginner or an experienced painter, there are several tips and techniques that can help you achieve a professional finish in your acrylic hand paintings. In this section, we will explore some of these tips and discuss how you can incorporate them into your artwork.
1. Use high-quality materials
The quality of your materials can greatly impact the overall look and feel of your acrylic hand paintings. Invest in good quality brushes, paints, and canvases to ensure that you have the best tools for the job. High-quality paints will have better pigmentation and coverage, allowing you to achieve more vibrant and saturated colors. Similarly, good brushes will help you achieve smoother brushstrokes and finer details.
2. Prepare your surface
Before you start painting, it’s important to prepare your surface properly. If you are working on canvas, make sure to prime it with gesso to create a smooth and even surface. This will help the paint adhere better and prevent it from sinking into the canvas. If you are working on a different surface, such as wood or metal, make sure to sand it and apply a suitable base coat.
3. Plan your composition
Before diving into your painting, take some time to plan out your composition. Consider the placement of the elements, the balance of colors, and the overall mood you want to create. Sketching out your composition beforehand can help you visualize the final result and make adjustments if needed.
4. Layering and glazing
One of the advantages of acrylic painting is the ability to layer and glaze colors. Layering involves applying multiple thin layers of paint, allowing each layer to dry before adding the next. This technique can add depth and dimension to your artwork. Glazing, on the other hand, involves applying a transparent layer of paint over a dried layer of color. This can create a subtle and luminous effect.
5. Experiment with textures
Acrylic paints can be used to create a variety of textures in your artwork. Explore different techniques such as dry brushing, stippling, or impasto to add tactile elements to your paintings. Textures can bring a sense of depth and interest to your artwork, making it more visually engaging.
6. Pay attention to details
Small details can make a big difference in the overall finish of your acrylic hand paintings. Take your time to add fine details and highlights to bring your artwork to life. Use a smaller brush and thin paint to create intricate details, and add highlights with a lighter color to create contrast.
7. Practice and experiment
Like any form of art, achieving a professional finish in acrylic hand paintings requires practice and experimentation. Don’t be afraid to try new techniques or explore different styles. Use your paintings as an opportunity to learn and grow as an artist. The more you practice, the more confident you will become in your abilities, and the better your paintings will be.
In summary, achieving a professional finish in acrylic hand paintings requires attention to detail, experimentation, and quality materials. By following these tips and incorporating them into your artwork, you can elevate your acrylic paintings to a new level of professionalism and create artwork that stands out.
FAQs
1. How can I paint hands with acrylic?
To paint hands with acrylic, start by sketching the basic shape of the hand using a pencil. Then, select your desired colors and mix them on a palette. Use a small brush to apply thin layers of paint, gradually building up the colors and details. Take your time and work from light to dark tones for a more realistic effect. Practice and experimentation will lead to improvement.
2. What techniques can I use to paint realistic hands with acrylic?
To create realistic-looking hands with acrylic, you can use various techniques such as blending, layering, and glazing. Blending involves smoothly mixing colors by applying them in a back-and-forth motion. Layering involves building up multiple thin layers of paint to create depth and dimension. Glazing involves adding transparent layers of paint over dried layers to enhance color and create a glossy effect.
3. Are there any tips for painting hands with acrylic?
Yes, here are a few tips for painting hands with acrylic: – Study hand anatomy to understand the structure and proportions. – Use reference photos or a mirror to observe the position and details of your own hand. – Start with an underpainting to establish the basic values before adding color. – Work in a well-lit area to accurately perceive colors and values. – Take breaks and step back periodically to assess your progress and make adjustments as needed. Remember, practice and patience are key to improving your painting skills!
Conclusion
In conclusion, painting hands with acrylic can be a fun and creative process that allows you to express your artistic vision. By following the right techniques and using high-quality acrylic paints, you can achieve stunning results. Remember to start with a sketch and build up layers of paint to create depth and realism. Experiment with different brush strokes and color combinations to add texture and dimension to your hand painting. Practice regularly and don’t be afraid to explore new styles and techniques. With time and dedication, you will enhance your skills and create beautiful hand paintings with acrylic.