
Yes, you can mix resin with acrylic paint to create unique and vibrant artworks. This combination allows you to enhance the visual appeal of your paintings and achieve a glossy and professional-looking finish.
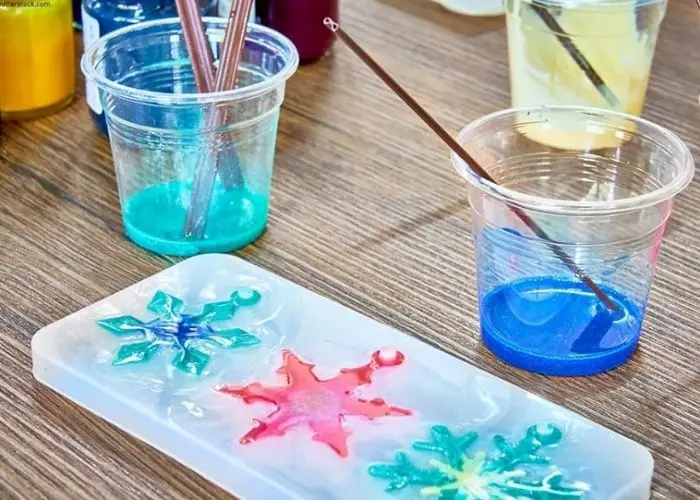
By adding resin to your acrylic paint, you can enhance the depth and dimension of your artwork, as well as create a smooth and glass-like surface. This technique is often used in resin art, where the resin is poured over the painted surface to create a stunning and glossy effect.
It’s important to note that when mixing resin with acrylic paint, you should follow the manufacturer’s instructions for both materials to ensure proper curing and compatibility. Additionally, proper ventilation and safety precautions should be taken when working with resin due to its toxic nature.
Overall, the combination of resin and acrylic paint opens up a world of possibilities for artists, allowing them to experiment with textures, effects, and finishes to create truly unique and captivating pieces of art.
Creating Depth and Gloss: How to Achieve Stunning Effects by Combining Resin and Acrylic Paint
Resin and acrylic paint are two versatile materials that, when combined, can result in breathtaking artwork with depth and gloss. This combination allows artists to create unique and stunning effects that elevate their pieces to a whole new level. In this section, we will explore the techniques and methods to achieve these effects and unlock your creative potential.
Materials Needed
Before diving into the process, it’s important to gather the necessary materials. Here’s a list of items you’ll need:
- Resin (epoxy or polyurethane based)
- Acrylic paint (various colors)
- Mixing cups
- Wood panel or canvas
- Paintbrushes and palette knives
- Heat gun or blowtorch
- Protective gloves and clothing
- Drop cloth or newspaper to protect your work area
Step 1: Preparing the Surface
Start by preparing the surface on which you will be working. If using a wood panel, ensure it is clean and free from dust or debris. If using a canvas, make sure it is stretched tightly on a frame to prevent sagging during the process.
Step 2: Mixing the Resin
Follow the instructions on the resin packaging to mix the appropriate amount of resin and hardener. Use separate measuring cups for resin and hardener to ensure accurate measurements. Stir the mixture thoroughly but gently to avoid introducing air bubbles.
Step 3: Adding Acrylic Paint
Add a few drops of acrylic paint to the resin mixture. Experiment with different colors to achieve the desired effect. Stir the mixture carefully until the paint is well incorporated, but be cautious not to overmix and create air bubbles.
Step 4: Applying the Mixture
Using a paintbrush or palette knife, apply the resin mixture to the prepared surface. Be creative with your brushstrokes and layering techniques to create depth and texture. The resin mixture is self-leveling, so it will even out as it cures.
Step 5: Enhancing with Additional Layers
To enhance the depth and gloss of your artwork, you can add additional layers of resin and acrylic paint. Allow each layer to fully cure before applying the next one. This will give your artwork a three-dimensional appearance.
Step 6: Finishing Touches
Once you’re satisfied with the depth and gloss of your artwork, use a heat gun or blowtorch to remove any remaining air bubbles and create a smooth surface. Take precautions and follow safety guidelines when handling these tools.
Step 7: Final Curing
Allow your artwork to cure according to the resin manufacturer’s instructions. This can take anywhere from a few hours to several days, depending on the type of resin used. Ensure the artwork is placed in a dust-free environment during the curing process.
Summary
Combining resin and acrylic paint offers endless possibilities for creating artwork with depth and gloss. By following these steps and experimenting with different techniques, you can achieve stunning effects that will captivate viewers and showcase your artistic talent. Remember to take proper safety precautions and enjoy the process of unleashing your creativity.
Exploring New Possibilities: Unleash Your Creativity by Mixing Resin and Acrylic Paint
Resin and acrylic paint are two versatile mediums that artists often use to create stunning artworks. However, have you ever thought about combining these two materials to unlock a world of new possibilities? By mixing resin and acrylic paint, you can create unique textures, vibrant colors, and captivating effects that will take your artwork to the next level. In this section, we will dive into the exciting realm of resin and acrylic paint mixing and explore the endless creative opportunities that await.
1. Understanding Resin and Acrylic Paint
Before we dive into the mixing process, let’s take a moment to understand the characteristics of resin and acrylic paint individually. Resin is a clear, glossy, and durable material that can be poured or layered onto various surfaces. It dries to a hardened, glass-like finish and can be used to create a glossy, three-dimensional effect in artworks. On the other hand, acrylic paint is a fast-drying water-based paint that offers vibrant colors and can be applied to a wide range of surfaces. It can be diluted with water or mixed with various mediums to achieve different textures and effects.
1.1 Resin:
Resin is typically a two-part material that consists of a resin and a hardener. When these two components are mixed together, a chemical reaction occurs, causing the mixture to harden and cure over time. Resin is self-leveling, which means it naturally spreads out and creates a smooth, flat surface. It can also be tinted with resin dyes or pigments to add color.
1.2 Acrylic Paint:
Acrylic paint is a versatile medium that comes in a wide range of colors and consistencies. It can be applied with brushes, palette knives, or even poured onto surfaces. Acrylic paint dries quickly, allowing for fast layering and building up of textures. It can also be thinned with water or mixed with various additives to create different effects, such as glazing or impasto.
2. Mixing Resin and Acrylic Paint
Now that we have a basic understanding of resin and acrylic paint let’s explore how we can combine these two mediums to create captivating artworks. Mixing resin and acrylic paint opens up a myriad of possibilities, allowing you to create unique textures, depth, and vibrancy in your artwork. Here’s how you can get started:
2.1 Preparing the Resin:
Follow the instructions provided by the resin manufacturer to prepare the resin mixture. This usually involves mixing the resin and hardener in the correct ratio and stirring them thoroughly. Make sure to work in a well-ventilated area and wear protective gloves and goggles as resin can be toxic if mishandled.
2.2 Adding Acrylic Paint:
Once the resin mixture is prepared, you can start adding acrylic paint to create color variations and effects. Begin by adding small amounts of paint to the resin and stir it gently with a stir stick or palette knife. Experiment with different colors and ratios to achieve the desired color intensity. You can also mix multiple colors together to create custom shades.
2.3 Creating Effects:
Now comes the fun part – creating various effects using the resin and acrylic paint mixture. Here are some techniques you can try:
- Marbling: Pour different colors of the resin and acrylic paint mixture onto your canvas or surface. Use a skewer or toothpick to create swirling patterns by dragging the colors together.
- Cells: Add a few drops of silicone oil to the resin and acrylic paint mixture to create beautiful cell-like patterns. The oil will rise to the surface, creating unique and organic shapes.
- Texture Building: Mix in various additives like sand, glass beads, or even dried flowers to the resin and acrylic paint mixture to create interesting textures and dimension in your artwork.
3. Curing and Finishing
After you have finished creating your artwork, allow the resin to cure according to the manufacturer’s instructions. This typically takes about 24 to 48 hours, depending on the brand and environmental conditions. Once the resin is fully cured, you can add finishing touches like varnishing or sealing the artwork to enhance its durability and protect it from UV damage.
Summary
The combination of resin and acrylic paint offers a world of creative possibilities for artists. By mixing these two mediums, you can create unique textures
Step-by-Step Guide: How to Properly Mix Resin with Acrylic Paint for a Professional Finish
If you’re an artist or crafter looking to add a glossy, durable finish to your acrylic paintings, mixing resin with acrylic paint can be the perfect solution. Resin not only enhances the vibrancy of your colors but also provides a protective layer that gives your artwork a professional finish. In this step-by-step guide, we will walk you through the process of properly mixing resin with acrylic paint to achieve stunning results.
Step 1: Gather Your Materials
Before you begin, make sure you have all the necessary materials handy. Here’s a list of what you’ll need:
- Acrylic paint
- Epoxy resin and hardener
- Measuring cups
- Stir sticks or craft sticks
- Disposable gloves
- Protective covering for your workspace
- Paintbrushes or palette knives
- Canvas or other painting surface
- Heat gun or torch (optional)
Step 2: Prepare Your Workspace
Resin can be messy, so it’s important to set up a clean and well-ventilated workspace. Cover your table or work area with a protective material, such as plastic or a drop cloth, to catch any drips or spills. Open windows or use a fan for proper ventilation.
Step 3: Mix the Resin
Follow the manufacturer’s instructions to measure and mix the epoxy resin and hardener. Use separate measuring cups for each component to ensure accurate measurements. Pour the resin into one cup and the hardener into another.
Step 4: Combine the Resin and Acrylic Paint
Once the resin and hardener are properly mixed, add your desired amount of acrylic paint to the resin mixture. The amount of paint you add will depend on the intensity of color you want to achieve. Start with a small amount and gradually add more if needed.
Use a stir stick or craft stick to thoroughly mix the resin and acrylic paint together. Make sure there are no streaks or clumps left behind. Stir slowly and steadily to avoid introducing air bubbles into the mixture.
Step 5: Apply the Mixture to Your Painting Surface
Now that your resin and acrylic paint are well combined, it’s time to apply the mixture to your painting surface. You can use a paintbrush or palette knife to spread the mixture evenly across the canvas or desired surface.
Be careful not to apply the resin mixture too thickly, as it may take longer to cure and could potentially result in uneven drying. Use smooth, even strokes to distribute the resin mixture evenly.
Step 6: Eliminate Air Bubbles
After applying the resin mixture, air bubbles may appear on the surface. To eliminate these bubbles, you can use a heat gun or torch. Gently pass the heat gun or torch over the surface, keeping it a few inches away from the painting, until the bubbles disappear.
Alternatively, you can use a toothpick or small pin to pop any visible bubbles. Be cautious not to disturb the surface of your painting while doing so.
Step 7: Allow the Resin to Cure
Once you’ve eliminated any air bubbles, allow the resin to cure according to the manufacturer’s instructions. This process typically takes 24 to 48 hours, depending on the brand and environmental conditions.
During the curing process, make sure your painting is placed in a dust-free area to prevent any particles from settling on the surface.
Step 8: Enjoy Your Professional Finish
After the resin has fully cured, you can admire your artwork with its beautiful, glossy finish. The resin will not only protect your painting but also enhance the colors and bring out the intricate details.
Remember to clean your brushes and tools thoroughly with soap and water immediately after use, as resin can harden and become difficult to remove once cured.
In summary, mixing resin with acrylic paint can elevate your artwork to a professional level. By following this step-by-step guide, you can achieve a glossy, durable finish that will make your paintings stand out.
Now that you know how to properly mix resin with acrylic paint, it’s time to unleash your creativity and experiment with different colors, techniques
5. Tips and Tricks: Mastering the Art of Resin and Acrylic Paint Fusion
Resin and acrylic paint fusion is a popular technique used by artists to create stunning and unique artwork. This process involves combining resin, a clear and glossy material, with acrylic paint to create a captivating and three-dimensional effect. If you are new to this technique or looking to improve your skills, here are some tips and tricks to help you master the art of resin and acrylic paint fusion:
1. Choose the right materials
Before you begin, it is essential to gather all the necessary materials for your resin and acrylic paint fusion project. Ensure that you have high-quality resin, acrylic paint, mixing cups, stirring sticks, a torch or heat gun, a level surface to work on, and any additional embellishments or tools you may need.
2. Prepare your workspace
Creating resin and acrylic paint fusion artwork can be messy. To avoid any mishaps, prepare your workspace properly. Cover your working area with a plastic or silicone mat to protect it from spills and drips. Make sure you have proper ventilation to avoid inhaling any fumes from the resin or paint.
3. Mix your resin and paint
To create the desired effect, you need to mix your resin and acrylic paint thoroughly. Start by measuring equal parts of resin and acrylic paint in separate mixing cups. Then, slowly pour the acrylic paint into the resin and stir gently with a stirring stick until the two materials are fully combined. Take care not to introduce too many air bubbles during the mixing process.
4. Experiment with colors and techniques
Resin and acrylic paint fusion allows for endless possibilities when it comes to colors and techniques. Don’t be afraid to experiment! Try mixing different colors of acrylic paint to create unique hues and shades. You can also experiment with different pouring techniques, such as the dirty pour or the swipe method, to achieve various effects in your artwork.
5. Practice proper pouring techniques
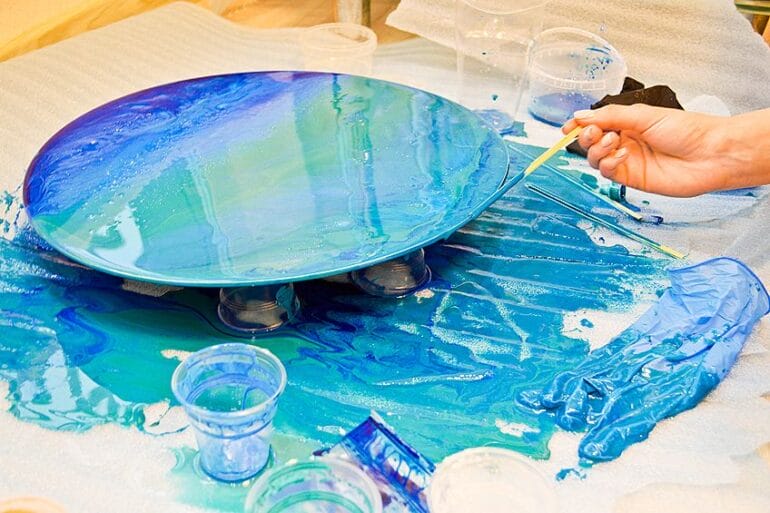
Pouring the resin and paint mixture onto your canvas is a crucial step in the process. To create beautiful and seamless designs, practice proper pouring techniques. Start by pouring the mixture in the center of the canvas and let it naturally flow towards the edges. Tilt the canvas gently to guide the flow and create interesting patterns and effects.
6. Eliminate air bubbles
Air bubbles can be a common issue in resin and acrylic paint fusion. To minimize the presence of air bubbles in your artwork, use a torch or heat gun to carefully move over the surface of the poured mixture. The heat will help release any trapped air bubbles, resulting in a smooth and flawless finish.
7. Add embellishments
To take your resin and acrylic paint fusion artwork to the next level, consider adding embellishments. You can incorporate elements such as glitter, dried flowers, or metallic foil into your design. Place these embellishments on top of the poured mixture and gently press them down using a stirring stick or a toothpick.
8. Allow proper curing time
Once you have completed your resin and acrylic paint fusion artwork, it is essential to allow it sufficient curing time. Follow the instructions provided by the resin manufacturer to determine the appropriate curing time for your project. Avoid touching or moving the artwork during this period to ensure a smooth and even finish.
9. Protect your artwork
After the curing process is complete, it is crucial to protect your resin and acrylic paint fusion artwork. Apply a clear topcoat or resin layer to seal and protect the artwork from dust, scratches, and UV damage. This will help preserve the vibrancy and longevity of your masterpiece.
With these tips and tricks in mind, you are well on your way to mastering the art of resin and acrylic paint fusion. Remember to experiment, practice, and let your creativity flow as you create stunning and unique artwork using this captivating technique.
FAQs
Can you mix resin with acrylic paint?
Yes, you can mix resin with acrylic paint to create a glossy and durable finish on your artwork. Add a small amount of resin to the paint and mix thoroughly to achieve the desired consistency. Keep in mind that resin can change the drying time and transparency of the paint, so it’s important to experiment and test before applying to your artwork.
Conclusion:
In conclusion, mixing resin with acrylic paint can open up a world of possibilities in your art creations. By combining the two mediums, you can achieve a glossy, vibrant finish that adds depth and dimension to your artwork. Whether you are creating abstract pieces, pouring techniques, or even resin jewelry, the combination of resin and acrylic paint offers endless creative opportunities.
However, it is important to ensure that you follow the proper ratio and mixing instructions to achieve the desired results. Experimentation and practice are key in finding the perfect balance between resin and acrylic paint to achieve the desired effect. So, don’t be afraid to explore and push the boundaries of your artistic expression by blending resin and acrylic paint together!