
Interested in making your own custom acrylic pen blanks?
Acrylic pen blanks are a versatile and popular material for creating stunning and unique pens.
With just a few steps, you can learn how to craft your own acrylic pen blanks and unleash your creativity.
From choosing the right acrylic colors to preparing the materials and casting the blanks, we’ll guide you through the entire process.
Whether you’re a pen enthusiast or a DIY lover, making acrylic pen blanks allows you to personalize your writing instruments and create beautiful pieces of functional art.
Ready to dive into the world of acrylic pen blank making? Let’s get started!
Tools and Materials Needed for Acrylic Pen Blank Making
Acrylic pen blank making is a popular craft that allows you to create unique, custom pen blanks from acrylic materials. Whether you are a seasoned pen turner or a beginner looking to start a new hobby, having the right tools and materials is essential for a successful project. In this section, we will discuss the tools and materials needed for acrylic pen blank making.
1. Acrylic Blanks
The main material needed for acrylic pen blank making is, of course, acrylic blanks. These blanks come in a variety of colors, patterns, and sizes, allowing you to create pens that are truly one-of-a-kind. You can purchase acrylic blanks from specialized pen turning suppliers or online retailers.
2. Lathe
A lathe is a machine that is used to shape the pen blanks and create the final pen. It consists of a rotating spindle that holds the pen blank and various cutting tools to shape the material. When choosing a lathe, consider the size of the pen blanks you plan to work with and the type of turning projects you will undertake.
3. Cutting Tools
To shape the acrylic pen blanks, you will need a set of cutting tools designed for pen turning. These tools typically include gouges, parting tools, skew chisels, and scrapers. It is important to use sharp and properly maintained cutting tools for clean and precise cuts.
4. Drill Chuck and Drill Bits
Drilling a hole through the pen blank is an important step in pen turning. A drill chuck attached to the lathe allows you to secure the pen blank and drill a hole for the pen kit hardware. Make sure to have a set of drill bits in various sizes to accommodate different pen kits.
5. Sandpaper and Abrasives
Sanding is an essential part of finishing the acrylic pen blanks. Starting with lower grit sandpaper and gradually moving to higher grits, you can achieve a smooth and polished surface. Additionally, using abrasives like micromesh pads or sanding discs can further enhance the finish.
6. Pen Mandrel
A pen mandrel is a metal rod that holds the pen blanks while they are being turned on the lathe. It allows you to secure the blanks in place and ensures that the pen is centered and aligned correctly. Make sure to choose a mandrel that matches the size of your pen blanks.
7. Pen Kit Hardware
Pen kits include various components such as pen barrels, pen clips, nibs, and ink cartridges. These components are essential for assembling the pen and giving it its functionality. Choose a pen kit that suits your style and preferences.
8. Safety Equipment
When working with power tools and sharp objects, safety should always be a priority. Make sure to wear safety glasses to protect your eyes from flying debris. It is also recommended to wear a dust mask or respirator to avoid inhaling acrylic dust.
With these tools and materials at hand, you will be well-equipped to start your acrylic pen blank making journey. Remember to always follow proper safety guidelines and take your time to master the techniques involved in pen turning. Happy crafting!
Step-by-Step Guide for Casting Acrylic Pen Blanks
Casting acrylic pen blanks is a popular hobby among pen enthusiasts. It allows you to create unique and personalized pen designs using colorful acrylic materials. In this step-by-step guide, we will walk you through the process of casting acrylic pen blanks, from gathering the necessary materials to finishing your beautiful pen blanks.
Materials Needed
Before you begin casting acrylic pen blanks, make sure you have the following materials:
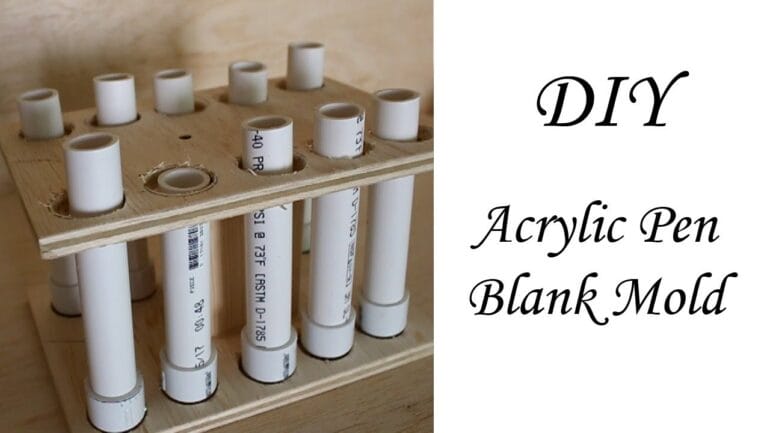
- Acrylic pen blank mold
- Acrylic resin, available in various colors
- Catalyst for the resin
- Measuring cups and stir sticks
- Mold release spray
- Pressure pot or vacuum chamber
- Lathe for turning the pen blanks
- Pen kit components
- Sanding materials (sandpaper, sanding pads)
- Polishing materials (polishing compound, microfiber cloth)
Step 1: Prepare the Mold
Start by preparing the acrylic pen blank mold. Ensure it is clean and free from any dust or debris. Apply mold release spray to the mold surface to prevent the resin from sticking.
Step 2: Mix the Resin
Follow the manufacturer’s instructions to measure the appropriate amount of acrylic resin and catalyst. Use a measuring cup to ensure the correct ratio. Mix the resin and catalyst thoroughly using a stir stick. Make sure there are no air bubbles in the mixture.
Step 3: Pour the Resin into the Mold
Slowly pour the mixed resin into the prepared mold. Be careful not to overfill the mold. Tap the mold gently on a hard surface to remove any trapped air bubbles. Allow the resin to settle evenly in the mold.
Step 4: Apply Pressure or Vacuum
If you have a pressure pot or vacuum chamber, place the mold inside and apply pressure or vacuum according to the manufacturer’s instructions. This will help remove any remaining air bubbles and ensure a smooth and bubble-free casting. If you don’t have access to a pressure pot or vacuum chamber, skip this step.
Step 5: Cure the Resin
Leave the mold undisturbed for the recommended curing time specified by the resin manufacturer. This usually takes several hours or overnight. Make sure the resin is fully cured before moving on to the next step.
Step 6: Remove from the Mold
Carefully remove the cured acrylic pen blank from the mold. If the blank is stubborn, you can gently tap the mold or use a release agent to loosen it. Take your time to ensure the blank comes out cleanly without any damage.
Step 7: Shape and Turn the Pen Blank
Mount the acrylic pen blank onto a lathe and shape it according to your desired design. Use different turning tools to create unique patterns and contours. Take your time and work slowly to avoid any accidents or mistakes.
Step 8: Sand and Polish
Once you are satisfied with the shape and smoothness of the pen blank, it’s time to sand and polish it. Start with coarse sandpaper and gradually work your way to finer grits. This will remove any tool marks and create a smooth surface. Finish off by polishing the pen blank with a polishing compound and a microfiber cloth for a shiny and professional look.
Step 9: Assemble the Pen
Finally, assemble the pen using the pen kit components. Follow the instructions provided with the kit to attach the pen blank to the pen hardware. Make sure everything fits together securely and smoothly.
Step 10: Enjoy Your Handmade Pen
Once the pen is fully assembled, take a moment to admire your craftsmanship. Your unique and personalized acrylic pen is ready to be used or gifted to someone special. Enjoy writing with a pen that you made with your own hands!
In summary, casting acrylic pen blanks is a rewarding and creative process. By following this step-by-step guide, you can create beautiful and customized pen designs to showcase your craftsmanship. Remember to take your time, follow safety precautions, and have fun experimenting with different colors and patterns. Happy pen casting!
Tips for Achieving Unique Designs and Patterns in Acrylic Pen Blanks
Acrylic pen blanks are a popular choice among pen turners due to their versatility and vibrant colors. One of the key advantages of working with acrylic blanks is the ability to create unique and eye-catching designs. In this section, we will explore some tips and techniques that can help you achieve stunning patterns in your acrylic pen blanks.
1. Experiment with Different Materials
When it comes to creating unique designs in acrylic pen blanks, the choice of materials is crucial. Acrylic blanks are available in a wide range of colors, patterns, and finishes. To achieve a distinctive look, consider combining different materials. You can try layering two or more acrylic blanks together or adding other materials like wood, metal, or even natural materials like feathers or seashells.
2. Use Resin for Added Depth and Dimension
If you want to add depth and dimension to your acrylic pen blanks, using resin can be a game-changer. Resin can be poured in between layers of acrylic blanks, creating stunning visual effects. You can experiment with different colors and opacities of resin to achieve a variety of designs. Additionally, you can also embed small objects like glitter, beads, or even dried flowers in the resin for added interest.
3. Incorporate Different Turning Techniques
Another way to achieve unique designs in acrylic pen blanks is by incorporating different turning techniques. For example, you can experiment with a variety of cuts and shapes, such as coves, beads, or V-grooves. Each technique will create a different texture and pattern on the surface of the pen blank. Try combining multiple techniques to create intricate and visually appealing designs.
4. Experiment with Coloring Techniques
Coloring techniques can greatly enhance the visual appeal of acrylic pen blanks. One popular method is using alcohol-based inks or dyes. These can be applied directly to the blank or mixed with resin for a more subtle effect. Another technique is using acrylic paints, which can be brushed or airbrushed onto the surface of the pen blank. Don’t be afraid to mix and layer different colors to create captivating patterns.
5. Consider Sanding and Polishing
The final step in achieving unique designs in acrylic pen blanks is sanding and polishing. Proper sanding and polishing techniques can greatly enhance the clarity and shine of the acrylic, bringing out the patterns and colors. Start with a coarse sandpaper to remove any imperfections, then gradually move to finer grits for a smooth finish. Finally, use a polishing compound or microfiber cloth to buff the surface to a high gloss.
6. Seek Inspiration and Learn from Others
Don’t hesitate to seek inspiration and learn from other pen turners or artists. There are numerous online communities, forums, and social media groups dedicated to pen turning and acrylic blank designs. Explore their work, ask questions, and gather ideas. This can help you discover new techniques, color combinations, and design possibilities that you may not have considered before.
In summary, achieving unique designs and patterns in acrylic pen blanks requires experimentation, creativity, and a willingness to try new techniques. By combining different materials, using resin to add depth, incorporating various turning techniques, experimenting with coloring methods, and seeking inspiration from others, you can create stunning and one-of-a-kind designs in your acrylic pen blanks. So let your imagination run wild and enjoy the process of creating truly unique pieces of functional art.
Finishing and Polishing Techniques for Acrylic Pen Blanks
Acrylic pen blanks are a popular and vibrant choice for pen turning enthusiasts. These blanks come in a variety of colors and patterns, making them a versatile option for creating stunning pens. However, to truly showcase the beauty of acrylic, it is important to finish and polish the pen blanks properly. In this section, we will explore some effective techniques to achieve a professional finish for acrylic pen blanks.
1. Sanding
The first step in finishing acrylic pen blanks is sanding. This process helps to smooth out any imperfections and prepare the surface for a high-quality finish. Start with a low-grit sandpaper, such as 120 or 180 grit, and gradually work your way up to higher grits, such as 400 or 600, for a smoother finish.
When sanding acrylic, it is important to use a light touch and avoid applying too much pressure, as this can cause the material to melt or warp. Sand in a circular motion to ensure even sanding and avoid creating flat spots.
2. Polishing
Once the sanding is complete, it’s time to polish the acrylic pen blanks. There are several methods you can use to achieve a glossy, professional-looking finish:
- Micro-Mesh Pads: Micro-Mesh pads are a popular choice for polishing acrylic. These pads come in various grits, ranging from coarse to ultra-fine, and are designed to produce a high-quality polish. Start with a coarse pad and gradually work your way up to finer grits to achieve a smooth and shiny surface.
- Plastic Polish: Another option is to use a plastic polish specifically formulated for acrylic. Apply the polish to a soft cloth or paper towel and gently buff the surface of the pen blanks in a circular motion. This method helps to remove any remaining scratches and bring out the shine of the acrylic.
- Sanding Sealer: Applying a sanding sealer before polishing can help to fill in any small imperfections and create a smoother surface. Follow the manufacturer’s instructions for applying the sealer and allow it to dry completely before proceeding with the polishing process.
3. Final Finishing Touches
After polishing, there are a few final finishing touches you can add to enhance the appearance of the acrylic pen blanks:
- Buffing Wheel: Using a buffing wheel or a soft cloth wheel on a drill or lathe can give your pen blanks an extra shine. Apply a buffing compound to the wheel and gently buff the surface of the acrylic in a circular motion for a polished finish.
- Applying a Finish: If desired, you can apply a finish to protect the acrylic and add a glossy sheen. There are various options available, such as CA glue or acrylic finish pens. Follow the manufacturer’s instructions for applying the finish and allow it to dry completely before assembling the pen.
Remember to take your time and work carefully when finishing and polishing acrylic pen blanks. It is important to remove any scratches or blemishes before applying a finish to ensure a flawless result. With the right techniques and attention to detail, you can achieve a professional finish that will showcase the beauty of your acrylic pen blanks.
In summary, finishing and polishing acrylic pen blanks requires careful sanding, polishing with micro-mesh pads or plastic polish, and adding final finishing touches such as buffing and applying a protective finish. With these techniques, you can transform your acrylic pen blanks into stunning works of art.
FAQs
1. How can I make acrylic pen blanks?
To make acrylic pen blanks, you will need acrylic resin, pigments, a mold, and a pressure pot. Mix the resin and pigments, pour it into the mold, and place it in the pressure pot. Apply pressure to remove any bubbles and let it cure. Once cured, remove from the mold and shape it into pen blanks.
2. What type of mold should I use for making acrylic pen blanks?
For making acrylic pen blanks, you can use silicone or PVC pipe molds. Silicone molds are flexible and easy to demold, while PVC pipe molds are rigid and provide a cylindrical shape. Choose a mold that suits your preferences and requirements.
3. Can I use different colors and effects in my acrylic pen blanks?
Yes, you can use different colors and effects in your acrylic pen blanks. You can mix pigments to create custom colors, add glitters or mica powders for a shimmer effect, or experiment with other additives to achieve unique designs. The possibilities for customization are endless.
Conclusion
In conclusion, learning how to make acrylic pen blanks can be a rewarding and creative endeavor. By following the step-by-step process, you can create unique and personalized pen blanks that reflect your artistic vision. Whether you’re a seasoned woodturner or a beginner looking to explore new techniques, acrylic pen blanks offer endless possibilities for design and color combinations.
With the right tools and materials, you can experiment with different casting techniques and create stunning results. The process of making acrylic pen blanks may require some practice and patience, but the end result is well worth the effort. So, get started and let your creativity flow as you dive into the world of acrylic pen blank making.