
If you’re looking to turn off pen pressure in Clip Studio Paint, you’ve come to the right place. Adjusting pen pressure is essential for artists and designers who want more control over their digital artwork. In this guide, we will walk you through the steps to disable pen pressure in Clip Studio Paint, allowing you to create precise and consistent lines without the influence of pressure sensitivity.
To turn off pen pressure in Clip Studio Paint, start by opening the application on your computer. Once you have it open, navigate to the “File” menu and select “Preferences.” In the preferences menu, locate the “Pen Tablet” tab. Here, you will find various settings related to pen pressure and sensitivity.
Within the “Pen Tablet” tab, you should see a checkbox labeled “Enable Pen Pressure.” By unchecking this box, you will effectively disable pen pressure in Clip Studio Paint. Once disabled, your strokes will be consistent and not affected by the pressure applied to your digital pen or tablet.
After disabling pen pressure, you may want to adjust other related settings to further customize your drawing experience. For instance, you can modify the brush size or opacity settings to achieve the desired effect. Experiment with different settings until you find what works best for your artistic style.
Remember, disabling pen pressure in Clip Studio Paint is a personal preference and may not be suitable for all artists. It is worth noting that pen pressure can add depth and

Adjusting pen pressure sensitivity settings in Clip Studio Paint
Clip Studio Paint is a popular digital art software that offers a wide range of tools and features to artists and illustrators. One of the key features of Clip Studio Paint is its ability to recognize and respond to pen pressure sensitivity, allowing for more natural and expressive brush strokes.
Adjusting the pen pressure sensitivity settings in Clip Studio Paint can help you customize your digital drawing experience to suit your specific preferences and drawing style. In this section, we will explore how to adjust these settings to optimize your pen pressure sensitivity.
Step 1: Access the pen pressure settings
To access the pen pressure settings in Clip Studio Paint, follow these steps:
- Open Clip Studio Paint and go to the “File” menu.
- Click on “Preferences” to open the preferences window.
- In the preferences window, navigate to the “Pen/Tablet” tab.
- Here, you will find various options related to pen pressure sensitivity.
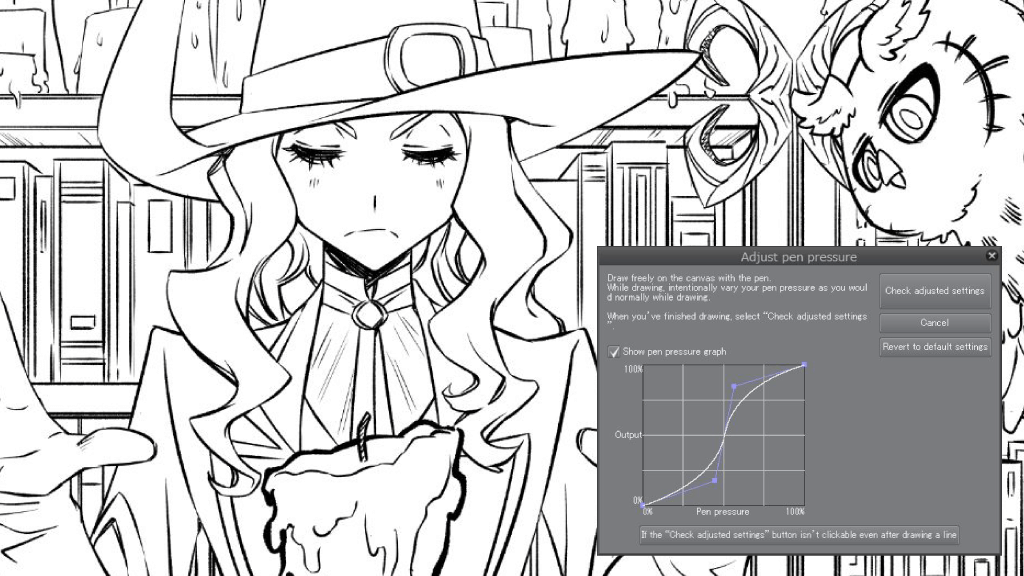
Step 2: Adjusting the pen pressure curve
The pen pressure curve allows you to customize how Clip Studio Paint interprets different levels of pen pressure. By adjusting the curve, you can make the software more responsive to light or heavy pen strokes.
Follow these steps to adjust the pen pressure curve:
- In the pen pressure settings, locate the “Pressure curve” section.
- Click on the “Edit” button next to the pressure curve.
- A new window will appear, showing a graph with a default pressure curve.
- To customize the curve, click and drag the points on the graph.
- You can add or remove points by right-clicking on the graph.
- Experiment with different curve shapes until you find a pressure response that feels comfortable to you.
- Click “OK” to save your changes.
Step 3: Testing and adjusting pen sensitivity
After adjusting the pen pressure curve, it’s important to test and fine-tune the sensitivity to ensure it matches your desired outcome. To do this:
- Create a new canvas or open an existing drawing.
- Select a brush tool and start making strokes on the canvas.
- Observe how the software responds to your pen pressure.
- If the strokes feel too light or heavy, go back to the pressure curve settings and make further adjustments.
- Repeat the testing process until you are satisfied with the pen pressure sensitivity.
Step 4: Additional settings
Clip Studio Paint also offers additional settings to further customize your pen pressure sensitivity. These settings include:
- Minimum pressure: Sets the minimum pressure required for a stroke to register.
- Maximum pressure: Sets the maximum pressure that can be applied to a stroke.
- Correction: Adjusts the smoothing of pen pressure sensitivity.
- Airbrush: Enables or disables airbrush-like pressure effects.
Explore these settings in the pen pressure options to refine your drawing experience even further.
Summary
Adjusting the pen pressure sensitivity settings in Clip Studio Paint can greatly enhance your digital drawing process. By customizing the pen pressure curve and exploring additional settings, you can create more expressive and versatile brush strokes. Take the time to experiment and fine-tune these settings to suit your unique style and preferences. With the right pen pressure sensitivity, you can unlock the full potential of your digital artwork.

Disabling Pen Pressure for a Smoother Drawing Experience in Clip Studio Paint
Clip Studio Paint is a popular digital art software that offers a wide range of features and tools for artists and designers. One of the key features that many artists appreciate is the ability to utilize pen pressure sensitivity, which allows for more natural and nuanced lines and strokes.
However, there may be instances where you prefer to disable pen pressure sensitivity and have a more consistent and smoother drawing experience. This could be due to personal preference or technical issues with your pen or tablet.
Step 1: Opening Preferences
To disable pen pressure sensitivity in Clip Studio Paint, start by opening the application and navigating to the “File” menu located in the top left corner of the window. From the drop-down menu, select “Preferences.”
Step 2: Accessing Tablet Settings
In the Preferences window, you will find a list of different settings categories on the left side. Look for and click on the “Tablet” category to access the tablet settings.
Step 3: Modifying Pen Pressure Settings
Within the Tablet settings, you will see various options related to pen pressure. Locate the “Pen Pressure Settings” section, which is where you can disable pen pressure sensitivity.
In this section, you will typically find a checkbox or toggle switch labeled “Enable pen pressure” or similar. Uncheck or toggle off this option to disable pen pressure sensitivity.
Step 4: Testing the Drawing Experience
After disabling pen pressure sensitivity, it’s important to test the drawing experience to ensure it meets your expectations. Try drawing simple lines and strokes to see if they are consistent and smooth.
If you are satisfied with the result, you can continue working with pen pressure disabled. However, if you prefer to re-enable pen pressure sensitivity in the future, you can simply follow the same steps and toggle the option back on.
Summary
If you prefer a smoother and more consistent drawing experience in Clip Studio Paint, you have the option to disable pen pressure sensitivity. By following a few simple steps in the preferences menu, you can modify the pen pressure settings and achieve your desired drawing style. Remember to test the changes to ensure they align with your preferences.
Overcoming Pen Pressure Sensitivity Problems in Clip Studio Paint
If you are an artist or a digital illustrator, you may be familiar with the frustrations of dealing with pen pressure sensitivity problems while using creative software like Clip Studio Paint. Pen pressure sensitivity is a crucial feature that allows you to control the thickness and opacity of your brush strokes based on how hard you press on your digital pen or stylus.
However, sometimes you may encounter issues where the pen pressure sensitivity does not work as expected in Clip Studio Paint, resulting in uniform and unresponsive strokes. This can significantly hinder your artistic process and make it challenging to achieve the desired effects in your artwork.
In this section, we will explore some common causes of pen pressure sensitivity problems in Clip Studio Paint and provide effective solutions to overcome them.
1. Incorrect Brush Settings
One of the most common causes of pen pressure sensitivity problems in Clip Studio Paint is incorrect brush settings. If your brush is not properly configured to respond to pen pressure, you may experience uniform strokes regardless of your input.
To resolve this issue, make sure you have selected a brush that supports pen pressure sensitivity. In Clip Studio Paint, many brushes have customizable settings, allowing you to adjust various parameters such as size, opacity, and flow based on pen pressure. Experiment with different brushes and their settings to find the ones that work best for you.
2. Outdated or Incompatible Driver
Another potential cause of pen pressure sensitivity problems is an outdated or incompatible driver for your digital pen or tablet. Drivers act as a bridge between your hardware and software, and outdated or incompatible drivers can disrupt the communication between your pen and Clip Studio Paint.
To address this issue, visit the manufacturer’s website for your digital pen or tablet and download the latest driver compatible with your operating system. Install the driver and restart your computer to ensure proper functionality. Updating the driver should resolve any compatibility issues and restore pen pressure sensitivity in Clip Studio Paint.
3. Tablet Calibration
Calibration is the process of aligning your digital pen or tablet with your computer screen. If the calibration is off, it can affect the accuracy and responsiveness of pen pressure sensitivity in Clip Studio Paint.
To recalibrate your tablet, follow these steps:
- Open the tablet driver settings or control panel.
- Select the option for “Calibration” or “Align”.
- Follow the on-screen instructions to calibrate your tablet.
- Save the changes and restart your computer.
By recalibrating your tablet, you can ensure that the pen pressure sensitivity works correctly in Clip Studio Paint.
4. Software Compatibility
In some cases, pen pressure sensitivity problems may arise due to compatibility issues between Clip Studio Paint and other software or plugins installed on your computer.
To troubleshoot this issue, try the following steps:
- Disable any third-party plugins or extensions that may interfere with Clip Studio Paint.
- Update Clip Studio Paint to the latest version available.
- Try running Clip Studio Paint in compatibility mode by right-clicking on the application icon and selecting “Properties.” In the Compatibility tab, choose a previous version of Windows and click “Apply.”
- If the issue persists, consider reinstalling Clip Studio Paint to ensure a clean installation.
By resolving any compatibility issues with other software or plugins, you can enhance the pen pressure sensitivity in Clip Studio Paint.
5. Hardware Malfunction
In rare cases, pen pressure sensitivity problems may be caused by a hardware malfunction in your digital pen or tablet. If none of the above solutions work, it is advisable to contact the manufacturer’s customer support for further assistance or consider getting your hardware checked or replaced if it is under warranty.
In summary, pen pressure sensitivity problems in Clip Studio Paint can be frustrating, but with the right troubleshooting steps, you can overcome them. Ensure your brush settings are correct, update your drivers, recalibrate your tablet, address software compatibility issues, and consider hardware malfunction as a last resort. By following these guidelines, you can unleash your creativity and fully utilize the pen pressure sensitivity feature in Clip Studio Paint.
Disabling Pen Pressure in Clip Studio Paint
If you’re an artist using Clip Studio Paint, you may have encountered issues with inconsistent strokes due to pen pressure sensitivity. While pen pressure can be beneficial for creating dynamic and expressive artwork, there are times when you may prefer to have consistent strokes without the added variation. In this section, we will explore how to disable pen pressure in Clip Studio Paint to achieve more controlled and consistent strokes.
Step 1: Accessing the Brush Settings
To disable pen pressure, you first need to access the brush settings in Clip Studio Paint. Open the program and select the brush tool from the toolbar. Then, click on the “Tool Property” palette located on the right side of the screen. This will open a panel with various brush settings.
Step 2: Adjusting Pen Pressure Settings
Within the “Tool Property” panel, look for the “Stroke” tab. Here, you will find a section labeled “Pen Pressure,” which controls how brush strokes respond to pressure sensitivity. By default, this option is enabled to simulate real pen and brush behavior.
To disable pen pressure, uncheck the box next to “Enable Pen Pressure.” This will turn off the pressure sensitivity for the selected brush, resulting in consistent strokes regardless of how hard or light your pressure is.
Step 3: Testing Your Brush Strokes
After disabling pen pressure, it’s important to test your brush strokes to ensure that the desired consistency is achieved. Select the brush tool and start drawing on the canvas. You should notice that the strokes remain uniform in thickness, regardless of the pressure applied.
If you’re satisfied with the results, you can continue creating your artwork with consistent strokes. However, if you wish to re-enable pen pressure, simply go back to the brush settings and check the “Enable Pen Pressure” box.
When to Disable Pen Pressure
Disabling pen pressure can be useful in various situations, such as when creating technical illustrations, line art, or graphic design elements that require precise and consistent strokes. By turning off pen pressure, you have more control over the outcome of your artwork, allowing for clean lines and predictable results.
Keep in mind that disabling pen pressure is a personal preference and may not be suitable for all artistic styles or projects. Experiment with different settings to find what works best for your specific needs.
Summary
In summary, disabling pen pressure in Clip Studio Paint can help you achieve consistent and controlled strokes. By accessing the brush settings and turning off the “Enable Pen Pressure” option, you can create artwork with uniform lines and predictable outcomes. However, it’s important to note that pen pressure can be beneficial for adding depth and dynamism to your art, so consider your artistic style and project requirements before deciding to disable it.
FAQs
How do I turn off pen pressure in Clip Studio Paint?
To turn off pen pressure in Clip Studio Paint, go to the “Tool Property” window, select the brush tool you’re using, and uncheck the “Use Pen Pressure” option. This will disable the pressure sensitivity for that specific brush.
Conclusion
In conclusion, turning off pen pressure in Clip Studio Paint can be a helpful technique for artists seeking more control over their digital artwork. By disabling pen pressure, artists can create consistent and uniform brush strokes without unwanted variations in line weight. This feature is particularly useful for certain styles of artwork, such as graphic design or comic book illustrations. However, it’s important to note that pen pressure can bring a sense of realism and depth to artwork, so it may be worth experimenting with both options to find the best fit for your creative process. Ultimately, the choice to turn off pen pressure in Clip Studio Paint depends on the specific artistic goals and preferences of each individual artist.