
Looking to customize your Glock frame with a fresh coat of paint? Painting your Glock frame is a fantastic way to add a personal touch and make your firearm stand out from the crowd. In this guide, we’ll walk you through the step-by-step process of how to paint your Glock frame, ensuring a professional and durable finish. From prepping the frame to choosing the right paint and applying it properly, we’ve got you covered. Let’s get started!
Preparing Your Glock Frame for Painting
Before you start painting your Glock frame, it’s crucial to properly prepare it to ensure a smooth and durable finish. This section will guide you through the necessary steps to get your frame ready for painting.
Gather the Supplies
First, gather all the supplies you will need for the preparation process. Here’s a list of the essential items:
- Acetone or Isopropyl Alcohol
- Lint-free Cloths or Paper Towels
- Masking Tape
- Sandpaper (120, 220, and 400 grit)
- Plastic or Rubber Gloves
- Surface Cleaner or Degreaser
Disassemble the Frame
Start by disassembling your Glock frame. Remove the slide, barrel, recoil spring, and any other internal parts. This will allow you to work on the frame more effectively and avoid damaging these parts during the painting process.
Clean the Frame
Using a lint-free cloth or paper towel, wipe down the entire frame with acetone or isopropyl alcohol. This will remove any oils, dirt, or residue on the surface, ensuring proper adhesion of the paint. Make sure to wear gloves to protect your hands during this step.
Mask Off the Areas
Next, use masking tape to cover any areas of the frame that you don’t want to paint. This includes the trigger, magazine release, slide rails, and other small parts. Take your time to ensure that the tape is applied securely and accurately to avoid any paint bleed or overspray.
Sand the Frame
Now it’s time to sand the frame to create a rough surface for better paint adhesion. Start with 120 grit sandpaper and sand the entire frame to remove the factory finish or any imperfections. Then move on to 220 grit sandpaper to further smooth out the surface. Finish off with 400 grit sandpaper for a final smooth finish.
Clean Again
After sanding, wipe down the frame with a surface cleaner or degreaser to remove any sanding dust or residue. This will ensure that the paint adheres properly and gives you a clean, even finish.
Inspect and Touch Up
Take a close look at the frame to ensure that there are no remaining imperfections or areas that need touching up. If you spot any, sand those areas again and clean them before proceeding to the painting step.
Summary
Preparing your Glock frame for painting is a crucial step in achieving a professional and long-lasting finish. By following these steps and taking your time to properly clean, mask, and sand the frame, you’ll be well on your way to creating a customized Glock that stands out from the crowd.
Step-by-Step Guide to Painting Your Glock Frame
Are you looking to personalize your Glock frame and give it a fresh new look? Painting your Glock frame can be a fun and rewarding project that allows you to customize your firearm to your unique style. In this guide, we will walk you through the step-by-step process of painting your Glock frame.
Materials Needed:
- Glock frame
- Painter’s tape
- Sandpaper (200 grit, 400 grit, and 800 grit)
- Acetone or degreaser
- Primer
- Spray paint (color of your choice)
- Clear coat
- Optional: stencil or camouflage template
Step 1: Disassemble Your Glock Frame
Before you begin painting, it is important to disassemble your Glock frame. Remove the slide, barrel, recoil spring, and any other components that may interfere with the painting process. Ensure that all parts are safely stored away from the painting area.
Step 2: Clean and Prep the Frame
Thoroughly clean the frame with acetone or a degreaser to remove any oils, dirt, or residue. This step is crucial to ensure proper adhesion of the paint. Use a lint-free cloth or paper towel to wipe down the frame. Next, use painter’s tape to cover any areas you do not want to paint, such as the serial number, slide rails, or grip texture.
Step 3: Sand the Frame
Using sandpaper, gently sand the entire frame, including the grip texture, to create a rough surface that will help the paint adhere better. Start with 200 grit sandpaper to remove any existing finish or imperfections. Follow up with 400 grit sandpaper to smooth out the surface, and finish with 800 grit sandpaper for a final smooth finish. Be sure to remove any sanding dust before proceeding to the next step.
Step 4: Apply Primer
Apply a thin, even coat of primer to the prepared frame. Primer helps to create a strong bond between the paint and the frame, as well as providing a smooth base for the paint to adhere to. Follow the manufacturer’s instructions on the primer can for optimal drying time.
Step 5: Apply Basecoat
Once the primer is dry, apply a thin, even coat of your chosen spray paint color to the frame. Hold the spray can about 6-8 inches away from the frame and use steady, sweeping motions to apply the paint. Allow the first coat to dry completely before applying additional coats, if needed. Multiple thin coats are better than one thick coat, as it prevents drips and provides a more even finish.
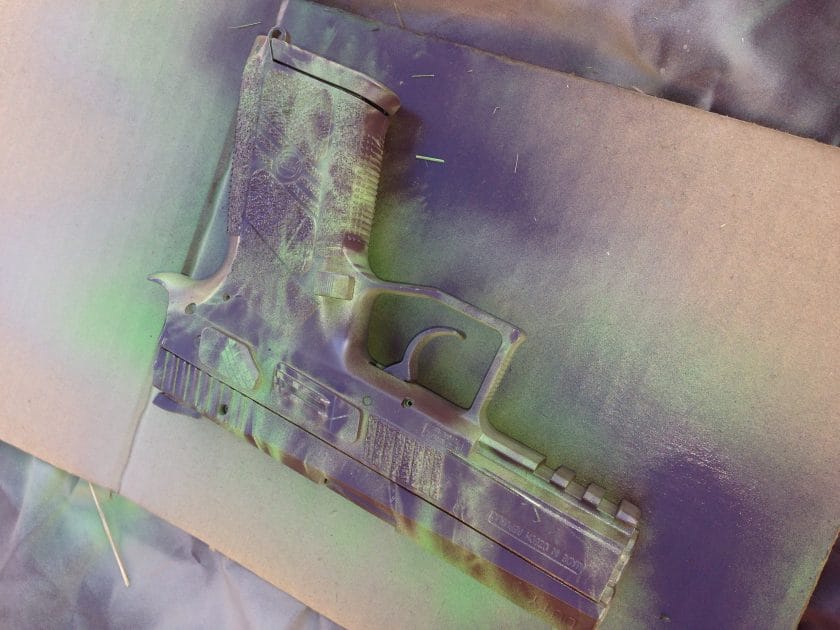
Step 6: Optional: Apply Stencil or Camouflage Pattern
If you want to add a stencil or camouflage pattern to your Glock frame, now is the time to do so. Use painter’s tape or a stencil to create your desired design. Apply the additional color(s) using the same method as before, ensuring thin, even coats and allowing proper drying time between each coat.
Step 7: Apply Clear Coat
To protect the paint and provide a durable finish, apply a clear coat. This will also give your Glock frame a glossy or matte finish, depending on your preference. Apply the clear coat in the same manner as the basecoat, using thin, even coats and allowing proper drying time between each coat.
Step 8: Reassemble Your Glock Frame
Once the paint and clear coat have dried completely, carefully remove the painter’s tape and reassemble your Glock frame. Ensure that all components are properly aligned and secured. Test the functionality of the firearm before use.
Summary
Painting your Glock frame can be a fun and rewarding project that allows you to customize your firearm. By following this step-by-step guide, you can achieve a professional-looking paint job that reflects your personal style. Remember to always prioritize safety and functionality when working on your firearm. Happy painting!
Tips and Techniques for Achieving a Professional Finish
When it comes to completing any task, achieving a professional finish is always the goal. Whether you are working on a home improvement project, crafting a piece of artwork, or even applying makeup, the finishing touches can make all the difference in the final result. In this section, we will explore some valuable tips and techniques that can help you achieve a professional finish in various areas of your life.
1. Preparation is Key
One of the most important steps in achieving a professional finish is proper preparation. Before diving into any project, take the time to gather all the necessary tools and materials. This will ensure that you have everything you need and prevent any unnecessary interruptions during the process. Additionally, make sure to prepare the surface or area you will be working on. Clean, smooth, and properly primed surfaces will create a solid foundation for a professional finish.
2. Pay Attention to Detail
When aiming for a professional finish, it’s crucial to pay attention to the smallest details. Take the time to carefully inspect your work at each stage of the process. Look for imperfections, such as rough edges, uneven lines, or smudges, and address them promptly. By addressing these minor issues early on, you can prevent them from becoming more significant problems later.
3. Choose the Right Tools
Using the appropriate tools for the task at hand is essential for achieving a professional finish. Research and invest in high-quality tools that are specifically designed for the job you are working on. Whether it’s a paintbrush with fine bristles, a precision cutting tool, or a professional-grade makeup brush, using the right tool will help you achieve a more refined and polished result.
4. Practice Patience
Patience is a virtue when it comes to achieving a professional finish. Rushing through a project can lead to sloppy workmanship and subpar results. Take your time, work methodically, and allow each step to fully dry or set before moving on to the next. This will ensure that each layer or application is properly cured and will result in a more professional and durable finish.
5. Learn from the Experts
One of the best ways to improve your skills and achieve a professional finish is to learn from those who have mastered the craft. Take advantage of available resources such as online tutorials, instructional videos, or workshops. Attend classes or seek guidance from professionals in the field you are interested in. By learning from experts, you can gain valuable insights and techniques that can elevate your work to the next level.
6. Experiment and Refine
Don’t be afraid to experiment and push boundaries when trying to achieve a professional finish. Allow yourself to explore different techniques, materials, or styles that may enhance your work. Through experimentation, you can discover new methods that suit your style and produce unique and professional results. Continually refine your skills and stay open to learning and improving.
7. Attention to Finishing Details
Lastly, pay attention to the finishing details to achieve a truly professional result. Whether it’s adding a final coat of varnish to a wooden surface, blending and contouring makeup seamlessly, or adding small embellishments to a piece of artwork, these finishing touches can elevate your work to a whole new level. Take the time to add those final touches that demonstrate your commitment to excellence.
In summary, achieving a professional finish requires careful preparation, attention to detail, the use of appropriate tools, patience, continuous learning, experimentation, and a focus on finishing touches. By implementing these tips and techniques, you can take your projects to the next level and create results that exude professionalism and craftsmanship.
Maintenance and Care of Your Painted Glock Frame
Now that you have customized your Glock frame with a fresh coat of paint, it’s important to know how to properly maintain and care for it to ensure the longevity and durability of the finish. In this section, we will discuss some essential tips and guidelines for maintaining your painted Glock frame.
1. Cleaning
Regular cleaning is crucial for maintaining the appearance and functionality of your painted Glock frame. After each use, it is recommended to clean the frame using a soft cloth or brush to remove any debris, dirt, or residue that may have accumulated. Avoid using any harsh chemicals or solvents that may damage the paint finish.
For stubborn stains or grime, a mild soap solution or non-abrasive cleaner can be used. Gently scrub the surface with a soft cloth or sponge, being careful not to scratch or damage the paint. Rinse thoroughly with clean water and dry with a soft cloth.
2. Avoid Excessive Handling
While the paint used for customizing Glock frames is generally durable, excessive handling can cause the finish to wear off over time. Avoid gripping the frame too tightly or repeatedly sliding it in and out of holsters, as friction can rub off the paint. It is recommended to use a holster specifically designed to protect the frame’s finish.
3. Protect from Extreme Temperatures
Extreme temperatures can have a detrimental effect on the paint finish of your Glock frame. Avoid exposing the frame to excessive heat or cold for prolonged periods of time, as this can cause the paint to fade, crack, or peel. When not in use, store your Glock frame in a cool and dry place.
4. Use Protective Coatings
To further enhance the durability of your painted Glock frame, you can consider applying a protective clear coat or sealant. This additional layer acts as a barrier against scratches, abrasions, and UV rays. Make sure to follow the manufacturer’s instructions when applying the protective coating, and allow sufficient drying time before handling the frame.
5. Avoid Harsh Chemicals
When cleaning or maintaining your painted Glock frame, avoid using harsh chemicals or solvents that may damage the paint or cause discoloration. This includes strong solvents, ammonia-based cleaners, or abrasive substances. Opt for mild soaps, non-abrasive cleaners, or specialized gun cleaning products that are safe for painted surfaces.
6. Regular Inspection
Periodically inspect your painted Glock frame for any signs of wear, peeling, or damage. If you notice any areas where the paint has chipped or worn off, it is recommended to touch up the affected spots to prevent further damage. Use a small brush or q-tip to carefully apply the paint, matching the color and finish of the original coating.
7. Store Properly
When storing your Glock frame for an extended period of time, ensure it is stored in a clean, dry, and well-ventilated environment. Consider using a soft cloth or padded case to protect the frame from dust, moisture, and potential scratches. Avoid storing it with other hard objects that may cause unnecessary pressure or friction on the paint surface.
In summary, maintaining and caring for your painted Glock frame involves regular cleaning, avoiding excessive handling, protecting from extreme temperatures, using protective coatings, avoiding harsh chemicals, regular inspection, and proper storage. By following these guidelines, you can keep your painted Glock frame looking great and functioning optimally for years to come.
FAQs
How can I paint my Glock frame?
To paint your Glock frame, you will need to disassemble the gun and clean it thoroughly. Apply a primer designed for firearms, then use a high-quality spray paint or Cerakote firearm coating in your desired color. Allow the paint to dry completely before reassembling the gun.
What type of paint should I use to paint my Glock frame?
For painting a Glock frame, it is recommended to use a high-quality spray paint specially designed for firearms, or a durable firearm coating such as Cerakote. These products provide a long-lasting finish that can withstand the rigors of regular use.
Is it legal to paint a Glock frame?
In most cases, it is legal to paint a Glock frame as long as you are not altering any identifying markings or violating any local laws. However, it is always a good idea to check your local laws and regulations regarding firearms modifications before proceeding.
Conclusion
In conclusion, painting a Glock frame is a great way to add a personal touch and upgrade its appearance. By following the proper steps and using the right materials, you can achieve a professional-looking finish that will enhance the overall look of your firearm. Whether you prefer a solid color or a custom design, the key to a successful paint job lies in thorough preparation, careful application, and allowing the paint to fully cure. Remember to dismantle the gun, clean and degrease the frame, and apply multiple thin coats for a smooth and durable finish. With patience and attention to detail, you can transform your Glock into a unique and eye-catching masterpiece.