
Are you an artist looking to showcase your acrylic paintings in the best way possible? Framing your artwork not only protects it, but also enhances its presentation. With the right frame, you can elevate your acrylic painting to a whole new level. In this guide, we will walk you through the steps of framing your acrylic painting, from selecting the right frame and materials to assembling and hanging the finished piece. So, let’s get started and give your artwork the attention it deserves!
Choosing the Right Frame for Your Acrylic Painting
When it comes to showcasing your acrylic paintings, choosing the right frame can make a significant difference in enhancing the overall presentation. A well-chosen frame not only adds aesthetic appeal but also protects your artwork from damage. In this section, we will explore various factors to consider when selecting the perfect frame for your acrylic painting.
1. Style and Theme
The style and theme of your acrylic painting should be the primary guide when selecting a frame. Consider the overall mood, color scheme, and subject matter of the artwork. Is it a contemporary piece with bold colors and abstract shapes? Or is it a traditional landscape painting with a serene ambiance?
For contemporary acrylic paintings, a sleek and minimalistic frame in black or metallic finish can complement the modern aesthetic. On the other hand, traditional paintings may benefit from a more ornate frame with intricate details and warm wood tones.
2. Size and Proportions
The size and proportions of your acrylic painting also play a crucial role in frame selection. A frame that is too small or too large can disrupt the visual balance of the artwork. Measure the dimensions of your painting accurately and choose a frame that complements its size.
Consider the width of the frame as well. A narrow frame works well for smaller paintings, while wider frames can add visual impact to larger artworks. Remember to leave sufficient space between the edge of the painting and the frame for a professional and visually pleasing presentation.
3. Material and Finish
The choice of material and finish for the frame can greatly impact the overall look of your acrylic painting. The most common materials used for frames include wood, metal, and plastic.
Wooden frames are versatile and can be stained or painted to match the color palette of your painting. They offer a classic and timeless look. Metal frames, on the other hand, can provide a more contemporary and sleek appearance. Plastic frames are a more budget-friendly option and are suitable for lightweight paintings.
Consider the finish of the frame as well. A glossy finish can add a touch of elegance, while a matte finish can create a more subdued and understated effect. Keep in mind that the frame should not overpower the artwork but rather enhance its beauty.
4. Conservation and Protection
Protecting your acrylic painting from environmental factors such as dust, moisture, and UV rays is essential for its longevity. Opt for frames that come with protective features such as UV-resistant glass or acrylic glazing to shield your artwork from harmful light exposure. These protective measures can prevent fading and discoloration over time.
Additionally, consider the framing techniques used to ensure the stability and durability of the artwork. Acid-free mats and backing boards can prevent acid migration and preserve the quality of your painting.
5. Personal Preference
Last but not least, do not forget to consider your personal preference when choosing a frame for your acrylic painting. Your artwork is a reflection of your artistic style and personality, and the frame should align with your vision.
Take your time to explore different options, visit art galleries, and seek advice from professionals if needed. Ultimately, the frame you choose should not only enhance the visual appeal of your acrylic painting but also resonate with your artistic goals and aspirations.
In summary, selecting the right frame for your acrylic painting involves considering the style and theme of the artwork, the size and proportions, the material and finish of the frame, conservation and protection measures, as well as your personal preference. By carefully considering these factors, you can choose a frame that not only enhances the visual impact of your painting but also offers protection and longevity.

Step-by-Step Guide to Framing an Acrylic Painting
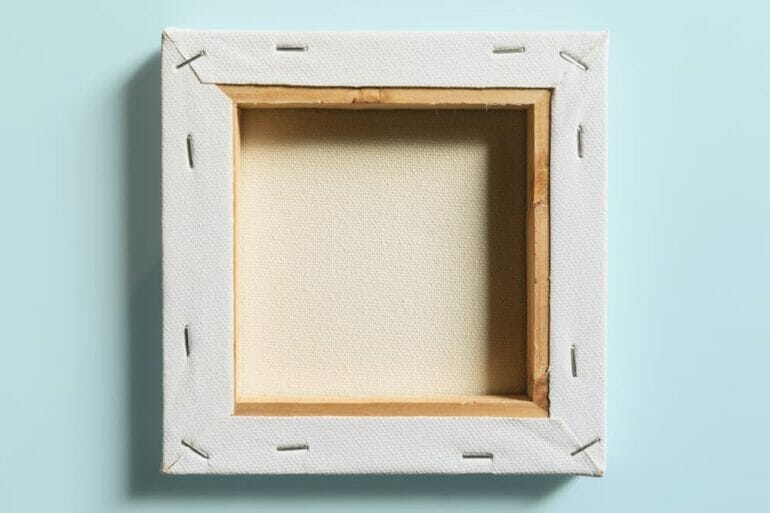
Acrylic paintings are a popular choice among artists due to their vibrant colors and versatility. Once you have completed an acrylic painting, the next step is to frame it to enhance its visual appeal and protect it from damage. Framing an acrylic painting may seem daunting, but with the right tools and techniques, you can achieve professional-looking results. In this guide, we will walk you through the step-by-step process of framing an acrylic painting.
Step 1: Gather Your Materials
The first step in framing an acrylic painting is to gather all the necessary materials. Here’s a list of items you’ll need:
- A frame – Choose a frame that complements the style and size of your painting. You can opt for a ready-made frame or have one custom-made.
- Mat board – A mat board is a thick and sturdy cardboard-like material that sits between the painting and the frame. It not only adds a professional touch but also protects the painting from directly touching the glass.
- Glass or acrylic sheet – You can choose to use either glass or acrylic sheet as a covering for your painting. Acrylic sheets are lightweight and shatter-resistant, making them a safer choice.
- Mounting tape or adhesive – Use mounting tape or adhesive to secure the painting to the mat board.
- Hanging hardware – Depending on the weight of your painting, choose appropriate hanging hardware such as D-rings or wire.
- A tape measure, pencil, and ruler – These tools will help you accurately measure and mark the dimensions for the mat board.
- A clean cloth or microfiber cloth – Use a cloth to wipe down the glass or acrylic sheet and remove any dust or smudges.
Step 2: Prepare Your Painting
Before framing, it’s essential to ensure that your acrylic painting is clean and dry. Remove any dust or debris from the surface using a soft brush or a dry cloth. If there are any smudges or stains, gently clean them with a damp cloth. Make sure your painting is completely dry before proceeding to the next step.
Step 3: Measure and Cut the Mat Board
Using a tape measure, measure the dimensions of your painting. Add an extra 1/8 inch to each side to allow for the painting to fit comfortably within the mat board window. Mark these measurements on the mat board using a pencil and ruler. Carefully cut out the mat board along the marked lines using a sharp utility knife or mat cutter.
Step 4: Attach the Painting to the Mat Board
Apply a strip of mounting tape or adhesive along the top edge of the back of your painting. Carefully position the painting onto the mat board, aligning it with the window. Press down firmly to secure the painting to the mat board. Ensure that the painting is centered and straight.
Step 5: Frame the Painting
Place the framed mat board with the attached painting into the chosen frame. Ensure that the mat board fits snugly within the frame. If necessary, use framing points or clips to hold the mat board in place.
Step 6: Add the Glass or Acrylic Sheet
If you have chosen to use glass, carefully place it on top of the framed painting. If you prefer using an acrylic sheet, remove the protective film from both sides and place it over the painting. Make sure it sits flush with the frame edges.
Step 7: Attach Hanging Hardware
Flip the frame over and attach the appropriate hanging hardware to the back. D-rings or wire are commonly used for hanging larger paintings, while smaller ones may require sawtooth hangers. Make sure the hardware is securely fixed and can support the weight of the framed painting.
Step 8: Clean and Inspect
Lastly, use a clean cloth or microfiber cloth to wipe down the glass or acrylic sheet, removing any fingerprints or smudges. Inspect the framed painting to ensure it is clean, secure, and ready to be displayed.
Summary
Framing an acrylic painting is a rewarding process that enhances the overall presentation and longevity of your artwork. By following this step-by-step guide, you can frame your acrylic painting with confidence. Remember to select a frame and mat board that complements your painting, and choose glass or acrylic sheet for added protection. With the right

Tips for Matting and Mounting an Acrylic Painting
Matting and mounting an acrylic painting not only enhances its overall presentation but also helps protect it from damage. Whether you are preparing your artwork for framing or display, here are some valuable tips to ensure a professional and secure finish:
Gather the necessary materials
Before you begin the matting and mounting process, make sure you have all the required materials at hand. This includes:
- Acid-free mat board
- Clear acrylic glazing
- Adhesive tape or acid-free mounting corners
- Backing board
- Framing tape
- Hanging hardware
- Soft cloth or gloves
- Clean working space
Prepare your artwork
Before proceeding with matting and mounting, ensure your acrylic painting is clean and dry. Remove any dust or debris from the surface using a soft cloth or compressed air. It is essential to work in a clean and dust-free environment to prevent any particles from getting trapped between the layers.
Choose the right mat board
Selecting the appropriate mat board is crucial as it can significantly impact the overall look and presentation of your artwork. Opt for acid-free mat boards to prevent any discoloration or degradation over time. Consider the color and thickness of the mat board to complement your painting.
Measure and cut the mat board
Measure the dimensions of your artwork and calculate the dimensions of the mat window. Make sure to leave a small border between the painting and the mat window to prevent any overlap or damage. Use a sharp blade or mat cutter to cut the mat board accurately.
Secure the painting to the mat board
Using acid-free adhesive tape or mounting corners, carefully attach the acrylic painting to the back of the mat board. Ensure the painting is centered and aligned correctly within the mat window. Avoid applying excessive pressure or using adhesives that may damage the artwork.
Protect the painting with acrylic glazing
To safeguard your acrylic painting from dust, UV rays, and other environmental factors, place a clear acrylic glazing over the artwork. This will not only provide protection but also give a professional, finished look to your piece. Ensure the glazing is clean and free of any scratches before placing it over the painting.
Secure the backing board
Once the painting and glazing are in place, carefully position a backing board behind the artwork. This will provide additional support and prevent the artwork from bending or warping over time. Use framing tape to secure the backing board to the mat board.
Add hanging hardware
If you plan to hang your matted and mounted acrylic painting, attach the appropriate hanging hardware to the back of the frame or backing board. This can include D-rings, wire, or sawtooth hangers, depending on the weight and size of your artwork.
Finalize and inspect
Before concluding the matting and mounting process, carefully inspect the final result for any imperfections or damage. Ensure there are no visible smudges, bubbles, or dust particles trapped within the layers. Make any necessary adjustments or corrections before securely packaging or displaying your artwork.
In summary, matting and mounting an acrylic painting require attention to detail and the use of proper materials. By following these tips, you can achieve a professional finish and protect your artwork for years to come.
5. Displaying and Hanging Your Framed Acrylic Painting
Once you have finished framing your acrylic painting, the next step is to display and hang it. Properly showcasing your artwork not only enhances its visual appeal but also protects it from damage. Here are some tips on how to display and hang your framed acrylic painting:
1. Choose the Right Location
Selecting the right location to display your acrylic painting is essential. Consider a well-lit area where the artwork can be the focal point of the room. Avoid hanging it near direct sunlight or areas with high humidity, as these can cause the colors to fade or the canvas to warp over time.
2. Determine the Height
Deciding the height at which to hang your painting depends on various factors, such as the size of the artwork, the height of the wall, and the eye level of the viewers. As a general guideline, the center of the artwork should be at eye level, approximately 57-60 inches from the floor. However, you can adjust this height based on your personal preference.
3. Use the Right Hardware
When it comes to hanging your framed acrylic painting, it is crucial to use the right hardware to ensure stability and prevent any accidents. Choose picture hooks, D-rings, or sawtooth hangers based on the weight and size of your artwork. Make sure the hardware is securely attached to the back of the frame.
4. Level the Painting
Before hanging your acrylic painting, ensure that it is level to maintain a professional appearance. Use a level tool to make sure the artwork is straight. You can place small adhesive bumpers on the bottom corners of the frame to prevent it from tilting or scratching the wall.
5. Create a Grouping or Arrangement
If you have multiple framed acrylic paintings, consider creating a grouping or arrangement on the wall. This can add visual interest and create a cohesive display. Arrange the artworks based on their sizes, themes, or color schemes. Use a tape measure and painter’s tape to plan the layout before making any holes in the wall.
6. Lighting the Artwork
Proper lighting can significantly enhance the visual impact of your acrylic painting. Consider using track lighting, wall sconces, or picture lights to illuminate the artwork. Make sure the lighting is positioned correctly to avoid glare or shadows on the painting. LED lights are recommended as they emit minimal heat, reducing the risk of damaging the artwork.
7. Regular Maintenance and Cleaning
Once your acrylic painting is displayed, it is essential to regularly maintain and clean it to preserve its beauty. Use a soft, lint-free cloth or a feather duster to remove any dust or dirt that may accumulate on the surface. Avoid using abrasive materials or harsh cleaning agents, as they can damage the paint or the frame.
By following these guidelines, you can proudly display and hang your framed acrylic painting, creating a captivating focal point in your space. Remember to consider the location, height, hardware, and lighting while ensuring regular maintenance to keep your artwork looking its best for years to come.
FAQs
1. How do I frame an acrylic painting?
To frame an acrylic painting, start by selecting a suitable frame that complements the artwork. Ensure that the frame is larger than the painting to allow for matting if desired. Use acid-free tape or adhesive to mount the painting on a mat board or backing board. Finally, secure the artwork in the frame and add any additional elements like glass or protective UV coating.
2. Should I use a mat when framing an acrylic painting?
Using a mat is a personal preference, but it can enhance the overall presentation of the artwork. A mat creates a border between the painting and the frame, adding depth and visual interest. It also helps protect the painted surface from direct contact with the frame and glass.
3. What materials should I use to frame an acrylic painting?
When framing an acrylic painting, it is essential to use acid-free and archival-quality materials. This includes acid-free tape or adhesive to mount the painting, acid-free mat board or backing board, and UV-protective glass or acrylic to safeguard the artwork from harmful light. Using these materials will help preserve the longevity and quality of your acrylic painting.
Conclusion
In conclusion, framing an acrylic painting not only adds a finishing touch to the artwork but also provides protection and enhances its overall presentation. By following the steps mentioned in this guide, you can ensure that your acrylic painting is properly framed and preserved for years to come.
Remember to choose a frame that complements the style and theme of your painting, use archival materials to prevent damage, and consider adding additional elements like a mat or glass for added protection. By taking the time to frame your acrylic painting correctly, you can showcase your artwork in the best possible way and create a lasting impression on viewers.