
Are you looking for a way to cut acrylic sheets with your Cricut machine? Look no further! Cutting acrylic sheets with a Cricut can be a breeze with the right tools and techniques. In this guide, we will walk you through the step-by-step process of cutting acrylic sheets with your Cricut machine, ensuring precision and clean cuts every time. Whether you’re a beginner or an experienced Cricut user, this guide will provide you with all the information you need to successfully cut acrylic sheets with your Cricut.
Acrylic sheets are a versatile material used in various DIY projects, signage, and crafts. With a Cricut machine, you can easily cut intricate shapes, letters, and designs on acrylic sheets with precision and accuracy. However, it’s important to use the right tools and settings to ensure clean cuts without damaging or cracking the acrylic.
First, you’ll need to gather the necessary tools and materials, including an acrylic sheet, a Cricut machine, a fine-point blade, and a strong grip mat. It’s also recommended to use a brayer or a scraper tool to ensure proper adhesion between the acrylic sheet and the mat.
Next, you’ll need to prepare the acrylic sheet for cutting by removing any protective film on both sides. This will ensure that the blade cuts through the acrylic cleanly without any interference. Once the sheet is prepared, you can place it on the strong grip

Cricut Cutting Tools for Acrylic: A Guide to Choose the Right Tools
When it comes to cutting acrylic materials, having the right tools is essential to achieve clean and precise results. Cricut, a leading brand in the world of crafting, offers a range of cutting tools specifically designed for working with acrylic. In this guide, we will walk you through the different options available and help you choose the right tools for your acrylic cutting projects.
1. Cricut Explore Air 2
The Cricut Explore Air 2 is a versatile cutting machine that can handle a wide range of materials, including acrylic. With its precision cutting technology, this machine can accurately cut intricate designs and shapes in acrylic sheets of various thicknesses. It offers a user-friendly interface and is compatible with Cricut’s Design Space software, which allows you to easily customize and create your own designs.
2. Cricut Rotary Blade
For more intricate and detailed cuts on acrylic, the Cricut Rotary Blade is a great tool to have. This blade is specifically designed to cut through thicker materials like acrylic with ease. It is compatible with the Cricut Maker machine and offers precise and clean cuts, even on complex designs. The Rotary Blade can be used to cut acrylic sheets up to 2.4mm in thickness, making it ideal for various crafting projects.
3. Cricut Knife Blade
If you are working with thicker acrylic materials, the Cricut Knife Blade is a must-have tool. This blade is designed to cut through materials up to 3/32″ thick, making it perfect for heavier acrylic sheets. The Knife Blade offers deep and precise cuts, allowing you to create intricate designs in thicker acrylic materials. It is compatible with the Cricut Maker machine and is a great addition to your cutting tool collection.
4. Cricut TrueControl Knife
For more manual and precise cutting on acrylic, the Cricut TrueControl Knife is a reliable choice. This knife features a comfortable grip and a razor-sharp blade that allows for smooth and accurate cuts. It is perfect for trimming and shaping smaller acrylic pieces or for making precise cuts on delicate designs. The TrueControl Knife is a versatile tool that every acrylic crafter should have in their arsenal.
5. Cricut Acrylic Ruler
To ensure precise measurements and straight cuts on acrylic, the Cricut Acrylic Ruler is an essential tool. This ruler is made from durable acrylic material and features easy-to-read markings for accurate measurements. It also has a non-slip backing, which keeps the ruler securely in place while cutting. The Cricut Acrylic Ruler is a handy tool for any acrylic cutting project.
6. Cricut Self-Healing Mat
A self-healing mat is a must-have accessory for any acrylic cutting project. The Cricut Self-Healing Mat provides a smooth and durable surface for cutting acrylic materials. It features a grid pattern that helps with alignment and measuring, ensuring precise cuts every time. The self-healing property of the mat allows it to regain its shape after each cut, prolonging its lifespan. This mat is available in different sizes to accommodate various project sizes.
Summary
Choosing the right cutting tools for acrylic is crucial to achieve professional-looking results. Whether you are working on intricate designs or thicker acrylic sheets, Cricut offers a range of tools that cater to different cutting needs. From cutting machines like the Cricut Explore Air 2 to specialized blades like the Rotary Blade and Knife Blade, there are options available for every project. Don’t forget to invest in essential accessories like the TrueControl Knife, Acrylic Ruler, and Self-Healing Mat to ensure accurate measurements and smooth cutting. With the right tools in hand, you can unlock endless possibilities for your acrylic crafting projects.
Step-by-Step: How to Prepare Your Acrylic Sheet for Cutting with Cricut
Using the Cricut machine to cut acrylic sheets can open up a whole new world of crafting possibilities. However, before you can start cutting, it is important to properly prepare your acrylic sheet to ensure clean and precise cuts. In this section, we will guide you through the step-by-step process of preparing your acrylic sheet for cutting with a Cricut machine.
Gather Your Materials
Before you begin, make sure you have all the necessary materials on hand. Here’s what you’ll need:
- Acrylic sheet
- Cricut machine
- Cricut cutting mat
- Painter’s tape
- Measuring tape or ruler
- Marker or pen
- Scissors or acrylic cutting tool
- Lint-free cloth
Measure and Mark
Start by measuring and marking the dimensions of the design you want to cut on the acrylic sheet. Use a measuring tape or ruler to ensure accurate measurements. Make sure to leave some space around the design for the Cricut machine to grip the edges of the acrylic sheet.
Once you have measured the dimensions, use a marker or pen to mark the lines on the protective film of the acrylic sheet. This will serve as a guide for cutting.
Cover with Painter’s Tape
To prevent any scratches or damage to the acrylic sheet during the cutting process, cover the marked area with painter’s tape. This will also help to hold the acrylic sheet in place on the cutting mat.
Apply the painter’s tape carefully and smoothly, ensuring that it adheres well to the surface of the acrylic sheet. Smooth out any air bubbles or wrinkles using a lint-free cloth.
Cut the Acrylic Sheet
Now it’s time to cut the acrylic sheet. Place the acrylic sheet on the Cricut cutting mat, ensuring that the marked area is aligned with the guidelines on the mat.
If you have a Cricut machine with adjustable blade depth, set the blade depth according to the thickness of your acrylic sheet. If not, use a standard setting that works well with medium-thickness materials.
Load the cutting mat with the acrylic sheet into the Cricut machine and follow the instructions on the machine to start the cutting process.
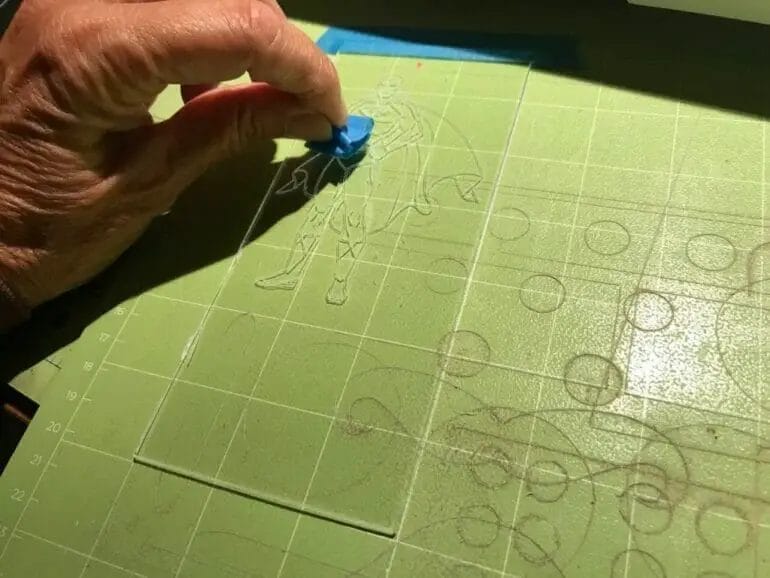
Once the Cricut machine has finished cutting, carefully remove the acrylic sheet from the cutting mat. Peel off the painter’s tape and gently remove any excess tape residue.
Clean and Fine-Tune
After cutting, examine the edges of the acrylic sheet for any rough or uneven areas. If needed, use scissors or an acrylic cutting tool to trim and fine-tune the edges for a clean and polished finish.
Finally, give the acrylic sheet a thorough cleaning using a lint-free cloth and mild soap or acrylic cleaner. This will remove any dirt, fingerprints, or adhesive residue, leaving your acrylic sheet ready for further crafting or display.
Summary
Preparing your acrylic sheet for cutting with a Cricut machine requires careful measurement, marking, tape application, and cutting. By following this step-by-step guide, you can ensure that your acrylic sheet is properly prepared for clean and precise cuts with your Cricut machine. Remember to always handle the acrylic sheet with care and follow the safety guidelines provided by the manufacturer.
Cricut Design Space: Tips and Tricks for Creating Perfect Cuts on Acrylic Sheet
Acrylic sheets are a versatile material that can be used for a variety of crafting projects. With the help of Cricut Design Space, you can easily create precise cuts on acrylic sheets using your Cricut machine. In this section, we will explore some useful tips and tricks to ensure that your cuts on acrylic sheets are perfect every time.
1. Choose the Right Acrylic Sheet
Before you begin cutting acrylic sheets with your Cricut machine, it’s important to choose the right type of sheet. Opt for cast acrylic sheets instead of extruded ones, as they provide better results when cut with a machine. Additionally, make sure the sheet is of uniform thickness for consistent cuts.
2. Prepare the Acrylic Sheet
Preparing the acrylic sheet before cutting is crucial for achieving clean cuts. Start by cleaning the sheet thoroughly with a mild detergent and water to remove any dust or debris. Avoid using harsh chemicals or abrasive cleaners as they can damage the surface. Once cleaned, dry the sheet completely.
3. Apply Masking Tape
To prevent any potential scratches or damage to the surface of the acrylic sheet, it’s recommended to apply masking tape before cutting. Simply place the tape over the area that will be cut to provide an extra layer of protection. This will ensure that your cuts are clean and free from any marks.
4. Use the Right Blade
Choosing the correct blade for cutting acrylic sheets is essential for achieving optimal results. The deep cut blade or the premium fine-point blade are both suitable for cutting acrylic. Ensure that the blade is sharp and in good condition to avoid any tearing or rough edges on the cut.
5. Adjust Cutting Settings
In Cricut Design Space, it’s important to adjust the cutting settings to match the thickness of your acrylic sheet. Select the appropriate material setting or create a custom setting if necessary. It’s recommended to perform a test cut on a small piece of acrylic sheet to ensure that the settings are correct before cutting your actual design.
6. Secure the Acrylic Sheet
Before cutting, make sure the acrylic sheet is securely fixed to the cutting mat to prevent any shifting or movement during the cutting process. Consider using a strong adhesive or painter’s tape to hold the sheet in place. This will help ensure that the cuts are accurate and precise.
7. Start with Simple Designs
If you are new to cutting acrylic sheets with Cricut Design Space, it’s recommended to start with simpler designs before moving on to more complex ones. This will allow you to practice and gain confidence in handling the material and the machine. Once you are comfortable, you can experiment with more intricate designs.
8. Take Your Time
Precision is key when cutting acrylic sheets with your Cricut machine. Take your time and allow the machine to cut at a slower speed, especially when working with thicker acrylic sheets. Rushing the process can lead to inaccurate cuts and potential damage to the material.
9. Remove the Masking Tape
After cutting is complete, gently remove the masking tape from the acrylic sheet. Be careful not to scratch or damage the surface. If there are any residue or adhesive marks, clean the surface again with a mild detergent and water.
10. Finishing Touches
Once you have successfully cut your design on the acrylic sheet, you can add some finishing touches to enhance the overall appearance. Consider sanding the edges lightly to remove any roughness or imperfections. Additionally, you can apply a protective coating or polish to give the acrylic a glossy finish.
In summary, by following these tips and tricks, you can create perfect cuts on acrylic sheets using Cricut Design Space and your Cricut machine. Remember to choose the right acrylic sheet, prepare it properly, apply masking tape, use the correct blade, adjust cutting settings, secure the sheet, start with simple designs, take your time, remove the masking tape carefully, and add finishing touches to make your projects shine.
Troubleshooting: Common Challenges and Solutions when Cutting Acrylic with Cricut
Acrylic is a popular material for crafting, and using a Cricut machine to cut it can open up a world of creative possibilities. However, like any crafting process, cutting acrylic with a Cricut can present some challenges. In this section, we will explore some common issues that may arise when cutting acrylic with a Cricut and provide effective solutions to overcome them.
1. Poor Cut Quality
One of the most common challenges when cutting acrylic with a Cricut is achieving a clean and precise cut. If you find that your cuts are uneven, jagged, or incomplete, there are a few factors to consider:
- Blade Type: Ensure that you are using the correct blade for cutting acrylic. The fine-point blade or the deep-point blade is recommended for cutting thicker acrylic.
- Blade Sharpness: Check the sharpness of your blade. Dull blades can result in poor cut quality. Replace the blade if necessary.
- Material Thickness: Adjust the machine settings to match the thickness of your acrylic. This will ensure that the blade cuts through the material effectively.
- Pressure Settings: Increase the pressure setting on your Cricut machine to provide enough force for cutting through the acrylic.
2. Acrylic Melting or Warping
Acrylic has a tendency to melt or warp when subjected to excessive heat. This can occur during the cutting process, especially if the speed is too high. To prevent melting or warping:
- Reduce Speed: Slow down the cutting speed on your Cricut machine. This will reduce the heat generated and minimize the risk of melting or warping.
- Use a Cooling Fan: Consider using a cooling fan to direct airflow towards the acrylic while cutting. This can help dissipate heat and prevent overheating.
- Masking Tape: Apply masking tape to both sides of the acrylic sheet before cutting. This can act as a protective barrier, reducing the risk of melting or warping.
3. Material Slippage or Movement
Keeping the acrylic securely in place during the cutting process is essential for precise cuts. If you are experiencing material slippage or movement, try the following solutions:
- Secure the Material: Use painter’s tape or a strong adhesive to secure the acrylic sheet firmly to the cutting mat. This will prevent movement and ensure accurate cuts.
- Clean Cutting Mat: Ensure that your cutting mat is clean and free from debris. A dirty or worn-out mat can reduce the grip and lead to material slippage.
- Mat Adhesive: Consider using a stronger mat adhesive, such as a repositionable spray adhesive, to enhance the grip between the acrylic and the cutting mat.
4. Breaking or Cracking
Acrylic can be prone to breaking or cracking, especially if it is thin or brittle. Here are some tips to prevent breakage:
- Choose the Right Acrylic: Opt for acrylic sheets that are specifically designed for cutting with Cricut machines. These sheets are typically more flexible and less likely to crack.
- Reduce Blade Pressure: Adjust the blade pressure to a lower setting. Excessive pressure can cause the acrylic to crack or break during the cutting process.
- Slow Cutting Speed: Cutting too quickly can put added stress on the acrylic, leading to breakage. Slow down the cutting speed to minimize the risk.
In summary, cutting acrylic with a Cricut machine may present some challenges, but with the right techniques and adjustments, you can achieve excellent results. Remember to use the correct blade, adjust machine settings appropriately, prevent heat buildup, secure the material firmly, and choose the right type of acrylic for your project. By troubleshooting common issues and implementing the suggested solutions, you can enjoy smooth and precise cuts every time you work with acrylic and your Cricut machine.
Beyond the Basics: Creative Ideas and Projects for Cutting Acrylic with Cricut
Once you have mastered the basics of cutting acrylic with your Cricut machine, you may be looking for some creative ideas and projects to take your crafting to the next level. Acrylic is a versatile material that can be used for a wide range of crafts, from jewelry and home decor to personalized gifts and more. In this section, we will explore some exciting project ideas that will inspire you to unleash your creativity and make unique creations using acrylic and your Cricut machine.
1. Acrylic Keychains
One popular project idea is to create custom acrylic keychains. With your Cricut machine, you can easily cut out shapes, letters, or designs on acrylic sheets. You can then add keychain hardware and personalize them with names or monograms. Acrylic keychains make great gifts or party favors, and you can get creative with different colors and patterns.
2. Acrylic Earrings
Another trendy and stylish project is making acrylic earrings. With your Cricut machine, you can cut out intricate shapes or patterns on acrylic sheets to create unique earrings. Experiment with different colors and textures of acrylic to make statement pieces that will elevate any outfit.
3. Acrylic Home Decor
Acrylic can be transformed into beautiful home decor pieces. Cut out shapes like flowers, animals, or words to create wall art or decorative accents. You can also use acrylic sheets to make personalized nameplates or signs for your home. The possibilities are endless, and you can customize the design to match your home’s style.
4. Acrylic Stencils
If you enjoy painting or creating art, acrylic stencils can be a game-changer. Use your Cricut machine to cut out intricate stencil designs on acrylic sheets. These stencils can then be used on various surfaces, such as canvas, wood, or fabric, to create stunning artwork. You can also use the stencils for home decor projects like stenciled walls or furniture.
5. Acrylic Jewelry
Create beautiful and unique jewelry pieces using acrylic and your Cricut machine. Cut out shapes like pendants, bracelets, or earrings, and embellish them with beads, charms, or glitter. Acrylic jewelry is lightweight and durable, making it perfect for everyday wear or special occasions.
6. Acrylic Gift Tags
Add a personal touch to your gifts by creating custom acrylic gift tags. Cut out various shapes or designs on acrylic sheets and attach them to your gift with ribbon or twine. You can also engrave names or messages using your Cricut machine. These gift tags will make your presents stand out and show that you put thought and effort into the presentation.
7. Acrylic Ornaments
Make your holiday tree sparkle with acrylic ornaments. Cut out festive shapes like snowflakes, reindeer, or Christmas trees on acrylic sheets. Add glitter, paint, or vinyl to customize them further. These acrylic ornaments will add a modern and elegant touch to your holiday decor.
8. Acrylic Bookmarks
If you’re a book lover, why not create your own personalized acrylic bookmarks? Cut out unique shapes or designs on acrylic sheets and add tassels or ribbons. You can also engrave inspiring quotes or images using your Cricut machine. These bookmarks make great gifts for avid readers or as party favors for book-themed events.
In summary, cutting acrylic with your Cricut machine opens up a world of creative possibilities. From keychains and earrings to home decor and jewelry, there are endless opportunities to make one-of-a-kind creations. Let your imagination run wild and explore the exciting world of acrylic crafting with your Cricut machine.

FAQs
1. How can I cut acrylic sheet with Cricut?
To cut acrylic sheet with Cricut, you’ll need to use a deep-cut blade and a strong grip cutting mat. Adjust the settings in Cricut Design Space to the appropriate material thickness, and ensure the acrylic sheet is securely attached to the mat. Follow the cutting instructions provided by Cricut, and always wear appropriate safety gear when working with acrylic.
2. What should I do if my Cricut is not cutting through the acrylic sheet?
If your Cricut is not cutting through the acrylic sheet, try increasing the pressure setting in Cricut Design Space. Additionally, make sure the blade is sharp and clean. If the problem persists, you may need to switch to a stronger blade or consider using a different cutting tool specifically designed for thicker materials.
3. Can I use a Cricut machine to cut complex designs on acrylic sheet?
Yes, you can use a Cricut machine to cut complex designs on acrylic sheet. However, keep in mind that intricate designs with small details may be challenging to cut accurately on thicker acrylic sheets. It is recommended to experiment with different settings and conduct test cuts to achieve the desired results.
Conclusion
In conclusion, cutting acrylic sheets with a Cricut machine is a convenient and efficient way to achieve precise and clean cuts for various projects. With the right technique and precautions, you can create customized designs that add a professional touch to your crafts. The versatility of the Cricut machine allows you to experiment with different designs, shapes, and sizes, opening up endless creative possibilities. Remember to choose the correct blade and settings for cutting acrylic, and ensure proper ventilation and safety measures. With practice and patience, you’ll be able to master the art of cutting acrylic sheets with your Cricut machine and bring your projects to life.