
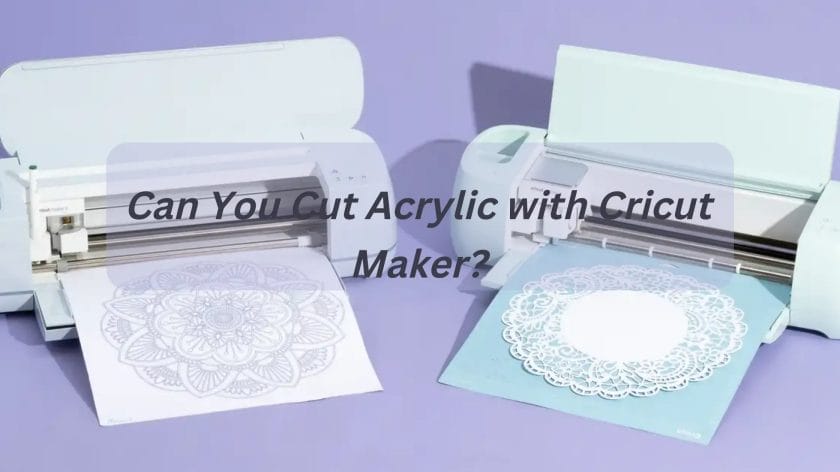
Yes, Cricut machines are capable of cutting acrylic. With their advanced technology and precision blades, Cricut machines can effortlessly cut through acrylic sheets, allowing you to create intricate and precise designs. Whether you’re a DIY enthusiast or a professional crafter, Cricut machines offer a versatile and convenient solution for cutting acrylic and bringing your creative ideas to life. Say goodbye to manual cutting and let Cricut do the work for you, delivering clean and professional results every time.
Exploring the Feasibility of Cutting Acrylic with a Cricut Machine
When it comes to crafting and DIY projects, the Cricut machine has become a popular tool for its versatility and precision. While traditionally used for cutting paper and vinyl, many crafters wonder if it is possible to cut acrylic with a Cricut machine. In this section, we will explore the feasibility of cutting acrylic with a Cricut machine and discuss the considerations and techniques involved.
Understanding Acrylic
Acrylic, also known as Plexiglass or Perspex, is a lightweight and durable plastic material that is commonly used in various applications, including signage, home decor, and even jewelry. It is available in different thicknesses and colors, making it a versatile material for crafting projects.
The Challenges of Cutting Acrylic
Unlike paper and vinyl, acrylic is a harder and more rigid material, which poses some challenges when it comes to cutting it with a Cricut machine. The Cricut machine utilizes a fine-point blade to cut through materials, and while it can easily handle softer and more pliable materials, it may struggle with cutting through acrylic effectively.
Considerations for Cutting Acrylic with a Cricut Machine
Before attempting to cut acrylic with a Cricut machine, there are several considerations to keep in mind:
- Machine Compatibility: Not all Cricut machines are capable of cutting acrylic. It is essential to check the specifications and capabilities of your specific model to ensure compatibility.
- Blade Selection: The standard fine-point blade that comes with most Cricut machines may not be suitable for cutting acrylic. It is recommended to use a deep-cut blade or a premium fine-point blade specifically designed for thicker materials.
- Material Thickness: Acrylic sheets come in various thicknesses, and the thickness of the material can affect the success of the cutting process. Thicker acrylic sheets may require multiple passes or adjustments to the machine settings.
- Machine Settings: Adjusting the machine settings, such as speed and pressure, is crucial when cutting acrylic. It may require some experimentation to find the optimal settings for your specific project.
Techniques for Cutting Acrylic with a Cricut Machine
When it comes to cutting acrylic with a Cricut machine, there are a few techniques that can help improve the results:
- Multiple Passes: As acrylic is a harder material, it may require multiple passes of the blade to ensure a clean and precise cut. This can be achieved by duplicating the design or increasing the number of copies in your Cricut software.
- Backer Material: Using a backer material, such as a strong adhesive vinyl or transfer tape, can provide additional support to the acrylic during the cutting process. This helps prevent the material from cracking or breaking under the pressure of the blade.
- Masking Tape: Applying masking tape to the surface of the acrylic can help reduce the risk of chipping and provide a smoother cutting experience.
In summary, cutting acrylic with a Cricut machine is feasible, but it requires careful consideration and experimentation. Not all Cricut machines are compatible with cutting acrylic, and using the right blade, adjusting the machine settings, and employing specific techniques can greatly improve the results. It is important to start with small projects and practice before attempting larger and more complex designs. With the right approach and patience, you can achieve precise and intricate cuts on acrylic with your Cricut machine.
Maximizing the Potential: Tips and Tricks for Cutting Acrylic with a Cricut
Acrylic is a versatile material that can be used for a variety of crafting projects. With the right tools and techniques, you can achieve clean and precise cuts on acrylic sheets using a Cricut machine. In this section, we will explore some useful tips and tricks to help you maximize the potential of cutting acrylic with a Cricut.
1. Use the Right Blade
When cutting acrylic with a Cricut, it is important to use the correct blade. The Fine-Point Blade is suitable for most materials, including acrylic. However, if you are working with thicker acrylic sheets, you may need to consider using the Deep-Point Blade for better results.
2. Adjust the Settings
Before cutting acrylic, it is essential to adjust the settings on your Cricut machine. Start by selecting the appropriate material setting for acrylic. If your Cricut model does not have a specific acrylic setting, you can manually adjust the settings to ensure the correct depth and pressure for cutting acrylic.
3. Prepare the Acrylic Sheet
Prior to cutting, it is crucial to prepare the acrylic sheet for the best results. Begin by cleaning the surface of the acrylic sheet to remove any dirt, dust, or fingerprints. It is also recommended to use a lint-free cloth to wipe the sheet clean.
Next, secure the acrylic sheet firmly onto a cutting mat. This will prevent the sheet from shifting during the cutting process. Make sure to align the sheet properly to ensure accurate cuts.
4. Test with a Sample Design
Before cutting a complex design on your acrylic sheet, it is advisable to run a test with a sample design. This will help you assess the cutting accuracy and make any necessary adjustments before proceeding with your actual project.
5. Use a Strong Grip Transfer Tape
When working with acrylic, it is important to use a strong grip transfer tape to ensure that your design stays intact during the cutting process. This will help prevent any lifting or shifting of the acrylic sheet, resulting in clean and precise cuts.
6. Apply Firm Pressure
To achieve clean cuts on acrylic, it is crucial to apply firm pressure when cutting. This will ensure that the blade penetrates through the material smoothly, resulting in precise and crisp cuts. Additionally, using too much pressure can cause the acrylic to crack or chip, so finding the right balance is key.
7. Remove the Protective Film
After cutting your design on the acrylic sheet, it is important to remove the protective film on both sides of the acrylic. This will reveal the clear and polished surface of the acrylic, giving your project a professional and finished look.
8. Clean the Acrylic Sheet
Once you have finished cutting your design, it is essential to clean the acrylic sheet to remove any remaining debris or adhesive residue. Use a mild soap and water solution or acrylic cleaner to gently clean the surface. Avoid using harsh chemicals or abrasive materials that could scratch or damage the acrylic.
9. Finishing Touches
After cutting and cleaning the acrylic sheet, you can add some finishing touches to your project. This could include sanding the edges for a smooth finish, painting or applying vinyl to the acrylic, or adding additional embellishments to enhance the overall design.
10. Safety Precautions
When working with acrylic and a Cricut machine, it is important to prioritize safety. Always wear protective eyewear and gloves to protect yourself from any potential hazards. Additionally, ensure that your workspace is well-ventilated to prevent the inhalation of any fumes or particles.
In summary, cutting acrylic with a Cricut can be a rewarding and enjoyable process. By following these tips and tricks, you can maximize the potential of your Cricut machine and achieve clean and precise cuts on acrylic sheets. Remember to always prioritize safety and take the necessary precautions when working with acrylic and other materials.
Step-by-Step Guide: How to Cut Acrylic Using a Cricut Machine
Acrylic is a versatile material that can be used for various DIY projects. If you own a Cricut machine, you’ll be glad to know that you can easily cut acrylic sheets with it. In this guide, we’ll take you through the step-by-step process of cutting acrylic using a Cricut machine.
Step 1: Gather Your Materials
Before you begin, make sure you have all the necessary materials at hand. Here’s what you’ll need:
- Cricut machine
- Acrylic sheet
- Cricut fine-point blade
- Standard grip cutting mat
- Painter’s tape
- Design software or Cricut Design Space
Step 2: Prepare Your Design
If you haven’t already, start by designing your desired shape or pattern in the design software or Cricut Design Space. Once you’re satisfied with your design, ensure that it is properly sized to fit the acrylic sheet.
Step 3: Set Up Your Cricut Machine
Now it’s time to set up your Cricut machine for cutting acrylic. Place the standard grip cutting mat on the machine’s cutting mat guide and insert the fine-point blade into the machine’s blade housing.
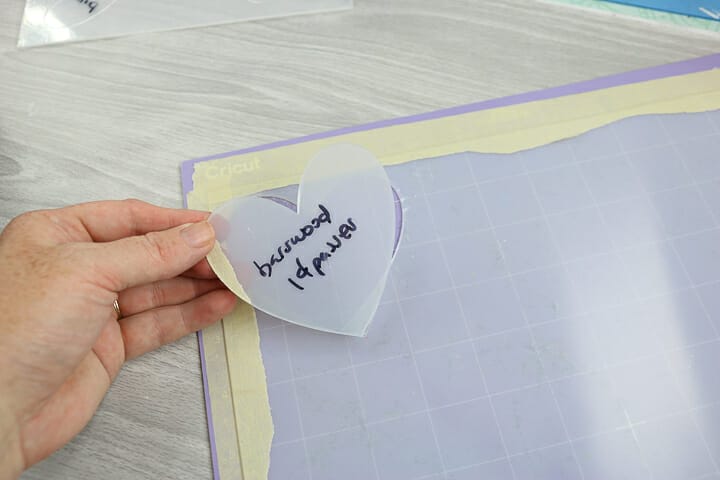
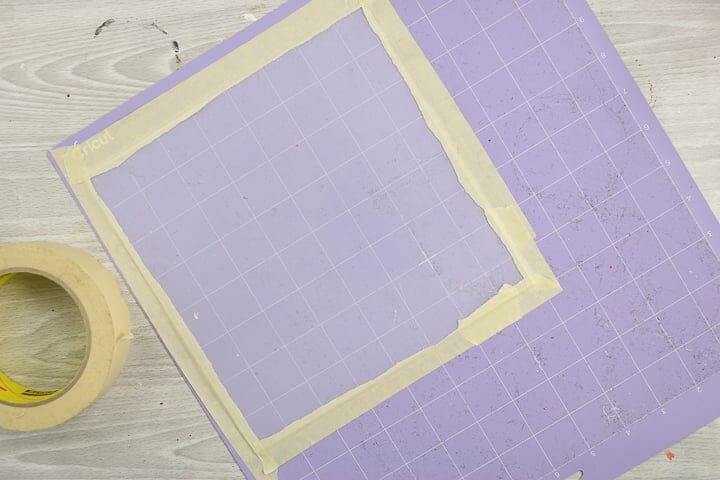
Step 4: Secure the Acrylic Sheet
Take your acrylic sheet and place it on the cutting mat, making sure it is aligned properly. To prevent the acrylic from slipping during the cutting process, use painter’s tape to secure it to the mat. Make sure the tape doesn’t cover the area where you want to cut.
Step 5: Load the Design into Cricut Design Space
Transfer your design to Cricut Design Space by either connecting your computer to the Cricut machine or using a USB drive. Once the design is loaded, select the appropriate settings for cutting acrylic. Consult the Cricut machine’s user manual or refer to the manufacturer’s guidelines for the recommended settings.
Step 6: Start the Cutting Process
Double-check all the settings and ensure that everything is properly aligned. Press the “Go” button on your Cricut machine to start the cutting process. The machine will follow the design and cut through the acrylic sheet with precision.
Step 7: Remove the Acrylic Sheet
Once the cutting process is complete, carefully remove the acrylic sheet from the cutting mat. Take your time to peel off any remaining painter’s tape from the acrylic surface.
Step 8: Clean Up and Finishing Touches
Give your cut acrylic piece a gentle wipe with a clean cloth to remove any dust or debris. If needed, you can also use sandpaper or a file to smooth out any rough edges or imperfections.
Now you have successfully cut acrylic using your Cricut machine! You can use your cut piece for various DIY projects, such as creating signs, jewelry, or home decor items.
In summary, cutting acrylic with a Cricut machine is a straightforward process that requires proper setup and alignment. With the right materials and a well-designed pattern, you can achieve precise and clean cuts on acrylic sheets. So, grab your Cricut machine and start exploring the endless possibilities of working with acrylic!
Understanding the Limitations: Factors to Consider when Cutting Acrylic with a Cricut
Acrylic is a popular material in various crafting projects, and if you own a Cricut machine, you may be wondering if it’s possible to cut acrylic with it. While the Cricut is a versatile tool, there are a few limitations and factors to consider when working with acrylic. In this section, we will explore these limitations and discuss the factors you need to keep in mind when cutting acrylic with a Cricut.
1. Thickness of Acrylic
One of the key factors to consider when cutting acrylic with a Cricut is the thickness of the material. The Cricut is designed to cut materials up to a certain thickness, and exceeding that limit can lead to ineffective cuts or even damage to the machine. It’s important to check the specifications of your Cricut machine to determine the maximum thickness it can handle.
Thinner acrylic sheets are generally easier to cut with a Cricut, and you’re more likely to achieve clean and precise cuts. Thicker acrylic, on the other hand, may require multiple passes or adjustments to the settings to ensure a successful cut. It’s recommended to start with thinner acrylic and gradually work your way up to thicker sheets as you gain more experience.
2. Blade Selection
The blade selection plays a crucial role in cutting acrylic with a Cricut. The standard fine point blade that comes with most Cricut machines is suitable for cutting thin to medium-weight materials, including some acrylic sheets. However, for thicker acrylic or more intricate designs, you may need to consider using a different blade.
For thicker acrylic, a deep point blade or a knife blade can be more effective. These blades are specifically designed for cutting denser materials and can provide cleaner and more precise cuts. It’s important to note that using a different blade may require adjusting the settings on your Cricut machine to achieve optimal results.
3. Cutting Speed and Pressure
When working with acrylic, finding the right balance of cutting speed and pressure is crucial to achieve the desired results. Cutting too fast or applying too much pressure can cause the acrylic to crack or break, while cutting too slow or with insufficient pressure may result in incomplete cuts.
It’s recommended to start with the default settings for cutting acrylic provided by Cricut, and then make adjustments based on your specific project and the thickness of the acrylic. Conducting test cuts on a small piece of acrylic before cutting your final design can help you determine the optimal speed and pressure settings.
4. Design Complexity
The complexity of your design can also affect the success of cutting acrylic with a Cricut. Intricate or highly detailed designs may be more challenging to cut, especially if you’re working with thicker acrylic. Simplifying the design or breaking it down into smaller, more manageable sections can increase the chances of a successful cut.
Additionally, using a suitable adhesive on the acrylic sheet can help prevent the material from lifting or moving during the cutting process, ensuring cleaner cuts and reducing the risk of errors.
5. Safety Precautions
Finally, it’s important to prioritize safety when cutting acrylic with a Cricut. Acrylic sheets can produce sharp edges, and the process of cutting can generate heat and fumes. It is recommended to work in a well-ventilated area and use appropriate personal protective equipment, such as safety glasses and gloves, to minimize the risk of injury.
In summary, cutting acrylic with a Cricut is possible, but there are limitations and factors to consider to ensure successful results. Pay attention to the thickness of the acrylic, choose the right blade, adjust the cutting speed and pressure, simplify complex designs, and prioritize safety. With practice and proper preparation, you can achieve clean and precise cuts on acrylic using your Cricut machine.
Alternative Materials: Finding Substitutes for Acrylic in Cricut Cutting Projects
Acrylic is a popular material for Cricut cutting projects due to its versatility and durability. However, there may be times when you want to explore alternative materials for various reasons. Whether it’s because of personal preference, budget constraints, or the unavailability of acrylic, it’s important to know that there are several alternatives that can be used in Cricut cutting projects. In this section, we will explore some of the commonly used substitute materials for acrylic.
1. Cardstock
Cardstock is a thick, sturdy paper that is often used in crafting and scrapbooking. It comes in various colors, textures, and finishes, making it a versatile choice for Cricut cutting projects. Cardstock is readily available and comes in various thicknesses, allowing you to choose the one that best suits your project needs. It is compatible with the Cricut machine and can be easily cut into intricate designs. However, it is important to note that cardstock may not be as durable as acrylic and may not be suitable for projects that require long-term use or exposure to moisture.
2. Wood Veneer
Wood veneer is a thin layer of real wood that is often used to give a natural and rustic look to projects. It can be easily cut with a Cricut machine, allowing you to create intricate wooden designs. Wood veneer comes in different species and finishes, offering a variety of options to choose from. It is important to select a wood veneer that is thin enough to be cut by the Cricut machine but thick enough to maintain its structural integrity. Wood veneer can add a unique touch to your projects, but it may require additional finishing and sealing to protect it from moisture and damage.
3. Felt
Felt is a soft, fabric-like material that is often used in crafting and DIY projects. It is available in a wide range of colors and thicknesses, making it suitable for various Cricut cutting projects. Felt can be easily cut using a Cricut machine, allowing you to create intricate designs and shapes. It is a versatile material that can be used for various applications, such as appliques, ornaments, and decorations. However, it is important to note that felt may fray or lose its shape over time, especially if exposed to moisture or frequent handling.
4. PVC Sheets
PVC sheets, also known as plastic sheets, are lightweight and durable materials that can be used as an alternative to acrylic in Cricut cutting projects. PVC sheets come in different thicknesses and colors, allowing you to choose the one that best suits your project needs. They are compatible with the Cricut machine and can be easily cut into various shapes and designs. PVC sheets are resistant to moisture and can withstand outdoor conditions, making them suitable for projects that require durability and weather resistance. However, it is important to work in a well-ventilated area when cutting and working with PVC sheets as they can release harmful fumes.
5. Leather
Leather is a versatile material that can add a touch of elegance and sophistication to Cricut cutting projects. It comes in various textures, finishes, and colors, allowing you to create unique designs. Leather can be easily cut with a Cricut machine, making it suitable for projects such as personalized keychains, wallets, and accessories. However, it is important to use a deep-cut blade or a leather-specific blade when cutting leather with a Cricut machine. Additionally, leather requires special care and maintenance to prevent cracking and drying out over time.
6. Foam Sheets
Foam sheets are lightweight and flexible materials that can be easily cut with a Cricut machine. They come in various thicknesses and colors, offering versatility for different projects. Foam sheets are often used for creating embellishments, signage, and kid-friendly crafts. They are affordable and readily available, making them a popular choice for crafters. However, it is important to note that foam sheets may not be as durable as acrylic and may lose their shape or integrity over time, especially if exposed to excessive heat or pressure.
In summary, while acrylic is a popular material for Cricut cutting projects, there are several alternatives that can be used depending on your preferences and project requirements. Cardstock, wood veneer, felt, PVC sheets, leather, and foam sheets are some of the commonly used substitute materials for acrylic. Each material has its own unique characteristics and considerations, so it is important to choose the one that best suits your project needs. Experimenting with different materials can open up new
FAQs
Can a Cricut cut acrylic?
No, a Cricut machine is not designed to cut acrylic. It is primarily used for cutting materials like paper, cardstock, vinyl, and fabric. If you need to cut acrylic, you will need a laser cutter or CNC machine that is specifically designed for that purpose.
Conclusion:
In conclusion, while a Cricut machine is primarily designed for cutting paper and other thin materials, it is possible to cut acrylic with certain adaptations and precautions. By using a deep-cut blade and adjusting the settings for speed and pressure, you may achieve satisfactory results. However, it is important to note that cutting acrylic with a Cricut can be more challenging and may require multiple passes and careful handling. It is recommended to practice on smaller pieces of acrylic and ensure proper ventilation in the workspace. Additionally, it is advisable to consider using a laser cutter or other specialized equipment for more precise and efficient cutting of acrylic.