
Yes, you can use acrylic paint on Shrinky Dinks! Acrylic paint is a versatile and popular choice for many craft projects, and it works well on the smooth surface of Shrinky Dinks. The paint adheres easily and dries quickly, allowing you to create vibrant and detailed designs on your Shrinky Dinks. Once the paint is dry, you can follow the usual instructions for baking and shrinking the plastic to complete your project. So go ahead and get creative with acrylic paint on your Shrinky Dinks!
Tips and Techniques for Using Acrylic Paint on Shrinky Dinks
Shrinky Dinks are a popular craft material that can be used to create various types of artwork. These plastic sheets can be colored with markers, colored pencils, or painted with acrylic paint. If you choose to use acrylic paint on your Shrinky Dinks, here are some helpful tips and techniques to ensure successful results.
1. Choose the Right Type of Acrylic Paint
When working with Shrinky Dinks, it is important to use the right type of acrylic paint. Opt for water-based acrylic paint that is suitable for use on plastic surfaces. This type of paint adheres well to the Shrinky Dink material and dries quickly.
2. Prepare the Shrinky Dinks
Before painting, it is essential to prepare the Shrinky Dinks properly. Start by cleaning the surface of the plastic sheets with a mild soap and water solution to remove any dirt or oils. Once dry, lightly sand the surface with fine-grit sandpaper to create a slightly rough texture. This will help the paint adhere better to the plastic.
3. Apply Thin Layers of Paint
When painting Shrinky Dinks with acrylic paint, it is best to apply thin layers of paint. This allows for even drying and prevents the paint from becoming too thick and cracking during the shrinking process. Use a small brush and apply the paint in smooth, even strokes, making sure to cover the entire surface.
4. Allow Sufficient Drying Time
After each layer of paint is applied, allow sufficient drying time before adding another layer or moving on to the next step. This will prevent smudging or smearing of the paint. Follow the instructions on the paint bottle for recommended drying times, as they may vary depending on the brand.
5. Add Details and Highlights
Once the base layers of paint are dry, you can add details and highlights to your Shrinky Dinks. Use a smaller brush or a fine-tipped paint pen to add intricate designs or outlines. This will enhance the overall appearance of your artwork and make it more visually appealing.
6. Seal the Painted Surface
To protect your painted Shrinky Dinks and ensure longevity, it is important to seal the painted surface. Apply a thin layer of clear varnish or acrylic sealer over the paint, following the product instructions for application. This will help prevent the paint from scratching or chipping off.
7. Bake According to Instructions
After you have finished painting and sealing your Shrinky Dinks, it is time to bake them to shrink and harden the plastic. Follow the instructions provided with the Shrinky Dinks kit or the manufacturer’s recommendations for baking temperature and time. Be sure to monitor the process closely to prevent any melting or warping of the plastic.
8. Handle with Care
Once the Shrinky Dinks are fully cooled and shrunken, handle them with care. The painted surface can still be susceptible to scratches, so avoid rough handling or excessive rubbing. Display your artwork proudly or use them in various craft projects.
Summary
Using acrylic paint on Shrinky Dinks opens up a world of creativity and allows you to create unique and personalized artwork. By following these tips and techniques, you can achieve vibrant and long-lasting results. Choose the right type of paint, prepare the surface properly, apply thin layers, add details and highlights, seal the paint, bake according to instructions, and handle with care. Enjoy the process and let your imagination run wild!
Experimenting with Color and Effects: Acrylic Paint on Shrinky Dinks
Shrinky Dinks are a fun and versatile craft material that allows you to create unique and personalized items. One way to enhance the creative possibilities of Shrinky Dinks is by using acrylic paint to add vibrant colors and interesting effects to your designs. In this section, we will explore various techniques and tips for using acrylic paint on Shrinky Dinks.
Materials Needed
Before we dive into the exciting world of acrylic paint and Shrinky Dinks, let’s gather the materials we will need for this experiment:
- Shrinky Dinks sheets
- Acrylic paint in various colors
- Paintbrushes in different sizes
- Palette or plastic surface for mixing colors
- Water and paper towels for cleaning brushes
- Optional: Fine-tipped markers or colored pencils for additional details
Preparing the Shrinky Dinks
Before we start painting, it is essential to prepare the Shrinky Dinks properly to ensure optimal adhesion and durability of the acrylic paint. Follow these steps to prepare your Shrinky Dinks:
- Clean the surface of the Shrinky Dinks sheets using a mild soap and water solution. This will remove any dirt or oils that can interfere with the paint’s ability to adhere.
- Dry the sheets thoroughly using a lint-free cloth or paper towel.
- If desired, lightly sand the surface of the sheets with fine-grit sandpaper. This will create a slightly rough texture that helps the paint adhere better.
Applying Acrylic Paint
Now that our Shrinky Dinks are ready, it’s time to add some color! Here are a few techniques you can try:
1. Solid Color
One of the simplest ways to use acrylic paint on Shrinky Dinks is to apply a solid color. Squeeze a small amount of acrylic paint onto your palette and use a paintbrush to evenly coat the desired area of the Shrinky Dinks sheet. Allow the paint to dry completely before moving on to the next step.
2. Gradient Effect
Create a stunning gradient effect by blending different shades of acrylic paint. Start by applying one color to a section of the Shrinky Dinks sheet. While the paint is still wet, gradually mix in a second color, blending them together using a clean brush or a sponge. Experiment with different color combinations to achieve the desired effect.
3. Textured Background
Add depth and texture to your Shrinky Dinks designs by incorporating various painting techniques. You can create a textured background by using a dry brush or a sponge to dab different colors onto the sheet. This technique adds visual interest and dimension to your artwork.
4. Stencils and Patterns
If you want to achieve intricate patterns or precise shapes, stencils can be a helpful tool. Place the stencil on the Shrinky Dinks sheet and use a small brush or sponge to carefully apply the acrylic paint. Remove the stencil and allow the paint to dry before proceeding with any additional details.
Adding Finishing Touches
Once you have painted your desired design on the Shrinky Dinks, you can take it a step further by adding additional details using fine-tipped markers or colored pencils. These tools allow for precise lines and intricate designs that can enhance the overall look of your artwork.
Baking and Shrinking
Now that your masterpiece is complete, it’s time to shrink it! Follow the instructions provided with your Shrinky Dinks kit to bake the painted sheet in a preheated oven. As the sheet heats up, it will shrink and thicken, resulting in a miniature version of your original design. Allow the Shrinky Dinks to cool completely before handling.
Summary
Experimenting with acrylic paint on Shrinky Dinks opens up a world of possibilities for creating colorful and eye-catching designs. Whether you opt for solid colors, gradients, textured backgrounds, or intricate patterns, the combination of acrylic paint and Shrinky Dinks allows you to unleash your creativity. Remember to prepare the Shrinky Dinks properly and allow the paint to dry before baking and shrinking. With a little practice
Sealants and Finishes: Enhancing Acrylic Paint on Shrinky Dinks
Shrinky Dinks have been a popular craft material for many years, allowing both kids and adults to create unique and personalized pieces of art. One of the most common ways to decorate Shrinky Dinks is by using acrylic paint. Acrylic paint offers a wide range of vibrant colors and is easy to work with. However, to protect and enhance the paint on Shrinky Dinks, sealants and finishes are often used.
The Importance of Sealants
Sealants play a crucial role in preserving the longevity and appearance of acrylic paint on Shrinky Dinks. They create a protective barrier that prevents the paint from chipping, fading, or smudging. Sealants also enhance the colors, giving them a glossy or matte finish depending on the desired outcome.
Without a sealant, the acrylic paint on Shrinky Dinks may be vulnerable to moisture, scratches, and other forms of wear and tear. As Shrinky Dinks are often used for jewelry, keychains, and other accessories, it is essential to apply a sealant to ensure the paint stays intact and vibrant.
Types of Sealants
When choosing a sealant for acrylic paint on Shrinky Dinks, it is important to consider the specific needs and preferences for your project. There are various types of sealants available, each with its own characteristics and benefits.
1. Acrylic Sealants
Acrylic sealants are specifically formulated for acrylic paint and are an excellent choice for sealing Shrinky Dinks. They dry quickly, provide a clear and glossy finish, and are compatible with most types of acrylic paint. Acrylic sealants are available in spray form, making them easy to apply evenly on the surface of Shrinky Dinks.
2. Mod Podge
Mod Podge is a popular all-in-one sealant, glue, and finish that works well on various surfaces, including Shrinky Dinks. It is available in different finishes, such as glossy, matte, and satin, allowing you to achieve the desired look. Mod Podge can be applied with a brush, ensuring even coverage and protecting the acrylic paint.
3. UV-Resistant Sealants
If your Shrinky Dink creations will be exposed to sunlight or outdoor elements, consider using a UV-resistant sealant. These sealants provide an additional layer of protection against UV rays, preventing the acrylic paint from fading or yellowing over time. UV-resistant sealants are available in spray or brush-on forms.
Application Techniques
Proper application techniques are essential to achieve optimal results when using sealants on Shrinky Dinks. Here are a few tips:
- Clean the surface: Before applying the sealant, make sure the Shrinky Dinks are clean and free from any dust or debris.
- Test on a small area: It is always a good idea to test the sealant on a small corner of the Shrinky Dinks to ensure compatibility and desired results.
- Apply thin, even coats: Instead of applying a thick and heavy layer of sealant, it is recommended to apply thin, even coats. This allows for better control and smoother finish.
- Allow proper drying time: Follow the manufacturer’s instructions regarding drying time between coats and overall curing time.
- Consider multiple layers: Depending on the level of protection and desired finish, it may be necessary to apply multiple layers of sealant. Each layer should be allowed to dry completely before applying the next one.
Additional Finishes
In addition to sealants, there are other finishes that can enhance the appearance of acrylic paint on Shrinky Dinks:
1. Glazes
Glazes add a glossy and dimensional finish to the acrylic paint. They can be applied over dried paint and create a smooth, glass-like effect. Glazes come in various colors and can be mixed to create customized shades.
2. Varnishes
Varnishes are similar to sealants but provide a more durable and long-lasting finish. They protect the paint from UV rays, water, and other environmental factors. Varnishes are available in glossy, matte, and satin finishes.
3. Resin Coatings
Resin coatings create a high-gloss
Inspiration and Ideas: Using Acrylic Paint to Create Stunning Shrinky Dink Art
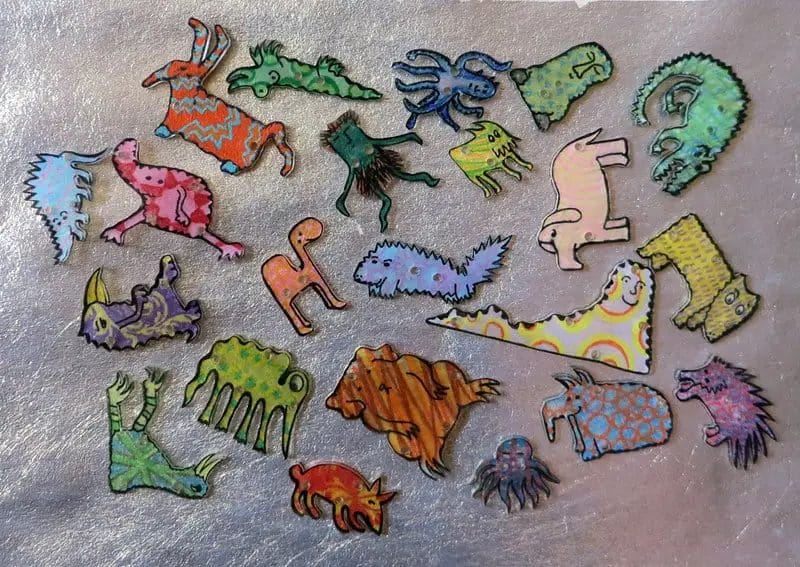
Acrylic paint is a versatile medium that can be used in a variety of art projects. One unique and exciting way to use acrylic paint is by creating stunning Shrinky Dink art. Shrinky Dinks are sheets of plastic that shrink and harden when heated, resulting in small, durable creations. By combining the vibrant colors and blendability of acrylic paint with the transformative properties of Shrinky Dinks, you can create beautiful and eye-catching artwork.
Materials Needed:
- Shrinky Dink sheets
- Acrylic paint
- Paintbrushes
- Permanent markers
- Scissors
- Hole punch
- Baking sheet
- Oven or heat gun
Step 1: Prepare the Shrinky Dink Sheets
Start by cutting the Shrinky Dink sheets into the desired shapes and sizes for your artwork. You can use scissors or a craft knife to achieve precise cuts. Remember that the shrinkage process will cause your artwork to reduce in size, so make your initial designs slightly larger than the desired final result.
Step 2: Apply the Acrylic Paint
Using your paintbrushes, apply the acrylic paint to the rough side of the Shrinky Dink sheets. Experiment with different colors, blends, and brush techniques to create unique effects. Acrylic paint dries relatively quickly, allowing you to layer colors and add intricate details to your artwork.
Step 3: Let the Paint Dry
After applying the acrylic paint, set aside the Shrinky Dink sheets and allow the paint to dry completely. This may take a few minutes or up to an hour, depending on the thickness of the paint layers. Avoid touching the paint while it is still wet to prevent smudging or smearing.
Step 4: Add Details with Permanent Markers
Once the acrylic paint is fully dry, you can enhance your artwork by adding details with permanent markers. Use fine-tipped markers to create intricate designs, outlines, or text. The permanent markers will not smudge or fade during the shrinking process, ensuring your artwork remains vibrant and intact.
Step 5: Punch Holes (if desired)
If you plan to turn your Shrinky Dink artwork into jewelry or hanging ornaments, use a hole punch to create small holes in the desired locations. Remember that the holes will also shrink, so make them slightly larger than needed. Ensure that the holes are positioned near the edges to prevent cracking or breaking.
Step 6: Shrink the Artwork
Preheat your oven to the temperature specified on the Shrinky Dink packaging. Place the painted and decorated sheets on a baking sheet and carefully slide them into the preheated oven. Alternatively, you can use a heat gun to shrink the artwork. Monitor the shrinking process closely, as it only takes a few minutes. The Shrinky Dink sheets will curl and shrink before flattening out and becoming rigid.
Step 7: Cooling and Finishing Touches
Once the Shrinky Dink artwork has finished shrinking, remove it from the oven or heat gun and allow it to cool completely. The artwork will retain its vibrant colors and harden into a durable plastic piece. You can now add finishing touches, such as attaching jump rings or earring hooks for jewelry, or tying string or ribbon for hanging ornaments.
Summary
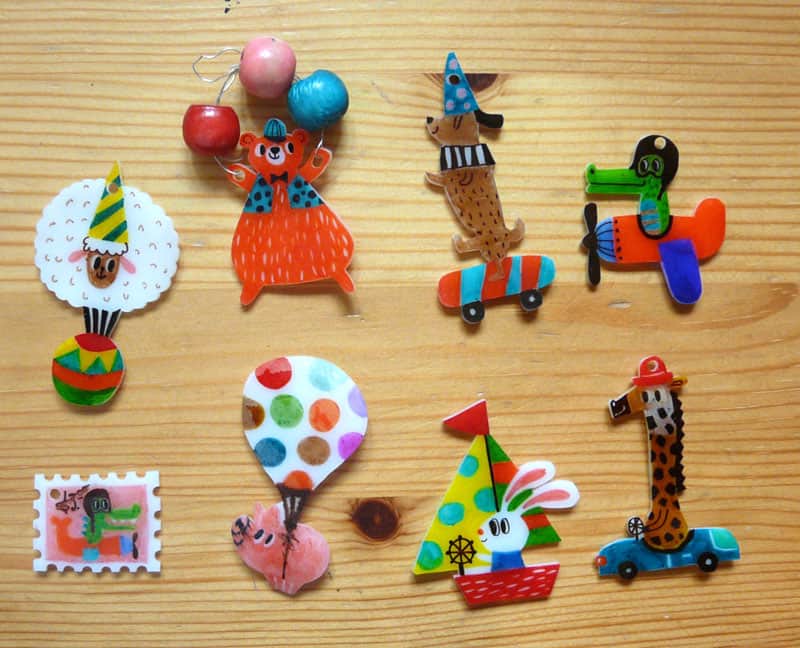
Using acrylic paint to create stunning Shrinky Dink art is a fun and creative way to express your artistic skills. By following the steps outlined above and experimenting with different techniques, colors, and designs, you can produce unique and eye-catching pieces of artwork. Whether you choose to make jewelry, ornaments, or decorative pieces, the transformative properties of Shrinky Dinks combined with the versatility of acrylic paint will result in stunning creations.
FAQs
Can I use acrylic paint on Shrinky Dinks?
Yes, you can use acrylic paint on Shrinky Dinks. However, it is important to note that the paint might not adhere as well to the smooth surface of the Shrinky Dinks. To improve adhesion, you can lightly sand the surface before painting or use a primer designed for use on plastic.
How long does it take for Shrinky Dinks to shrink?
Shrinky Dinks typically take about 3-5 minutes to shrink in a preheated oven at 325°F (163°C). Keep a close eye on them while they are shrinking, as they can quickly over-shrink or curl up if left in the oven for too long.
Can I color Shrinky Dinks after they have shrunk?
No, it is not recommended to color Shrinky Dinks after they have shrunk. The plastic becomes harder and more brittle after shrinking, making it difficult for color to adhere properly. It is best to color or decorate the Shrinky Dinks before shrinking them.
Conclusion
In conclusion, using acrylic paint on shrinky dinks is a popular and creative way to personalize and enhance these versatile craft materials. The ability of acrylic paint to adhere to different surfaces makes it a suitable choice for coloring and decorating shrinky dinks. By using acrylic paint, you can unleash your creativity and create vibrant and detailed designs on your shrinky dinks. Moreover, the durability of acrylic paint ensures that your designs will remain intact even after baking in the oven. So go ahead and explore the endless possibilities of using acrylic paint on shrinky dinks to create unique and eye-catching crafts.