
Looking to add a touch of elegance to your acrylic project? Learn how to frost acrylic like a pro with our step-by-step guide. Frosted acrylic provides a beautiful, matte finish that is perfect for adding privacy to windows, creating unique home decor pieces, or adding a subtle textured effect to your crafts. In this tutorial, we will walk you through the different methods to achieve a frosted look on acrylic, including sanding, chemical etching, and using frosted spray paint. Let’s get started and bring your acrylic projects to the next level!
Using Sandpaper to Achieve a Frosted Effect on Acrylic
If you’re looking to add a unique and stylish touch to your acrylic projects, achieving a frosted effect can be a great option. While there are various methods available, one popular and cost-effective technique is using sandpaper. In this section, we will explore how you can use sandpaper to achieve a beautiful frosted look on acrylic surfaces.
Materials Needed
To get started, you will need the following materials:
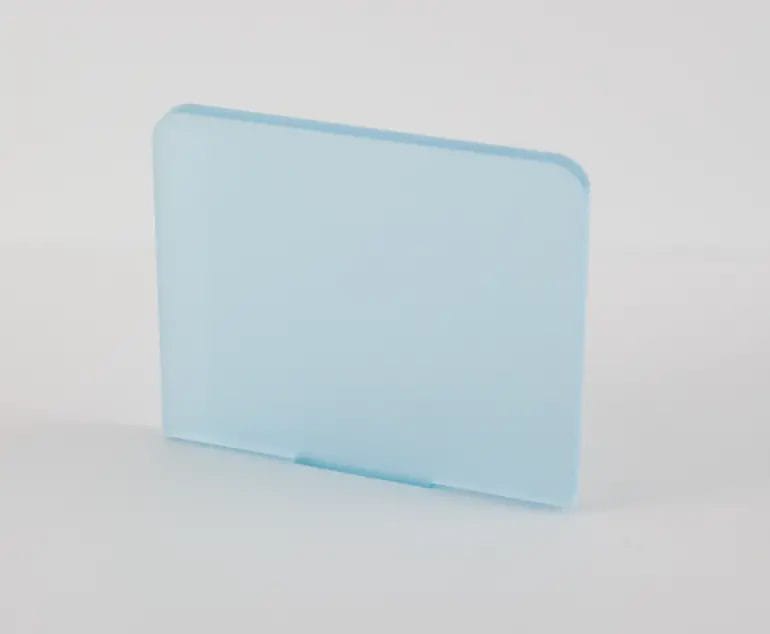
- Acrylic piece
- Sandpaper (grit ranging from 180-400)
- Water
- Spray bottle
- Soft cloth or sponge
Step-by-Step Process
Follow these steps to achieve a frosted effect on acrylic using sandpaper:
- Select the Acrylic Piece: Choose the acrylic piece you want to work on. It can be a sheet, a decorative item, or any other acrylic surface you wish to transform.
- Clean the Surface: Ensure that the acrylic surface is clean and free from any dirt or debris. This will help to achieve a smooth and even frosted effect.
- Choose the Right Grit: Depending on the desired level of frosted effect, select the appropriate grit of sandpaper. Finer grits, such as 400, will result in a softer frosted look, while coarser grits, like 180, will create a more pronounced effect.
- Sand the Surface: Start sanding the acrylic surface gently with the chosen sandpaper. It is recommended to wet the surface with water to reduce friction and avoid melting the acrylic. Use light and even strokes, moving in a circular or back-and-forth motion. Continue sanding until you achieve the desired frosted effect.
- Rinse and Clean: Once you have achieved the desired frosted effect, rinse the acrylic piece with water to remove any sanding residue. Make sure to thoroughly clean the surface to remove any particles that may have accumulated during the sanding process.
- Dry and Finish: After rinsing, dry the acrylic piece using a soft cloth or sponge. Inspect the surface to ensure that you have achieved a consistent and even frosted effect. If necessary, repeat the sanding process on specific areas to achieve the desired result.
By following these steps, you can transform your plain acrylic surfaces into beautifully frosted creations. This technique allows you to customize acrylic pieces for various applications such as home decor, art projects, or even signs and displays.
In summary, using sandpaper to achieve a frosted effect on acrylic involves selecting the right materials, cleaning the surface, choosing the appropriate sandpaper grit, gently sanding the acrylic, thoroughly rinsing and cleaning the surface, and finally drying and inspecting the frosted effect. With a little patience and creativity, you can create stunning frosted acrylic pieces that will surely impress.

Chemical methods for frosting acrylic
Acrylic is a versatile material commonly used in various industries due to its transparency, durability, and lightweight properties. However, there are instances when a frosted effect is desired for acrylic surfaces. Frosted acrylic offers a softer, diffused appearance and can be highly beneficial in applications such as signage, displays, and decorative items.
In this section, we will explore the chemical methods that can be employed to achieve a frosted look on acrylic surfaces. These methods involve the use of specific chemicals or solutions that react with the acrylic material, altering its surface texture and appearance.
1. Sanding
One of the simplest and most common chemical methods for frosting acrylic is sanding. This method involves using sandpaper or a sanding block to manually create a frosted effect on the acrylic surface. The abrasion caused by the sanding process roughens the smooth surface, diffusing light and creating the desired frosted appearance.
To achieve a consistent and uniform frosted effect, it is recommended to use fine-grit sandpaper and apply even pressure while sanding. It is important to note that sanding can result in scratches or marks on the acrylic surface, so caution should be exercised.
2. Chemical etching
Chemical etching is another effective method for frosting acrylic surfaces. This technique involves applying a specific chemical solution that reacts with the acrylic, causing controlled surface degradation. The chemical etchant eats away at the smooth surface, creating a frosted finish.
Commonly used etching solutions for acrylic include acetone, ethyl acetate, or a mixture of isopropyl alcohol and water. These chemicals gradually dissolve the acrylic surface, producing a frosted appearance. It is important to follow safety guidelines when working with chemical etching solutions and use appropriate personal protective equipment.
3. Frosting spray
Frosting sprays provide a convenient and easy-to-use option for achieving a frosted look on acrylic surfaces. These sprays contain a specialized formula that creates a thin layer of frosted coating on the acrylic when applied. They are widely available in hardware stores and are popular for DIY projects.
To use a frosting spray, the acrylic surface should be thoroughly cleaned and dried. The spray should be applied in even coats, allowing each coat to dry before applying the next. This method allows for precise control over the level of frosting desired.
4. Sandblasting
Sandblasting is a more advanced chemical method for frosting acrylic, commonly used in large-scale industrial applications. It involves using high-pressure air or water to propel abrasive materials, such as sand or glass beads, against the acrylic surface. The abrasive particles erode the smooth surface, creating a frosted effect.
It is important to note that sandblasting requires specialized equipment and should be performed by professionals to ensure safety and achieve the desired results. Careful control of pressure and abrasive materials is necessary to avoid damaging the acrylic surface.
Chemical methods offer various options for frosting acrylic surfaces, allowing for customization and creativity in various applications. Whether through sanding, chemical etching, using frosting sprays, or sandblasting, each method provides a unique way to achieve the desired frosted effect on acrylic. It is important to consider the specific requirements of the project and choose the most suitable method accordingly.

Creating a Frosted Appearance with Etching Cream on Acrylic
Etching cream is a popular choice for creating a frosted appearance on various surfaces, including glass and acrylic. It is a chemical compound that erodes or “eats away” at the surface of the material, resulting in a permanent etched design. This technique can be used to add a touch of elegance and privacy to windows, doors, or even decorative accessories. In this section, we will explore the process of creating a frosted appearance with etching cream specifically on acrylic.
Materials Needed
To get started with this project, you will need the following materials:
- Acrylic sheet
- Etching cream
- Paintbrush or foam brush
- Stencil or adhesive vinyl
- Painter’s tape
- Protective gloves
- Protective eyewear
- Plastic or glass container
- Water
- Soap
Step-by-Step Process
Follow these steps to achieve a beautiful frosted effect on your acrylic surface:
- Clean the acrylic: Before applying the etching cream, ensure that the acrylic sheet is clean and free from any dust or debris. Wash it with soap and water, then dry it thoroughly.
- Prepare the stencil: If you are using a stencil or adhesive vinyl to create a specific design, carefully cut out the desired shape or pattern. Make sure the stencil adheres securely to the acrylic surface.
- Protect the surrounding area: Apply painter’s tape around the edges of the acrylic to protect any areas you do not want to etch. This will ensure a clean and precise finish.
- Put on protective gear: It is essential to protect yourself during the etching process. Wear protective gloves and eyewear to prevent any direct contact with the etching cream.
- Apply the etching cream: Using a paintbrush or foam brush, apply a thick, even layer of etching cream onto the exposed areas of the acrylic. Make sure to cover the stencil completely.
- Let it sit: The duration for which the etching cream needs to sit on the acrylic may vary depending on the brand and desired effect. Follow the instructions provided by the manufacturer, usually ranging from 5 to 15 minutes.
- Rinse off the cream: After the recommended wait time, rinse off the etching cream under running water. Ensure that all the cream is completely removed from the surface of the acrylic.
- Remove the stencil: If you used a stencil or adhesive vinyl, carefully peel it off to reveal the frosted design. Be cautious not to smudge or damage the etched areas.
- Clean and dry: Give the acrylic sheet a final wash with soap and water to remove any residue. Dry it thoroughly before handling or displaying your newly frosted piece.
Tips and Precautions
Here are some additional tips and precautions to keep in mind when using etching cream on acrylic:
- Choose a well-ventilated area for your etching project to avoid inhaling any fumes from the etching cream.
- Always read and follow the instructions provided by the manufacturer of your chosen etching cream.
- Experiment with different stencil designs and patterns to create unique and personalized frosted effects.
- Practice on a small piece of acrylic before working on larger surfaces or valuable items.
- Etching cream is not suitable for use on coated or painted acrylic surfaces.
- Dispose of the etching cream and any remaining solution according to local regulations.
By following these steps and taking the necessary precautions, you can successfully create a frosted appearance on acrylic using etching cream. Whether you are enhancing the privacy of a bathroom window or adding a decorative touch to a photo frame, this technique offers a versatile and stylish solution.
Tips and Tricks for Achieving a Professional Frosted Finish on Acrylic
Acrylic is a versatile material that is commonly used in various DIY projects, art installations, and even home decor items. One of the most popular techniques for enhancing the appearance of acrylic is to give it a frosted finish. A frosted finish adds a touch of elegance and sophistication to acrylic, making it a favorite choice for many creators. If you want to achieve a professional frosted finish on acrylic, here are some tips and tricks to help you:
1. Proper Surface Preparation
Before you begin the frosting process, it is crucial to prepare the surface of the acrylic properly. Start by cleaning the acrylic thoroughly using a mild soap and water solution. Make sure to remove any dirt, dust, or grease from the surface. Once the acrylic is clean, dry it thoroughly with a lint-free cloth or towel.
2. Sanding the Surface
To achieve a frosted finish, you will need to sand the surface of the acrylic. Start by using a fine-grit sandpaper, such as 220-grit, and gently sand the surface in a circular motion. This will help create a rough texture on the acrylic, which is essential for achieving the frosted effect. Be sure to sand evenly and avoid applying too much pressure, as this could cause damage to the acrylic.
3. Using a Sandblaster
If you want to achieve a more uniform and professional frosted finish, consider using a sandblaster. A sandblaster is a tool that propels fine abrasive materials onto the surface of the acrylic, creating a frosted effect. This technique allows for more precise control over the frosting process and can result in a smoother finish. However, it is important to follow the manufacturer’s instructions and take necessary safety precautions when using a sandblaster.
4. Applying Frosted Glass Spray
Another popular method for achieving a frosted finish on acrylic is by using a frosted glass spray. This spray is specially formulated to create a frosted effect on glass surfaces, but it can also be used on acrylic. Before applying the spray, make sure to shake the can well and hold it about 6-8 inches away from the acrylic surface. Apply a light, even coat of the spray in a sweeping motion, making sure to cover the entire surface. Allow the spray to dry according to the manufacturer’s instructions before applying additional coats if needed.
5. Experiment with Different Techniques
Don’t be afraid to experiment with different techniques to achieve the desired frosted finish on your acrylic. You can try combining sanding and spraying methods or even use stencils to create unique patterns on the surface. Remember that practice makes perfect, so don’t get discouraged if your first attempts don’t turn out exactly as expected. Keep refining your technique and experimenting with different approaches until you achieve the professional frosted finish you desire.
6. Protective Coating
Once you have achieved the desired frosted finish on your acrylic, it is essential to protect it from scratches and damage. Applying a protective coating, such as a clear acrylic sealer or varnish, can help preserve the frosted effect and extend the lifespan of your acrylic piece. Follow the instructions on the coating product carefully to ensure proper application and drying time.
Summary
Creating a professional frosted finish on acrylic can take a bit of practice and experimentation, but with the right techniques, you can achieve stunning results. Remember to properly prepare the surface, consider using sanding or sandblasting techniques, or opt for a frosted glass spray. Don’t be afraid to get creative and experiment with different methods to achieve the desired effect. Finally, protect your frosted acrylic with a suitable coating to ensure its longevity. With these tips and tricks, you’ll be able to achieve a beautiful frosted finish on your acrylic projects.
FAQs
Q: How to frost acrylic?
To frost acrylic, you can use sandpaper or a sanding block with a grit between 220 and 400. Rub the sandpaper or sanding block gently in circular motions over the surface of the acrylic until it becomes cloudy and opaque. Rinse the acrylic with water, then dry it with a clean cloth.
Conclusion
In conclusion, learning how to frost acrylic can be a creative and rewarding skill to have. By following the step-by-step process, you can transform plain acrylic surfaces into beautiful frosted designs. Whether you’re looking to enhance the privacy of a window or add an artistic touch to a glass door, frosting acrylic offers endless possibilities.
Remember to prepare the surface properly, choose the right frosting method, and handle the materials with care. Experimenting with different techniques and tools can help you achieve unique and customized results. So don’t be afraid to get creative and have fun frosting your acrylic projects!