
If you want to add a rustic and weathered look to your wooden projects, distressing acrylic paint is the way to go. By following a few simple techniques, you can achieve an authentic vintage appearance that will make your piece stand out. In this guide, we will show you step by step how to distress acrylic paint on wood, allowing you to create stunning and unique pieces of art or furniture.
Distressing acrylic paint involves creating deliberate imperfections, such as cracks, chipped edges, or faded areas, to give your wooden surface an aged and worn-out effect. This technique is popular for creating a vintage or shabby-chic style, and it is incredibly versatile. From picture frames to tables, distressed acrylic paint can transform ordinary wooden objects into eye-catching works of art.
When distressing acrylic paint on wood, it’s crucial to choose the right materials and tools. Sandpaper, paint brushes, and a variety of acrylic paint colors will be your best friends throughout the process. Additionally, having a clear idea of the desired distressed look and practicing on a test piece before applying it to your main project will help you achieve the best results.
To begin distressing acrylic paint on wood, you’ll need to prepare the surface by sanding it lightly and priming it if necessary. Once the surface is ready, you can start applying layers of acrylic paint in your preferred colors, allowing each layer to dry before adding the next. Then,
Step-by-step guide to distressing wood using acrylic paint
Distressing wood using acrylic paint is a popular technique to give furniture and other wooden items a vintage or weathered look. This step-by-step guide will walk you through the process of distressing wood using acrylic paint, allowing you to create unique and charming pieces with a rustic appeal.
Materials Needed:
- Wooden item to distress
- Acrylic paint in desired colors
- Paintbrushes
- Sandpaper (fine-grit)
- Clear coat or sealant
Step 1: Choose a wooden item
Start by selecting a wooden item that you want to distress. It can be a piece of furniture, a wooden box, or any other wooden object that you wish to transform.
Step 2: Prepare the surface
Before applying the acrylic paint, make sure the surface of the wood is clean and free from any dirt, dust, or grease. Use a damp cloth to wipe it down if necessary. Sand any rough areas or imperfections to create a smooth surface.
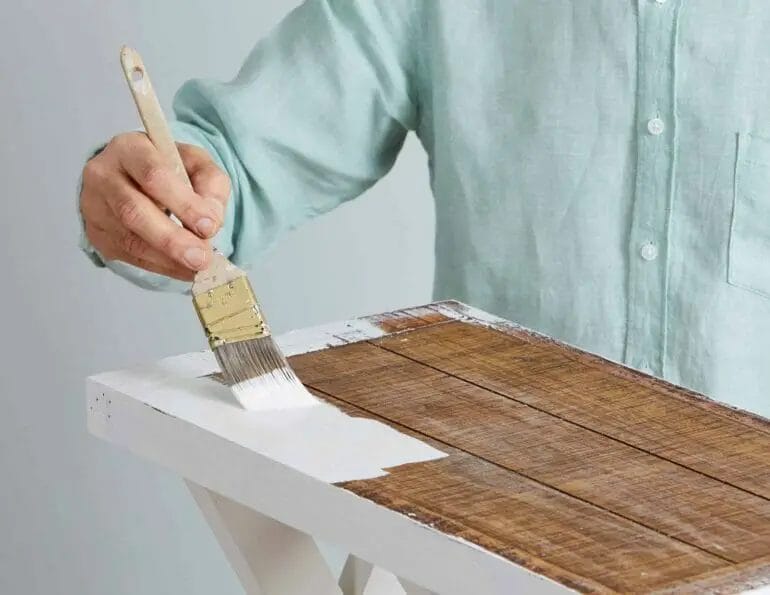
Step 3: Apply the base coat
Select a base color for your distressed look. Apply the acrylic paint using a paintbrush, making sure to cover the entire surface evenly. Allow the paint to dry completely before moving on to the next step.
Step 4: Add a second color
To create a distressed effect, choose a contrasting color to apply over the base coat. Use a dry brush or a sponge to lightly dab the second color on random areas of the wooden item. This will add depth and texture to the distressed look.
Step 5: Sand the edges
Take a fine-grit sandpaper and gently sand the edges and corners of the wooden item. Focus on areas that would naturally experience wear and tear over time, such as corners and edges. This will expose the base coat and create a worn appearance.
Step 6: Distress further (optional)
If you want to enhance the distressed look, you can apply additional techniques. For example, you can lightly tap the wooden item with a chain or a hammer to create small dents and dings. You can also use a nail or screwdriver to create scratches or gouges.
Step 7: Seal the distressed finish
To protect the distressed look and ensure its longevity, apply a clear coat or sealant over the painted surface. This will also give the wood a subtle sheen.
Step 8: Enjoy your distressed wood
Once the clear coat is dry, your distressed wood item is ready to be enjoyed. Use it as a unique decor piece or incorporate it into your existing furniture collection for a vintage touch.
Distressing wood using acrylic paint is a versatile technique that allows you to unleash your creativity and transform ordinary wooden items into extraordinary pieces with character and charm. Experiment with different colors, distressing methods, and finishes to achieve the desired look for your project.

Tips and Tricks for Achieving a Vintage or Weathered Effect with Acrylic Paint on Wood
Acrylic paint is a versatile medium that can be used on various surfaces, including wood. If you’re aiming to create a vintage or weathered look on wooden objects using acrylic paint, there are a few tips and tricks that can help you achieve the desired effect. Whether you’re working on a furniture restoration project or looking to add a distressed finish to a wooden sign, follow these steps to achieve a beautiful vintage look.
1. Prepare the Wood
Before you begin painting, it’s important to prepare the wood surface. Start by sanding the wood to ensure a smooth and even base. Use fine-grit sandpaper to smooth out any rough edges or imperfections. After sanding, wipe away any dust with a clean cloth to create a clean surface for painting.
2. Choose the Right Colors
The color palette you choose plays a crucial role in creating a vintage or weathered effect. Opt for muted or earthy tones that mimic the natural aging process. Shades of brown, gray, and off-white work well for achieving an authentic vintage look. Experiment with layering different shades to create depth and dimension in your piece.
3. Use a Dry Brushing Technique
Dry brushing is a technique that involves using a brush with minimal paint to create a textured, weathered effect. Dip your brush lightly into the paint, then dab off most of the paint onto a paper towel or palette. Apply the paint in quick, light strokes, focusing on the raised areas of the wood. This technique allows some of the wood grain to show through, adding to the vintage appeal.
4. Experiment with Distressing Techniques
To achieve a truly weathered look, consider distressing the wood surface. There are several techniques you can try, such as sanding, scraping, or using a hammer to create small dents and dings. These imperfections mimic the natural wear and tear that occurs over time. Be sure to experiment on a scrap piece of wood first to determine which distressing techniques work best for your project.
5. Layer and Blend Colors
Layering and blending colors is key to creating a realistic vintage effect. Start with a base coat of your chosen color, then gradually add layers of different shades to build depth and dimension. Use a dry brush or a sponge to blend the colors together, creating a seamless transition between shades. This technique adds visual interest and enhances the weathered look of the wood.
6. Add Details and Accents
To further enhance the vintage effect, consider adding details and accents. This could include distressing certain areas more than others, adding faux cracks or peeling paint, or using a stencil to create intricate designs. These small details can make a big difference in achieving an authentic vintage look.
7. Seal and Protect
After you’ve achieved the desired vintage effect, it’s important to seal and protect your painted wood. Apply a clear acrylic sealer or varnish to protect the paint from chipping or fading over time. This will ensure that your vintage finish lasts for years to come.
By following these tips and tricks, you can successfully achieve a vintage or weathered effect with acrylic paint on wood. Whether you’re transforming furniture, creating wall art, or working on any other wooden project, the end result will be a beautifully aged piece with a unique charm.
Exploring different distressing methods with acrylic paint on wooden surfaces
Acrylic paint is a versatile medium that can be used to create a wide range of effects on various surfaces. When it comes to distressing wooden surfaces, acrylic paint offers an array of techniques that can add character and a weathered appearance. In this section, we will explore different distressing methods using acrylic paint on wooden surfaces.
1. Dry brushing
Dry brushing is a technique that involves using a dry brush and a small amount of paint to create a subtle, worn-out effect. To achieve this, dip the brush lightly into the paint, then remove most of it by dabbing it onto a paper towel or palette. With light strokes, apply the paint to the wooden surface, focusing on areas that naturally experience wear and tear, such as edges and corners. This technique allows the texture and grain of the wood to show through, giving it an aged appearance.
2. Distressed layers
To achieve a more pronounced distressed look, consider using multiple layers of paint. Start by applying a base coat in a color of your choice. Once dry, apply a second coat in a contrasting color. Before the second coat dries completely, use sandpaper or a damp cloth to gently remove some of the paint, revealing the base coat underneath. This technique creates a worn and weathered look, with the different layers of paint peeking through.
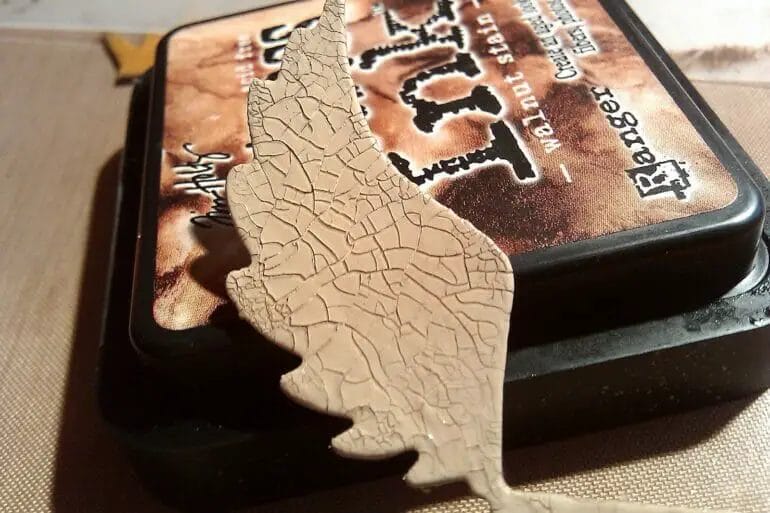
3. Crackle effect
The crackle effect is a popular distressing technique that mimics the look of aged paint. To achieve this effect, apply a layer of crackle medium onto the wooden surface after applying a base coat. Once the crackle medium is dry, apply a top coat of a different color. As the top coat dries, it will crack and peel, revealing the base coat underneath. This creates a unique and textured distressed look that adds depth and character to the wooden surface.
4. Wash technique
The wash technique involves thinning down acrylic paint with water to create a translucent glaze-like effect. To distress a wooden surface using the wash technique, mix a small amount of paint with water until you achieve the desired consistency. Apply the wash evenly over the surface, allowing the wood grain to show through. For a more distressed look, you can wipe off some of the wash with a cloth or sponge while it is still wet. This technique adds a subtle, aged appearance to the wooden surface.
5. Stencil distressing
If you’re looking for a more intricate distressed design, stencil distressing is a great option. Start by applying a base coat to the wooden surface. Once dry, place a stencil on top and secure it in place. Use a dry brush or a sponge to lightly dab paint over the stencil, being careful not to oversaturate the surface. Remove the stencil and allow the paint to dry. This technique adds a distressed pattern or design to the wooden surface, giving it a unique and aged look.
In summary, distressing wooden surfaces with acrylic paint offers endless creative possibilities. Whether you prefer a subtle weathered effect or a more pronounced distressed look, these techniques allow you to achieve a unique and aged appearance on your wooden projects. Experiment with different methods and have fun exploring the world of distressing with acrylic paint.
Enhancing the Distressed Look with Additional Techniques and Finishes using Acrylic Paint on Wood
Acrylic paint is a versatile medium that can be used to create a distressed look on wood surfaces. Distressing wood involves intentionally aging or weathering the wood to give it a worn and aged appearance. This technique is commonly used in furniture restoration and DIY projects to achieve a vintage or rustic look. While distressing wood with acrylic paint is relatively easy, you can enhance the distressed look by incorporating additional techniques and finishes. In this section, we will explore some creative ways to take your distressed wood project to the next level.
1. Layering Colors
One way to enhance the distressed look on wood is by layering different colors of acrylic paint. Start by applying a base coat of a neutral color, such as white, cream, or gray. Once the base coat is dry, lightly sand the surface to create texture and expose some of the wood grain. Next, apply a second coat of a contrasting color, such as a darker or brighter shade. Use a dry brush or a sponge to apply the paint in a light, dabbing motion, leaving some areas of the base coat showing through. This layering technique adds depth and dimension to the distressed finish.
2. Dry Brushing
Dry brushing is a technique that involves using a small amount of paint on a dry brush to achieve a subtle and textured effect. To dry brush wood, load a small amount of paint onto a brush and then wipe off most of it on a paper towel. Lightly drag the brush over the surface of the wood, focusing on the raised areas and edges. This technique adds highlights and accents to the distressed finish, making it look more realistic and worn.
3. Crackle Finish
A crackle finish is a popular technique used to achieve an aged and weathered appearance on wood surfaces. To create a crackle finish with acrylic paint, start by applying a base coat of a contrasting color. Once the base coat is dry, apply a crackle medium over the top. The crackle medium will create small cracks and fissures as it dries. Finally, apply a top coat of a different color. As the top coat dries, the cracks in the crackle medium will start to show through, creating an authentic aged look.
4. Distressing Techniques
In addition to layering colors and using different finishes, there are several distressing techniques you can incorporate to enhance the distressed look on wood. Sanding is one of the most common techniques used to distress wood. Use sandpaper or a sanding block to gently sand the edges, corners, and other areas that would naturally wear over time. You can also use a hammer or chain to create dents and dings in the wood, adding character and authenticity to the distressed finish. Another technique is dry brushing with a metallic paint to create a worn and tarnished effect.
5. Sealing and Protecting the Finish
Once you have achieved the desired distressed look on your wood surface, it is important to seal and protect the finish. Apply a clear matte or satin varnish over the painted surface to protect it from wear and tear. The varnish will also enhance the colors and textures of the distressed finish. Make sure to follow the manufacturer’s instructions for proper application and drying times.
In summary, acrylic paint can be a great medium for distressing wood surfaces and achieving a worn and aged look. By incorporating additional techniques and finishes, such as layering colors, dry brushing, crackle finishes, and distressing techniques, you can enhance the distressed look and create a more realistic and visually appealing finish. Don’t forget to seal and protect the finish with a clear varnish to ensure its longevity. So, get creative and experiment with these techniques to transform your wood projects into stunning distressed masterpieces.
Frequently Asked Questions
1. How do I distress acrylic paint on wood?
To distress acrylic paint on wood, start by applying a base coat of acrylic paint and let it dry. Then, use sandpaper or a sanding block to lightly sand the painted surface, focusing on the edges and areas where natural wear and tear would occur. Finally, you can add additional layers of paint or use a stain or glaze to further distress the wood and create an aged effect.
2. What tools do I need to distress acrylic paint on wood?
To distress acrylic paint on wood, you will need sandpaper or a sanding block with different grits, a paintbrush or sponge for applying paint, and optional tools like a putty knife or hammer for creating additional texture. Additionally, you may need a clear sealer or varnish to protect the distressed finish.
3. Can I distress acrylic paint on any type of wood?
Yes, you can distress acrylic paint on various types of wood, including plywood, solid wood, and even MDF (medium-density fiberboard). However, the texture and absorbency of the wood may affect the overall distressing process and the final result. It’s always a good idea to test the distressing techniques on a small, inconspicuous area before applying them to the entire surface.
Conclusion:
In conclusion, distressing acrylic paint on wood can be a fun and creative way to add texture and character to your projects. By using techniques such as sanding, dry brushing, and layering, you can achieve a vintage and weathered look that adds a rustic charm to your wooden surfaces.
Remember to experiment with different tools and materials, such as sandpaper, steel wool, and even a toothbrush, to create unique distressing effects. Don’t be afraid to mix and match colors or add additional layers of paint for depth and dimension.
With practice and creativity, you’ll be able to master the art of distressing acrylic paint on wood and create stunning pieces that showcase your artistic flair and personal style.