
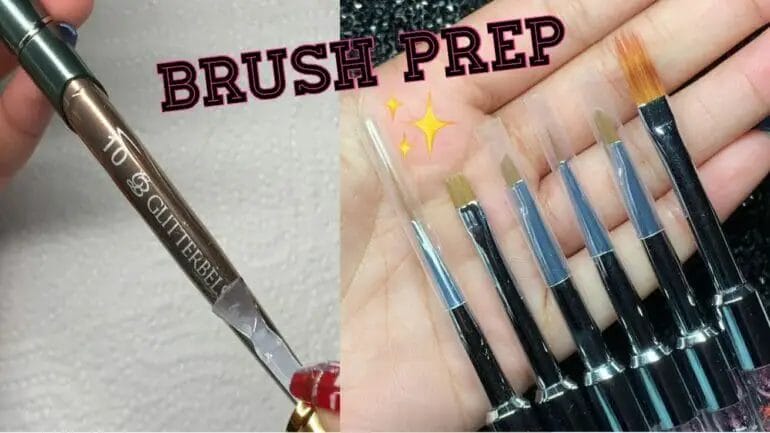
If you’re an avid acrylic nail user, it’s important to know how to properly prep your acrylic nail brush. This crucial step ensures that your brush remains in optimal condition, allowing for smoother applications and cleaner results. By following a few simple steps, you can keep your acrylic nail brush in top shape and extend its lifespan.
The first step in prepping your acrylic nail brush is to thoroughly clean it. This can be done by rinsing the brush under warm water to remove any excess product or debris. Then, using a gentle brush cleaner or a mild soap, gently cleanse the bristles to remove any remaining residue.
After cleaning, it’s crucial to properly sanitize your acrylic nail brush. You can do this by using a brush sanitizer or a mixture of warm water and salon-grade disinfectant. Soak your brush in the solution for the recommended amount of time, allowing the disinfectant to kill any bacteria or germs.
Once your brush has been sanitized, rinse it thoroughly under warm water to remove any traces of the disinfectant. Gently pat the bristles dry with a clean towel or paper towel. It’s important to avoid rubbing the bristles too harshly, as this can cause damage or fraying.
To maintain the shape and integrity of your acrylic nail brush, it’s essential to store it properly. Place the brush in a clean container or brush holder with the bristles facing up.
Proper Storage and Maintenance of Acrylic Nail Brushes
Acrylic nail brushes are essential tools for creating beautiful and long-lasting nail extensions. Whether you are a professional nail technician or a DIY enthusiast, it is important to properly store and maintain your acrylic nail brushes to ensure their longevity and optimal performance. In this section, we will discuss some tips and guidelines for storing and maintaining your acrylic nail brushes.
1. Clean your brushes after each use
After each use, it is crucial to clean your acrylic nail brushes thoroughly to remove any residual acrylic or gel. Start by wiping off excess product using a lint-free cloth or paper towel. Then, rinse the brush under warm water to remove any remaining product. Avoid using hot water as it can damage the brush bristles.
Once the excess product is removed, use a brush cleaner or a mild antibacterial soap to thoroughly clean the bristles. Gently massage the bristles to remove any trapped product or debris. Rinse the brush again under running water until the water runs clear.
After cleaning, reshape the bristles using your fingers and let the brush air dry completely before storing or using it again. Avoid using a blow dryer or placing the brush near a heat source to speed up the drying process, as this can cause the bristles to become brittle or deformed.
2. Store your brushes properly
Proper storage is essential to keep your acrylic nail brushes in good condition. Avoid leaving your brushes exposed to dust, moisture, or direct sunlight, as these factors can damage the bristles and affect their performance.
It is recommended to store your brushes in a brush holder or a dedicated case specifically designed for nail brushes. These storage options help protect the brushes from dust, keep the bristles straight, and prevent them from coming into contact with other tools or surfaces.
If you don’t have a brush holder or case, you can use a clean, empty nail polish bottle or a small glass jar to store your brushes. Fill the container with acetone or brush cleaner solution, ensuring that the bristles are fully submerged. This will help keep the bristles clean and prevent them from drying out or becoming misshapen.
3. Avoid using harsh chemicals
When cleaning your acrylic nail brushes, it is important to avoid using harsh chemicals or acetone-based products. These can damage the bristles and compromise the brush’s performance.
Instead, opt for gentle brush cleaners or mild antibacterial soaps specifically designed for cleaning nail brushes. These products effectively clean the bristles without causing any damage or degradation.
4. Replace worn-out brushes
Over time, acrylic nail brushes may show signs of wear and tear, such as frayed or splayed bristles. When the bristles become excessively worn or damaged, it is time to replace the brush.
Using a worn-out brush can affect the quality of your nail extensions and make the application process more difficult. It is recommended to regularly inspect your brushes for signs of wear and replace them as needed to maintain optimal performance and achieve flawless results.
5. Handle your brushes with care
Lastly, it is important to handle your acrylic nail brushes with care to avoid any damage or deformation. Avoid excessive bending or pressing on the bristles, as this can cause them to become misshapen or fall out.
When using your brushes, hold them at the base near the ferrule and avoid gripping them too tightly. This allows for better control and helps prevent unnecessary strain on the bristles.
Summary
Proper storage and maintenance of acrylic nail brushes are essential for their longevity and optimal performance. Remember to clean your brushes thoroughly after each use, store them properly in a brush holder or case, avoid using harsh chemicals, replace worn-out brushes, and handle them with care. By following these tips, you can ensure that your acrylic nail brushes remain in excellent condition, enabling you to create flawless nail extensions every time.
Removing Excess Residue from Your Acrylic Nail Brush
Acrylic nails have become increasingly popular as a way to achieve long-lasting and beautiful manicures. To create these stunning designs, nail technicians rely on specialized tools, one of which is the acrylic nail brush. This brush is used to apply the acrylic powder and liquid mixture onto the nail, creating the desired shape and design. However, after each use, it is essential to clean the brush thoroughly to remove any excess residue and ensure its longevity.
Excess residue on your acrylic nail brush can lead to a compromised application and affect the overall outcome of your manicure. If left unchecked, built-up residue can harden and cause the brush bristles to become stiff, making it difficult to achieve precise and smooth strokes. To prevent this from happening, it is crucial to regularly clean and remove any excess residue from your acrylic nail brush.
Tools and Materials Needed
Before we dive into the process, let’s gather the necessary tools and materials:
- Acrylic nail brush
- Acetone or monomer
- Cotton pads or lint-free wipes
- A small glass or container
Step-by-Step Guide
Now that we have everything we need, follow these steps to remove excess residue from your acrylic nail brush:
- Begin by pouring a small amount of acetone or monomer into a glass or container. Ensure that the liquid is enough to submerge the bristles of your brush.
- Gently swirl your brush in the liquid, allowing the solvent to penetrate the bristles and dissolve any residue. Be careful not to apply too much pressure or bend the bristles, as this can damage the brush.
- After a few seconds of swirling, remove the brush from the liquid and gently wipe off any excess residue on a cotton pad or lint-free wipe. You may need to repeat this step a few times until the residue is completely removed.
- Inspect the brush bristles to ensure that no residue remains. If you notice any remaining residue, repeat the previous steps until the brush is clean and free from any buildup.
- Once the brush is clean, rinse it under lukewarm water to remove any traces of acetone or monomer. Gently pat the brush bristles dry with a clean towel or paper towel.
- Finally, reshape the bristles of the brush using your fingers. Ensure that they are evenly aligned and in their original shape before storing the brush.
In summary, removing excess residue from your acrylic nail brush is an essential step in maintaining its quality and performance. By regularly cleaning and removing buildup, you can ensure that your brush remains in optimal condition, allowing you to create flawless acrylic nail designs. Remember to handle the brush with care and store it properly to extend its lifespan. Happy nail designing!
Choosing the right type of brush cleaner for acrylic nail brushes
Acrylic nail brushes are an essential tool for any nail technician or DIY enthusiast who loves creating beautiful acrylic nail designs. To keep your brushes in optimal condition and ensure they last for a long time, it’s crucial to clean them regularly. However, not all brush cleaners are suitable for acrylic nail brushes. In this section, we will explore the factors to consider when choosing the right type of brush cleaner for acrylic nail brushes.
1. Avoid acetone-based cleaners
When it comes to cleaning acrylic nail brushes, it’s important to steer clear of acetone-based cleaners. Acetone is a powerful solvent that can break down the bristles of your brush, leading to fraying and shorter brush lifespan. Additionally, acetone can also dissolve the glue that holds the bristles together, causing them to shed and deteriorate over time.
Instead, opt for brush cleaners that are specifically formulated for acrylic brushes. These cleaners are usually gentle and effective in removing acrylic residue without causing any damage to the bristles.
2. Look for non-toxic options
Considering the health and safety aspects is crucial when selecting a brush cleaner. Look for non-toxic options that are free from harmful chemicals. Acrylic nail brushes come into direct contact with the skin, so using a non-toxic cleaner ensures that there are no adverse effects on the nail technician or the client.
Some brush cleaners are labeled as “eco-friendly” or “natural,” indicating that they are made from organic or plant-based ingredients. These options are generally safer and gentler on both the brushes and the environment.
3. Consider the effectiveness
While it’s important to prioritize the safety of the brush cleaner, its effectiveness shouldn’t be compromised. Look for brush cleaners that have a reputation for efficiently removing acrylic residue from the brushes. Check customer reviews and testimonials to gauge the effectiveness of the product.
Some brush cleaners may require soaking the brushes for a certain period, while others may offer a quick-drying formula. Choose a cleaner that aligns with your preferences and provides the desired level of cleaning efficiency.
4. Evaluate the conditioning properties
Acrylic nail brushes, like any other brushes, benefit from regular conditioning to maintain their softness and flexibility. Some brush cleaners have conditioning properties that help to nourish and protect the bristles, keeping them in excellent condition for prolonged use.
Look for brush cleaners that contain ingredients like jojoba oil, vitamin E, or other natural moisturizers. These ingredients can help prevent bristle dryness and brittleness, ensuring that the brush remains in optimal condition for a longer duration.
5. Check compatibility with brush materials
Acrylic nail brushes are available in different materials, such as natural bristles, synthetic bristles, or a combination of both. It’s essential to choose a brush cleaner that is compatible with the material of your brush.
Some brush cleaners may be specifically formulated for synthetic bristles, while others may work better on natural bristles. Read the product label or description carefully to ensure that the cleaner is suitable for the type of brush you are using.
Summary
Choosing the right type of brush cleaner for acrylic nail brushes is essential to maintain their longevity and optimal performance. Avoid acetone-based cleaners as they can damage the bristles. Instead, opt for brush cleaners specifically formulated for acrylic brushes. Look for non-toxic options that are safe for both the user and the environment. Consider the effectiveness of the cleaner and choose one that efficiently removes acrylic residue. Evaluate the conditioning properties of the cleaner to keep the brush soft and flexible. Finally, check the compatibility of the cleaner with the material of your brush.
By following these guidelines, you can ensure that your acrylic nail brushes remain in excellent condition, allowing you to create stunning nail designs with ease.
Troubleshooting common issues with acrylic nail brushes
Acrylic nail brushes are essential tools in the world of nail art and design. They are used to apply acrylic powder and liquid monomer to create beautiful artificial nails. However, like any other tool, acrylic nail brushes can encounter issues that may affect their performance. In this section, we will discuss some common problems that nail technicians may encounter with acrylic brushes and how to troubleshoot them.
1. Brush bristles splaying
One of the most common issues with acrylic nail brushes is bristle splaying. This occurs when the bristles of the brush start to fan out or separate, making it difficult to create precise lines and control the application of acrylic products. There are a few reasons why bristles may splay:
- The brush has been exposed to excessive heat or harsh chemicals, causing the bristles to weaken and lose their shape.
- The brush has been improperly stored, leading to bristle distortion.
- The brush has been used with an incorrect ratio of acrylic powder to liquid monomer, causing the bristles to become overloaded and splay.
To troubleshoot this issue:
- Clean the brush thoroughly using a gentle brush cleaner or mild soap to remove any built-up product.
- Reshape the bristles by gently combing them back into shape using a fine-toothed brush comb or your fingers.
- Store the brush properly in a brush case or container to protect the delicate bristles.
- Ensure that you are using the correct ratio of acrylic powder to liquid monomer to prevent overload and stress on the bristles.
2. Brush losing its shape
Another common issue with acrylic nail brushes is the loss of shape. This occurs when the bristles of the brush become misshapen or frayed, affecting the precision and control of application. The factors contributing to this problem include:
- Excessive use or improper cleaning techniques that cause wear and tear on the bristles.
- Using excessive pressure during application, which can lead to bristle distortion.
- Using a brush with bristles that are too long or too stiff for the desired application technique.
To troubleshoot this issue:
- Regularly clean the brush after each use to remove any residue or product buildup.
- Use a soft brush cleaner or mild soap to gently cleanse the bristles.
- Avoid using excessive pressure during application and instead, apply gentle and controlled strokes.
- Choose a brush with bristles that are suitable in length and stiffness for the technique you are using.
3. Acrylic product drying too quickly
Sometimes nail technicians may find that the acrylic product dries too quickly, making it challenging to work with and create a smooth application. This issue can arise due to various reasons:
- Using a brush with bristles that are too absorbent, causing the liquid monomer to evaporate rapidly.
- Mixing the acrylic powder and liquid monomer at an incorrect ratio, resulting in a faster drying time.
- Working in a room with low humidity or high temperature, accelerating the drying process.
To troubleshoot this issue:
- Choose a brush with synthetic bristles that are less absorbent and allow for better control of liquid monomer application.
- Ensure that you are using the correct ratio of acrylic powder to liquid monomer as recommended by the manufacturer.
- Work in a well-ventilated room with moderate humidity to slow down the drying process.
- Consider using a slow-drying liquid monomer to extend the working time.
By troubleshooting these common issues with acrylic nail brushes, nail technicians can ensure optimal performance and create stunning nail designs with ease. Remember to properly clean, store, and maintain your brushes to prolong their lifespan and achieve exceptional results.
FAQs
1. How do I prep an acrylic nail brush?
To prep an acrylic nail brush, start by removing any residue or old product by gently wiping it with a lint-free pad soaked in acrylic brush cleaner. Then, rinse the brush well with warm water. Gently reshape the bristles and allow the brush to air dry before using it again.
2. Can I use acetone to clean my acrylic nail brush?
No, it is not recommended to use acetone to clean an acrylic nail brush. Acetone can damage the bristles and affect the performance of the brush. It is best to use a specialized acrylic brush cleaner or monomer liquid specifically designed for cleaning acrylic brushes.
3. How often should I clean my acrylic nail brush?
It is recommended to clean your acrylic nail brush after each use to maintain its performance and longevity. Regular cleaning prevents product buildup and ensures that the brush remains clean and ready for use. Proper cleaning and maintenance will help extend the life of your brush.
Conclusion
In conclusion, properly preparing an acrylic nail brush is essential for achieving flawless nail extensions and designs. By following a few simple steps, you can ensure that your brush remains in top condition and prolong its lifespan.
First, it is crucial to remove any excess glue or residue from the brush bristles after each use. This can be done by gently wiping the brush with a lint-free cloth or using a brush cleaner solution. Additionally, regularly disinfecting the brush with a sanitizing solution will help maintain its hygiene and prevent the spread of bacteria.
Furthermore, storing your acrylic nail brush properly in a protective case or holder will prevent any damage or bending of the bristles. Remember to replace your brush whenever you notice signs of fraying or excessive wear to maintain optimal performance.
By following these steps, you can ensure that your acrylic nail brush remains in perfect condition, allowing you to create stunning nail art with ease and precision.