
If you’re looking to remove acrylic nails at home and want to know which nail drill bit to use, we’ve got you covered. Choosing the right nail drill bit is crucial for a safe and effective removal process.
When it comes to removing acrylic nails, it’s recommended to use a coarse grit nail drill bit, such as a carbide or diamond bit. These bits are designed to quickly and efficiently file away the acrylic without causing damage to your natural nails.
Carbide bits are known for their durability and can easily remove even the toughest acrylic nails. On the other hand, diamond bits are perfect for precision work and offer a smoother finish.
Before using a nail drill bit, ensure that you have proper training or guidance to avoid any mishaps. Remember to always prioritize safety and take breaks to prevent overheating of the nail plate.
By selecting the right nail drill bit and following proper techniques, you can safely and effectively remove acrylic nails in the comfort of your own home.

Top-rated Nail Drill Bits for Acrylic Nail Removal
Acrylic nails are a popular choice for those who want a durable and long-lasting manicure. However, there comes a time when you need to remove them, and this is where nail drill bits come in handy. Nail drill bits are essential tools for effectively and efficiently removing acrylic nails without causing damage to your natural nails. With so many options available in the market, it can be challenging to find the best nail drill bits for acrylic nail removal. In this section, we will discuss some of the top-rated nail drill bits that are highly recommended by professionals.
Diamond Nail Drill Bits
Diamond nail drill bits are known for their durability and effectiveness in removing acrylic nails. They feature a cylindrical shape with a diamond coating on the tip, which allows for precise and efficient removal of acrylic material. The diamond coating helps to prevent overheating of the nail and reduces the risk of damage to the natural nail bed. These drill bits are available in various sizes and grit levels, allowing you to choose the one that suits your needs.
Carbide Nail Drill Bits
Carbide nail drill bits are another popular choice for acrylic nail removal. They are made from a combination of carbide metal and ceramic, which makes them highly durable and long-lasting. These drill bits are known for their ability to quickly and efficiently remove acrylic material without causing any harm to the natural nails. Carbide nail drill bits are available in different shapes and sizes, including cone, flame, and barrel, offering versatility for various nail removal techniques.
Electric File Bits
Electric file bits are specifically designed for use with electric nail drills or e-files. These bits are made from high-quality materials such as ceramic, tungsten carbide, or diamond, ensuring durability and performance. Electric file bits come in a variety of shapes and sizes to cater to different acrylic nail removal needs. They are known for their speed and precision, allowing you to remove acrylic nails quickly and effectively.
Sanding Bands
Sanding bands are widely used in both professional salons and at-home nail care routines. They are made from sandpaper-like material and are an affordable option for acrylic nail removal. Sanding bands attach to a mandrel or a bit holder and are used to gently file away acrylic material. They come in various grits, from coarse to fine, allowing you to choose the right level of abrasiveness for your needs. Sanding bands are great for gentle removal of acrylic nails without causing damage to the natural nails.
In summary, when it comes to removing acrylic nails, using the right nail drill bits is essential. Diamond nail drill bits, carbide nail drill bits, electric file bits, and sanding bands are all highly recommended options. They offer durability, precision, and efficiency in removing acrylic material without causing harm to your natural nails. It is important to choose the right drill bits for your needs and ensure proper usage to achieve the best results.
How to Choose the Right Nail Drill Bit for Removing Acrylic Nails
Removing acrylic nails can be a tricky task, especially if you don’t have the right tools. One essential tool that you’ll need is a nail drill bit. Nail drill bits come in various shapes and sizes, each designed for different purposes. In this section, we will guide you on how to choose the right nail drill bit for removing acrylic nails.
Consider the Material
The first thing to consider when choosing a nail drill bit for acrylic nail removal is the material. The most common materials used for nail drill bits are ceramic, carbide, and diamond. Each material has its own advantages and disadvantages.
Ceramic nail drill bits are gentle on the nails and great for beginners. They are less aggressive and ideal for removing acrylic overlays and surface gel polish. However, they may not be as effective for quick and efficient acrylic nail removal.
Carbide nail drill bits are known for their strength and durability. They are perfect for removing thick layers of acrylic quickly. However, they can be quite aggressive and should be used with caution to avoid damaging the natural nails.
Diamond nail drill bits are the most durable and long-lasting. They are great for removing tough acrylic nails and can be used for both surface work and cuticle area. However, they can be quite expensive compared to other materials.
Choose the Right Shape
The shape of the nail drill bit is another important factor to consider. Different shapes are designed for specific purposes and offer different results.
A barrel-shaped nail drill bit is ideal for removing bulk acrylic and reducing the length of the nails. It allows for quick and efficient removal of acrylic material.
A cone-shaped nail drill bit is perfect for precision work and cleaning up the cuticle area. It can reach tight corners and remove leftover acrylic from hard-to-reach areas.
A flame-shaped nail drill bit is great for removing acrylic from the sidewalls and shaping the nails. It allows for controlled and precise shaping.
A cylindrical-shaped nail drill bit is versatile and can be used for various purposes, such as removing acrylic, shaping, and refining the nail surface.
Consider Grit Size
Grit size refers to the coarseness of the nail drill bit. It determines how quickly and aggressively the bit will remove acrylic. Nail drill bits with lower grit numbers (e.g., 80 or 100) are more coarse and suitable for heavy-duty acrylic removal. Higher grit numbers (e.g., 180 or 240) are finer and suitable for refining and smoothing the nail surface.
Choose a Reputable Brand
Lastly, it’s important to choose a nail drill bit from a reputable brand. Reliable brands often offer high-quality, durable, and safe products. Look for online reviews and recommendations from professionals to ensure you are purchasing a reliable nail drill bit.
In summary, choosing the right nail drill bit for removing acrylic nails requires considering the material, shape, grit size, and brand. Remember to prioritize the health and safety of your natural nails while removing acrylic. By selecting the appropriate nail drill bit, you can efficiently and effectively remove acrylic nails without causing damage.
Step-by-step Guide to Using a Nail Drill Bit for Acrylic Nail Removal
Acrylic nails are a popular choice for those who want long, strong, and beautiful nails. However, there may come a time when you need to remove them. While you can opt for the traditional method of soaking your nails in acetone, using a nail drill bit can make the process quicker and more efficient. In this guide, we will walk you through the step-by-step process of removing acrylic nails using a nail drill bit.
Step 1: Gather the Necessary Tools
Before you begin the acrylic nail removal process, gather all the tools you will need. Here’s a list of the essentials:
- Nail drill machine
- Coarse-grit nail drill bit
- Fine-grit nail drill bit
- Cuticle oil
- Nail file
- Lint-free wipes
Make sure you have all these tools ready before proceeding.
Step 2: Prep Your Workspace
Choose a well-lit area where you can comfortably work on your nails. Set up a table or a tray with all the tools you gathered in Step 1. Ensure that you have enough space to maneuver the nail drill machine and your hands.
Step 3: File the Surface of the Acrylic Nails
Using a nail file, gently file the surface of each acrylic nail. This step helps to break the seal and make the removal process easier. Be careful not to file too aggressively, as you don’t want to damage your natural nails.
Step 4: Attach the Coarse-Grit Nail Drill Bit
Choose a coarse-grit nail drill bit and attach it to your nail drill machine. Make sure it is secured properly before proceeding.
Step 5: Start the Nail Drill
Switch on the nail drill machine and adjust the speed to a comfortable level. Begin by using the drill bit on the edges of the acrylic nails, working your way towards the center. Be gentle and take your time to avoid discomfort or damage to your natural nails.
Continue using the nail drill bit until most of the acrylic material is removed. Remember, the goal is to thin out the acrylic, not completely remove it at this stage.
Step 6: Switch to the Fine-Grit Nail Drill Bit
Once you have thinned out the acrylic, it’s time to switch to the fine-grit nail drill bit. This bit will help smooth out any remaining acrylic and give your nails a more natural appearance.
Step 7: Refine the Nails
Using the fine-grit nail drill bit, gently refine the remaining acrylic, paying attention to the cuticle area and any uneven spots. Take your time and work carefully to achieve the desired results.
Step 8: Clean and Moisturize
Once you are satisfied with the removal process, wipe away any dust or debris with a lint-free wipe. Apply cuticle oil or a moisturizing lotion to rehydrate your nails and cuticles.
Step 9: Care for Your Natural Nails
After acrylic nail removal, it’s important to take care of your natural nails. Avoid aggressive filing or picking at the nails as they may be slightly weakened. Moisturize your nails and cuticles regularly and give them time to strengthen and recover.
In summary, using a nail drill bit for acrylic nail removal can be an efficient and effective method. Remember to gather all the necessary tools, prep your workspace, file the surface of the acrylic nails, and use the appropriate nail drill bits. Take your time, be gentle, and prioritize the health of your natural nails throughout the process. With this step-by-step guide, you can confidently remove your acrylic nails at home.
Tips and Tricks for Safe and Effective Acrylic Nail Removal with a Nail Drill Bit
Acrylic nails have become increasingly popular for those looking to enhance the appearance of their natural nails. However, there may come a time when you need to remove them, whether it’s because they have grown out or you simply want to change your look. While there are various methods for acrylic nail removal, one effective and efficient way is to use a nail drill bit. In this section, we will explore some tips and tricks to safely and effectively remove acrylic nails using a nail drill bit.
1. Prep your workspace
Before you begin the acrylic nail removal process, it’s important to prepare your workspace. Ensure that you have a clean and well-lit area to work in. Gather all the necessary tools such as a nail drill with appropriate drill bits, acetone or nail polish remover, a glass bowl, wooden stick or cuticle pusher, and a towel or paper towels for clean-up.
2. Protect your skin and nails
Prior to starting the removal process, it’s essential to protect your skin and natural nails. Apply a thin layer of petroleum jelly or cuticle oil around your nail beds to create a barrier that will prevent the acetone from drying out your skin. You can also use a reusable finger or cuticle guard to protect your skin during the process.
3. File the top layer of the acrylic nails
Using a coarse nail file or a nail drill bit with a low grit, gently file the top layer of the acrylic nails. This will help to break the seal and remove the shine from the nails, allowing the acetone to penetrate more effectively. Be cautious not to file down too much, as this can damage your natural nails.
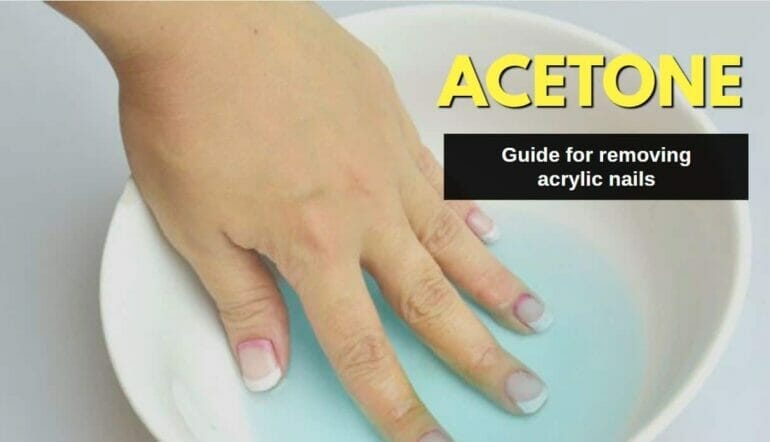
4. Soak the nails in acetone
Fill a glass bowl with enough acetone to fully submerge your fingertips. Place your fingers in the bowl, ensuring the acrylic nails are fully immersed in the acetone. You can cover the bowl with a towel or use a finger soak to retain the heat and enhance the acetone’s effectiveness. Soak your nails for 15-20 minutes to allow the acrylic to soften.
5. Gently remove the softened acrylic
After soaking, the acrylic nails should have softened. Use a wooden stick or a cuticle pusher to gently push off the softened acrylic from your natural nails. Be careful not to apply too much pressure or force, as this can cause damage or pain. If there are stubborn areas that are difficult to remove, you can lightly file them with a nail drill bit.
6. Clean and moisturize
Once you have removed the acrylic nails, it’s essential to clean and moisturize your nails and hands. Wash your hands with warm water and soap to remove any residue. Use a gentle nail brush to clean under your nails. Apply a nourishing cuticle oil or hand cream to hydrate and replenish moisture to your nails and surrounding skin.
7. Give your nails a break
After acrylic nail removal, it’s important to allow your natural nails to breathe and recover. Avoid applying any nail enhancements or polish immediately after removal. Instead, give your nails a break and apply a strengthening nail treatment to promote healthy nail growth.
In summary, removing acrylic nails with a nail drill bit can be a safe and effective method when done correctly. Remember to prep your workspace, protect your skin and nails, file the top layer, soak in acetone, gently remove the softened acrylic, clean and moisturize, and give your nails a break. By following these tips and tricks, you can achieve a successful acrylic nail removal process with a nail drill bit.
FAQs
What nail drill bit should I use to remove acrylic nails?
For removing acrylic nails, it is recommended to use a coarse-grit, barrel-shaped drill bit. This type of bit will efficiently grind down the acrylic material, making the removal process easier and faster.
Conclusion
In conclusion, when it comes to removing acrylic nails, choosing the right nail drill bit is crucial. By using the appropriate drill bit, you can ensure a safe and efficient removal process. Opt for a coarse grit drill bit, such as a carbide or diamond bit, to effectively remove the acrylic without causing damage to your natural nails. Remember to take necessary precautions, such as wearing safety goggles and using a low-speed setting, to minimize the risk of accidents or injury. Additionally, proper technique and patience are key factors in achieving desirable results. So, equip yourself with the right nail drill bit and say goodbye to your acrylic nails with ease!