
Painting your alternator can be a great way to give it a fresh and customized look that matches the style and color scheme of your vehicle.
Before you start, it’s important to properly prep the alternator by cleaning and sanding it to ensure the paint adheres well.
Choose a high-quality automotive paint that is resistant to heat and chemicals, as the alternator can get hot during operation.
Apply the paint in thin and even coats, allowing each coat to dry completely before applying the next for a smooth and professional finish.
Once the paint is dry, consider applying a clear coat to protect the paint and add durability.
Remember to cover any parts that should not be painted, such as electrical connections, to avoid any issues with functionality.
With proper preparation and attention to detail, painting your alternator can be a fun and rewarding DIY project that adds a personal touch to your vehicle’s engine bay.
Choosing the Right Paint for Your Alternator
When it comes to maintaining and improving the appearance of your vehicle’s alternator, choosing the right paint is essential. Not only does a fresh coat of paint give your alternator a polished look, but it also helps protect it from corrosion and other environmental factors. In this section, we will explore the factors to consider when selecting paint for your alternator and provide you with some helpful tips to ensure a successful paint job.
1. Heat Resistance
One of the most important factors to consider when choosing paint for your alternator is its heat resistance. The alternator generates heat during operation, and using paint that can withstand high temperatures is crucial to prevent peeling, cracking, or discoloration. Look for paints specifically designed for automotive applications and have a high-temperature rating to ensure the paint can withstand the heat produced by the alternator.
2. Electrical Conductivity
Another important consideration is the electrical conductivity of the paint. The alternator relies on the flow of electricity to function properly, and using a paint that interferes with the electrical conductivity can lead to performance issues. Look for paints that have low resistance and are specifically formulated for electrical components to ensure uninterrupted electrical flow.
3. Durability and Protection
Since the alternator is located in the engine bay, it is exposed to various elements like moisture, dirt, and chemicals. Choosing a paint that offers durability and protection is crucial to ensure the longevity of your alternator’s appearance. Opt for paints with anti-corrosion properties that can shield the alternator from rust and other corrosive agents.
4. Compatibility
Before applying any paint to your alternator, make sure it is compatible with the materials used in its construction. Different alternators may have different materials such as aluminum, steel, or a combination of both. Consult the manufacturer’s guidelines or seek professional advice to determine the suitable paint options for your specific alternator.
5. Application Method
Lastly, consider the application method when selecting paint for your alternator. Spray painting is the most common and convenient method for painting automotive components. Ensure the paint you choose is suitable for spray application and provides a smooth and even finish. Additionally, consider the drying time and curing process of the paint to ensure proper adhesion and long-lasting results.
Choosing the right paint for your alternator is essential for both its appearance and protection. Consider factors such as heat resistance, electrical conductivity, durability, compatibility, and application method when making your selection. By choosing a high-quality paint that meets these criteria, you can give your alternator a fresh and attractive look while ensuring its longevity and performance.
Preparing the Alternator for Painting
Before you can paint your alternator, it’s important to properly prepare the surface to ensure a smooth and long-lasting finish. This process involves cleaning, sanding, and priming the alternator to create an ideal surface for the paint to adhere to. In this section, we will outline the steps you need to follow to prepare your alternator for painting.
Clean the Surface
The first step in preparing your alternator for painting is to clean the surface thoroughly. Start by removing any dirt, grease, or debris using a degreaser or a mild detergent mixed with water. Use a clean cloth or brush to scrub the surface gently, paying attention to hard-to-reach areas. Rinse off the degreaser or detergent with clean water and allow the alternator to dry completely before proceeding to the next step.
Sand the Alternator
Once the surface is clean and dry, the next step is to sand the alternator. Use a fine-grit sandpaper (around 400-600 grit) to sand the entire surface, including the edges and corners. Sanding helps to remove any existing paint, rust, or imperfections on the surface, and also creates a rough texture for the primer to adhere to.
Make sure to sand in a circular motion, applying even pressure. Be careful not to sand too aggressively, as this can damage the surface. Keep checking the surface as you sand to ensure that it is smooth and free from any imperfections.
Remove Dust and Residue
After sanding, it’s important to remove any dust or residue from the surface of the alternator. Use a clean cloth or compressed air to blow away any loose particles. You can also use a tack cloth or a lint-free cloth dampened with a mild solvent to wipe down the surface and remove any remaining dust or residue. This step is crucial to ensure a clean and smooth surface for the painting process.
Apply Primer
Priming the alternator is an essential step to promote adhesion and enhance the durability of the paint job. Choose a high-quality automotive primer that is suitable for the type of paint you will be using. Apply the primer according to the manufacturer’s instructions, using a spray gun or a brush. Ensure that the primer is applied in thin, even coats, allowing each coat to dry before applying the next one. Multiple coats may be necessary to achieve full coverage and optimal adhesion.
Allow the Primer to Cure
After applying the primer, it’s important to allow it to cure completely before proceeding with the painting process. Check the manufacturer’s instructions for the recommended curing time, as it may vary depending on the type of primer used. During this curing period, avoid touching or handling the primed surface to prevent any damage or smudging.
Inspect and Prepare for Painting
Once the primer is fully cured, inspect the surface of the alternator for any imperfections, such as rough spots or drips. Use a fine-grit sandpaper to lightly sand any areas that require touch-ups or smoothing. After sanding, clean the surface again to remove any dust or residue.
At this point, your alternator is now ready for the painting process. Follow the manufacturer’s instructions for the specific type of paint you will be using, and apply the paint in thin, even coats for a professional-looking finish. Allow each coat to dry fully before applying additional coats, and make sure to protect the painted surface from any potential damage while it cures.
In summary, preparing the alternator for painting involves cleaning the surface, sanding to remove imperfections, applying primer for adhesion, allowing the primer to cure, inspecting and preparing the surface for painting. By following these steps, you can achieve a beautifully painted alternator that will enhance the overall appearance of your vehicle.
Step-by-Step Guide to Painting the Alternator
If you want to give your car’s alternator a fresh new look, painting it can be a great DIY project. Not only will it give your engine bay a customized appearance, but it can also help protect the alternator from rust and corrosion. In this section, we will provide you with a step-by-step guide on how to paint the alternator.
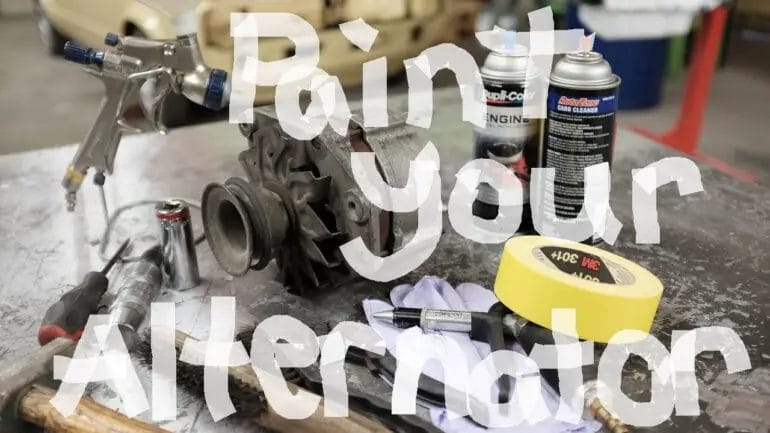
Materials Needed:
- Painter’s tape
- Sandpaper (varying grits)
- Primer
- Spray paint (color of your choice)
- Clear coat spray
- Masking paper or newspaper
- Lint-free cloth
- Rubbing alcohol
Step 1: Preparation
Start by disconnecting the negative terminal of your car’s battery to prevent any electrical mishaps. Then, locate the alternator and carefully remove it from the engine bay, following the instructions provided in your car’s manual.
Step 2: Cleaning
Before painting, it’s essential to clean the surface of the alternator thoroughly. Use a lint-free cloth soaked in rubbing alcohol to remove any dirt, grease, or oil that may be present. This will ensure that the paint adheres properly.
Step 3: Sanding
Using sandpaper of varying grits, start sanding the surface of the alternator. This will help remove any existing paint, rust, or imperfections. Start with a coarse grit sandpaper and gradually move to finer grits for a smooth finish. Make sure to wipe away any debris with a clean cloth after sanding.
Step 4: Masking
Take painter’s tape and masking paper or newspaper to cover any areas of the alternator that you do not want to be painted. This includes electrical connectors, wiring, and other sensitive parts. Ensure that the tape is securely in place to prevent paint from seeping through.
Step 5: Priming
Apply a coat of primer to the sanded surface of the alternator. Primer helps create a smooth base for the paint and enhances its durability. Follow the instructions on the primer can for proper application techniques and drying times. Allow the primer to dry completely.
Step 6: Painting
Once the primer is dry, it’s time to apply the spray paint. Hold the can approximately 8-12 inches away from the alternator and apply light, even coats. Avoid spraying too much paint at once to prevent drips or uneven coverage. Allow each coat to dry before applying the next. Repeat this process until you achieve the desired color and finish.
Step 7: Clear Coat
For added protection and a glossy finish, apply a clear coat spray to the painted alternator. This will help seal the paint and provide resistance against chipping and fading. Follow the instructions on the clear coat can for application and drying times. Allow the clear coat to dry completely before handling.
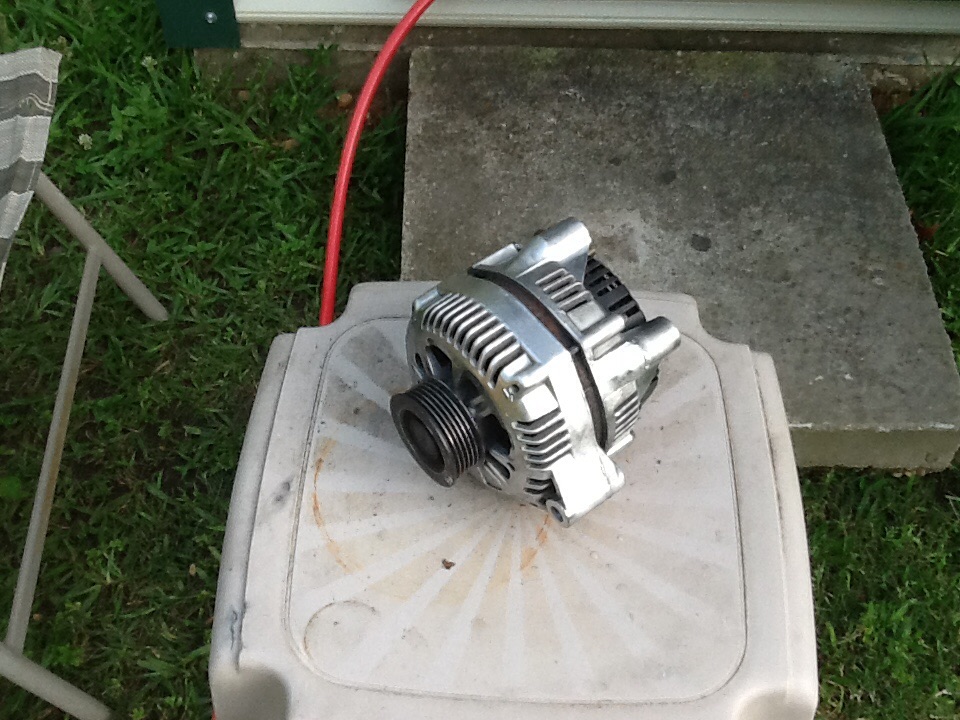
Step 8: Reinstallation
Once the paint and clear coat are fully dry, carefully remove the masking tape and reinstall the alternator back into the engine bay. Reconnect the electrical connectors and wiring, ensuring everything is securely in place. Finally, reattach the negative terminal of your car’s battery.
In summary, painting your alternator is an excellent way to give your car a customized look. By following these step-by-step instructions, you can achieve a professional-looking finish and protect your alternator from rust and corrosion. Happy painting!
Tips for Properly Curing the Paint on the Alternator
When it comes to painting the alternator of your vehicle, proper curing is essential to ensure a durable and long-lasting finish. Curing refers to the process of allowing the paint to fully dry and harden, creating a strong bond with the surface. If not properly cured, the paint may peel, chip, or not adhere properly, affecting the overall appearance and protection of the alternator. In this section, we will discuss some useful tips for properly curing the paint on the alternator.
1. Clean and Prepare the Surface
Before applying any paint, it is crucial to clean and prepare the surface of the alternator. Use a mild detergent and water solution to remove any dirt, grease, or grime. Rinse thoroughly and allow the surface to dry completely. It is recommended to use a lint-free cloth or towels for drying to prevent any fibers from sticking to the surface.
2. Choose the Right Paint
Selecting the appropriate paint for your alternator is vital for achieving a successful and long-lasting finish. Look for paints specifically designed for automotive applications, such as engine enamel or high-temperature paint. These paints are formulated to withstand the heat and conditions under the hood of your vehicle. Consider factors such as color, finish, and compatibility with the alternator material.
3. Apply Multiple Thin Coats
Instead of applying one thick coat of paint, it is recommended to apply multiple thin coats. Thin coats dry faster and have a better chance of curing properly. Allow each coat to dry completely before applying the next one. Follow the manufacturer’s instructions regarding the recommended drying time between coats.
4. Allow Sufficient Drying Time
Proper curing requires sufficient drying time. It is important to allow the painted alternator to dry in a well-ventilated area, free from dust and debris. This helps prevent contaminants from sticking to the surface and affecting the curing process. Follow the drying time specified by the paint manufacturer, which may vary depending on the type of paint used.
5. Use Heat or Oven Curing (If Recommended)
Some automotive paints may require additional heat or oven curing to achieve optimal results. If the paint manufacturer suggests heat or oven curing, follow the instructions carefully. This process helps accelerate the curing time and enhances the durability of the paint finish. Use caution and follow all safety guidelines when using heat or oven curing methods.
6. Handle with Care After Curing
Once the paint is fully cured, handle the alternator with care to prevent any scratches or damage to the finish. Avoid using abrasive cleaners or rough materials when cleaning the surface. Instead, use a gentle cleaner and a soft cloth to maintain the appearance of the painted alternator.
By following these tips for properly curing the paint on the alternator, you can achieve a professional-looking finish that withstands the demands of the engine bay. Proper curing ensures the longevity of the paint and protects the alternator from rust, corrosion, and other environmental factors. Take your time, follow the instructions, and enjoy the satisfying results of a well-painted alternator.
Maintaining the Painted Alternator for Longevity
When it comes to the longevity of your vehicle’s alternator, regular maintenance is crucial. The alternator plays a vital role in keeping your vehicle’s electrical system functioning properly, and one of the key aspects of maintenance is ensuring that the painted surface of the alternator remains in good condition. In this section, we will discuss the importance of maintaining the painted alternator and some tips to help you prolong its lifespan.
Why is maintaining the painted alternator important?
The painted surface of the alternator serves as a protective barrier against various environmental factors that can cause damage over time. It shields the internal components of the alternator from moisture, dirt, and other contaminants that can lead to corrosion and other issues. By maintaining the integrity of the paint, you can extend the life of your alternator and avoid costly repairs or replacements.
Tips for maintaining the painted alternator
Here are some useful tips to help you keep the painted surface of your alternator in excellent condition:
- Regular cleaning: To prevent dirt and grime from accumulating on the painted surface, it is essential to clean your alternator regularly. Use a mild detergent and a soft cloth or sponge to gently wipe away any dirt or debris. Avoid using abrasive materials or harsh cleaning agents that could damage the paint.
- Avoid high-pressure washing: While cleaning is essential, it’s important to note that high-pressure washing can force water into the alternator and cause damage. Stick to gentle cleaning methods and avoid spraying water directly onto the alternator.
- Inspect for damage: Regularly inspect the painted surface of your alternator for any signs of damage, such as scratches, chips, or peeling paint. If you notice any issues, it’s crucial to address them promptly to prevent further deterioration.
- Touch-up paint: If you do come across minor scratches or chips on the painted surface, consider using touch-up paint to repair the damage. This will help maintain the protective coating and prevent any potential corrosion.
- Protective coating: Applying a high-quality protective coating or sealant specifically designed for automotive paint can provide an extra layer of protection to the painted surface of your alternator. This can help shield it from UV rays, moisture, and other harmful elements.
- Keep the engine compartment clean: Alongside maintaining the alternator’s painted surface, it’s important to keep the entire engine compartment clean. A clean engine compartment minimizes the risk of debris or contaminants reaching the alternator and causing damage.
Summary
Maintaining the painted alternator is essential for ensuring the longevity of this crucial component of your vehicle’s electrical system. By regularly cleaning the painted surface, avoiding high-pressure washing, inspecting for damage, using touch-up paint when necessary, applying a protective coating, and keeping the engine compartment clean, you can maximize the lifespan of your alternator and avoid costly repairs. Taking these preventive measures will help keep your vehicle running smoothly and efficiently for years to come.
Frequently Asked Questions (FAQs)
1. How do I paint an alternator?
To paint an alternator, start by cleaning the surface thoroughly to remove any dirt and oil. Use masking tape to cover any parts you don’t want to paint. Apply a primer coat to help the paint adhere, and then follow with a few layers of paint, allowing each coat to dry before applying the next. Finish with a clear coat for added protection.
2. What type of paint should I use for an alternator?
It’s best to use a high-temperature paint specifically designed for automotive applications. Look for paint that can withstand the heat generated by the alternator to prevent peeling and fading. Additionally, choose a paint that is compatible with your alternator’s material, such as enamel paint for metal surfaces.
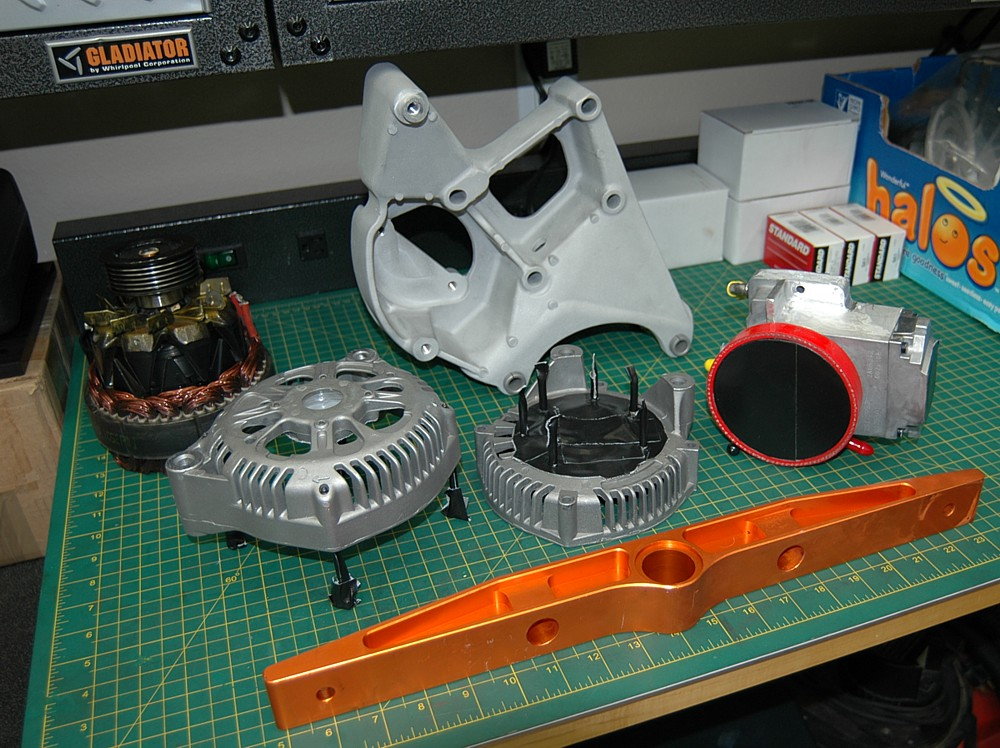
3. Can I paint the internal components of an alternator?
No, it is not recommended to paint the internal components of an alternator. The paint can interfere with the electrical connections and affect the alternator’s performance. It’s best to focus on painting the external surfaces while leaving the internal parts untouched.
Conclusion
In conclusion, learning how to paint an alternator can be a great way to add a personal touch and enhance the aesthetic of your vehicle. By following the steps mentioned in this guide, you can successfully transform your alternator into a unique and eye-catching piece. Remember to properly clean and prepare the surface, choose a suitable primer and paint, and apply thin and even coats for a professional finish.
Painting your alternator not only allows you to customize its look but also helps protect it from rust and corrosion. It is important to note that while painting an alternator can be a fun DIY project, it is essential to take proper safety precautions such as wearing protective gear and working in a well-ventilated area.
With a little time and effort, you can give your alternator a fresh and vibrant appearance that reflects your personal style and adds a unique touch to your vehicle’s engine bay.