
If you’re tired of acrylic nails and looking for a new alternative, you might be wondering if you can make the switch to dip nails. The good news is that yes, you can transition from acrylic to dip nails seamlessly. Dip nails offer a durable and long-lasting alternative to acrylics, with a simpler application process and minimal damage to your natural nails. In this article, we’ll explore how you can smoothly transition from acrylic to dip nails, giving your manicure a fresh and trendy update.
Acrylic Nails vs. Dip Nails: Understanding the Difference
If you’re someone who loves to keep their nails looking on point, you’ve probably come across the terms “acrylic nails” and “dip nails.” These are two popular nail enhancement techniques that can give you beautiful, long-lasting nails. However, they differ in terms of their application process, durability, and maintenance. In this section, we will delve into the details and help you understand the difference between acrylic nails and dip nails.
Acrylic Nails
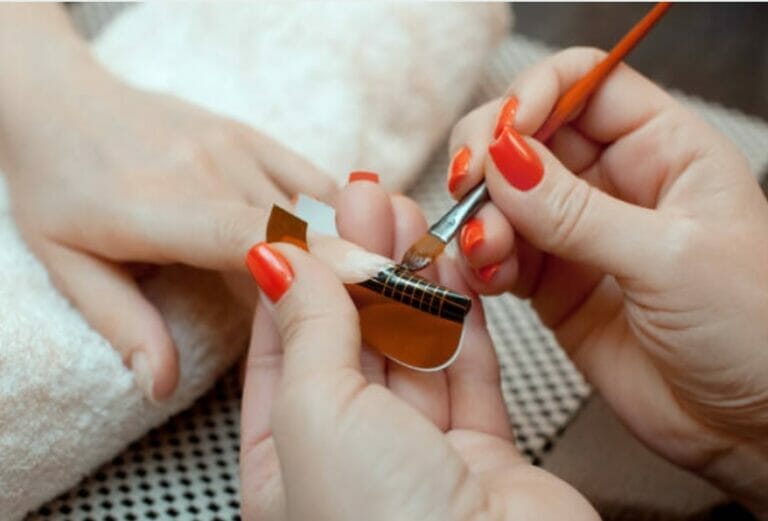
Acrylic nails are the most common and traditional method of nail extension. They are made by combining a liquid monomer and a powdered polymer to create a paste-like substance that can be applied to the natural nail or nail tip. The mixture then hardens when exposed to air, creating a strong and durable artificial nail. Acrylic nails can be shaped and filed to achieve the desired length and shape.
One of the advantages of acrylic nails is their strength and durability. They can withstand everyday wear and tear, making them an ideal choice for those with weak or brittle nails. Acrylic nails also offer a wide range of design possibilities, as they can be painted, polished, or adorned with nail art.
However, acrylic nails require regular maintenance. They need to be filled every few weeks as your natural nails grow, and they may require occasional repairs if they chip or break. Additionally, the application process involves the use of strong chemicals that can be harsh on the nail bed and cuticles.
Dip Nails
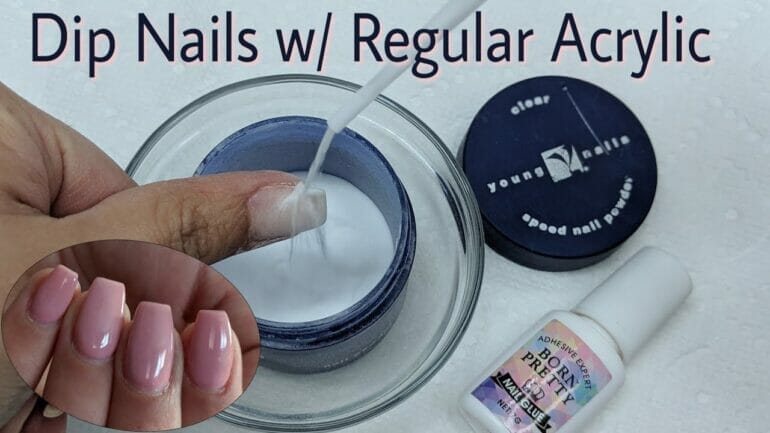
Dip nails, also known as SNS nails or powder nails, have gained popularity in recent years. This technique involves applying a base coat, dipping the nails into a pigmented powder, and seal it with a topcoat. The powder bonds to the nails, creating a hard and durable layer.
One of the main advantages of dip nails is that they are odorless and do not require the use of liquid monomers or harsh chemicals. This makes them a healthier alternative for those with sensitive nails or allergies. Dip nails also have a more natural look and feel compared to acrylic nails.
Dip nails generally require less maintenance than acrylic nails. They do not need to be filled as frequently, as the powder layer is thicker and can withstand more growth. However, if a dip nail does chip or break, it may be more challenging to repair compared to acrylic nails.
Which One Is Right for You?
Choosing between acrylic nails and dip nails ultimately depends on your preferences and lifestyle. If you prefer a strong and durable nail enhancement with unlimited design options, acrylic nails may be the better choice for you. However, if you prioritize a healthier and more natural nail enhancement with less frequent maintenance, dip nails could be the ideal option.
It’s important to consult with a professional nail technician who can assess the condition of your natural nails and help you make an informed decision. They can also provide guidance on proper nail care and maintenance to ensure the longevity of your chosen nail enhancement technique.
In summary, acrylic nails and dip nails differ in terms of their application process, durability, and maintenance. Understanding these differences will help you choose the nail enhancement technique that best suits your needs and preferences.
Transitioning from Acrylic Nails to Dip Nails: Step-by-Step Guide
If you’re a fan of long and durable nails, you’ve probably tried acrylic nails at some point. However, if you’re looking for a change or want to explore other nail enhancement options, dip nails can be a great alternative. Transitioning from acrylic nails to dip nails is relatively straightforward and can be done at home with the right tools and techniques. In this section, we’ll provide you with a step-by-step guide to help you make the switch smoothly.
Step 1: Remove Acrylic Nails
The first step in transitioning from acrylic nails to dip nails is to remove your existing acrylic nails. There are two common methods to remove acrylic nails at home:
- Acetone Soak: Fill a bowl with acetone and place your hands in it for about 15-20 minutes, allowing the acetone to soften the acrylic. Gently scrape off the acrylic using a cuticle pusher or an orangewood stick. Be patient and avoid forcefully pulling or prying the acrylic nails, as this may damage your natural nails.
- Filing Method: If you prefer not to use acetone, you can file down the acrylic nails using a coarse nail file. Start filing from the top layer of the acrylic until you reach the natural nail bed. This method requires more time and effort but can be a good option for those who want to avoid acetone.
Step 2: Prep Your Natural Nails
Once your acrylic nails are removed, it’s essential to properly prep your natural nails before applying dip powder. Follow these steps to ensure a clean and healthy surface:
- Trim and Shape: Trim your nails to your desired length and shape them using a nail file. Whether you prefer square, oval, or coffin-shaped nails, make sure they are all uniform in size.
- Buff: Gently buff the surface of your nails using a buffer block to remove any remaining debris or rough edges. This step helps the dip powder adhere better to your natural nails.
- Cuticle Care: Push back your cuticles using a cuticle pusher or an orangewood stick. Be gentle and avoid cutting or trimming your cuticles as it may lead to infection.
- Dehydrate: Cleanse the nail surface using a nail dehydrator or rubbing alcohol to remove any oils or residue. This step ensures better adhesion and longer-lasting results.
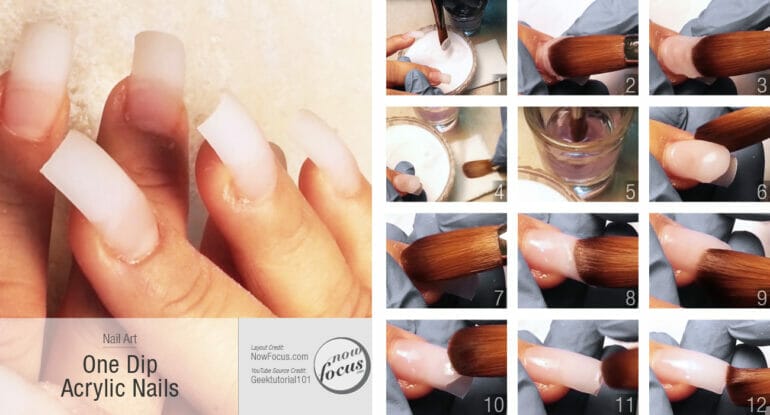
Step 3: Apply Base Coat and Dip Powder
With your natural nails prepped, it’s time to apply the base coat and dip powder. Follow these instructions:
- Apply Base Coat: Apply a thin layer of adhesive base coat to each nail, making sure to avoid the cuticles. The base coat acts as a foundation for the dip powder and helps it adhere to the nails.
- Dip Nails: Dip your nails into the chosen dip powder color at a 45-degree angle. Gently tap off the excess powder and repeat the process for each nail.
- Repeat and Seal: Apply a second coat of base coat and dip the nails into the powder again. This step helps build thickness and ensures a longer-lasting manicure. Seal the dip powder with a final layer of base coat.
Step 4: Shape and Buff
Once the dip powder has fully dried, it’s time to shape and buff your nails to perfection:
- Shape: Use a nail file to shape your nails to your desired length and shape. Be gentle and consistent to achieve a symmetrical look.
- Buff: Gently buff the surface of the nails using a buffer block to smooth out any imperfections or unevenness. This step gives your nails a polished and professional finish.
Congratulations! You’ve successfully transitioned from acrylic nails to dip nails. Remember to moisturize your nails and cuticles regularly to keep them hydrated and healthy. Enjoy your new dip manicure and experiment with different colors and designs!
Pros and Cons of Switching from Acrylic to Dip Nails
Switching from acrylic nails to dip nails has become a popular choice among nail enthusiasts. Both acrylic and dip nails offer their own unique benefits and drawbacks. In this section, we will explore the pros and cons of switching from acrylic to dip nails to help you make an informed decision.
Pros
1. Healthier for your nails
One of the main advantages of dip nails is that they are considered to be healthier for your natural nails compared to acrylic nails. Acrylic nails require the use of strong chemicals and excessive filing, which can weaken and damage your natural nails over time. On the other hand, dip nails are a non-toxic alternative that do not require harsh chemicals or excessive filing, making them a more gentle option for your nails.
2. Long-lasting
Dip nails are known for their durability and longevity. The dip powder used in the process is designed to adhere to the nails and provide a strong and long-lasting finish. This means that you can enjoy beautiful and chip-free nails for several weeks without the need for frequent touch-ups.
3. Quick and easy application
Switching to dip nails can save you time during your salon visits. The application process for dip nails is relatively quick and straightforward. After applying a base coat, the nails are dipped into the powder, followed by a sealant and top coat. The process does not involve the use of liquid monomers or the need for sculpting, making it a simpler and faster alternative to acrylic nails.
4. Wide range of colors and finishes
Dip nails offer a vast selection of colors and finishes to choose from. Whether you prefer a natural look, bold and vibrant colors, or trendy nail art designs, you can find a dip powder that suits your style. The versatility of dip nails allows you to experiment with different shades and finishes without limitations.
Cons
1. Limited length and shape options
Compared to acrylic nails, dip nails have some limitations when it comes to length and shape. As dip nails rely on a powder-dipping technique, it can be challenging to achieve extremely long or pointed nail shapes. If you prefer more intricate nail designs or dramatic lengths, acrylic nails might be a better choice for you.
2. Requires professional application
While dip nails can be applied at home, achieving salon-quality results often requires professional application. The process involves precise dipping and sealing techniques to ensure a smooth and even finish. If you are not confident in your nail skills or do not have access to professional-grade products, it is recommended to visit a salon to achieve the best results.
3. Potential for product contamination
Unlike acrylic nails, dip powders are exposed to the risk of product contamination. When multiple clients use the same powder jar at a salon, there is a chance of bacteria or fungus transmission. To minimize the risk, it is essential to choose salons that adhere to strict hygiene practices and use disposable application tools.
4. Removal process
Removing dip nails can be more challenging compared to acrylic nails. The removal process involves soaking the nails in acetone for an extended period to dissolve the powder layers. This can be time-consuming and may require professional assistance to ensure proper removal without damaging the natural nails.
Summary
Switching from acrylic to dip nails comes with its own set of pros and cons. Dip nails offer a healthier and long-lasting alternative, with quick and easy application and a wide range of color options. However, they have some limitations in terms of length and shape, require professional application for best results, and can be more challenging to remove. Consider these factors when deciding which nail enhancement option is right for you.
Tips for a Successful Conversion from Acrylic to Dip Nails
If you’ve been using acrylic nails and are considering making the switch to dip nails, you’re in for a treat. Dip nails, also known as SNS nails, are gaining popularity for their durability, long-lasting effects, and easy application process. However, transitioning from acrylic to dip nails may require some adjustments. In this section, we will provide you with some tips to ensure a successful conversion from acrylic to dip nails.
1. Remove Acrylic Nails Properly
Before you can start applying dip nails, it’s important to remove your acrylic nails correctly. Improper removal can damage your natural nails and make the transition more challenging. We recommend visiting a professional nail technician who can safely remove your acrylic nails using the appropriate techniques.
2. Prepare Your Natural Nails
After removing your acrylic nails, it’s crucial to prepare your natural nails for the application of dip nails. Start by gently filing the surface of your nails to remove any leftover acrylic residue. Next, shape your nails to your desired length and push back your cuticles for a clean look. Make sure to sanitize your nails to remove any oils or debris that may interfere with the dip nail application.
3. Invest in High-Quality Dip Products
To achieve the best results, it’s essential to invest in high-quality dip products. Look for reputable brands that offer a wide range of dip powders in various shades and finishes. Additionally, ensure that the products you choose are formulated with safe and non-toxic ingredients. This will not only contribute to the longevity of your dip nails but also protect the health of your natural nails.
4. Follow the Dip Nail Application Process
Each dip nail system may have its specific application process, so be sure to follow the instructions provided by the brand you choose. Generally, the process involves applying a base coat, dipping your nails into the powder, and sealing it with a top coat. Take your time during the application process to ensure even and smooth coverage. If you’re unsure about any step, consult tutorials or seek guidance from a professional nail technician.
5. Take Care of Your Dip Nails
Maintaining your dip nails is essential for their longevity and appearance. Avoid exposing your nails to harsh chemicals, such as household cleaners or acetone-based products, as these can weaken the dip powder. Wear gloves when engaging in activities that may cause damage to your nails, such as gardening or cleaning. Additionally, regularly apply cuticle oil to keep your nails and surrounding skin hydrated.
6. Schedule Regular Maintenance
Like any nail enhancement, dip nails require regular maintenance to keep them looking their best. Schedule regular appointments with a nail technician to have your dip nails filled or touched up. This will help prevent lifting, chipping, or breakage and ensure that your dip nails stay intact for an extended period.
In summary, transitioning from acrylic to dip nails can be a straightforward process with the right techniques and products. Properly removing your acrylic nails, preparing your natural nails, investing in high-quality dip products, following the application process, taking care of your dip nails, and scheduling regular maintenance are all vital steps for a successful conversion. By following these tips, you can enjoy the benefits of dip nails and achieve beautiful, long-lasting manicures.
Maintaining and Caring for Dip Nails: Dos and Don’ts
Dip nails are a popular choice for those looking for long-lasting and durable manicures. This type of nail enhancement involves applying layers of colored powder to the nails, creating a strong and beautiful finish that can last for weeks. However, like any other manicure, dip nails require proper maintenance and care to ensure they stay looking their best. In this section, we will discuss the dos and don’ts of maintaining and caring for dip nails.
Do:
- Keep your nails hydrated: Moisturizing your nails and cuticles is essential for maintaining the health and longevity of your dip nails. Use cuticle oil or hand cream regularly to keep your nails hydrated and prevent them from becoming brittle.
- Wear gloves when doing household chores: Harsh chemicals and detergents can damage your dip nails. Protect them by wearing gloves when you’re cleaning, washing dishes, or doing any other household chores that involve contact with water or cleaning products.
- Get regular maintenance: Dip nails grow out over time, so it’s important to get regular maintenance appointments at your nail salon. This typically involves filling in the growth area and applying a new layer of dip powder, ensuring that your nails remain strong and intact.
- Use a soft nail brush: To keep your dip nails clean and free from dirt and debris, gently brush them with a soft nail brush. This will help prevent any buildup or staining, keeping your nails looking fresh and vibrant.
- Protect your nails from excessive heat: Excessive heat can cause dip nails to lift or weaken. Avoid exposing your nails to hot water, saunas, or other high-temperature environments. If you use heat styling tools, such as curling irons or straighteners, make sure to use heat protectant gloves to shield your dip nails.
Don’t:
- Bite or pick at your nails: Avoid the temptation to bite or pick at your dip nails. Not only can this damage the nail itself, but it can also cause the dip powder to lift or chip prematurely. If you have a habit of biting your nails, consider using a bitter-tasting nail polish specifically designed to deter nail-biting.
- Use your nails as tools: While dip nails are strong, they are not indestructible. Avoid using your nails as tools to open packages, scrape off stickers, or perform other tasks that can put stress on the nails. Instead, use appropriate tools to avoid any damage.
- Expose your nails to harsh chemicals: Certain chemicals, such as acetone, can weaken the bond between the dip powder and your natural nails. Avoid exposing your nails to harsh chemicals or acetone-based products, as they can cause lifting or damage to your dip nails.
- Over-file your nails: It’s important to maintain the shape and length of your dip nails, but be careful not to over-file them. Over-filing can weaken the structure of the nail and lead to breakage or lifting. Use a gentle touch and a fine-grit file when shaping your nails.
- Neglect proper removal: When it’s time to remove your dip nails, it’s crucial to do it correctly to avoid damage to your natural nails. Follow the recommended removal process, which typically involves soaking your nails in acetone and gently pushing off the softened dip powder. Avoid forcefully scraping or peeling off the dip powder, as this can cause significant damage.
In summary, maintaining and caring for dip nails involves keeping them hydrated, wearing gloves during household chores, getting regular maintenance appointments, using a soft nail brush, and protecting them from excessive heat. On the other hand, it’s important to avoid biting or picking at your nails, using them as tools, exposing them to harsh chemicals, over-filing, and neglecting proper removal. By following these dos and don’ts, you can ensure that your dip nails stay beautiful and intact for an extended period.
FAQs
Can you transition from acrylic nails to dip nails?
Yes, you can transition from acrylic nails to dip nails. You will need to remove the existing acrylic nails by filing or soaking them off. Once the acrylic is removed, you can apply the dip powder on your natural nails following the dip nail application process.
How long do dip nails last?
Dip nails can last for up to 3-4 weeks with proper care. However, the longevity of dip nails also depends on factors like the growth of your natural nails and how well you maintain them. Regular maintenance and avoiding harsh activities can help extend the lifespan of your dip nails.
Can you do dip nails at home?
Yes, you can do dip nails at home. Dip nail kits are available for purchase that include all the necessary products and instructions for applying dip powder. With proper preparation and following the steps correctly, you can achieve salon-quality dip nails at home.
Conclusion:
In conclusion, transitioning from acrylic nails to dip nails is a popular trend in the beauty industry. By following a few simple steps, you can easily switch from acrylic to dip nails. The dip powder system provides a durable, long-lasting, and natural-looking alternative to traditional acrylic nails. Not only does it offer a wide range of colors and finishes, but it also requires less maintenance and is gentler on your nails. Whether you’re a nail enthusiast or a professional nail technician, exploring the world of dip nails can elevate your nail game and give you a flawless manicure that lasts.