
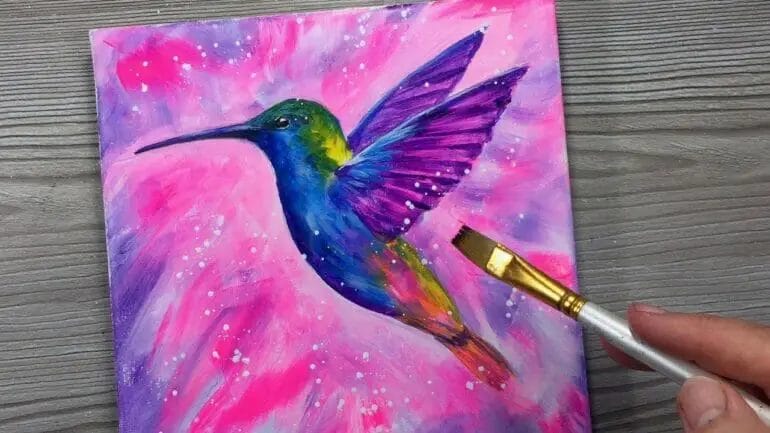
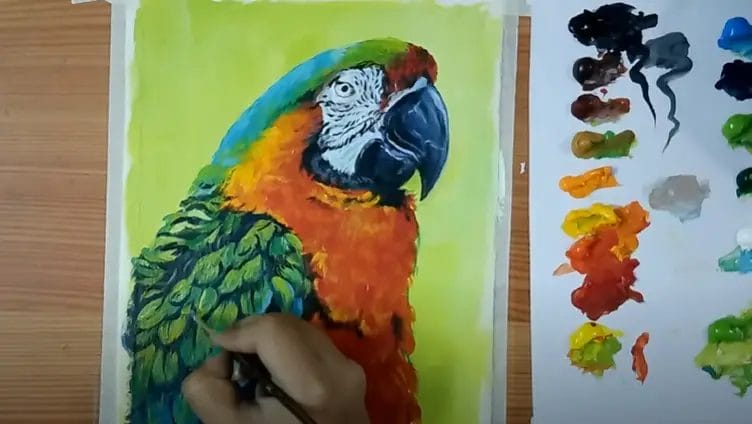
Want to bring your bird paintings to life with vibrant colors and stunning details? Look no further than acrylics! Painting birds with acrylics allows you to capture their beauty and grace, showcasing their feathers and unique features.
With the versatility of acrylic paints, you can create textured feathers, realistic eyes, and intricate patterns in your bird artworks. Whether you’re a beginner or an experienced artist, this guide will take you through the step-by-step process of painting birds with acrylics, from choosing the right reference photo to adding the final touches.
Discover the secrets to mastering bird paintings with acrylics and unlock your creativity. Let’s dive in and create stunning avian masterpieces!

Mastering the Basics: Techniques for Painting Feathers with Acrylics
Feathers are a fascinating subject to paint, with their delicate texture and vibrant colors. If you’re an artist who wants to master the technique of painting feathers with acrylics, this guide is for you. In this section, we will explore various techniques and tips that will help you bring feathers to life on canvas.
Gathering the Right Materials
Before diving into painting feathers, it’s essential to gather the right materials. Here are the items you’ll need:
- Acrylic paints
- Paintbrushes of various sizes
- Canvas or painting surface
- Palette or mixing tray
- Water container
- Pencil or sketching tool
- Reference image of feathers
Having the right materials will ensure that you have everything you need to successfully paint feathers with acrylics.
Observation and Sketching
Observation is key when it comes to painting feathers realistically. Take time to study the structure and patterns of different types of feathers. Look at the intricate details, such as the barbs and barbules.
Start by sketching the basic shape of the feather on your canvas using a pencil or sketching tool. This initial sketch will serve as a guideline for your painting.
Layering Techniques
Layering is an essential technique when it comes to achieving the depth and dimensionality of feathers. Start by applying a base layer of paint in the lightest color of the feather. Gradually build up the layers using different shades of paint to create shadows and highlights.
Use thin, transparent layers of paint to mimic the translucent quality of feathers. This technique will give your artwork a realistic and three-dimensional appearance.
Dry Brushing
Dry brushing is a technique that can add texture and detail to your feather paintings. Load a small amount of paint onto a dry brush and then remove most of it by wiping it on a paper towel. Lightly drag the brush across the canvas, allowing the bristles to pick up the texture of the surface. This technique will create a feather-like texture.
Blending Colors
Feathers often have a gradient of colors, especially in areas where light hits them. To achieve this effect, practice blending colors seamlessly. Start by applying the lighter color as a base and then gradually add darker shades. Use a clean brush or a blending tool to smooth out the transitions between colors.
Adding Details
Details such as fine lines, intricate patterns, and small barbs can bring your feather painting to life. Use a thin brush or a fine-tipped paint pen to add these details with precision. Pay attention to the direction of the lines to capture the natural flow and movement of feathers.
Experimenting and Practice
As with any art form, practice is key to mastering the technique of painting feathers. Experiment with different brushstrokes, color combinations, and techniques to find your unique style. Don’t be afraid to make mistakes and learn from them. With time and practice, you’ll become more confident in capturing the beauty of feathers with acrylics.
In summary, painting feathers with acrylics requires observation, layering techniques, dry brushing, color blending, adding details, and lots of practice. With the right materials and a willingness to experiment, you can master the art of painting feathers and create stunning artworks that showcase the beauty and intricacy of these natural wonders.
Capturing Realistic Bird Anatomy in Your Acrylic Paintings
When creating realistic bird paintings with acrylics, accurately capturing the bird’s anatomy is crucial. By understanding the structure and proportions of different bird species, you can bring life and authenticity to your artwork. In this section, we will explore the key aspects of bird anatomy that you should focus on when painting with acrylics.
1. Understanding the Skeletal Structure
Before starting a bird painting, it is essential to have a basic understanding of avian skeletal structure. Birds have lightweight, hollow bones designed for flight. Their main skeletal components include the skull, vertebrae, wings, and legs. Familiarize yourself with the skeletal anatomy of the bird species you are painting to ensure accurate representation.
2. Mastering Feather Texture and Patterns
Feathers contribute significantly to a bird’s appearance and can vary in texture and pattern. Learning to depict feathers realistically is essential for capturing the essence of a bird in your acrylic paintings. Study different feather types and their arrangements on the bird’s body. Acrylic paints can simulate the texture and shine of feathers beautifully when applied with skill and precision.
3. Proportions and Body Shape
Understanding the proportions and body shape of the bird you are painting is vital for achieving realism. Pay attention to the size of the head in relation to the body, the length and shape of the wings and tail, and the overall body proportions. Observing and measuring these aspects accurately will help you achieve a lifelike representation of the bird’s anatomy.
4. Capturing Facial Features and Eyes
The face and eyes are often the focal point of bird paintings. Pay close attention to the shape, size, and placement of the eyes, as they can convey the bird’s emotions and add depth to your artwork. Study the beaks and facial features specific to the bird species you are painting to ensure accurate representation.
5. Understanding Wing and Feather Positions
Wings play a significant role in a bird’s anatomy. Understanding how they fold, extend, and interact with the body is crucial for creating dynamic and realistic bird paintings. Study the different positions and angles in which the wings can be portrayed and consider the underlying skeletal structure when depicting feather arrangement.
6. Adding Depth and Dimension
Acrylic paints allow for layering, which is essential for creating depth and dimension in your bird paintings. Use lighter and darker shades to add highlights and shadows, giving your artwork a three-dimensional effect. Pay attention to the direction of light sources to create realistic lighting and shading in your paintings.
7. Reference Photos and Observational Drawing
When striving for realism in bird anatomy, using reference photos and practicing observational drawing is highly recommended. Study photographs of the bird species you are painting from different angles and in various positions. Additionally, practice sketching birds from life to develop a keen eye for capturing their anatomy accurately.
By paying attention to these key aspects of bird anatomy and practicing your acrylic painting techniques, you can capture the beauty and realism of birds in your artwork. Remember to observe, study, and practice regularly to refine your skills and create stunning bird paintings that showcase the intricate details of avian anatomy.
Exploring Different Bird Species: Painting Birds of Prey with Acrylics
Birds of prey, also known as raptors, are majestic creatures that have captured the fascination of artists and nature enthusiasts alike. Their unique characteristics, captivating flight patterns, and fierce hunting abilities make them a popular subject for artists looking to explore the beauty of the natural world through their artwork. In this section, we will delve into the world of painting birds of prey with acrylics, providing you with tips and techniques to bring these magnificent creatures to life on your canvas.
Choosing the Right Reference Material
Before diving into the painting process, it is essential to have a good reference material to work with. Observing the birds of prey in their natural habitats or studying high-quality photographs can provide valuable insights into their anatomy, plumage, and unique features. Look for images that showcase the bird’s distinctive characteristics, such as their sharp beaks, piercing eyes, and intricate feather patterns.
Additionally, it is crucial to consider the bird species you wish to paint. Birds of prey encompass a wide range of species, including eagles, hawks, falcons, and owls. Each species has its own distinct traits and coloring, so it is essential to choose a reference that accurately represents the specific bird you want to portray.
Gathering Your Materials
Once you have chosen your reference material, it’s time to gather your painting supplies. Acrylic paints are a versatile medium, allowing you to create vibrant colors and build up layers of texture. Here is a list of materials you will need:
- Acrylic paints in a variety of colors
- Artist-quality brushes in different sizes
- Canvas or painting surface
- Palette for mixing colors
- Water container
- Palette knife (optional)
- Masking tape or painter’s tape
Having these materials ready will ensure a smooth painting process and enable you to achieve the desired effects in your artwork.
Sketching the Composition
Before applying paint to the canvas, it is helpful to sketch a rough outline of your composition. This initial sketch will serve as a guide for placing the bird in the desired position and capturing its proportions accurately. Use a pencil or a light wash of diluted acrylic paint to create the preliminary sketch.
Pay close attention to the bird’s body posture, wingspan, and facial expression, as these elements play a significant role in conveying the bird’s character and mood in your painting.
Building Layers with Acrylic Paints
Acrylic paints are known for their fast-drying nature, making them an excellent choice for building layers of colors. Start by blocking in the base colors of the bird, using a larger brush to cover larger areas and a smaller brush for more intricate details.
As you progress, gradually add layers of paint to capture the textures and patterns of the bird’s feathers. Pay attention to the interplay of light and shadow, using lighter shades for areas that catch the light and darker tones for areas in shadow.
Utilize different brush techniques, such as dry brushing or glazing, to create depth and texture in your painting. Experiment with blending colors, creating soft transitions between different hues to achieve a realistic representation of the bird’s plumage.
Adding Details and Refining the Painting
Once the base layers are complete, it’s time to add finer details to your painting. Use smaller brushes to capture the intricate features of the bird, such as its eyes, beak, and talons. Pay attention to the specific characteristics of the bird species you are painting, as these details can greatly enhance the realism of your artwork.
Take your time during this stage, as the small details can make a significant impact on the overall quality of your painting. Step back frequently, observe your work from a distance, and make any necessary adjustments to ensure accuracy and harmony in your composition.
Final Thoughts
Painting birds of prey with acrylics offers a wonderful opportunity to explore the beauty and intricacies of these magnificent creatures. By choosing the right reference material, gathering the necessary supplies, and employing various techniques, you can create captivating artworks that showcase the unique qualities of birds of prey.
Remember to take your time, practice, and experiment with different approaches to discover your own style and artistic interpretation of these remarkable birds. Happy painting!
Adding Depth and Dimension: Creating Backgrounds for Acrylic Bird Paintings
Acrylic bird paintings can truly come to life with the addition of depth and dimension in the background. A well-crafted background can provide a sense of realism and enhance the overall composition of the artwork. In this section, we will explore various techniques and ideas for creating captivating backgrounds that complement your acrylic bird paintings.
1. Layering Colors
Layering colors is a fundamental technique that can bring depth and dimension to your background. Start by selecting a base color that complements the colors in your bird painting. Apply the base color evenly across the canvas using broad brush strokes or a sponge. Once the base color is dry, layer additional colors on top using a dry brush technique. Gradually build up the colors, allowing each layer to dry before adding the next. This layering technique creates a subtle gradation of tones, adding depth to the background.
2. Textured Backgrounds
Textured backgrounds can add visual interest and dimension to your acrylic bird paintings. Experiment with different techniques such as sponging, spattering, or using palette knives to create texture. These techniques can simulate various elements like foliage, branches, or water. For example, you can create a foliage texture by dabbing a sponge lightly on the canvas with different shades of green. This textured background will provide a realistic backdrop for your bird painting.
3. Gradient Backgrounds
Gradient backgrounds can create a sense of depth and atmosphere in your acrylic bird paintings. Start by choosing two or more colors that harmonize well together. Apply the lighter color at the top of the canvas and gradually transition to the darker color at the bottom using a soft blending brush. This technique simulates the natural transition from sky to ground or water to land. Gradient backgrounds can create a beautiful backdrop for your bird painting and enhance the overall composition.
4. Adding Elements
Consider adding elements such as branches, leaves, or flowers to your background to further enhance the depth and dimension of your acrylic bird paintings. These elements can be painted directly on the background or added using mixed media techniques. For example, you can glue real dried leaves onto the canvas or use stencils to create intricate patterns. These added elements create visual interest and make the background more engaging.
5. Creating Depth with Perspective
Using perspective in your background can create a sense of depth and realism in your acrylic bird paintings. Consider incorporating elements such as trees, buildings, or landscapes to create a sense of distance and space. For example, painting distant trees with lighter, cooler tones and gradually adding darker, warmer tones towards the foreground can give the illusion of depth. Pay attention to the scale and placement of these elements to ensure a harmonious composition.
6. Experimenting with Light and Shadows
Light and shadows play a crucial role in creating depth and dimension in your acrylic bird paintings. Consider the direction of light in your painting and incorporate corresponding shadows in the background. This will enhance the three-dimensional effect and make your bird painting appear more realistic. Experiment with different techniques to create soft or dramatic lighting effects, such as dry brushing or glazing.
In summary, creating captivating backgrounds for acrylic bird paintings involves layering colors, adding texture, experimenting with gradients, incorporating elements, using perspective, and playing with light and shadows. These techniques can bring depth and dimension to your artwork, making it visually appealing and engaging. Explore these ideas and techniques to elevate your acrylic bird paintings to new heights.
FAQs
Q: How to paint birds with acrylics?
To paint birds with acrylics, start by sketching the bird’s outline on your canvas. Use layers of thin paint to build up colors and details, starting with lighter shades and adding darker tones later. Pay attention to the bird’s feathers, beak, and eyes. Use small brushes for fine details and experiment with different brush strokes and techniques to capture the bird’s texture and movement.
Q: What are some tips for painting realistic bird feathers with acrylics?
When painting realistic bird feathers with acrylics, start with a base layer of the bird’s overall color. Then, using a thin brush, add individual feather markings with a slightly darker shade. Create depth and dimension by adding highlights with a lighter color. Blend and layer different shades of paint to mimic the texture and patterns of the feathers, working from the base of the feather towards the tip.
Q: How can I make a bird painting stand out with acrylics?
To make a bird painting stand out with acrylics, pay attention to the background. Use contrasting colors to make the bird pop, or create a soft, muted background to emphasize the bird’s vibrant colors. Play with different textures and brush strokes to bring the bird to life. Experiment with adding details like highlights, shadows, and reflections to make the painting more dynamic and visually interesting.
Conclusion:
In conclusion, painting birds with acrylics offers a versatile and dynamic way to capture the beauty of these winged creatures. With the ability to blend colors, add texture, and create intricate details, acrylics provide an ideal medium for artistically expressing the grace and vibrancy of birds. Whether you are a beginner or a seasoned artist, the techniques and tips shared in this article can help you embark on a creative journey to create stunning bird paintings. So grab your brushes, experiment with different techniques, and let your imagination soar as you bring these majestic creatures to life on canvas.