
Are you ready to add some festive flair to your holiday celebrations? Painting a Christmas tree with acrylic paint is a great way to unleash your creativity and personalize your seasonal decor. With its vibrant colors and easy application, acrylic paint allows you to bring your vision to life on canvas or any other surface.
Whether you’re a beginner or an experienced artist, painting a Christmas tree with acrylics can be a fun and rewarding project. With a few simple techniques and a little practice, you’ll be able to create a beautiful and unique masterpiece that captures the spirit of the season.
Start by gathering your supplies, including acrylic paints in various shades of green, a canvas or any other surface you’d like to paint on, brushes of different sizes, and a palette for mixing your colors. You can also use additional colors like red, gold, silver, or white to add ornaments, lights, and other festive details to your tree.
Begin by sketching the outline of your tree on the canvas with a pencil. This will serve as a guide for your painting. Then, start applying your base layer of green paint, starting from the bottom of the tree and working your way up.
Use different brush strokes and shades of green to create depth and texture in your tree. Add highlights and shadows to make it look more realistic. Don’t forget to let each layer of paint dry before adding the next one to avoid smudging or mixing

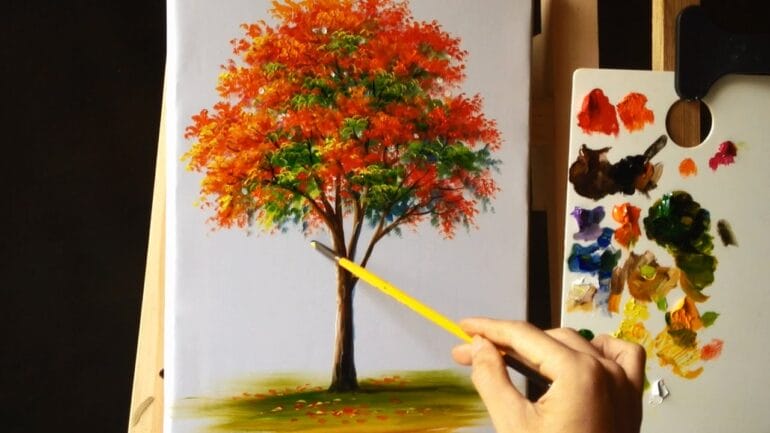
Step-by-Step Guide to Painting a Realistic Christmas Tree with Acrylics
Are you looking to add a festive touch to your holiday decorations? Painting a realistic Christmas tree with acrylics is a fun and creative way to bring the holiday spirit to life on canvas. In this section, we will provide you with a step-by-step guide on how to paint a realistic Christmas tree using acrylic paints.
Materials Needed
Before we begin, gather all the necessary materials to complete this painting project. You will need:
- Canvas or canvas panel
- Acrylic paints (green, brown, and any additional desired colors)
- Paint brushes (flat and round brushes in various sizes)
- Palette or mixing tray
- Water cup for cleaning brushes
- Palette knife (optional)
- Masking tape (optional)
- Pencil
- Eraser
- Reference image of a Christmas tree
Step 1: Prepare Your Canvas
Start by preparing your canvas. If necessary, apply a coat of gesso to prime the canvas and allow it to dry completely. This step creates a smooth surface for painting.
Step 2: Sketch the Outline
Using a pencil, lightly sketch the outline of the Christmas tree on your canvas. Take your time and make sure the proportions and shape of the tree are to your liking. You can use a reference image or create your own design.
Step 3: Mix Your Colors
Now it’s time to mix your paint colors. Start by mixing different shades of green to achieve a realistic tree color. Use your palette knife or brushes to mix different ratios of green paint with a touch of brown to create depth and dimension. Feel free to experiment with adding other colors like blue or yellow for variation.
Step 4: Begin Painting the Tree
With your mixed colors ready, start painting the tree. Begin at the bottom and work your way up. Use a flat brush to apply broad strokes for the main body of the tree. Gradually add darker shades of green towards the base of the tree to represent shadows and depth.
As you move upward, use a round brush to create smaller branches and add texture to the tree. Vary the pressure and direction of your brushstrokes to mimic the irregularity of real tree branches. Remember to step back and observe your painting from a distance to ensure a balanced composition.
Step 5: Add Details
Once the base of the tree is complete, it’s time to add details. Use a smaller brush to paint individual needles or clusters of needles. You can also add highlights by mixing a lighter shade of green and applying it to the edges of the branches. This will give the tree a sense of depth and dimension.
If desired, you can add additional decorations to your tree, such as ornaments or lights. Get creative and have fun with it!
Step 6: Finishing Touches
Once you are satisfied with your tree, take a step back and assess the overall composition. Make any necessary adjustments or touch-ups to ensure a polished and realistic look.
Allow your painting to dry completely before displaying or framing it. You can also apply a varnish or sealant to protect the finished artwork.
Summary
Painting a realistic Christmas tree with acrylics is a rewarding and enjoyable project that allows you to unleash your creativity and add a festive touch to your holiday decor. Follow this step-by-step guide to create a stunning piece of art that captures the beauty of the holiday season.

Adding Depth and Texture to Your Acrylic Painted Christmas Tree
Acrylic painting is a versatile medium that allows artists to create vibrant and textured artworks. When it comes to painting a Christmas tree, adding depth and texture can bring your artwork to life. In this section, we will explore various techniques to enhance your acrylic painted Christmas tree and make it visually appealing.
1. Layering Colors
One way to add depth to your acrylic painted Christmas tree is by layering colors. Start by painting the base layer in a solid color, such as green for the tree. Once the base layer is dry, mix a slightly darker shade of green and add it to the areas where shadows would naturally fall, such as the inner branches or the bottom of the tree. This will create a three-dimensional effect and make the tree appear more realistic.
You can also add highlights by mixing a lighter shade of green and applying it to the outer edges of the branches. This will give the tree a sense of dimension and make it stand out.
2. Adding Texture
Texture can bring an acrylic painted Christmas tree to life and make it more visually interesting. There are several techniques you can use to add texture to your artwork:
- Impasto: Apply thick layers of paint using a palette knife to create raised texture on the tree’s branches. This technique works well for depicting snowy or frosty trees.
- Dry Brushing: Dip a dry brush into a small amount of paint and apply it lightly over the surface of the tree. This technique creates a textured, brushstroke effect.
- Splattering: Load a small brush with paint, hold it close to the canvas, and flick the bristles with your finger to create a splattering effect. This technique can be used to depict falling snow or shimmering lights on the tree.
3. Adding Details
To make your acrylic painted Christmas tree more realistic and visually appealing, adding details is essential. Here are some ideas to consider:
- Ornaments: Paint colorful ornaments hanging from the branches of the tree. Use a small brush and fine details to create different shapes and designs.
- Lights: Use a small brush or a toothpick to paint tiny dots of yellow or white to represent fairy lights on the tree. Add small highlights on the lights to make them appear reflective.
- Tinsel or Garland: Paint thin lines of metallic paint or glitter to depict tinsel or garland draped around the tree.
- Tree Trunk: Paint the tree trunk using a combination of brown and black, adding texture and shadow for a realistic look.
4. Blending and Softening
To create a smooth and seamless transition between colors and textures, blending and softening techniques can be applied. Use a clean brush or a dry brush to gently blend the colors together, creating a soft gradient effect. This technique can be used to blend the different shades of green on the tree, as well as to soften any harsh edges or lines.
In summary, adding depth and texture to your acrylic painted Christmas tree can elevate your artwork and make it more visually appealing. Layering colors, adding texture, incorporating details, and blending and softening techniques are effective ways to achieve this. Experiment with different techniques and unleash your creativity to create a vibrant and realistic acrylic painted Christmas tree.
Tips and Tricks for Painting Ornaments on Your Acrylic Christmas Tree
Christmas is a time of joy and celebration, and one of the most beloved traditions is decorating the Christmas tree. While traditional trees are often adorned with ornaments that have been passed down through generations, more and more people are opting for acrylic Christmas trees. These trees offer a modern and sleek look, but they require a different approach when it comes to painting ornaments. In this section, we will provide you with some tips and tricks to help you create beautiful and unique ornaments for your acrylic Christmas tree.
1. Choose the Right Paint
When it comes to painting ornaments on an acrylic Christmas tree, it’s crucial to choose the right type of paint. Acrylic paint is the best option as it adheres well to plastic surfaces and dries quickly. There is a wide range of acrylic paints available in various colors and finishes, so you can easily find the perfect shade for your ornaments. Make sure to use water-based acrylic paints, as they are non-toxic and safe for indoor use.
2. Prepare the Surface
Before you start painting your ornaments, it’s essential to prepare the surface properly. Clean the ornaments with a mild soap and warm water to remove any dust or oils that may interfere with the paint’s adhesion. Once the ornaments are dry, lightly sand them with fine-grit sandpaper to create a slightly rough surface, which will help the paint stick better.
3. Use a Primer
Applying a primer to your ornaments can help the paint adhere more effectively and prevent it from peeling or chipping over time. Choose a primer specifically designed for use on plastic surfaces and apply a thin, even layer to the ornaments. Allow the primer to dry completely before moving on to the next step.
4. Plan Your Design
Before diving into painting, it’s a good idea to plan your ornament design. Consider the color scheme of your Christmas tree and choose complementary colors for your ornaments. You can sketch out your design on paper or use masking tape to create patterns on the ornaments. Planning ahead will help you achieve a cohesive and visually appealing look.
5. Apply Thin Layers of Paint
When painting your ornaments, it’s best to apply thin layers of paint instead of thick coats. This allows for better control and helps prevent the paint from pooling or running. Start with a base coat and let it dry before adding additional layers or details. Use a small brush or a paint pen for more intricate designs.
6. Add Details and Accents
To make your ornaments truly stand out, consider adding some details and accents. You can use metallic or glitter paints to add a touch of sparkle or use a fine-tipped brush to create intricate patterns or lettering. Don’t be afraid to get creative and experiment with different techniques to personalize your ornaments.
7. Seal the Paint
Once you have finished painting your ornaments, it’s important to seal the paint to protect it and ensure its longevity. Choose a clear acrylic sealer specifically formulated for plastic surfaces and apply a thin, even coat over the painted areas. The sealer will provide a protective barrier and help prevent the paint from scratching or fading.
8. Allow Ample Drying Time
After completing the painting and sealing process, allow ample drying time before handling or hanging the ornaments on your acrylic Christmas tree. Follow the manufacturer’s instructions regarding drying times, as different paints and sealers may require different periods to fully cure. Patience is key to ensure that your ornaments are fully dry and ready for display.
9. Hang the Ornaments Carefully
Once your ornaments are dry, it’s time to hang them on your acrylic Christmas tree. Handle them with care to avoid smudging or scratching the paint. Consider using ornament hooks or strings that won’t put excess pressure on the ornaments and ensure they are securely fastened to the tree branches.
10. Enjoy the Fruits of Your Labor
Now that you have successfully painted and hung your ornaments on your acrylic Christmas tree, it’s time to sit back, relax, and enjoy the festive ambiance. Admire your creativity and the personal touch you have added to your Christmas decorations. Your uniquely painted ornaments will undoubtedly become cherished keepsakes for years to come.
In summary, painting ornaments on your acrylic Christmas tree is a fun and creative process that requires some preparation and attention to detail. By following these tips and tricks, you can ensure that your ornaments turn out beautifully and enhance
Finishing Touches: Enhancing Your Acrylic Painted Christmas Tree with Details
Once you have painted the base of your acrylic Christmas tree and allowed it to dry, it’s time to add the finishing touches. Adding details to your artwork will bring it to life and make it even more festive. In this section, we will explore various techniques and ideas to enhance your acrylic painted Christmas tree.
1. Ornaments
No Christmas tree is complete without ornaments. You can use a small brush to paint colorful baubles or ornaments hanging from the branches of your tree. Experiment with different shapes, sizes, and colors to create a visually interesting display. You can also add glitter or metallic paint to make the ornaments sparkle and shine.
2. Lights
To create a realistic effect, add lights to your acrylic painted Christmas tree. Use a small brush and paint tiny dots or dashes of yellow or white paint on the branches to represent the glow of fairy lights. You can also use a fine-tipped brush to paint individual bulbs on a string of lights.
3. Snow
A touch of snow can transform your acrylic painted Christmas tree into a winter wonderland. Use a dry brush technique to add snowflakes to the branches. Dip a fan brush lightly into white paint and then gently brush it across the tree, creating the illusion of snowfall. You can also use a toothbrush to splatter white paint onto the tree for a more textured snow effect.
4. Presents
Underneath the tree, add colorful presents to complete the festive scene. Use a small brush to paint various shapes and sizes of gift boxes in different colors. You can also add bows or ribbons for an extra touch of detail. Don’t forget to add shadows to make the presents appear three-dimensional.
5. Garland and Tinsel
To add some shimmer and shine to your acrylic painted Christmas tree, paint garland or tinsel. Use a thin brush and metallic paint to create the illusion of strands of garland draped across the branches. You can also use a metallic marker to add tiny dots or lines of glittery tinsel. This will add depth and texture to your artwork.
6. Tree Topper
No Christmas tree is complete without a tree topper. Use your creativity to paint a unique and eye-catching tree topper. You can paint a star, angel, or any other symbol that represents the holiday season. Use metallic paint or glitter to make the tree topper stand out.
7. Background and Surroundings
Consider adding a background or surroundings to your acrylic painted Christmas tree to create a more complete scene. Paint a snowy landscape, a cozy living room, or a starry night sky. This will add depth and context to your artwork, making it more visually appealing.
Remember to step back and assess your artwork as you add each detail. Take breaks if needed, and don’t be afraid to experiment and make adjustments as you go. The finishing touches will elevate your acrylic painted Christmas tree and make it a stunning centerpiece of your holiday decorations.
FAQs
1. How can I paint a Christmas tree with acrylic paint?
To paint a Christmas tree with acrylic paint, start by sketching the outline of the tree on your canvas. Then, use a medium-sized flat brush to paint the shape of the tree with green acrylic paint. Add details such as branches, ornaments, and a trunk using smaller brushes and different colors. Allow the paint to dry between layers, and consider adding highlights and shadows for depth.
2. What kind of brushes should I use for painting a Christmas tree with acrylics?
For painting a Christmas tree with acrylics, it is recommended to use a combination of brushes. A medium-sized flat brush is ideal for painting the main shape of the tree, while smaller round brushes can be used for adding details, like branches and ornaments. Additionally, a liner brush can be handy for painting thin lines or intricate designs.
3. Can I use different colors instead of green to paint my Christmas tree?
Yes, you can use different colors instead of green to paint your Christmas tree with acrylics. While green is the traditional color for Christmas trees, you can get creative and use any color you desire. Experiment with different color combinations or even try using metallic or glitter paints for a unique look.
Conclusion
In conclusion, painting a Christmas tree with acrylic paint can be a fun and creative activity during the holiday season. By following simple steps and using the right techniques, you can create a stunning masterpiece that adds a festive touch to your decorations. Acrylic paint offers a wide range of colors and textures, allowing you to experiment and bring your artistic vision to life. Remember to start with a sketch, layer your colors, and add details for depth and dimension. Whether you’re a beginner or an experienced artist, painting a Christmas tree with acrylic paint is a wonderful way to express your creativity and spread holiday cheer.