
If you have a green nail and are considering using acrylic, it is essential to assess the condition of your nail first. Acrylic can be applied to a green nail, but it is crucial to address the underlying cause of the discoloration before proceeding. Green nails may indicate a fungal infection or other nail issues, which should be treated before applying acrylic. Consulting with a nail professional or a dermatologist is recommended to ensure the health and integrity of your nails.
Achieving a Flawless Acrylic Overlay on Green Nails
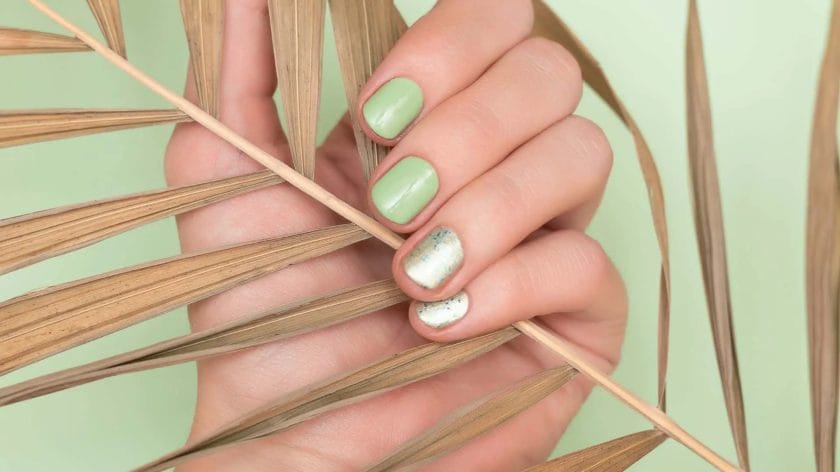
Green nails are a unique and vibrant choice for individuals looking to express their personal style. Whether you have natural green nails or opt for green nail extensions, achieving a flawless acrylic overlay can enhance the beauty of your nails. In this section, we will discuss the step-by-step process to achieve a perfect acrylic overlay on green nails.
1. Preparation is Key
Before applying the acrylic overlay, it is essential to prep your nails properly. Start by removing any existing nail polish or gel using a gentle acetone-free nail polish remover. Next, trim and shape your nails to your desired length, ensuring they are clean and free from any debris.
2. Apply a Base Coat
To create a smooth surface for the acrylic overlay, it is crucial to apply a base coat. Choose a quality nail primer that is specifically designed for acrylic overlays. Apply a thin layer of the primer to each nail, making sure to cover the entire surface. Allow the primer to dry completely before proceeding to the next step.
3. Select the Right Acrylic Powder
Choosing the right acrylic powder is crucial to achieve a flawless overlay on green nails. Opt for a shade that complements your green nail color or go for a clear acrylic powder for a natural look. Make sure to select high-quality acrylic powder to ensure a long-lasting and durable finish.
4. Apply the Acrylic Overlay
Start by dipping your brush into the liquid monomer, then dip it into the acrylic powder. Mix the two components together to form a ball of acrylic. Place the ball onto the nail bed and gently press it down, starting from the cuticle area and working towards the free edge. Use your brush to shape and smooth the acrylic, ensuring an even distribution across the entire nail surface.
Repeat this process for each nail, working one at a time to ensure precision and avoid the acrylic from drying too quickly. It is essential to work swiftly but carefully to achieve the desired result.
5. Shape and Buff
Once the acrylic overlay has dried and hardened, it’s time to shape and buff your nails. Use a fine-grit nail file to shape your nails into your desired style, whether it be square, round, almond, or any other shape. Gently file the edges to create smooth and even contours.
Next, use a buffing block or a buffer to smooth out the surface of the acrylic overlay. This will remove any imperfections, such as lumps or bumps, and create a glossy finish. Be gentle during this process to avoid damaging the acrylic.
6. Apply a Top Coat
To seal and protect the acrylic overlay, apply a top coat specifically designed for acrylic nails. This will add shine and durability to your nails, prolonging the life of the overlay. Apply the top coat evenly and allow it to dry completely before engaging in any activities that may damage the nails.
In summary, achieving a flawless acrylic overlay on green nails requires proper preparation, the right products, and careful application. By following these steps, you can enjoy beautiful and long-lasting green nails with a perfect acrylic overlay.
Tips for Applying Acrylic on Green Nail Polish
Acrylic nails have become a popular choice for nail enthusiasts due to their durability and versatility. Whether you’re a professional nail technician or a DIY nail enthusiast, applying acrylic on green nail polish can add a unique and vibrant touch to your manicure. In this section, we will provide you with some valuable tips to ensure a smooth and flawless application of acrylic on green nail polish.
1. Prepare Your Nails
Before applying acrylic on green nail polish, it is essential to prepare your nails properly. Start by removing any old nail polish and filing your nails to the desired shape and length. Gently push back your cuticles using a cuticle pusher to create a clean and even surface for the acrylic application.
2. Prime Your Nails
Applying a nail primer is crucial to ensure the longevity of your acrylic nails. The primer helps the acrylic adhere better to the natural nails, preventing lifting or peeling. Apply a thin layer of primer to each nail, making sure to avoid applying it on the surrounding skin.
3. Apply a Base Coat
Before applying the green nail polish, it is recommended to apply a base coat. The base coat will create a smooth surface for the polish and help prevent any staining or discoloration of the natural nails. Allow the base coat to dry completely before moving on to the next step.
4. Choose the Right Acrylic Powder
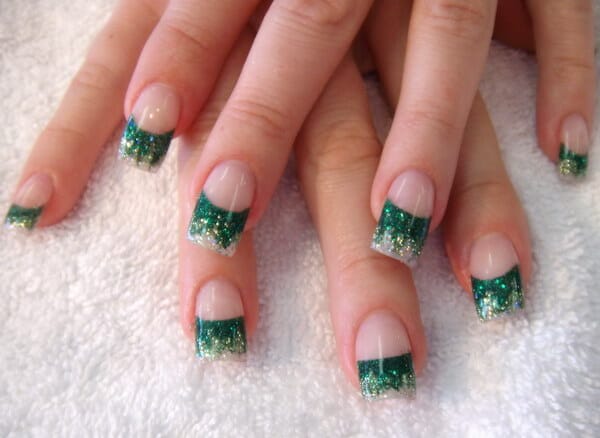
When selecting an acrylic powder to use on green nail polish, opt for a color that complements or enhances the shade of green. For example, a glittery or metallic acrylic powder can add a beautiful accent to the green polish. Make sure to choose a high-quality acrylic powder that is easy to work with and provides a smooth finish.
5. Mix and Apply the Acrylic
In a clean, dry dappen dish, mix the acrylic liquid and powder following the manufacturer’s instructions. Using an acrylic brush, pick up a small bead of the mixed acrylic and gently press it onto the nail near the cuticle line. Slowly drag the bead towards the tip of the nail, ensuring an even distribution. Repeat this process for each nail, working one at a time.
6. Shape and File
Once the acrylic has dried and hardened, it’s time to shape and file your nails. Use a nail file to shape the nails to your desired length and style. Be careful not to file too vigorously, as this can damage the acrylic layer. Use a buffer to smooth out any rough edges and create a polished finish.
7. Apply a Top Coat
To seal and protect your acrylic nails, apply a top coat after shaping and filing. The top coat will add shine and longevity to your manicure while preventing chipping or peeling. Ensure the top coat is applied evenly and allow it to dry completely before engaging in any activities.
8. Maintain Your Acrylic Nails
Proper maintenance is essential for the longevity of your acrylic nails. Avoid using your nails as tools and wear gloves when engaging in household chores or activities that may damage your nails. Regularly moisturize your cuticles and nails to prevent dryness and cracking.
In summary, applying acrylic on green nail polish can be a fantastic way to add creativity and style to your manicure. By following these tips and techniques, you can achieve a flawless and long-lasting result. Remember to prepare your nails properly, choose the right acrylic powder, and maintain your nails to enjoy your stunning green acrylic manicure for weeks to come.
Creating a stunning look with acrylic overlays on green nails
Green nails can add a unique and eye-catching touch to any manicure. Whether you prefer a bold and vibrant shade of green or a more subtle and muted tone, acrylic overlays can help you achieve a stunning look that is sure to turn heads. In this section, we will explore the process of creating acrylic overlays on green nails and provide you with some tips and inspiration to help you achieve the perfect manicure.
1. Preparing the nails
Before applying acrylic overlays, it is important to properly prepare the nails to ensure optimal adhesion and longevity of the manicure. Start by removing any old nail polish and gently shaping the nails using a file. Push back the cuticles and remove any excess skin using a cuticle pusher. This will create a clean canvas for the acrylic overlays.
1.1 Applying a base coat
Once the nails are prepped, apply a thin layer of base coat to protect the natural nails and promote better adhesion of the acrylic overlays. Allow the base coat to dry completely before proceeding to the next step.
2. Applying the acrylic overlays
Acrylic overlays are created by mixing a liquid monomer with a powdered polymer to form a paste-like consistency. This mixture is then applied to the nails and shaped to create the desired look. Here is a step-by-step guide on how to apply acrylic overlays on green nails:
- Prepare the acrylic mixture by following the instructions provided by the manufacturer. Make sure to work in a well-ventilated area to avoid inhaling the fumes.
- Apply a small amount of the acrylic mixture onto the brush and carefully place it on the nail, starting from the cuticle area and working towards the tip. Use gentle strokes to spread the mixture evenly.
- Continue applying the acrylic mixture to the rest of the nails, one at a time, ensuring that each nail is covered completely.
- Once the acrylic overlays are applied, use a nail file to shape and refine the nails. You can create various shapes, such as square, round, or almond, depending on your preference.
- Buff the nails to smooth out any rough edges and create a polished finish.
3. Adding color and design
Now that the acrylic overlays are in place, it’s time to add some color and design to enhance the overall look of your nails. Green nails offer a wide range of possibilities when it comes to choosing colors and designs. Here are a few ideas to get you started:
- Opt for a classic solid green color for a sleek and sophisticated look.
- Add a touch of sparkle by applying glitter polish over the acrylic overlays.
- Create nail art designs using different shades of green or other complementary colors.
- Experiment with geometric patterns, floral motifs, or abstract designs for a more avant-garde look.
Remember to seal the design with a top coat to protect the color and increase the longevity of your manicure.
4. Maintaining acrylic overlays on green nails
Proper maintenance is essential to ensure the longevity of your acrylic overlays on green nails. Here are a few tips to help you maintain your stunning manicure:
- Avoid using your nails as tools to prevent lifting or chipping of the acrylic overlays.
- Apply cuticle oil regularly to keep the nails and surrounding skin hydrated.
- Wear gloves when performing household chores or any activities that may expose your nails to harsh chemicals or excessive moisture.
- Visit a professional nail technician for regular maintenance, such as infill or repairs, to keep your acrylic overlays looking fresh.
Summary
Creating a stunning look with acrylic overlays on green nails is a great way to express your personal style and make a statement. By following the proper preparation and application techniques, and adding your own touch of color and design, you can achieve a fabulous manicure that is sure to impress. Remember to take care of your acrylic overlays to ensure their longevity and maintain the beauty of your green nails.
The art of blending acrylic with green nail colors
When it comes to nail art, one of the most versatile and vibrant colors is green. From minty pastels to rich emeralds, green offers a wide range of shades that can add a pop of color to any manicure. One popular trend in nail art is blending acrylic with green nail colors, creating stunning and unique designs. In this section, we will explore the art of blending acrylic with green nail colors and how you can achieve beautiful and eye-catching nail designs.
Choosing the right shade of green
The first step in blending acrylic with green nail colors is choosing the right shade of green. There are countless shades of green available, each bringing its own unique vibe to your manicure. For a fresh and light look, you can opt for pastel greens such as mint or pistachio. If you prefer a bold and vibrant design, you can choose shades like emerald or forest green. Consider the overall theme and your personal style when selecting the shade of green for your acrylic blend.
Preparing your nails
Before starting the blending process, it’s essential to prepare your nails properly. Start by shaping and filing your nails to your desired length and shape. Make sure to remove any old nail polish and clean your nails thoroughly. Apply a base coat to protect your natural nails and create a smooth surface for the acrylic blend.
Blending acrylic with green nail colors
Now it’s time to blend acrylic with green nail colors. Start by applying a layer of clear or nude acrylic as a base. This will provide a foundation for the green color and help it blend seamlessly. Once the base layer is dry, you can proceed with adding the green acrylic. You can choose to create an ombre effect by blending different shades of green or opt for a marbled design by swirling different green colors together. Be creative and experiment with different techniques to achieve the desired look.
Adding accents and designs
To take your acrylic blend to the next level, you can add accents and designs to your nails. Green blends well with other colors, so consider adding some complementary shades to create contrast. You can use nail art brushes or dotting tools to create intricate patterns or add small details. The options are endless, from floral designs to geometric shapes, let your imagination run wild.
Sealing and finishing
Once you’re satisfied with your acrylic blend and designs, it’s crucial to seal and finish your nails properly. Apply a clear topcoat to seal the design and protect it from chipping. This will also give your nails a glossy and polished look. Allow the topcoat to dry completely before going about your day.
Tips for maintaining your acrylic blend
To ensure that your acrylic blend with green nail colors lasts as long as possible, here are some tips for maintenance:
- Avoid using your nails as tools to prevent chipping.
- Apply cuticle oil regularly to keep your nails and cuticles moisturized.
- Wear gloves when doing household chores to protect your nails.
- Avoid exposing your nails to harsh chemicals, such as cleaning products or acetone.
By following these tips, you can enjoy your beautifully blended acrylic with green nail colors for an extended period.
In summary
The art of blending acrylic with green nail colors allows you to create stunning and unique designs that are sure to catch attention. By choosing the right shade of green, preparing your nails properly, and getting creative with blending techniques and designs, you can achieve a manicure that reflects your personal style. Don’t forget to seal and maintain your nails properly to enjoy your acrylic blend for as long as possible. So go ahead, unleash your creativity, and embrace the beauty of blending acrylic with green nail colors.
Enhancing the Beauty of Green Nails with Acrylic Overlays
Green nails can add a touch of vibrancy and freshness to your overall look. Whether you have natural green nails or you want to experiment with a green nail polish, there are various ways to enhance their beauty. One popular method is by applying acrylic overlays. Acrylic overlays not only protect your nails but also provide a smooth and durable surface for nail art and extensions. In this section, we will explore the process of enhancing the beauty of green nails with acrylic overlays.
1. Preparing the Nails
The first step in the process is to prepare your nails for the acrylic overlay. Start by removing any old nail polish or residues using a nail polish remover. Trim and shape your nails to your desired length and shape. Gently push back your cuticles using a cuticle pusher, and then use a nail buffer to gently remove the shine from the surface of your nails. This helps the acrylic adhere better to the natural nail.
2. Applying the Acrylic Overlay
Once your nails are prepped, it’s time to apply the acrylic overlay. Here are the steps to follow:
- Apply a thin layer of primer to the natural nails to promote better adhesion.
- Take a small amount of acrylic powder and mix it with liquid monomer according to the manufacturer’s instructions.
- Dip a brush into the acrylic liquid and then into the powder, creating a small bead of acrylic mixture on the brush.
- Apply the bead of acrylic to the nail, starting from the cuticle area and gently brushing it towards the tip of the nail.
- Repeat this process on each nail, working quickly but carefully to avoid any lumps or inconsistencies.
- Allow the acrylic to dry and harden completely before moving on to the next step.
3. Shaping and Filing
Once the acrylic overlay is dry, you can shape and file your nails to your desired style. Use a nail file to shape the edges and smooth out any roughness. Pay attention to achieving a symmetric shape and a smooth surface.
4. Design and Nail Art
Now comes the fun part – designing and adding nail art to your green acrylic nails. You can choose to keep it simple with a solid green color or get creative with patterns, glitter, or other decorative elements. Consider using nail stencils, rhinestones, or even hand-painted designs to make your nails stand out.
5. Finishing Touches
Once you are satisfied with the design and nail art, finish off the look with a top coat. A good quality top coat not only adds shine but also helps seal in the design, preventing chipping and extending the life of your manicure. Apply the top coat evenly across each nail, allowing it to dry completely.
In summary, enhancing the beauty of green nails with acrylic overlays is a great way to elevate your nail game. From preparing the nails to applying the overlay, shaping, and adding nail art, this process allows you to customize and personalize your green nails. So go ahead, unleash your creativity, and enjoy stunning green nails that turn heads wherever you go.
FAQs
Can I put acrylic over a green nail?
Yes, you can apply acrylic over a green nail. However, it is important to address the underlying cause of the green discoloration, as it may be a sign of a fungal or bacterial infection. It’s recommended to consult with a professional nail technician or a healthcare provider to determine the cause and appropriate treatment.

Conclusion
In conclusion, putting acrylic over a green nail is not recommended. The green color on the nail could indicate an infection or fungal growth, and covering it with acrylic could worsen the condition. It is important to address the underlying issue before applying any artificial enhancements. Seeking professional advice from a nail technician or dermatologist is crucial in determining the best course of action for treating a green nail and ensuring the health and safety of your nails. Remember, prioritizing the well-being of your natural nails should always be the top priority.