
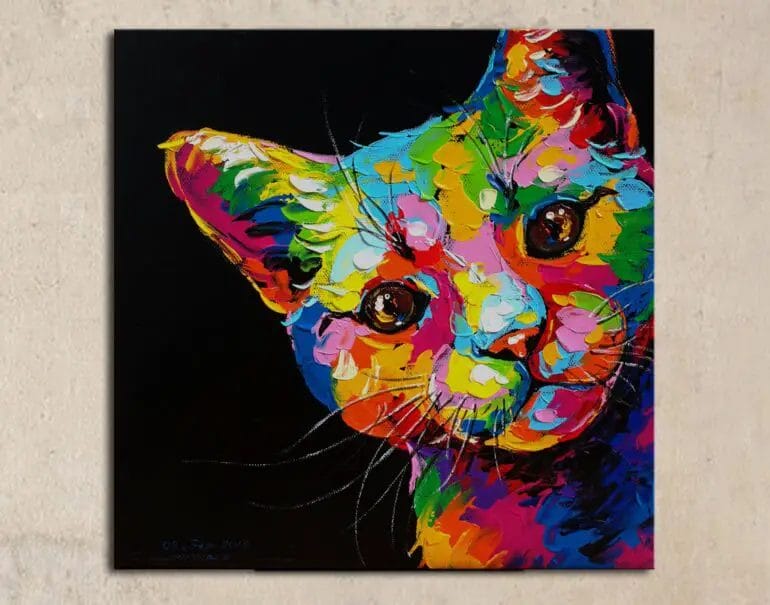
If you’re looking to unleash your artistic talents and capture the likeness of a beloved feline companion, painting a cat with acrylics is a great medium to explore.
Acrylic paint is known for its versatility, fast-drying properties, and vibrant colors, making it the perfect choice for bringing a cat’s unique personality to life on canvas.
In this guide, we’ll walk you through the step-by-step process of painting a cat using acrylics, from selecting the right reference photo to adding the final touches that will make your artwork truly stand out.
Whether you’re a seasoned artist or just starting your creative journey, this tutorial will provide you with the tips and techniques you need to create a stunning, lifelike portrayal of a cat in acrylics.
So, grab your brushes, set up your palette, and let’s dive into the wonderful world of acrylic cat painting!
Essential Supplies for Painting a Cat with Acrylics
Painting with acrylics can be a fun and rewarding experience, especially when capturing the beauty and charm of a cat. Whether you’re a beginner or an experienced artist, having the right supplies is essential to create a successful masterpiece. In this section, we will explore the essential supplies you need to paint a cat with acrylics.
1. Acrylic Paints
The first and most important supply you’ll need is a set of acrylic paints. Acrylic paints are versatile and easy to work with, making them ideal for capturing the different colors and textures of a cat’s fur. It’s best to choose a set that includes a variety of colors, including whites, grays, browns, and blacks, as these shades will be important for creating depth and dimension. Opt for high-quality paints that have good pigment and adhere well to the canvas.
2. Brushes
Having a selection of brushes is crucial for achieving different brushstrokes and textures in your painting. Look for brushes with different sizes and shapes, including flat brushes for larger areas, round brushes for finer details, and fan brushes for creating texture. Synthetic brushes are generally recommended for acrylic painting, as they are durable and easy to clean.
3. Canvas
A canvas serves as the foundation for your painting and provides a sturdy surface for the paint to adhere to. Choose a canvas size that suits your artistic vision and allows you to capture the cat’s likeness in detail. Consider using a stretched canvas for a professional and finished look, or opt for canvas panels if you prefer a more lightweight and portable option.
4. Palette
A palette is necessary for mixing and blending your acrylic paints. It can be a traditional wooden palette, a plastic palette, or even a disposable palette pad. Choose a palette that suits your preference and provides enough space for you to mix and experiment with different color combinations.
5. Water and Palette Knife
Water is essential for diluting and cleaning your brushes while painting. Keep a container of water nearby to rinse your brushes and thin down the acrylic paint as needed. Additionally, a palette knife can be handy for mixing colors, scraping away mistakes, and creating interesting textures in your painting.
6. Easel
An easel is not essential but can greatly enhance your painting experience. It provides a comfortable and adjustable surface to hold your canvas at the desired angle. Easels come in various styles and materials, so choose one that suits your needs and painting style.
7. Reference Photo
Having a reference photo of the cat you want to paint is essential for capturing its unique features and characteristics. Choose a clear and high-resolution photo that shows the cat from the desired angle and in good lighting. You can either print the photo or use a digital device to refer to it while painting.
8. Palette Paper or Disposable Mixing Cups
If you prefer a more convenient option for mixing colors, palette paper or disposable mixing cups can be useful. These allow you to mix colors directly on the paper or in the cups, eliminating the need for constant cleaning of your palette.
9. Sealer
After completing your painting, applying a sealer is recommended to protect the artwork and enhance its longevity. There are various sealers available specifically for acrylic paintings, such as gloss, matte, or satin finishes. Choose a sealer that suits your desired final look for the painting.
In summary, when painting a cat with acrylics, it’s essential to have the right supplies. Acrylic paints, brushes, canvas, palette, water, palette knife, easel (optional), reference photo, palette paper or disposable mixing cups, and sealer are all important tools that will help you bring your cat painting to life. With these supplies in hand, you’re ready to embark on your artistic journey and create a beautiful feline masterpiece.

Creating a Detailed Sketch of Your Cat Before Painting
Before starting a painting of your beloved cat, it is essential to create a detailed sketch. A well-executed sketch lays the foundation for a successful painting by capturing the accurate proportions and features of your cat. In this section, we will guide you through the process of creating a detailed sketch of your cat that will serve as a valuable reference for your painting.
Gather the Necessary Materials
Before you begin, gather all the necessary materials for sketching. You will need:
- Pencil: Choose a pencil with a medium hardness, such as an HB or 2B, for optimal versatility and control.
- Sketchbook or drawing paper: Select a sketchbook or heavyweight drawing paper that can handle erasing and shading.
- Reference photo: Find a clear and well-lit photo of your cat that captures its unique characteristics. This will serve as your visual reference throughout the sketching process.
- Eraser: Have a good quality eraser on hand to correct any mistakes or make adjustments as needed.
Observe and Analyze Your Cat
Take a moment to observe your cat closely. Pay attention to its proportions, the shape of its head, the placement of its eyes, nose, and ears, as well as any distinguishing features or markings. Study the reference photo to help you analyze these details accurately.
Start with Basic Shapes
Begin by lightly sketching basic shapes to establish the overall form of your cat. Use simple geometric shapes like circles, ovals, and triangles to outline the head, body, and limbs. These initial shapes will serve as a framework for adding more precise details later on.
Add Proportions and Features
Once you have the basic shapes in place, start refining the proportions and features. Compare the size relationships of different parts of your cat, ensuring they are accurately represented in your sketch. Pay close attention to the placement of the eyes, nose, and ears, as they significantly contribute to your cat’s likeness.
Use light, gentle strokes to draw these details, gradually adding more definition and depth. Remember to regularly refer back to your reference photo for guidance.
Capture the Fur Details
Next, focus on capturing the texture and patterns of your cat’s fur. Observe the direction in which the fur lies and use short, controlled strokes to indicate its flow. Take note of any distinctive markings or color variations and add them to your sketch accordingly.
Refine and Finalize the Sketch
Once you are satisfied with the overall proportions and details of your sketch, take the time to refine and finalize it. Erase any unnecessary construction lines or mistakes, and add any additional touches to enhance the realism of your cat’s features.
Review and Make Adjustments
Step back and review your sketch. Compare it to your reference photo and make any necessary adjustments to ensure accuracy. Pay attention to any areas that may need further refinement or correction.
Summary
Creating a detailed sketch of your cat before painting is an essential step in the artistic process. It allows you to accurately portray your cat’s unique features and proportions, providing a solid foundation for your painting. By following the steps outlined above, you can create a detailed and accurate sketch that will serve as a valuable reference throughout your painting journey.

Mastering Cat Fur Textures with Acrylic Paints
Painting cat fur can be a challenging task for any artist, but with the right techniques and materials, you can create realistic and lifelike textures using acrylic paints. In this section, we will explore various methods and tips that will help you to master the art of painting cat fur.
1. Understanding the Anatomy of Cat Fur
Before you start painting, it’s important to have a good understanding of the anatomy of cat fur. Cat fur consists of two main layers – the guard hairs and the undercoat. The guard hairs are long, coarse, and usually form the outer layer of the fur, while the undercoat is softer and denser, providing insulation.
Observing reference photos or real-life cats can help you understand how the fur is arranged and how it flows across the cat’s body. Pay attention to the direction of the fur growth and the patterns formed by the fur.
2. Choosing the Right Brushes
The choice of brushes plays a crucial role in achieving realistic fur textures. For painting cat fur, it’s recommended to use brushes with stiff bristles or synthetic hairs that mimic the texture of cat fur. Fan brushes, flat brushes, or round brushes with pointed tips are ideal choices for creating fur texture.
3. Layering Techniques
Layering is an important technique when it comes to painting fur textures. Start by blocking in the basic shapes and colors of the cat using broader strokes. Once the base layer is dry, you can start adding smaller and more defined brushstrokes to create the appearance of fur.
Using thin layers of paint and building up gradually will give a more realistic result. Apply lighter colors first and gradually add darker shades to create depth and dimension. Don’t forget to blend the colors seamlessly to achieve a smooth transition between fur strands.
4. Brush Control and Strokes
Mastering brush control is essential when painting fur. Practice creating short, flicking strokes with your brush to mimic individual strands of fur. Vary the length and direction of the strokes to capture the natural flow and texture of the fur.
Experiment with different brush sizes and pressures to create variations in the fur texture. For longer fur, use longer strokes with a lighter touch. For shorter fur, use shorter and more compact strokes with slightly more pressure.
5. Adding Details
Adding finer details to your cat fur painting can bring it to life. Use a smaller brush or a liner brush to add individual hairs or whiskers. You can also use a dry brush technique to create texture and highlight specific areas of the fur.
Pay attention to the highlights and shadows on the fur to create depth and realism. Add subtle highlights using a lighter color and create shadows by adding darker tones.
6. Practice and Patience
Like any skill, mastering the art of painting cat fur takes practice and patience. Don’t be discouraged if your first attempts don’t turn out as expected. Keep practicing different techniques and studying cat fur references to improve your skills over time.
Experiment with different color palettes, brush techniques, and textures to develop your unique style in capturing cat fur.
In summary, painting cat fur with acrylic paints requires a good understanding of the anatomy of cat fur, the use of appropriate brushes, layering techniques, brush control, and attention to details. With practice and patience, you can achieve realistic and lifelike cat fur textures in your acrylic paintings. So, grab your brushes and start mastering the art of painting cat fur!
Adding Depth and Detail to Your Cat Painting with Acrylic Techniques
When it comes to creating a realistic cat painting, adding depth and detail is essential. Acrylic paint offers a versatile medium to achieve these effects. In this section, we will explore various techniques that can help enhance your cat painting with depth and detail.
1. Layering
Layering is a fundamental technique in acrylic painting that allows you to create depth by building up multiple transparent or semi-transparent layers of paint. Start with a solid base layer and gradually add subsequent layers to add dimension to your cat’s fur, eyes, and other features. This technique is particularly effective for capturing the texture and depth of a cat’s coat.
2. Dry Brushing
Dry brushing is a technique that involves using a brush with minimal paint and applying it lightly over the surface. This technique is ideal for adding fine details and highlights to your cat painting. Use a small, stiff-bristled brush and gently skim it over the raised areas of the cat’s fur, whiskers, and other intricate features. Dry brushing can bring out the texture and create a realistic look.
3. Glazing
Glazing is a technique where a transparent layer of paint is applied over a dried layer of paint. This technique is useful for adding depth and richness to specific areas of your cat painting. Use a glazing medium or thin your acrylic paint with water to create a translucent effect. Apply the glaze selectively to areas that require enhancement, such as the cat’s eyes, nose, or ears. This technique can add a luminous quality to your painting.
4. Texturizing
To add texture to your cat painting, consider incorporating texturizing techniques. Use a palette knife or a stiff brush to apply thick, textural strokes of paint to mimic the roughness of the cat’s coat. You can also experiment with adding other materials like sand or modeling paste to create additional texture. Texturizing can bring depth and visual interest to your artwork.
5. Detailing with Small Brushes
When it comes to capturing intricate details, small brushes are your best friends. Use fine-tipped brushes to add precise details like individual strands of fur, whiskers, and the intricate patterns on the cat’s coat. Take your time and work patiently to achieve a realistic portrayal of these small details. Remember to step back from your painting regularly to assess the overall effect.
6. Working in Layers
Building up your cat painting in layers allows you to refine and add depth to your artwork. Start with a loose sketch to establish the composition and basic shapes. Then, gradually add layers of paint to refine the details and bring the cat to life. Each layer should add more depth and dimension to your painting. Allow each layer to dry before adding another to prevent unwanted blending.
7. Using Reference Photos
When painting a realistic cat, using reference photos is crucial to capture the cat’s unique features and expressions. Study different reference photos to understand the subtle variations in fur color, texture, and patterns. Pay close attention to the cat’s eyes, nose, and ears as these features often hold key details. Referencing photos will help you add accurate details and achieve a lifelike portrayal of the cat in your painting.
Summary
Mastering acrylic techniques for adding depth and detail to your cat painting can take time and practice. Experiment with layering, dry brushing, glazing, texturizing, and small brushes to achieve the desired effect. Remember to work in layers and use reference photos for accuracy. With patience and dedication, you can create a cat painting that impresses viewers with its depth and attention to detail.
Frequently Asked Questions
1. How can I paint a cat using acrylic paint?
To paint a cat using acrylic paint, start by sketching the outline of the cat using a pencil. Then, block in the basic shapes and colors using acrylic paints and a brush. Add details and texture by layering different shades of paint. Use fine brushes for fine details and larger brushes for larger areas. Allow the paint to dry between layers and remember to have reference images of cats for accuracy.
2. What are some tips for painting a realistic cat with acrylics?
To paint a realistic cat with acrylics, pay attention to the details of the cat’s anatomy and fur. Use a variety of brushes to create different textures and strokes. Layer different shades of paint to achieve depth and dimension. Observe the lighting in your reference image and replicate it in your painting. Practice blending and shading techniques to make the cat’s fur look soft and realistic.
3. Are there any specific color palettes that work well for painting a cat with acrylics?
While there is no specific color palette for painting a cat with acrylics, a common approach is to use a mix of warm and cool tones for the fur. Browns, grays, and blacks can be used as base colors, while adding hints of other colors for highlights and shadows. Experiment with different color combinations to achieve the desired effect and realism in your cat painting.
Conclusion
In conclusion, learning how to paint a cat with acrylics can be a rewarding and enjoyable experience for both beginners and experienced artists alike. By following the right techniques and practicing regularly, you can capture the unique details and personality of a cat through vibrant colors and brushstrokes. Experimenting with different styles and approaches can help you develop your own artistic voice and create stunning cat portraits. Whether you’re creating artwork for personal enjoyment or for exhibition, remember that patience and persistence are key when it comes to mastering this art form. So grab your brushes, unleash your creativity, and let the feline magic come to life on your canvas.