
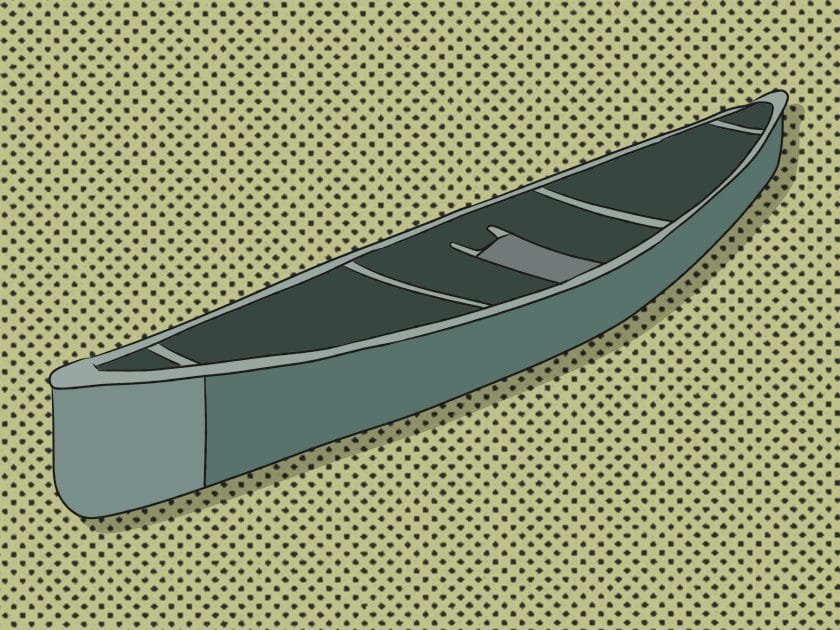
If you’re looking to transform your canoe into a work of art, painting it is a fantastic way to express your creativity and add a personal touch. Whether you want to stand out on the water or simply protect the hull from wear and tear, painting a canoe can be a fun and rewarding project. But where do you start? In this guide, we’ll walk you through the step-by-step process of how to paint a canoe, from prepping the surface to applying the final coat.
Before you begin painting your canoe, it’s essential to thoroughly clean and sand the surface to ensure proper adhesion. Start by removing any dirt, grease, or old paint using a mild detergent and a scrub brush. Next, sand the entire canoe with a fine-grit sandpaper to create a rough texture for the paint to adhere to. After sanding, wipe the surface clean to remove any dust or debris, leaving you with a smooth and clean surface.
Once the surface is prepped, the next step is to apply a primer to the canoe. Primer helps the paint adhere better and provides a smooth, even surface for the paint color. Choose a marine-grade primer specifically designed for use on boats and canoes. Using a paintbrush or a roller, apply the primer evenly, making sure to cover all areas of the canoe. Allow the primer to dry completely before moving on to the next step.
Now comes the fun part – applying the

Preparing the surface for painting
Before starting any painting project, it is crucial to properly prepare the surface to ensure a smooth and long-lasting finish. Preparing the surface involves cleaning, repairing, and priming the area to be painted. This process may seem tedious, but it is essential for achieving professional-looking results. In this section, we will outline the steps to prepare the surface for painting.
Cleaning the surface
The first step in preparing the surface for painting is to clean it thoroughly. This involves removing any dirt, dust, grease, or grime that may be present on the surface. To clean the surface, you can use a mild detergent mixed with water and a soft bristle brush or sponge. Gently scrub the surface in a circular motion to remove any dirt or stains. After cleaning, rinse the surface with clean water and allow it to dry completely before proceeding to the next step.
Repairing imperfections
Next, inspect the surface for any imperfections such as cracks, holes, or uneven areas. These imperfections should be repaired before painting to ensure a smooth and flawless finish. For small cracks or holes, you can use a spackling compound to fill them in. Apply the compound using a putty knife and smooth it out until it is flush with the surrounding surface. For larger holes or damaged areas, you may need to use a patching compound or replace the damaged section entirely. Allow the repaired areas to dry completely before moving on to the next step.
Sanding the surface
Once the repairs have dried, it is important to sand the surface to create a smooth and even texture. Sanding also helps to remove any rough spots or paint flakes that may be present. Start by using a medium-grit sandpaper to sand the surface in a circular motion. Be sure to sand lightly to avoid damaging the surface. After the initial sanding, switch to a fine-grit sandpaper and sand in the direction of the grain for a final smooth finish. After sanding, remove any dust or debris with a tack cloth or vacuum cleaner.
Priming the surface
Before applying the final coat of paint, it is recommended to prime the surface. Priming helps to seal the surface, provide better adhesion for the paint, and enhance the overall durability of the finish. Choose a primer that is suitable for the type of surface you are painting, such as a latex primer for walls or a metal primer for metal surfaces. Apply the primer evenly using a brush or roller, following the manufacturer’s instructions. Allow the primer to dry completely before proceeding with the painting process.
In summary, preparing the surface for painting is a crucial step in achieving a professional and long-lasting finish. It involves cleaning, repairing, sanding, and priming the surface to ensure a smooth and even texture. By following these steps, you can create a solid foundation for your paint job and achieve the desired results.
Applying the Primer Coat
Before painting a surface, it is essential to apply a primer coat. The primer acts as a preparatory layer that helps improve the adhesion of the paint to the surface, enhances durability, and provides a smooth and even finish. In this section, we will discuss the importance of applying a primer coat and the steps involved in the process.
Importance of Primer
The primer coat plays a crucial role in achieving a professional and long-lasting paint job. Here are some key reasons why applying a primer is necessary:
- Improved Adhesion: The primer creates a strong bond between the paint and the surface, ensuring better adhesion. This helps the paint adhere evenly and prevents it from peeling or chipping over time.
- Sealing and Smoothing: Primers are designed to seal porous surfaces, such as wood or drywall, preventing the paint from being absorbed unevenly. It also helps smooth out imperfections, such as small cracks or uneven textures, creating a more even surface for the paint.
- Stain Blocking: Certain primers are formulated to block stains, such as water or smoke stains, from bleeding through the paint. This is particularly important when painting over surfaces that have been previously damaged or stained.
- Enhanced Durability: A primer coat helps improve the durability and longevity of the paint job. It acts as a protective barrier, preventing moisture penetration and reducing the chances of the paint peeling or blistering.
Steps to Apply Primer
Now that we understand the importance of a primer coat, let’s look at the steps involved in applying it:
- Clean the Surface: Before applying the primer, ensure that the surface is clean and free from dust, dirt, grease, or any other contaminants. Use a mild detergent or cleaner and a sponge or cloth to thoroughly clean the surface. Rinse it off with clean water and allow it to dry completely.
- Prepare the Primer: Open the can of primer and stir it well using a stirring stick. Make sure the primer is thoroughly mixed before use.
- Apply the Primer: Use a paintbrush or roller to apply the primer onto the surface. Start with the edges and corners, using a brush for better precision. Then, use a roller to cover the larger areas. Apply an even coat of primer, ensuring full coverage. Follow the manufacturer’s instructions for the recommended drying time between coats.
- Smooth and Sand: Once the first coat of primer is dry, inspect the surface for any imperfections. If required, gently sand the surface using fine-grit sandpaper to smooth out any rough areas. Remove any dust or debris resulting from sanding before applying additional coats of primer.
- Apply Additional Coats: Depending on the surface and the desired finish, you may need to apply multiple coats of primer. Follow the same process of applying, drying, inspecting, and sanding between coats.
- Clean Up: After applying the final coat of primer, clean the paintbrushes, rollers, and any other tools used with warm, soapy water. Properly dispose of any leftover primer according to local regulations.
In summary, applying a primer coat before painting is crucial for achieving a professional and long-lasting finish. It improves adhesion, seals and smooths the surface, blocks stains, and enhances durability. By following the steps mentioned above, you can ensure that the primer is applied correctly, providing a solid foundation for the paint and ensuring a successful painting project.

Adding color and design to your canoe
When it comes to personalizing your canoe and making it stand out on the water, adding color and design can be a fun and creative way to achieve this. Whether you’re a seasoned paddler or just starting out, customizing your canoe can give it a unique and personalized touch. In this section, we will explore different ways you can add color and design to your canoe.
1. Paint
Painting your canoe is one of the most common and popular ways to add color and design. It allows you to completely transform the appearance of your canoe and make it truly your own. Here are some tips to keep in mind when painting your canoe:
- Choose the right type of paint: Look for marine-grade paint that is designed to withstand the elements and provide long-lasting protection. Avoid using regular household paint, as it may not adhere well to the canoe’s surface.
- Prepare the surface: Before painting, make sure to clean and sand the canoe’s surface to ensure proper adhesion. Remove any dirt, grease, or old paint to create a smooth and clean canvas.
- Use stencils or tape: If you want to create intricate designs or patterns, consider using stencils or tape to guide your painting. This can help you achieve precise lines and shapes.
- Apply multiple coats: To ensure a vibrant and durable finish, apply multiple thin coats of paint rather than one thick coat. Allow each coat to dry completely before applying the next.
- Protect the paint: Once the paint has fully cured, consider applying a clear protective coating to safeguard the design and prolong its lifespan.
2. Decals and Stickers
If you prefer a less permanent option or want to change up the design of your canoe more frequently, decals and stickers can be a great choice. They come in a wide variety of designs and styles, allowing you to customize your canoe to your liking. Here’s how you can use decals and stickers:
- Clean the surface: Make sure the area where you plan to apply the decal or sticker is clean and free from any dirt or debris. This will ensure proper adhesion and prevent any bubbles from forming.
- Peel and stick: Carefully peel off the backing of the decal or sticker, align it with the desired location on your canoe, and press it firmly onto the surface.
- Smooth out any bubbles: If any bubbles or wrinkles appear, use a credit card or similar object to gently smooth them out from the center towards the edges.
- Optional: Seal the decal or sticker with a clear protective coating to ensure its longevity and prevent it from peeling or fading.
3. Custom Graphics and Vinyl Wraps
For a truly unique and eye-catching design, you can consider custom graphics and vinyl wraps. This option allows you to showcase your creativity and have a professionally designed look. Here’s what you need to know:
- Work with a professional: Contact a graphic designer or a company specializing in custom vinyl wraps to discuss your design ideas and specifications. They will be able to create a design that suits your preferences and provide high-quality materials.
- Prepare the surface: Just like with painting, it’s important to clean and prepare the surface of your canoe before applying the vinyl wrap. This will ensure proper adhesion and prevent any damage to the wrap.
- Apply the vinyl wrap: Follow the instructions provided by the manufacturer or consult with the professionals who created the wrap. They will guide you through the application process to ensure a smooth and professional finish.
- Maintenance and care: Vinyl wraps are generally durable and long-lasting, but it’s essential to follow any maintenance instructions provided. Avoid using abrasive cleaners or tools that could damage the wrap.
4. Accessories and Trim
In addition to painting or adding decals, you can also enhance the overall look of your canoe by incorporating accessories and trim. These small details can make a big difference in the appearance of your canoe. Consider the following:
- Personalize with stickers: Add stickers or decals to your paddles, seat backs, or gear to create a cohesive and stylish look.
- Upgrade hardware: Replace standard hardware with brass or chrome-plated options to give your canoe a touch of elegance.
- Add custom seats or cushions: Choose seats or cushions with unique patterns
Protecting and Sealing the Painted Surface
Whether you’ve recently completed a painting project or you’re looking to restore an old painted surface, it’s important to protect and seal the paint to ensure its longevity and durability. By taking the necessary steps to protect and seal your painted surface, you can safeguard it from damage caused by moisture, UV rays, and everyday wear and tear.
Clean and Prepare the Surface
Prior to applying any protective sealant, it’s crucial to thoroughly clean and prepare the painted surface. Use a mild detergent or soap and water solution to remove any dirt, grime, or grease that may have accumulated on the surface. Scrub gently with a soft bristle brush or sponge, and rinse with clean water. Allow the surface to dry completely before proceeding.
Choose the Right Sealant
When it comes to selecting the appropriate sealant for your painted surface, consider the type of paint used and the specific requirements of the surface. There are various types of sealants available, such as acrylic sealants, polyurethane sealants, and epoxy sealants. Each type offers different levels of protection and durability, so choose the one that best suits your needs.
Apply the Sealant
Once you have chosen the sealant, follow the manufacturer’s instructions for application. Using a brush or roller, evenly apply the sealant over the entire painted surface. Make sure to cover the surface completely, paying special attention to any areas prone to moisture or damage. Allow the sealant to dry as recommended before applying additional coats, if necessary.
Regular Maintenance
After sealing the painted surface, it’s important to conduct regular maintenance to ensure its longevity. This includes regular cleaning with a mild detergent or soap and water solution, as well as periodic inspections for any signs of wear or damage. Promptly address any issues, such as chipping or peeling, by touching up the paint and reapplying the sealant if needed.
Protective Measures
In addition to sealing the painted surface, you can take further measures to protect it from potential damage. Consider using protective coverings, such as furniture pads or coasters, to prevent scratches or stains. Avoid placing hot objects directly on the surface to prevent heat damage. Additionally, limit exposure to direct sunlight by using blinds or curtains to reduce UV ray damage.
In summary, protecting and sealing your painted surface is essential for maintaining its appearance and durability. By following the steps outlined above, you can ensure that your paint job stands the test of time and remains in pristine condition. Remember to clean and prepare the surface, choose the right sealant, apply it correctly, conduct regular maintenance, and take protective measures to maximize the longevity of your painted surface.
FAQs
1. How to paint a canoe?
To paint a canoe, start by cleaning and sanding the surface to ensure proper adhesion. Apply a primer specifically designed for use on boats and allow it to dry. Then, apply multiple coats of marine-grade paint, allowing each coat to dry completely before adding the next. Finish with a clear coat for added protection.
2. What type of paint should I use for my canoe?
It is recommended to use marine-grade paint specifically designed for use on boats. These paints are formulated to withstand water exposure, UV rays, and other outdoor elements, providing long-lasting protection for your canoe.
3. Can I paint a fiberglass canoe?
Yes, you can paint a fiberglass canoe. The process is similar to painting other canoes. Just make sure to clean and sand the surface properly, apply a suitable primer, and use a marine-grade paint that adheres well to fiberglass materials.
Conclusion
In conclusion, painting a canoe can be a rewarding and fulfilling DIY project. By following the step-by-step process and using the right materials, you can transform your canoe into a personalized work of art. Whether you’re aiming for a sleek and sophisticated look or a vibrant and eye-catching design, the possibilities are endless. Remember to properly prepare the surface, choose high-quality paint, and apply multiple coats for a long-lasting finish. Don’t forget to protect your painted canoe from harsh weather conditions and regular maintenance to ensure its durability. So, grab your brushes and get ready to make a splash with your newly painted canoe!