
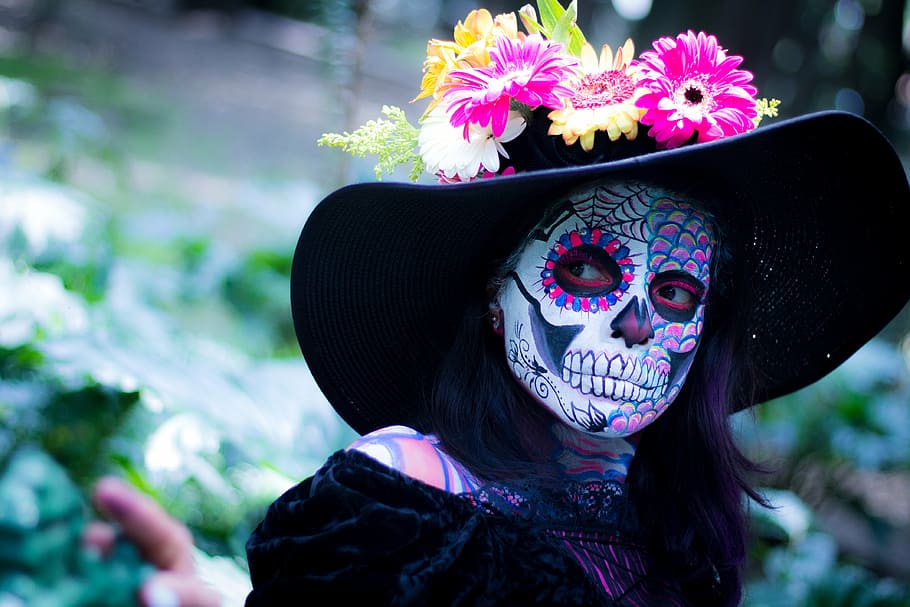
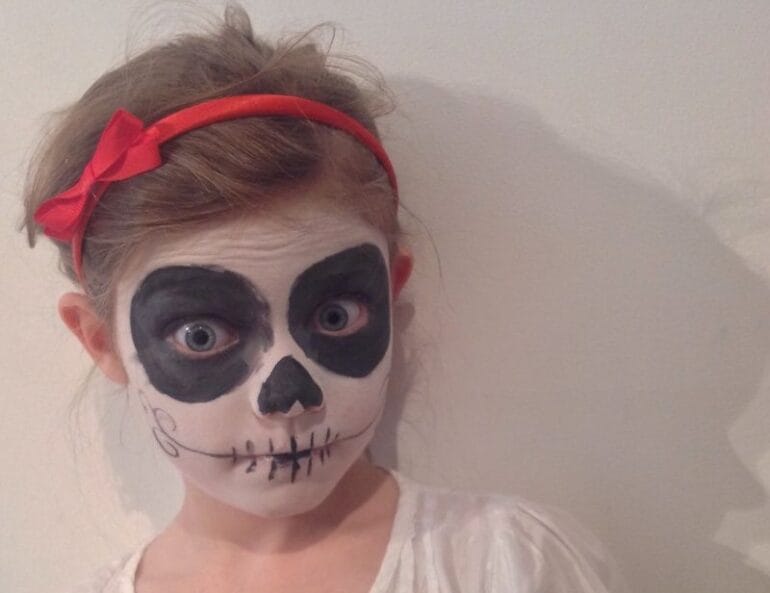
The Day of the Dead skull painting is a vibrant and symbolic art form that celebrates Mexican culture and the spirits of the deceased.
Painting a Day of the Dead skull involves using bold colors, intricate designs, and meaningful symbols to create a visually striking masterpiece.
Whether you are a beginner or an experienced artist, this step-by-step guide will provide you with the necessary techniques and inspiration to paint your own Day of the Dead skull.
From choosing the right materials to creating intricate details, we will walk you through the entire process, helping you bring this traditional Mexican art form to life.
Get ready to dive into the world of vibrant colors and rich symbolism as we explore the art of painting a Day of the Dead skull. Let’s begin!
Step-by-Step Guide to Sketching the Day of the Dead Skull Design
The Day of the Dead, or Dia de los Muertos, is a vibrant and colorful Mexican holiday that celebrates and honors deceased loved ones. One of the most iconic symbols of this holiday is the Day of the Dead skull, also known as the sugar skull. These skulls are intricately designed, featuring ornate patterns and vibrant colors. If you’re interested in creating your own Day of the Dead skull design, follow this step-by-step guide to sketching one.
Materials You’ll Need:
Before you start sketching, make sure you have the following materials ready:
- Sketchbook or drawing paper
- Pencil
- Eraser
- Fine-tip markers or colored pencils
Step 1: Start with a Basic Skull Shape
Begin by lightly sketching a rough outline of a skull shape on your paper. Start with a circle for the head and add the basic shapes for the eye sockets, nose, and jaw. Don’t worry about details at this point; focus on getting the proportions and overall shape right.
Step 2: Add Intricate Designs
Once you’re satisfied with the basic skull shape, start adding intricate designs to embellish the skull. These designs can include floral patterns, geometric shapes, hearts, and other decorative elements. Take inspiration from traditional Day of the Dead artwork, but don’t be afraid to add your own personal touch.
Step 3: Define the Features
Next, begin to define the features of the skull. Use darker lines to outline the eye sockets, nose, and jaw. Add details such as teeth, cracks, and shading to give the skull more depth and dimension.
Step 4: Choose Your Colors
Once you’re satisfied with the line work, it’s time to add color to your Day of the Dead skull. Traditional sugar skulls are often brightly colored with a mix of vibrant hues. Use markers or colored pencils to fill in the different sections of your design. Experiment with color combinations and patterns to create a visually striking skull.
Step 5: Add Final Details
Lastly, add any final details or embellishments to complete your Day of the Dead skull design. This can include additional patterns, shading, or highlights to make your design stand out. Take your time and carefully refine your sketch until you’re happy with the final result.
In summary, sketching a Day of the Dead skull design is a fun and creative way to celebrate the rich traditions of the Mexican holiday. Follow this step-by-step guide to create your own unique and vibrant sugar skull design. Remember to embrace your own artistic style and add personal touches to make your design truly one-of-a-kind. Happy sketching!
Adding Vibrant Colors and Intricate Patterns to the Day of the Dead Skull
The Day of the Dead, or Dia de los Muertos, is a traditional Mexican holiday that celebrates and honors deceased loved ones. One of the most iconic symbols of this holiday is the Day of the Dead skull, also known as Calavera. These skulls are typically adorned with vibrant colors and intricate patterns, making them visually stunning and representative of the festive spirit of the holiday. In this section, we will explore how to add vibrant colors and intricate patterns to the Day of the Dead skull, allowing you to create your own unique and eye-catching designs.
Gathering the Necessary Supplies
Before starting your Day of the Dead skull design, it is important to gather all the necessary supplies. Here is a list of items you will need:
- A ceramic or wooden skull
- Acrylic paints in a variety of vibrant colors
- Paintbrushes in different sizes
- Pencil or marker for sketching
- Clear varnish or sealant
- Optional: Rhinestones, glitter, or other decorative materials
Sketching the Design
Before applying paint to your Day of the Dead skull, it is helpful to sketch out your design first. Use a pencil or marker to lightly outline the patterns and shapes you want to incorporate. This will help you ensure symmetry and balance in your design. Remember, the Day of the Dead skull is traditionally decorated with intricate floral patterns, hearts, and geometric shapes. Feel free to add your own personal touch and creativity to the design.
Painting the Base Colors
Once you have sketched out your design, it’s time to start painting the base colors. Day of the Dead skulls are typically painted with bright and vibrant colors such as red, orange, yellow, pink, and purple. Use a medium-sized paintbrush to apply the base colors to different sections of the skull. Allow each color to dry before moving on to the next one to prevent smudging or mixing of the colors.
Adding Intricate Patterns
After the base colors have dried, it’s time to add the intricate patterns to your Day of the Dead skull. Use smaller paintbrushes or even toothpicks to create delicate lines, dots, and swirls. Traditionally, these patterns include intricate floral designs, hearts, spiderwebs, and geometric shapes. You can also incorporate symbols that represent the deceased loved ones you are honoring.
Enhancing the Design
To make your Day of the Dead skull design even more visually appealing, you can enhance it with additional decorative elements. Consider adding rhinestones, glitter, or sequins to specific areas for a touch of sparkle. You can also use metallic paint to accentuate certain details and make them stand out. Just remember to let each layer of paint or embellishment dry completely before adding the next one.
Sealing the Design
To protect your intricate Day of the Dead skull design and ensure its longevity, it’s important to seal it with a clear varnish or sealant. This will help prevent the paint from chipping or fading over time. Apply the varnish or sealant according to the manufacturer’s instructions and make sure to cover the entire surface of the skull. Allow it to dry completely before displaying or using your decorated Day of the Dead skull.
In summary, adding vibrant colors and intricate patterns to the Day of the Dead skull is a creative and visually captivating way to celebrate the Dia de los Muertos holiday. By gathering the necessary supplies, sketching the design, painting the base colors, adding intricate patterns, enhancing the design with decorative elements, and sealing the final product, you can create a unique and personalized Day of the Dead skull that pays homage to your loved ones and adds a festive touch to your holiday celebrations.
Enhancing the Details and Highlights of the Day of the Dead Skull
The Day of the Dead, or Dia de los Muertos, is a vibrant and meaningful celebration in Mexican culture. One of the most iconic symbols of this holiday is the Day of the Dead skull, also known as the Calavera. These intricately decorated skulls serve as a reminder to honor and remember loved ones who have passed away. In recent years, the Day of the Dead skull has gained popularity worldwide as a symbol of beauty, craftsmanship, and cultural significance.
The traditional Day of the Dead skull is adorned with colorful patterns, intricate designs, and symbolic elements. These features make each skull unique and provide ample opportunities for artists and craftsmen to enhance their details and highlights. Let’s explore some ways in which the details and highlights of the Day of the Dead skull can be further enhanced.
1. Intricate Designs and Patterns
One of the distinguishing features of the Day of the Dead skull is its intricate designs and patterns. These designs often include floral motifs, geometric shapes, and swirls. To enhance the details of the skull, artists can incorporate more complex and elaborate patterns. This can be achieved by adding smaller and finer elements within the existing design, creating depth and dimension. The use of vibrant colors like reds, blues, and yellows can also make the designs stand out and add a lively touch.
2. Incorporating Symbolic Elements
The Day of the Dead is a celebration of life, and the skull serves as a symbol of the cycle of life and death. To enhance the symbolic significance of the skull, artists can incorporate additional elements that represent different aspects of this celebration. For example, marigold flowers, known as “cempasuchil,” are often used to decorate altars and graves during the Day of the Dead. Including these flowers in the design of the skull can add a deeper meaning and connection to the tradition.
3. Playing with Texture and Materials
To add visual interest and tactile appeal, artists can experiment with different textures and materials when enhancing the details of the Day of the Dead skull. This can be achieved by incorporating elements like beads, sequins, feathers, or even using three-dimensional sculpting techniques. These additions not only make the skull visually captivating but also create a multi-sensory experience for the viewer.
4. Using Metallic Accents
Metallic accents can elevate the overall look of the Day of the Dead skull and make it even more striking. Artists can incorporate gold, silver, or bronze accents to highlight specific areas of the skull, such as the eye sockets, nose, or forehead. These metallic touches catch the light and add a touch of luxury to the design, further enhancing its visual appeal.
5. Customization and Personalization
Each Day of the Dead skull can be customized and personalized to reflect the individual or individuals being honored. Artists can incorporate names, initials, or meaningful symbols that hold significance to the person or family honoring their loved ones. This personal touch adds a deeper emotional connection and creates a truly unique and meaningful piece of art.
In summary, enhancing the details and highlights of the Day of the Dead skull involves incorporating intricate designs, symbolic elements, playing with texture and materials, using metallic accents, and allowing for customization and personalization. These enhancements not only elevate the visual appeal of the skull but also add a deeper layer of meaning and connection to the Day of the Dead celebration. The Day of the Dead skull is truly a remarkable art form that continues to captivate and inspire people worldwide.
Finishing Touches and Displaying Your Day of the Dead Skull Painting
Now that you have completed your beautiful Day of the Dead skull painting, it’s time to add some finishing touches and find the perfect way to display your artwork. Follow these steps to enhance your painting and showcase it for everyone to admire.
1. Varnishing
Before displaying your painting, it’s essential to protect it with a varnish. Varnishing not only adds a beautiful gloss finish but also helps preserve the colors and protects the painting from dust and UV damage. Choose a varnish specifically designed for acrylic paintings and apply it evenly using a soft brush. Follow the manufacturer’s instructions for drying time.
2. Framing
Framing your Day of the Dead skull painting can add a professional touch and make it stand out. Select a frame that complements your artwork and enhances its overall appearance. Consider choosing a frame with intricate details or bold colors that align with the spirit of the Day of the Dead. If your painting is on a canvas panel, you can have it professionally framed or opt for a ready-made frame that fits its dimensions.
3. Mounting on a Wooden Panel
If you prefer a more rustic look, you can mount your painting on a wooden panel. This method involves attaching your artwork securely to a wooden surface, which not only adds stability but also creates a unique visual effect. Apply an adhesive specifically designed for artwork to the back of your canvas and carefully place it on the wooden panel. Smooth out any air bubbles or wrinkles, and allow it to dry completely before displaying.
4. Lighting
Proper lighting can make a significant difference in how your Day of the Dead skull painting is perceived. Consider installing track lighting or spotlights to highlight your artwork and create a focal point. Experiment with different angles and intensities to achieve the desired effect. Avoid exposing your painting to direct sunlight, as it may cause fading or discoloration over time.
5. Hanging and Displaying
When it comes to displaying your Day of the Dead skull painting, there are several options to consider. You can hang it on a prominent wall using hooks or picture wire. If you have multiple artworks, creating a gallery wall can be a visually striking way to showcase your collection. Alternatively, you can place your painting on a decorative easel, allowing it to stand freely and be admired from various angles.
6. Curating a Theme
If you have multiple Day of the Dead skull paintings or other related artwork, consider curating a cohesive theme. Arrange your pieces in a way that tells a story or reflects a specific aesthetic. This approach not only enhances the visual impact but also adds depth and meaning to your collection.
7. Sharing and Enjoying
Lastly, don’t forget to share your Day of the Dead skull painting with others and enjoy the process of displaying your artwork. Whether it’s hosting a small gathering or posting pictures online, sharing your creation can inspire and spark conversations. Take pride in your work and continue exploring the vibrant world of Day of the Dead art.
In summary, finishing touches and proper display play a vital role in showcasing your Day of the Dead skull painting. By varnishing, framing, or mounting it on a wooden panel, you can enhance its appearance and protect it for years to come. Consider using suitable lighting techniques to highlight your artwork and experiment with different display options. Finally, curate a theme if you have multiple related pieces and share your creation with others. Enjoy the process and celebrate the beauty of Day of the Dead art!
Frequently Asked Questions
1. How can I paint a Day of the Dead skull?
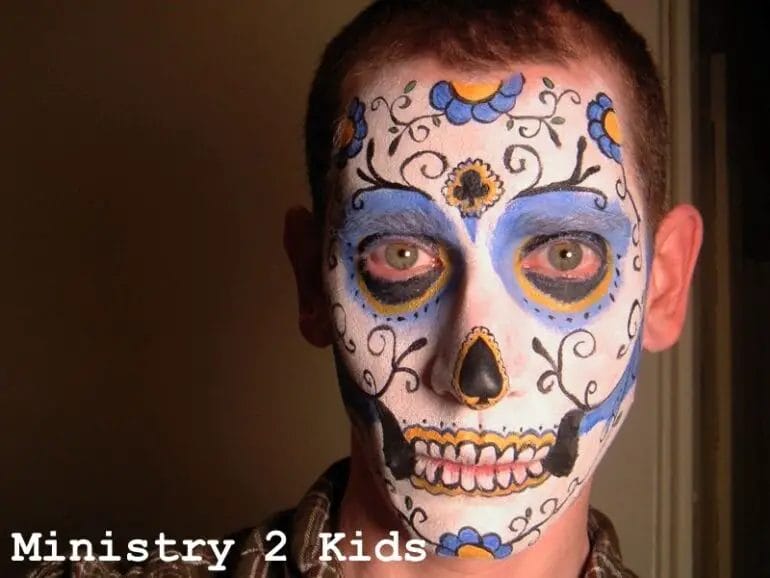
You can paint a Day of the Dead skull by following these steps: 1. Start with a white base coat on the skull. 2. Use black paint to outline the eyes, nose, and teeth. 3. Fill in the eye sockets and nose with colorful designs and patterns. 4. Paint intricate details like flowers, hearts, and swirls on the forehead and cheeks. 5. Finish off with shading and highlights to add depth. Remember to use vibrant colors and have fun with your creation!
2. What materials do I need to paint a Day of the Dead skull?
To paint a Day of the Dead skull, you will need the following materials: – A ceramic or plastic skull (or a skull-shaped canvas) – Acrylic paints in various colors – Paintbrushes in different sizes – Palette or a disposable plate for mixing colors – Water and paper towels for cleaning brushes – Optional: Pencil for sketching the design before painting
3. Can I use different colors for a Day of the Dead skull?
Yes, one of the unique aspects of Day of the Dead skulls is their vibrant and colorful designs. Feel free to use any colors you like to create your own personalized skull. However, it is recommended to use traditional colors such as bright pink, orange, yellow, and blue to maintain the essence of the celebration.
Conclusion
In conclusion, painting a Day of the Dead skull is a creative and mesmerizing activity that allows you to explore the vibrant and symbolic world of Mexican culture. By following the step-by-step process and incorporating your own artistic style, you can bring life to this traditional art form. Whether you choose to use traditional colors or put your own unique spin on the design, painting a Day of the Dead skull is a wonderful way to celebrate and honor the spirits of the departed. So gather your paints, brushes, and creativity, and let your imagination run wild as you create your own stunning Day of the Dead skull masterpiece!
Remember to take your time, experiment with different techniques, and have fun throughout the process. Don’t be afraid to add your own personal touch and make the design truly your own. Whether you’re a beginner or an experienced artist, painting a Day of the Dead skull is a fantastic way to embrace the rich cultural heritage and express your creativity. So grab your brushes and start painting today!