
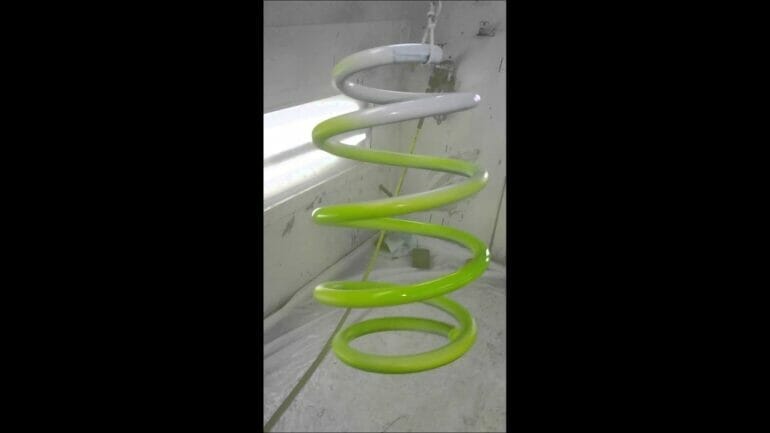
Yes, it is possible to paint coil springs to enhance their appearance and protect them from corrosion. Painting coil springs can be done using various methods, such as spray painting or powder coating. By applying a paint or coating to the springs, it not only adds a visually appealing finish but also helps to prolong their lifespan by preventing rust and corrosion. It is important to properly clean and prepare the springs before painting to ensure good adhesion and durability of the paint.
Pros and Cons of Painting Coil Springs
Coil springs are an essential component of many vehicles, providing support and stability to the suspension system. While they are typically made of metal and come in a variety of finishes, some car enthusiasts may consider painting their coil springs to enhance the visual appeal of their vehicles. However, before you decide to paint your coil springs, it’s important to weigh the pros and cons to make an informed decision.
Pros of Painting Coil Springs
1. Enhanced Aesthetic Appeal: One of the primary reasons why car owners choose to paint their coil springs is to enhance the overall look of their vehicles. By adding a fresh coat of paint, you can customize the appearance of your coil springs to match your personal style or the theme of your vehicle.
2. Protection against Rust: Coil springs are exposed to various elements, including moisture, dirt, and road debris. Over time, these factors can cause the springs to develop rust and corrosion, which can compromise their structural integrity. Painting the coil springs can act as a protective barrier, preventing rust from forming and extending their lifespan.
3. Easier Maintenance: Painted coil springs are generally easier to clean and maintain compared to untreated ones. The paint can help repel dirt and grime, making it easier to keep the springs looking clean and presentable with regular washing.
Cons of Painting Coil Springs
1. Added Weight: While the weight of the paint may seem negligible, it can add up when applied to all the coil springs in a vehicle’s suspension system. This extra weight can potentially affect the performance and handling of the vehicle, especially for high-performance or sports cars where weight optimization is critical.
2. Potential Paint Damage: Coil springs undergo constant compression and extension as part of the suspension system’s operation. This continuous movement can cause the paint to chip, crack, or peel over time. Additionally, road debris and rocks kicked up by the tires can also cause paint damage, diminishing the visual appeal of the painted springs.
3. Compatibility Issues: Coil springs often have a specific type of coating or finish applied during the manufacturing process. This coating is designed to provide optimal performance, durability, and corrosion resistance. Painting over the existing coating may interfere with the intended functionality of the springs and can void any warranty or guarantees provided by the manufacturer.
In summary, painting coil springs can be a great way to customize the look of your vehicle and provide added protection against rust. However, it’s important to consider the potential drawbacks, such as added weight, potential paint damage, and compatibility issues. Before deciding to paint your coil springs, consult with a professional or the manufacturer to ensure it won’t compromise the performance or safety of your vehicle.
Best Paints for Coil Springs: A Buyer’s Guide
If you are looking to give your coil springs a fresh new look, painting them can be a great option. Not only does it enhance their appearance but also provides a protective coating against rust and corrosion. However, choosing the right paint for coil springs can be a daunting task, considering the numerous options available in the market. In this buyer’s guide, we will explore some of the best paints for coil springs and provide you with valuable insights to help you make an informed decision.
1. Rust-Oleum Automotive High Heat Spray Paint
Rust-Oleum Automotive High Heat Spray Paint is a popular choice among automotive enthusiasts for painting their coil springs. This paint is specially formulated to withstand high temperatures and provides a durable finish that resists chipping, cracking, and peeling. It offers excellent adhesion and can be used on various surfaces, including metal coil springs. Additionally, it comes in a wide range of colors, allowing you to customize the look of your coil springs.
2. PlastiKote 1000 Universal Clear Coat Automotive Touch-Up Paint
If you are looking for a clear coat to protect and enhance the natural appearance of your coil springs, PlastiKote 1000 Universal Clear Coat Automotive Touch-Up Paint is a great choice. This paint is easy to apply and provides a glossy, long-lasting finish. It is resistant to UV rays, weathering, and fading, ensuring that your coil springs maintain their shine for an extended period. The clear coat also acts as a protective barrier against scratches and corrosion.
3. Dupli-Color Perfect Match Premium Automotive Paint
Dupli-Color Perfect Match Premium Automotive Paint is a versatile option for painting coil springs. This paint is designed to match the original color of your vehicle, making it ideal for touch-ups or complete paint jobs. It offers excellent coverage and dries quickly, providing a smooth and professional-looking finish. The paint is resistant to cracking, flaking, and peeling, ensuring that your coil springs stay vibrant and protected.
4. VHT Epoxy All-Weather Paint
If you are looking for a paint that can withstand extreme weather conditions, VHT Epoxy All-Weather Paint is a reliable choice. This paint is specifically formulated to provide long-lasting protection against rust, corrosion, and fading. It is resistant to heat, chemicals, and solvents, making it suitable for coil springs exposed to harsh environments. The paint adheres well to metal surfaces and provides a durable finish that can withstand the test of time.
5. Krylon ColorMaster Paint + Primer
Krylon ColorMaster Paint + Primer is a convenient option for painting coil springs. This paint combines a primer and paint in one, saving you time and effort during the painting process. It offers excellent coverage and adhesion, ensuring that the paint stays firmly on the coil springs. The paint dries quickly and provides a smooth, chip-resistant finish. It is available in a wide range of colors, allowing you to choose the perfect shade for your coil springs.
Factors to Consider When Choosing Paint for Coil Springs
When selecting the best paint for your coil springs, there are a few factors you should consider:
- Temperature resistance: Ensure that the paint can withstand high temperatures to prevent it from melting or peeling off.
- Adhesion: Look for a paint that adheres well to metal surfaces to ensure a durable and long-lasting finish.
- Finish: Decide whether you want a glossy, matte, or textured finish based on your personal preference.
- Protection: Consider paints that offer protection against rust, corrosion, UV rays, and other environmental factors.
- Application: Choose a paint that is easy to apply and provides good coverage, saving you time and effort during the painting process.
In summary, painting coil springs can be a rewarding project that enhances their appearance and provides protection against rust and corrosion. By considering factors such as temperature resistance, adhesion, finish, protection, and application, you can select the best paint for your coil springs. Whether you prefer a high heat spray paint, a clear coat, a color-matching paint, or an all-weather paint, the options mentioned in this buyer’s guide are some of the best paints available in the market. Choose the one that suits your needs and enjoy a refreshed and revitalized look for your coil springs.
Step-by-Step Guide to Painting Coil Springs
If you want to give your vehicle a unique and eye-catching look, one way to do so is by painting the coil springs. Coil springs, which are a key component of a vehicle’s suspension system, can be transformed into a vibrant and personalized feature with some paint. In this guide, we’ll take you through the step-by-step process of painting coil springs.
Step 1: Gather the Materials
Before you begin, it’s important to gather all the necessary materials. Here’s a list of what you’ll need:
- Coil springs
- Sandpaper
- Primer
- Paint (choose a color of your preference)
- Paintbrush or spray paint gun
- Masking tape
- Drop cloth or newspaper
- Clear coat (optional for added protection)
Step 2: Prepare the Coil Springs
The first step in painting coil springs is to prepare them for painting. Start by removing the coil springs from your vehicle. This may require using a jack and other tools to safely lift the vehicle. Once the coil springs are removed, clean them thoroughly with soap and water to remove any dirt or grease. After cleaning, use sandpaper to lightly sand the surface of the coil springs. This will help the paint adhere better.
Step 3: Apply the Primer
Applying a primer is an important step to ensure a smooth and long-lasting paint job. Use a primer specifically designed for metal surfaces. Apply a thin and even coat of primer to the coil springs, making sure to cover the entire surface. Allow the primer to dry completely according to the manufacturer’s instructions.
Step 4: Paint the Coil Springs
Now comes the fun part – painting the coil springs! Choose a high-quality paint that is suitable for metal surfaces. You can either use a paintbrush or a spray paint gun for this step. Apply the paint in thin and even coats, allowing each coat to dry before applying the next. This will help prevent drips and ensure a smooth finish.
For optimal results, it’s recommended to apply multiple coats of paint until you achieve the desired color and finish. Take your time and be patient throughout this process to ensure a professional-looking outcome.
Step 5: Optional Clear Coat
If you want to provide additional protection to the painted coil springs, you can apply a clear coat. This will help protect the paint from chips, scratches, and fading due to exposure to the elements. Follow the manufacturer’s instructions for applying the clear coat and allow it to dry completely before reattaching the coil springs to your vehicle.
Step 6: Reinstall the Coil Springs
Once the paint and clear coat have dried, it’s time to reinstall the coil springs back onto your vehicle. Carefully lower the vehicle and position the coil springs in their respective locations. Make sure to tighten all the bolts and nuts securely to ensure proper suspension function.
Step 7: Enjoy the New Look
With the coil springs painted and reinstalled, take a step back and admire the transformation. Your vehicle now has a unique and personalized touch that reflects your style and creativity. Enjoy the new look and show off your customized coil springs!
In summary, painting coil springs is a great way to enhance the appearance of your vehicle. By following this step-by-step guide, you can achieve a professional-looking paint job and create a unique look that sets your vehicle apart from the rest.
How to Properly Prepare Coil Springs for Painting
When it comes to giving your coil springs a fresh new look, proper preparation is key. Preparing your coil springs for painting ensures a smooth and long-lasting finish. Whether you are restoring an old vehicle or customizing your ride, follow these steps to properly prepare your coil springs for painting.
1. Gather the Necessary Tools and Materials
Before you begin the preparation process, make sure you have all the necessary tools and materials on hand. Here’s what you’ll need:
- Coil springs
- Wire brush
- Sandpaper (medium and fine grit)
- Steel wool
- Paint stripper
- Paint thinner
- Primer
- Paint
- Paintbrush or spray gun
- Protective gloves and goggles
2. Remove the Coil Springs
To properly prepare the coil springs, you’ll need to remove them from your vehicle. Refer to your vehicle’s manual or seek professional assistance to safely remove the coil springs. It is important to handle the coil springs with care to avoid any damage or injury.
3. Clean the Coil Springs
Begin the preparation process by thoroughly cleaning the coil springs. Use a wire brush to remove any dirt, rust, or loose paint from the surface. Be sure to clean all sides of the coil springs to ensure a smooth finish.
4. Strip the Old Paint
If there is any old paint remaining on the coil springs, you’ll need to strip it off. Apply a paint stripper according to the manufacturer’s instructions. Allow the stripper to sit for the recommended time and then use a wire brush or steel wool to remove the old paint. For stubborn areas, you may need to repeat this process or use a chemical paint remover.
5. Sand and Smooth the Surface
Once the paint has been stripped, use medium and fine grit sandpaper to sand the surface of the coil springs. Sanding helps to remove any remaining paint residue and creates a smooth surface for the new paint to adhere to. Be thorough and pay attention to detail, ensuring that all areas are sanded evenly.
6. Remove Dust and Debris
After sanding, use a clean cloth or compressed air to remove any dust and debris from the coil springs. It is essential to have a clean surface before applying any primer or paint.
7. Apply Primer
Priming the coil springs is essential to achieve a professional-looking finish. Choose a primer specifically designed for metal surfaces. Apply the primer evenly using a paintbrush or spray gun, following the manufacturer’s instructions. Allow the primer to dry completely before proceeding to the next step.
8. Paint the Coil Springs
Finally, it’s time to apply the paint to your coil springs. Choose a high-quality paint that is suitable for metal surfaces and provides the desired finish. Apply the paint in thin, even coats, allowing each coat to dry before applying the next one. This will help prevent drips and ensure a smooth finish. Use a paintbrush or spray gun for optimal coverage.
9. Allow the Paint to Cure
Once you have finished painting the coil springs, allow the paint to cure completely. Refer to the paint manufacturer’s instructions for the recommended curing time. It is important to avoid any contact or stress on the painted surface during this time to prevent any damage.
10. Reinstall the Coil Springs
After the paint has fully cured, you can safely reinstall the coil springs back onto your vehicle. Make sure to follow the proper installation procedures outlined in your vehicle’s manual or seek professional assistance.
Summary
Properly preparing your coil springs for painting is crucial to achieve a professional and long-lasting finish. By following these steps, you can ensure that your coil springs are clean, stripped of old paint, and properly primed and painted. Take your time, be thorough, and enjoy the process of transforming your coil springs into a standout feature of your vehicle.
Tips for Maintaining and Protecting Painted Coil Springs
Coil springs are an essential component of a vehicle’s suspension system. Not only do they provide support and stability, but they also help to absorb shocks and bumps while on the road. To ensure the optimal performance and longevity of your coil springs, proper maintenance and protection are crucial. In this section, we will discuss some valuable tips on how to maintain and protect painted coil springs.
1. Regular Cleaning
Regular cleaning is essential to keep your painted coil springs in good condition. Over time, dirt, grime, and road debris can accumulate on the surface of the springs, which can lead to corrosion and damage. To clean your coil springs, start by rinsing them with low-pressure water to remove loose dirt and debris. Then, use a mild soap and a soft brush to scrub away any stubborn residue. Finally, rinse thoroughly and dry the springs completely.
2. Apply a Protective Coating
To provide an additional layer of protection for your painted coil springs, consider applying a protective coating. There are various types of coatings available in the market, such as clear coat or rust-resistant spray paint. These coatings help to prevent rust, corrosion, and chipping of the paint. Before applying the protective coating, make sure to clean the springs thoroughly and remove any existing rust or loose paint.
3. Regular Inspection
Regular inspection is vital to identify any potential issues with your coil springs. Check for signs of wear and tear, such as cracks, chips, or peeling paint. If you notice any damage, it is important to address it promptly to prevent further deterioration. Regular inspections also allow you to detect any underlying suspension problems that may be affecting the performance of your coil springs.
4. Avoid Excessive Weight and Overloading
Excessive weight and overloading can put unnecessary strain on your coil springs, leading to premature wear and damage. It is crucial to be mindful of the weight capacity of your vehicle and avoid overloading it. If you frequently carry heavy loads, consider upgrading your coil springs to ones that are designed for heavier loads. This will help prolong the lifespan of your springs and maintain optimal suspension performance.
5. Drive with Caution
Driving habits play a significant role in maintaining the integrity of your coil springs. Avoid rough terrain, potholes, and speed bumps whenever possible to minimize the impact on your suspension system. Additionally, practicing defensive driving techniques and avoiding sudden stops or aggressive maneuvers can help prevent unnecessary stress on the coil springs.
6. Schedule Regular Maintenance
Lastly, scheduling regular maintenance with a qualified mechanic is essential for the overall health of your vehicle, including the coil springs. A professional inspection and servicing will ensure that any potential issues are identified early on and addressed proactively. This will help maintain the longevity and performance of your coil springs, as well as the safety of your vehicle.
In summary, maintaining and protecting painted coil springs is crucial for the optimal performance and longevity of your vehicle’s suspension system. By following these tips and incorporating them into your regular maintenance routine, you can ensure that your coil springs remain in top condition, providing a smooth and comfortable ride.
FAQs
Can you paint coil springs?
Yes, you can paint coil springs. Before painting, make sure to clean the springs thoroughly to remove any dirt or grease. Use a primer specifically designed for metal surfaces, and then apply a coat of paint. Allow the paint to dry completely before reinstalling the coil springs.
Conclusion:
In conclusion, painting coil springs can be a great way to enhance their appearance and protect them from rust and corrosion. By choosing the right type of paint and following the proper preparation and application steps, you can achieve a professional and durable finish. Whether you want to match the springs to your vehicle’s color or add a custom touch, painting coil springs is a feasible DIY project. Remember to clean the springs thoroughly, remove any existing paint or rust, and apply multiple thin coats for the best results. With a little effort and attention to detail, your painted coil springs will not only look great but also last longer.