
Are you wondering if you can paint contact paper? The answer is yes, you can! Painting contact paper is a great way to add a fresh look to old furniture or give a unique touch to your home decor. By using the right techniques and materials, you can transform your contact paper into a stunning and personalized piece. In this article, we will guide you through the process of painting contact paper, including preparation, painting techniques, and finishing touches. Let’s get started!
Transform Your Furniture with Painted Contact Paper
Are you tired of looking at the same old furniture in your home? Do you want to give your space a fresh new look without spending a fortune on new furniture? Look no further! With the help of painted contact paper, you can transform your furniture and breathe new life into your home.
Contact paper is a versatile material that is commonly used for covering shelves and countertops. However, its potential goes far beyond that. By simply adding a coat of paint to contact paper, you can create stunning patterns and designs that can be applied to almost any piece of furniture.
Here’s how you can transform your furniture with painted contact paper:
1. Prepare your furniture
Before you begin, make sure to clean and prepare the surface of your furniture. Remove any dust or dirt, and sand down any rough areas. This will ensure that the contact paper adheres properly and results in a smooth finish.
2. Choose your contact paper
Next, it’s time to choose the contact paper that will serve as the base for your painted design. There are endless options available, from solid colors to patterns and textures. Consider the style and theme of your room, and choose a contact paper that complements it.
3. Paint your contact paper
Now comes the fun part – painting the contact paper! Use acrylic or latex paint in your desired colors. You can opt for a single color or create a more intricate design by using multiple colors. Let your creativity guide you as you apply the paint to the contact paper. Allow the paint to dry completely before moving on to the next step.
4. Cut and apply the contact paper
Once the painted contact paper is dry, it’s time to cut it to the desired size and shape. Measure the surface of your furniture and cut the contact paper accordingly. Peel off the backing and carefully apply the contact paper to the surface, ensuring there are no bubbles or wrinkles. Smooth it out with a squeegee or a credit card to ensure proper adhesion.
5. Finishing touches
After applying the contact paper, take a moment to step back and admire your handiwork. If you notice any imperfections or air bubbles, gently lift the contact paper and reapply it. Once you are satisfied with the result, trim any excess contact paper and smooth the edges for a clean finish.
In summary, painted contact paper is a fantastic way to transform your furniture and give your space a fresh new look. With a little creativity and some basic DIY skills, you can achieve stunning results that will impress your friends and family. So why wait? Grab some contact paper, choose your paint colors, and start transforming your furniture today!
DIY Crafts: Painting Contact Paper for Creative Projects
Contact paper is a versatile material that can be used for a variety of crafts and DIY projects. One creative way to use contact paper is by painting it. By painting contact paper, you can add a personal touch to your projects and create unique designs. In this section, we will explore the process of painting contact paper and discuss some creative project ideas.
Materials Needed
Before we dive into the painting process, let’s gather the materials you will need for this DIY project:
- Contact paper
- Acrylic paints
- Paintbrushes
- Scissors
- Pencil
- Cardboard or poster board
Painting Process
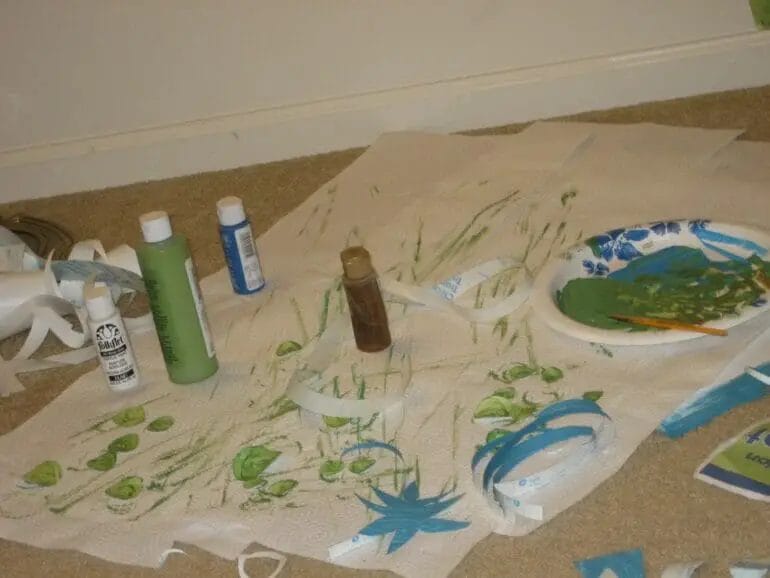
The first step in painting contact paper is to prepare your workspace. Lay out a piece of cardboard or poster board to protect your surface from any paint splatters.
Next, carefully peel off the backing of the contact paper and lay it flat on your work surface with the sticky side facing up. You can cut the contact paper into any desired shape or size using scissors.
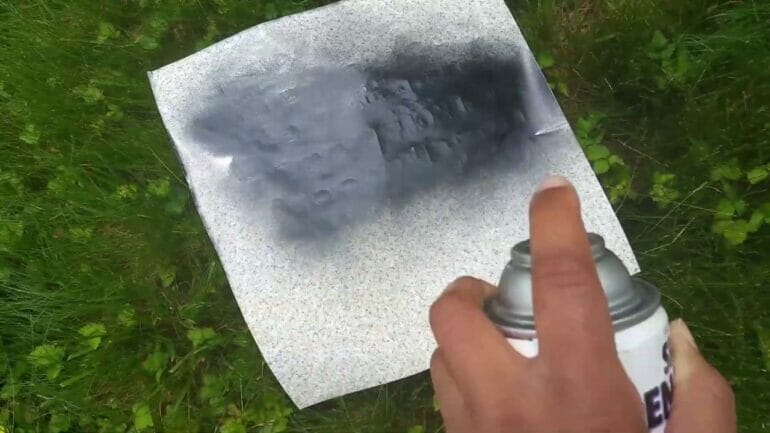
Once you have your contact paper ready, it’s time to start painting! Use acrylic paints and paintbrushes to apply your desired colors and designs onto the contact paper. You can create patterns, abstract designs, or even paint realistic images.
Allow the paint to dry completely before moving on to the next step. This usually takes around 1-2 hours, depending on the thickness of the paint layers. Once the paint is dry, carefully peel off the contact paper from your work surface.
You now have a beautifully painted piece of contact paper that can be used for various creative projects.
Creative Project Ideas
Now that you have your painted contact paper, let’s explore some creative project ideas to put it to use:
- Decorative Wall Art: Cut your painted contact paper into different shapes and sizes to create a unique wall art arrangement. Stick the pieces onto a blank canvas or directly onto your wall for an eye-catching display.
- Customized Laptop Skin: Measure and cut the painted contact paper to fit the lid of your laptop. Peel off the backing and carefully apply it to give your laptop a personalized and stylish look.
- DIY Stickers: Cut out your painted contact paper into various shapes and sizes to create custom stickers. Stick them onto notebooks, gift wrap, or any other surface to add a personal touch.
- Furniture Makeover: Give a plain piece of furniture a new look by applying your painted contact paper to its surface. Cut the contact paper into the desired shapes and patterns, then carefully stick it onto the furniture for an instant transformation.
- Gift Wrapping: Use your painted contact paper to wrap gifts in a unique and personalized way. Cut out strips or shapes from the contact paper and apply them to plain gift wrap for a creative and eye-catching presentation.
These are just a few ideas to get you started, but the possibilities with painted contact paper are endless. Let your creativity flow and explore different ways to incorporate your painted contact paper into your DIY projects.
In summary, painting contact paper is a fun and creative way to add a personal touch to your DIY crafts. With just a few materials and some imagination, you can transform plain contact paper into a unique and vibrant artistic medium. Whether you use it for wall art, laptop skins, stickers, furniture makeovers, or gift wrapping, painted contact paper is sure to elevate your projects to the next level. So, grab your paints and brushes, and let your creativity shine!
Enhance Your Home Decor with Painted Contact Paper
Are you looking for a simple and affordable way to update your home decor? Look no further than painted contact paper. This versatile material can be used to transform any surface, from walls to furniture, with a fresh new look. In this section, we will explore how you can enhance your home decor using painted contact paper.
1. Prep the Surface
Before applying contact paper, it is important to properly prepare the surface. Start by cleaning the area thoroughly to remove any dirt or debris. If you are working with a rough surface, such as textured walls, consider sanding it down to create a smoother base for the contact paper to adhere to.
2. Choose Your Paint
Next, select the paint color or colors that you want to use. Consider the overall aesthetic of your space and choose colors that complement your existing decor. You can opt for a single color for a cohesive look, or get creative and use multiple colors for a more unique and eye-catching design.
3. Apply the Paint
Now it’s time to unleash your creativity and apply the paint to the contact paper. Lay the contact paper flat on a protected surface and use a brush or roller to apply the paint evenly. You can experiment with different painting techniques, such as sponging or stenciling, to achieve different effects.
4. Let it Dry
Once you have finished painting the contact paper, allow it to dry completely. This may take a few hours or overnight, depending on the type of paint you used and the thickness of the application. Be patient and resist the temptation to touch or move the contact paper before it is fully dry.
5. Apply the Contact Paper
Once the painted contact paper is dry, carefully peel off the backing and apply it to the desired surface. Start from one corner and smooth out any air bubbles or wrinkles as you go. Take your time to ensure a seamless application and use a squeegee or credit card to smooth out any imperfections.
6. Trim and Finish
After the contact paper is securely applied, trim any excess material using a sharp utility knife or scissors. Pay attention to corners and edges to achieve a clean and professional finish. If desired, you can also apply a clear sealant or topcoat to protect the painted surface and enhance its durability.
7. Enjoy Your Updated Decor
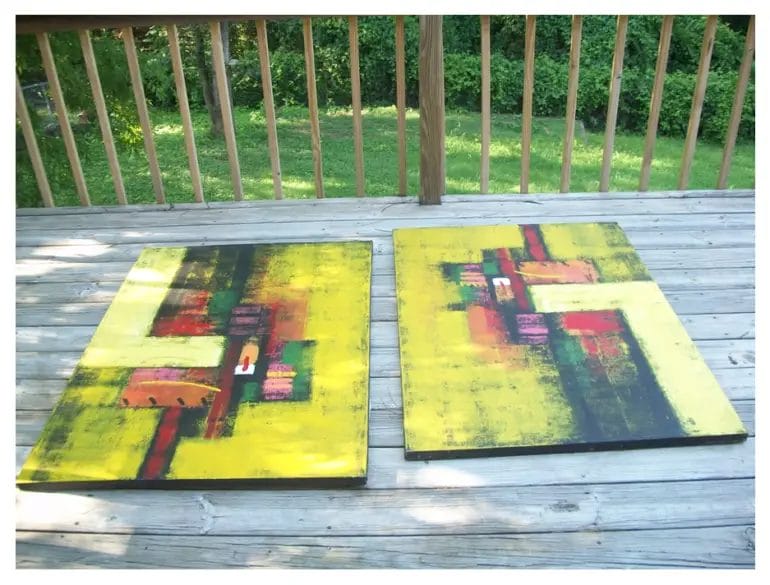
Now that your painted contact paper is in place, step back and admire your updated home decor. Whether you’ve transformed a wall, furniture piece, or even a small accent, painted contact paper can breathe new life into any space. Sit back and enjoy the fresh and stylish look you’ve created.
In summary, painted contact paper is a fantastic tool for enhancing your home decor. It offers a cost-effective and easy way to update your space with a fresh new look. By following these steps, you can transform any surface into a work of art. So why wait? Give painted contact paper a try and see the stunning results for yourself.
4. Painted Contact Paper: A Budget-Friendly Way to Customize Your Space
Are you looking to give your living space a fresh new look without breaking the bank? Look no further than painted contact paper. This budget-friendly DIY solution allows you to customize your space and add a personal touch to your home decor.
Contact paper is a versatile material that can be used in a variety of creative ways. While it is commonly used to line shelves and drawers, it can also be transformed into a unique design element with a little bit of paint and creativity.
Here’s how you can easily create your own painted contact paper:
1. Gather Your Materials
Before you get started, make sure you have all the necessary materials. You will need:
- Contact paper
- Acrylic paint
- Paintbrushes
- Scissors
- Painter’s tape
2. Prepare the Surface
Clean the surface where you plan to apply the contact paper. Make sure it is smooth and free from any dust or debris. This will ensure better adhesion and a smooth finish.
3. Measure and Cut
Measure the dimensions of the area you want to cover with the contact paper. Add a few extra inches to each side to allow for trimming and adjustment. Use scissors to cut the contact paper to the desired size.
4. Create Your Design
Now comes the fun part – creating your design! Use painter’s tape to create patterns, stripes, or any other design you desire on the contact paper. This will help create clean lines and prevent the paint from bleeding.
5. Paint Away!
Using acrylic paint and a paintbrush, apply your chosen colors to the contact paper. Be creative and experiment with different techniques such as sponging, stenciling, or even freehand painting. Allow the paint to dry completely before moving on to the next step.
6. Apply the Contact Paper
Carefully peel off the backing of the contact paper and align it with the surface you want to cover. Slowly press the contact paper onto the surface, smoothing out any air bubbles or wrinkles as you go. Trim any excess contact paper using scissors.
7. Enjoy Your Newly Customized Space
Step back and admire your work! You now have a budget-friendly and completely customized space. Whether you’ve transformed a plain bookshelf into a statement piece or added a pop of color to your kitchen cabinets, painted contact paper allows you to personalize your space with ease.
In summary, painted contact paper is a fantastic and affordable way to add a personal touch to your living space. With just a few materials and some creativity, you can transform any surface into a unique design element. So why wait? Grab some contact paper, paint, and brushes, and get ready to unleash your inner artist!
Unlock Your Creativity: Painting Techniques for Contact Paper
If you are looking for a fun and creative way to add a personal touch to your home decor, then contact paper painting is the perfect solution. Contact paper, also known as self-adhesive vinyl, is a versatile material that can be used for various DIY projects. By applying different painting techniques, you can transform plain contact paper into unique and eye-catching designs. In this section, we will explore some exciting painting techniques that will unlock your creativity and inspire you to create stunning pieces of art using contact paper.
1. Stencil Painting
Stencil painting is a popular technique that allows you to create intricate and detailed designs with ease. Start by choosing a stencil pattern that matches your desired design. Place the stencil on the contact paper and secure it with tape to prevent any movement. Dip a foam brush or sponge into your chosen paint color and dab it lightly over the stencil, ensuring complete coverage. Carefully remove the stencil to reveal your beautifully painted design. Stencil painting is an excellent technique for creating repetitive patterns or adding intricate details to your contact paper artwork.
2. Sponging
Sponging is a versatile painting technique that can be used to create various textures and effects on contact paper. Start by cutting a natural sponge into small pieces or use a sea sponge for a more organic texture. Dip the sponge into your chosen paint color and gently dab it onto the contact paper. You can experiment with different colors and blending techniques to create a unique and vibrant artwork. Sponging is a great technique for adding depth and dimension to your contact paper designs.
3. Splatter Painting
If you are looking for a more abstract and playful design, splatter painting is the perfect technique. Start by diluting your chosen paint colors with water to achieve a more fluid consistency. Hold a paintbrush or toothbrush over the contact paper and flick it with your fingers to create splatters of paint. You can experiment with different brush sizes, paint colors, and flicking techniques to create different effects. Splatter painting is a fun and spontaneous technique that can add a modern and vibrant touch to your contact paper artwork.
4. Tape Resist
Tape resist is a technique that involves using adhesive tape to create interesting shapes and patterns on your contact paper. Start by applying strips of adhesive tape onto the contact paper, forming your desired design. Make sure the tape is securely pressed onto the paper to prevent any paint from seeping underneath. Use a sponge or brush to apply paint over the entire surface, including the taped areas. Once the paint is dry, carefully remove the tape to reveal the unpainted shapes and patterns. Tape resist is a versatile technique that allows you to create geometric, abstract, or even organic designs on your contact paper.
5. Marbling
Marbling is a captivating painting technique that can create stunning and intricate designs on your contact paper. Start by filling a shallow tray with water and add drops of different colored paints onto the surface of the water. Use a toothpick or a skewer to gently swirl the colors together, creating unique patterns. Lay the contact paper on top of the water, allowing it to absorb the marbled colors. Carefully lift the contact paper from the water and let it dry completely. Marbling is a mesmerizing technique that can produce beautiful and abstract designs on your contact paper artwork.
In summary, contact paper painting offers a world of artistic possibilities. By experimenting with different painting techniques such as stencil painting, sponging, splatter painting, tape resist, and marbling, you can unlock your creativity and create stunning pieces of art. Whether you want to decorate your walls, furniture, or any other surface, contact paper painting is a fun and affordable way to personalize your space and showcase your artistic flair.
FAQs
Can you paint contact paper?
Yes, you can paint contact paper. However, it is important to ensure that the surface is clean and smooth before applying any paint. Use a primer for better adhesion and choose a paint suitable for the material of the contact paper. Allow the paint to dry completely before using or applying any additional layers of paint.
Conclusion
In conclusion, while it is technically possible to paint contact paper, it may not yield the desired results. Contact paper is specifically designed as a temporary, peel-and-stick material for various surfaces. Adding paint to it may compromise its adhesive properties and result in a less durable finish. Additionally, contact paper is not typically designed to withstand the wear and tear that painted surfaces often experience. It is recommended to explore alternative options, such as removable wallpaper or actual paint for a more reliable, long-lasting solution.