
If you’re looking to create vibrant and mesmerizing art with acrylic paint pouring, mastering the art of mixing is essential. One of the key elements in achieving the perfect consistency for your pour is water. By carefully adding water to your acrylic paint, you can control its fluidity and create stunning effects. In this guide, we’ll share some tips and techniques on how to mix acrylic paint for pouring with water, helping you unleash your creativity and create beautiful, one-of-a-kind artworks.
When it comes to mixing acrylic paint for pouring, the ratio of paint to water is crucial. By gradually adding water to your paint, you can achieve various levels of fluidity and transparency. Start by adding a small amount of water to your paint and mix it thoroughly. If the consistency is too thick, gradually add more water until you reach the desired fluidity.
Experimenting with different ratios of paint to water will give you a range of effects. Adding more water will result in a more fluid consistency, allowing the paint to flow and blend effortlessly. On the other hand, using less water will create a thicker consistency, perfect for creating heavy textures and controlled lines in your pour.
It’s important to note that the amount of water needed may vary depending on the brand and quality of your acrylic paint. Some paints may require more water to achieve the desired consistency, while others may need only a small amount. It’s always a good idea to test your
Finding the Right Consistency: Achieving the Perfect Pouring Consistency
When it comes to baking and cooking, achieving the right consistency is crucial for a successful outcome. Whether you are making a cake batter, a sauce, or a dough, the consistency of the mixture plays a key role in the final result. One aspect of consistency that is often overlooked but equally important is pouring consistency. In this section, we will explore what pouring consistency is, why it matters, and how you can achieve the perfect pouring consistency for your recipes.
What is Pouring Consistency?
Pouring consistency refers to the texture and thickness of a mixture that allows it to flow smoothly and evenly when poured. It is commonly used in recipes that require the mixture to be poured, such as pancake batter, salad dressings, and sauces. A batter or sauce with the right pouring consistency will have a smooth, flowing texture that is not too thick or too runny.
Why Does Pouring Consistency Matter?
Achieving the perfect pouring consistency is important for several reasons:
- Texture: The right pouring consistency ensures that your end product has the desired texture. Too thick of a batter or sauce can result in a dense and heavy final product, while a runny consistency may lead to a thin and watery outcome.
- Even Distribution: Pouring consistency allows the mixture to be evenly distributed, ensuring that all parts of your dish are coated or soaked appropriately. This is particularly important in recipes where the flavor or texture needs to be consistent throughout.
- Presentation: Pouring consistency also affects the visual appeal of your dish. A smooth and even pour can enhance the appearance of your final creation, making it more appetizing.
How to Achieve the Perfect Pouring Consistency?
While achieving the perfect pouring consistency may require some practice and adjustment, there are a few general guidelines you can follow:
| Ingredient | Adjustment Tips |
|---|---|
| Liquid |
|
| Dry Ingredients |
|
| Eggs or Binders |
|
It is important to make adjustments gradually, as adding too much liquid or dry ingredients at once can result in overcompensation and lead to an imbalance in the overall flavor and texture of your recipe.
In Summary
Achieving the perfect pouring consistency is an important aspect of cooking and baking. It ensures that your mixture flows smoothly and evenly, resulting in a desirable texture, even distribution, and appealing presentation. By making gradual adjustments to the liquid, dry ingredients, and binders, you can achieve the ideal pouring consistency for your recipes. Remember to practice and experiment to find the right balance that suits your taste preferences and the specific requirements of your dishes.
Experimenting with Ratios: Water to Acrylic Paint Ratios for Pouring
Acrylic pouring is a popular art technique that involves creating mesmerizing abstract designs by pouring layers of acrylic paint onto a canvas or other surfaces. One crucial aspect of acrylic pouring is finding the right water to paint ratio to achieve the desired consistency and flow of the paint.
There are no strict rules when it comes to mixing water and acrylic paint for pouring. However, experimenting with different ratios can help you understand how each ratio affects the outcome of your pour. Let’s explore some common water to acrylic paint ratios used in pouring and what effects they can have on your artwork.
1. Heavy Body Acrylic Paint:
Heavy body acrylic paint has a thick consistency and is typically used straight from the tube without adding water. This type of paint is ideal for creating bold, textured effects in acrylic pouring. However, if you prefer a more fluid consistency, you can add a small amount of water to the paint to achieve the desired flow.
2. Soft Body Acrylic Paint:
Soft body acrylic paint has a smoother consistency compared to heavy body paint. It is already more fluid and suitable for pouring techniques. Most artists find that soft body paint requires less water compared to heavy body paint. You can start with a 1:1 ratio of water to paint and adjust as needed.
3. Fluid Acrylic Paint:
Fluid acrylic paint is specifically formulated for pouring techniques. It has a thin consistency and is ready to pour straight from the bottle. You may not need to add any additional water to fluid acrylic paint, but if you prefer a slightly more fluid consistency, you can experiment with adding a small amount of water.
4. Water to Paint Ratios:
The water to acrylic paint ratio in pouring varies depending on the desired effect and the type of paint used. Here are some common ratios artists use as a starting point:
- 1:1 (Equal parts water and paint): This ratio creates a fluid consistency and promotes better flow of the paint, allowing it to spread easily on the canvas.
- 1:2 (One part water and two parts paint): This ratio is slightly thicker and creates more defined lines and shapes in the pour.
- 1:3 (One part water and three parts paint): This ratio produces a thicker consistency, ideal for creating cells and textured effects in acrylic pouring.
It’s important to note that these ratios are just starting points, and you can adjust them according to your preference and the specific effect you want to achieve. The humidity and temperature of your environment can also affect the paint’s flow, so it’s a good idea to experiment and make adjustments accordingly.
Experimenting with different water to acrylic paint ratios is an exciting part of acrylic pouring. It allows you to discover the unique effects each ratio produces and gives you the freedom to create a wide range of stunning abstract designs. Whether you prefer a fluid consistency or a thicker texture, finding the right ratio for your pouring style is key to achieving the desired results. Remember to keep experimenting, have fun, and let your creativity flow!
Adding Mediums: Enhancing the Flow with Pouring Mediums
When it comes to creating beautiful and dynamic abstract paintings, one of the key techniques to master is pouring. Pouring allows the artist to create stunning flow and movement on the canvas. However, achieving the perfect consistency and fluidity can sometimes be a challenge. This is where pouring mediums come into play.
Pouring mediums are additives that are mixed with paint to enhance its flow and ease of application. They help to create a smooth and consistent consistency that is perfect for pouring techniques. By adding pouring mediums to your paint, you can achieve stunning effects such as cells, ribbons, and marbling.
What are Pouring Mediums?
Pouring mediums are specially formulated products that are designed to improve the flow of acrylic paint. They are typically made from a mixture of ingredients such as polymer emulsion, binders, and surfactants. These ingredients work together to create a smooth and fluid consistency that is ideal for pouring.
One of the main benefits of using pouring mediums is that they help to prevent the paint from cracking or drying too quickly. This allows the artist to work with the paint for a longer period of time, giving them more control over the final outcome. Pouring mediums also help to improve color vibrancy and transparency, resulting in more vibrant and dynamic paintings.
How to Use Pouring Mediums
Using pouring mediums is relatively simple. Here’s a step-by-step guide on how to use them:
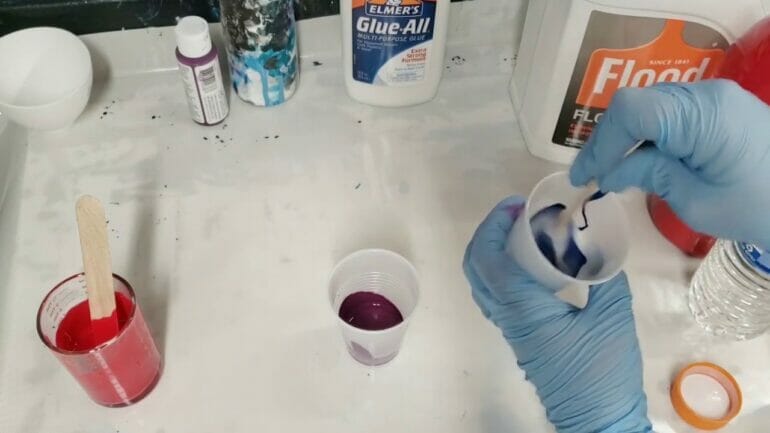
- Start by selecting the colors of acrylic paint that you want to use for your pour.
- Mix each color of paint with the pouring medium in separate cups. The ratio of paint to pouring medium can vary depending on the desired consistency, so it’s best to follow the instructions provided by the manufacturer.
- Stir the mixture gently until the paint and pouring medium are fully combined. Avoid overmixing, as this can introduce air bubbles into the mixture.
- If desired, you can add additional additives such as silicone oil or alcohol to create interesting effects like cells or lacing.
- Pour the mixture onto your canvas in a steady and controlled manner, allowing the paint to flow and interact with each other.
- Tilt the canvas in different directions to encourage the paint to flow and create interesting patterns and designs.
- Leave the painting to dry completely before applying any additional layers or varnish.
Benefits of Using Pouring Mediums
There are several benefits to using pouring mediums in your artwork:
- Enhanced Flow: Pouring mediums create a fluid and consistent consistency that allows the paint to flow smoothly and effortlessly on the canvas.
- Increased Workability: By preventing the paint from drying too quickly, pouring mediums give you more time to work with the paint and manipulate it to achieve your desired effects.
- Better Color Saturation: Pouring mediums help to improve color vibrancy and transparency, resulting in more vibrant and dynamic paintings.
- Improved Pouring Techniques: Using pouring mediums can help you achieve various pouring techniques such as cells, ribbons, and marbling, adding depth and visual interest to your artwork.
Pouring mediums are a valuable tool for artists looking to enhance the flow and movement in their abstract paintings. By mixing pouring mediums with acrylic paint, artists can achieve stunning effects and create dynamic and visually captivating artworks. So, grab your pouring mediums and get ready to unleash your creativity!
Avoiding Common Mistakes: Tips for Mixing Acrylic Paint and Water for Pouring
Acrylic pouring is a popular technique among artists, allowing for the creation of mesmerizing abstract artworks. One of the key aspects of acrylic pouring is getting the right consistency of paint and water mixture. Achieving the perfect consistency can be challenging, but with the right knowledge and techniques, you can avoid common mistakes and create stunning pouring effects. In this section, we will discuss some valuable tips for mixing acrylic paint and water for pouring.
1. Start with the Right Materials
Before you begin mixing your paint and water, it’s important to gather the right materials. Make sure you have high-quality acrylic paints that are suitable for pouring. These paints are typically more fluid and have a lower viscosity compared to regular acrylic paints. Additionally, you will need a pouring medium, which helps to improve the flow of the paint. Choose a pouring medium that is compatible with acrylic paints and has the consistency you desire for your artwork.
2. Use Measuring Tools
Consistency is crucial in acrylic pouring. To achieve consistent results, it’s recommended to use measuring tools such as measuring cups or syringes. This will help you maintain the correct paint-to-water ratio. Different pouring techniques may require different ratios, so it’s important to experiment and find what works best for you. Keeping track of the ratios will also allow you to recreate your favorite mixes in the future.
3. Slowly Add Water to the Paint
When adding water to your acrylic paint, it’s best to do it gradually. Start by pouring a small amount of water into your paint mixture and stir it thoroughly. Gradually add more water if needed, while continuously mixing. This step-by-step approach allows you to control the consistency and avoid adding too much water at once, which can result in a paint mixture that is too thin.
4. Mix Thoroughly and Test the Consistency
Properly mixing your paint and water is essential for achieving the desired consistency. Use a palette knife or a stirring stick to thoroughly mix the two components together. Pay attention to any lumps or clumps and ensure they are fully dissolved. Once mixed, test the consistency by lifting the stirrer or palette knife and observing how the paint flows off it. It should have a smooth, fluid consistency without being too runny or too thick.
5. Adjust as Needed
If you find that your paint mixture is too thick, you can add a small amount of water to thin it out. On the other hand, if the mixture is too thin, you can add more paint or pouring medium to thicken it. It’s important to make these adjustments gradually and test the consistency after each addition to avoid over-correcting.
6. Practice and Experiment
Acrylic pouring is a technique that requires practice and experimentation. Don’t be afraid to try different paint-to-water ratios and pouring techniques to find your own unique style. Keep a record of your mixes and techniques to track your progress and create consistency in your artwork.
7. Clean Up Properly
After you’ve finished your pouring project, it’s essential to clean up your materials properly. Acrylic paint can dry quickly and become difficult to remove, so make sure to clean your brushes and mixing tools immediately after use. Use warm soapy water to clean the tools thoroughly, ensuring there is no residual paint left.
In summary, achieving the right consistency of acrylic paint and water mixture is crucial for successful pouring. By starting with the right materials, using measuring tools, slowly adding water, mixing thoroughly, and making adjustments as needed, you can avoid common mistakes and create stunning poured artworks. Remember to practice, experiment, and enjoy the creative process!
Advanced Techniques: Creating Unique Effects with Acrylic Paint and Water Pouring
If you’re an artist or a hobbyist who enjoys working with acrylic paints, you may be interested in exploring advanced techniques to create unique and captivating effects. One technique that has gained popularity in recent years is water pouring with acrylic paint. By combining the fluidity of water and the vibrancy of acrylics, artists can achieve stunning, unpredictable patterns and textures on their canvas.
What is Water Pouring?
Water pouring, also known as acrylic pouring or fluid art, is a technique where diluted acrylic paint is poured onto a canvas or other painting surface. The paint is then manipulated by tilting or moving the canvas, allowing the colors to blend and create mesmerizing patterns. This technique is often associated with abstract art, as the results are unpredictable and unique.
Materials Needed
- Acrylic paints: Choose a variety of colors that complement each other.
- Pouring medium: This is a special additive that thins the paint and improves its flow.
- Silicone oil: This optional additive creates cells and interesting effects in the paint.
- Canvas or painting surface: Select a size that suits your project.
- Disposable cups and stir sticks: These are used for mixing the paint.
- Protective gloves and apron: Acrylic pouring can get messy, so it’s important to protect your clothes and skin.
- Drop cloth or plastic sheet: This will protect your working area from any spills or drips.
Step-by-Step Process
1. Prepare your workspace by laying down a drop cloth or plastic sheet to protect your surface.
2. Select the colors you want to use and mix each acrylic paint with the pouring medium according to the manufacturer’s instructions. The ratio of paint to pouring medium will depend on the desired consistency.
3. Optional: Add a few drops of silicone oil to some of the paint mixtures. This will create interesting cells in the final result.
4. Pour each color of paint into separate cups, stacking them on top of each other. This will create layers of paint that will flow onto the canvas.
5. Lift the stack of cups and place them upside down on the center of the canvas. Allow the paint to flow out of the cups, creating a puddle on the canvas.
6. Slowly and carefully tilt the canvas in different directions, allowing the paint to spread and blend. Continue tilting until you are satisfied with the composition.
7. If desired, use a blow dryer or a heat gun to manipulate the paint and create additional effects.
8. Allow the painting to dry completely. This may take anywhere from 24 to 48 hours, depending on the thickness of the paint.
Tips and Tricks
– Experiment with different color combinations and pouring techniques to create unique effects.
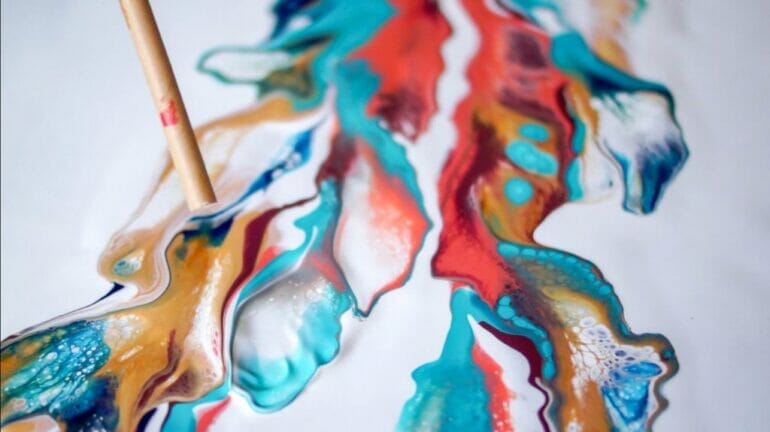
– Use a palette knife or a toothpick to create swirls or texture in the paint while it’s still wet.
– Don’t overmix the paint to avoid muddying the colors.
– Practice on small surfaces or canvas boards before attempting larger pieces.
– Embrace the unpredictability of the technique and let go of the need for control.
In summary, water pouring with acrylic paint is an advanced technique that allows artists to create stunning and unique effects on their canvas. By experimenting with different colors, pouring mediums, and pouring techniques, artists can achieve mesmerizing patterns and textures. This fluid art technique is a great way to explore your creativity and create one-of-a-kind artworks.
Frequently Asked Questions
How do I mix acrylic paint for pouring with water?
To mix acrylic paint for pouring with water, start by adding a small amount of water to your paint and gradually mix it in until you reach the desired consistency. Aim for a consistency similar to melted ice cream. Remember to stir slowly and avoid overmixing to prevent air bubbles.
Conclusion
In conclusion, mixing acrylic paint for pouring with water is a simple yet effective technique that opens up a world of creative possibilities. By diluting the paint with water, you can achieve a fluid consistency that is perfect for pouring and creating unique abstract designs. Whether you’re a beginner or an experienced artist, this method allows you to experiment with different colors, create stunning effects, and unleash your artistic expression.
Remember to start with a 1:1 ratio of water to paint and adjust as needed to achieve your desired consistency. Additionally, use a pouring medium to enhance the flow and durability of your artwork. With practice and experimentation, you can create beautiful and mesmerizing acrylic pour paintings that will captivate viewers and showcase your artistic talents.