
If you’re looking to add a unique touch to your vehicle’s intercooler, you might be wondering if it’s possible to paint it. The good news is that painting an intercooler is indeed an option. By choosing the right type of paint and following the correct process, you can give your intercooler a fresh look that matches your style. In this article, we will discuss the steps involved in painting an intercooler and provide some tips to help you achieve a professional and long-lasting finish.
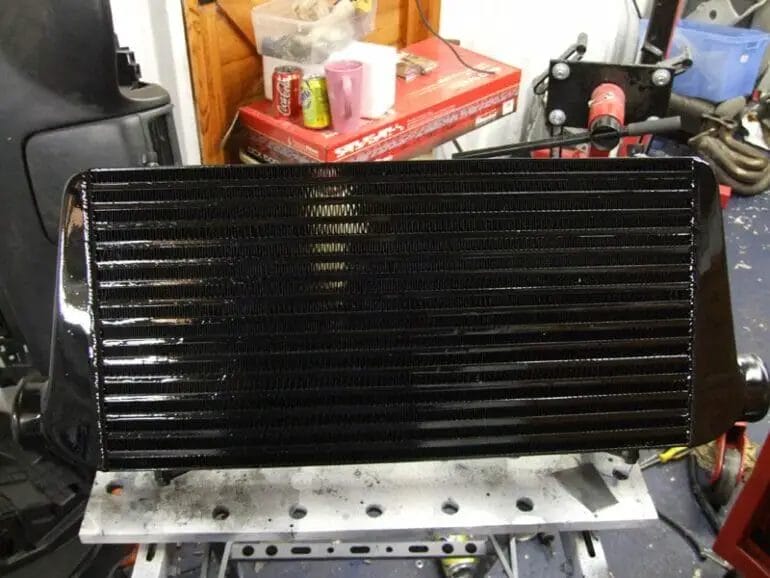
Benefits of Painting Your Intercooler
Painting your intercooler is a simple yet effective way to enhance both the appearance and performance of your vehicle. While the intercooler may not be the most glamorous part of your car, it plays a vital role in improving engine efficiency and overall performance. In this section, we will explore the various benefits of painting your intercooler and how it can contribute to an enhanced driving experience.
Enhanced Heat Dissipation
One of the primary benefits of painting your intercooler is that it can help improve heat dissipation. The intercooler is responsible for cooling down the compressed air coming from the turbocharger or supercharger before it enters the engine. By painting the intercooler with a heat-resistant coating, you can help reduce the temperature of the air passing through it. As a result, the engine will receive cooler and denser air, leading to improved combustion and increased horsepower.
Protection Against Corrosion
Another advantage of painting your intercooler is that it provides protection against corrosion. The intercooler is exposed to various elements, such as moisture, dirt, and road debris, which can lead to rust and corrosion over time. By applying a high-quality paint or coating, you create a barrier that protects the intercooler from these corrosive elements. This helps prolong the lifespan of the intercooler and ensures its optimal performance for a longer period.
Customization and Aesthetics
Painting your intercooler also offers an opportunity for customization and enhanced aesthetics. Many car enthusiasts choose to paint their intercoolers in unique colors or designs to add a personalized touch to their vehicle. Whether you prefer a sleek and understated look or a bold and eye-catching design, painting your intercooler can help you achieve the desired appearance and make your car stand out from the crowd.
Improved Overall Performance
By improving heat dissipation, protecting against corrosion, and enhancing the appearance of your intercooler, painting it can contribute to improved overall performance. The engine will receive cooler air, reducing the risk of heat-related issues and increasing the efficiency of combustion. This, in turn, can lead to improved throttle response, faster acceleration, and better fuel efficiency.
Easy Installation and Maintenance
Painting your intercooler is a relatively simple process that can be done by yourself or by a professional. With the right preparation and materials, you can apply the paint or coating evenly and achieve a smooth finish. Additionally, maintaining the painted intercooler is easy. Regular cleaning and waxing can keep it looking great and ensure its continued performance.
In summary, painting your intercooler can provide several benefits, including enhanced heat dissipation, protection against corrosion, customization options, improved overall performance, and easy installation and maintenance. Consider painting your intercooler to optimize its functionality, protect it from damage, and add a personalized touch to your vehicle.
Choosing the Right Paint for Your Intercooler
When it comes to upgrading your car’s performance, the intercooler plays a crucial role. It helps cool down the compressed air from the turbocharger or supercharger before it enters the engine, resulting in increased power and efficiency. While functionality is key, aesthetics should not be overlooked. Painting your intercooler not only adds a personal touch to your vehicle but also helps protect it from corrosion and rust. In this section, we will discuss the factors to consider when choosing the right paint for your intercooler.
1. Heat Resistance
One of the primary factors to consider when selecting paint for your intercooler is its heat resistance. The intercooler is subjected to high temperatures due to the hot compressed air passing through it. Therefore, it is crucial to choose a paint that can withstand these elevated temperatures without cracking or peeling. Look for high-temperature paint specifically designed for automotive applications.
2. Adhesion and Durability
Paint on the intercooler must be able to adhere well to the metal surface and withstand the rigors of daily driving. It should have excellent durability to resist chipping, flaking, and scratching. Opt for a paint that is formulated to bond firmly to the intercooler’s material, such as aluminum or stainless steel, ensuring long-lasting protection.
3. Corrosion and Rust Resistance
Intercoolers are exposed to various elements, including moisture and road debris, which can cause corrosion and rust over time. Choosing a paint with corrosion and rust resistance properties is crucial to protect your intercooler and extend its lifespan. Look for paints that have rust inhibitors and provide a protective barrier against environmental factors.
4. Heat Dissipation
While it is essential to protect the intercooler with a suitable paint, it is equally crucial to ensure that the paint does not impede its heat dissipation capabilities. Some paints may act as an insulator, reducing the intercooler’s efficiency. Look for paints that are designed specifically for intercoolers and promote heat transfer, allowing the intercooler to function optimally.
5. Aesthetic Appeal
Painting your intercooler gives you the opportunity to customize the look of your engine bay and showcase your personal style. Consider choosing a paint color that complements your vehicle’s overall aesthetic. Additionally, select a paint finish that suits your preference, whether it be glossy, matte, or metallic.
6. Application Method
Lastly, consider the ease of application when selecting the right paint for your intercooler. Some paints may require special equipment or professional assistance for a proper and even finish. Others may come in a spray can for convenient DIY application. Choose a paint that aligns with your skill level and available resources.
Summary
When choosing the right paint for your intercooler, it is essential to consider factors such as heat resistance, adhesion and durability, corrosion and rust resistance, heat dissipation, aesthetic appeal, and application method. By selecting a paint that meets these criteria, you can not only protect your intercooler but also enhance the overall look of your vehicle. Remember to follow proper painting techniques and consult with professionals if needed to ensure a successful paint job.
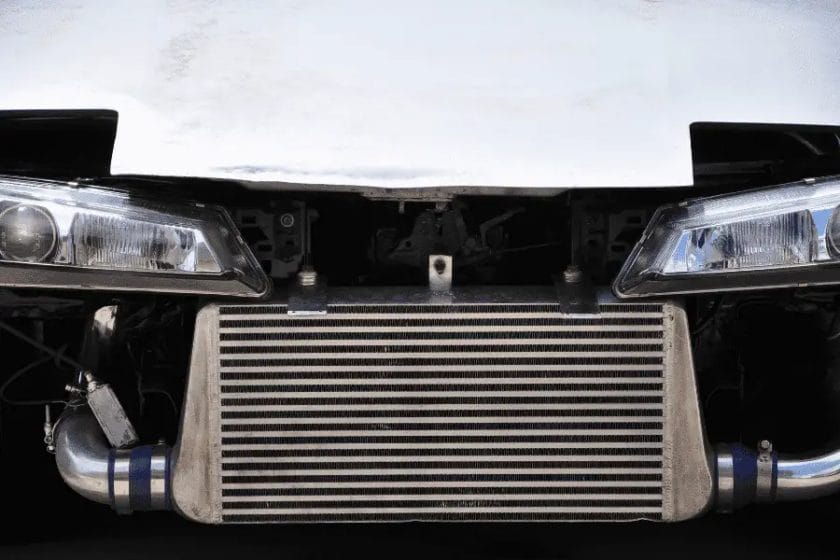
Step-by-Step Guide to Painting Your Intercooler
Painting your intercooler is a great way to add a touch of personalization to your vehicle’s engine bay. Not only does it enhance the overall look and aesthetics, but it can also provide some added protection against rust and corrosion. In this step-by-step guide, we will walk you through the process of painting your intercooler, ensuring a seamless and professional finish.
Materials You Will Need
Before you begin, gather the following materials:
- Intercooler
- Sandpaper (various grits)
- Scrub brush
- Soap and water
- Masking tape
- Newspaper or drop cloth
- Primer
- Spray paint (in desired color)
- Clear coat
- Wax or sealant
Step 1: Preparation
The first step is to prepare the intercooler for painting. Start by removing the intercooler from the vehicle, if necessary. Clean the intercooler thoroughly using a scrub brush, soap, and water. This will help remove any dirt, grease, or debris that may interfere with the paint adhering properly.
Next, use sandpaper to gently roughen the surface of the intercooler. This will create a better surface for the primer and paint to adhere to. Start with a lower grit sandpaper and gradually work your way up to a higher grit for a smoother finish.
Step 2: Masking
To ensure that only the desired areas are painted, use masking tape to cover any parts of the intercooler that you do not want to paint. This will protect those areas from overspray and ensure a clean and professional-looking result.
Step 3: Priming
Before applying the final coat of paint, it is essential to apply a layer of primer. The primer will improve the adhesion of the paint and help create a smoother finish. Follow the instructions on the primer can and apply an even coat to the prepared surface of the intercooler. Allow the primer to dry completely before moving on to the next step.
Step 4: Painting
Once the primer is dry, it’s time to apply the paint. Shake the spray paint can vigorously to ensure proper mixing of the paint. Hold the can approximately 6-8 inches away from the intercooler and apply a light, even coat of paint. Allow the paint to dry according to the manufacturer’s instructions before applying additional coats if necessary.
If you want to achieve a more vibrant or custom color, repeat this step with additional coats of paint, allowing sufficient drying time between each coat. Remember to follow the instructions on the spray paint can and apply the paint in a well-ventilated area.
Step 5: Clear Coat
To protect the paint and give it a glossy finish, apply a clear coat. The clear coat will also provide added durability and help prevent the paint from chipping or fading over time. Apply the clear coat following the same process as the paint, ensuring even coverage and allowing sufficient drying time between coats.
Step 6: Finishing Touches
After the clear coat has dried, carefully remove the masking tape from the intercooler. Inspect the painted surface for any imperfections or rough spots. If necessary, lightly sand those areas and apply another coat of clear coat for a smooth, flawless finish.
Finally, apply a wax or sealant to protect the painted surface and enhance its shine. This step is optional but recommended for added longevity and a polished look.
Summary
Painting your intercooler can be a rewarding DIY project that adds a personal touch to your vehicle’s engine bay. By following this step-by-step guide, you can achieve a professional-looking finish that not only enhances the aesthetics but also provides protection against rust and corrosion. Remember to take your time, follow the instructions on the products you use, and work in a well-ventilated area for the best results.
Proper Maintenance Techniques for Painted Intercoolers
Painted intercoolers are an essential component of many vehicles, providing efficient cooling for the intake air and improving overall engine performance. To ensure the longevity and optimal functioning of these intercoolers, proper maintenance techniques are crucial. In this section, we will explore some important tips and guidelines for maintaining painted intercoolers.
Regular Cleaning
One of the most important maintenance tasks for painted intercoolers is regular cleaning. Over time, dirt, dust, and debris can accumulate on the surface, impacting the cooling efficiency and potentially leading to corrosion. It is recommended to clean the intercooler at regular intervals to remove any buildup and maintain its performance.
When cleaning a painted intercooler, it is important to use mild soap or a specific intercooler cleaner that is compatible with the paint. Avoid using harsh chemicals or abrasive materials that can damage the paint or the surface of the intercooler. Gently scrub the surface with a soft brush or sponge, paying attention to any areas with heavy buildup. Rinse thoroughly with clean water to remove all cleaning agents.
Inspecting for Damage
Regular inspection of the painted intercooler is another crucial maintenance step. Check for any signs of damage, such as scratches, dents, or chipped paint. These can compromise the effectiveness of the intercooler and lead to corrosion. If any damage is detected, it should be addressed promptly to prevent further deterioration.
If the paint on the intercooler is chipped or scratched, it is advisable to touch up those areas with matching paint to prevent corrosion. This can be done using a small brush and automotive touch-up paint. Make sure to follow the instructions on the paint product for the best results.
Protective Coating
Applying a protective coating to the painted intercooler can provide an extra layer of defense against environmental elements and potential damage. There are various protective coatings available in the market specifically designed for intercoolers. These coatings can help prevent corrosion, reduce heat transfer, and extend the lifespan of the intercooler.
Before applying any protective coating, it is important to thoroughly clean and dry the intercooler to ensure proper adhesion. Follow the instructions provided by the coating manufacturer for the best application process. Allow sufficient drying time before reinstalling the intercooler to avoid any potential damage.
Proper Installation and Usage
Ensuring proper installation and usage of the painted intercooler is also essential for its maintenance. Follow the manufacturer’s guidelines and recommendations for installation to ensure a secure and efficient fit. Improper installation can lead to leaks, reduced performance, and potential damage to the intercooler.
Additionally, it is important to use the intercooler as intended and avoid subjecting it to excessive stress or pressure. Operating the vehicle within the specified temperature and pressure limits will help maintain the integrity of the intercooler and prevent premature failure.
In summary, proper maintenance techniques for painted intercoolers are crucial to ensure their optimal performance and longevity. Regular cleaning, inspection for damage, applying protective coatings, and following proper installation and usage guidelines are key steps to maintain the efficiency of the intercooler. By implementing these maintenance techniques, you can extend the lifespan of your painted intercooler and enjoy improved engine performance.
Common Mistakes to Avoid When Painting Your Intercooler
Adding a personal touch to your vehicle is always exciting. Whether it’s a new paint job, an upgraded exhaust system, or even a unique set of rims, these modifications can enhance the overall look and feel of your car. One component that often goes unnoticed but can make a huge difference in the aesthetics of your vehicle is the intercooler.
The intercooler plays a crucial role in boosting engine performance by cooling down the compressed air before it enters the engine. While it primarily serves a functional purpose, there’s no reason why you can’t give it a stylish makeover. However, when it comes to painting your intercooler, there are some common mistakes that you should avoid to ensure a successful outcome.
1. Skipping the Prep Work
One of the biggest mistakes people make when painting their intercooler is skipping the necessary prep work. Before applying any paint, it’s important to thoroughly clean the surface to remove any dirt, grime, or oil. You can use a degreaser or a mild soap solution along with a soft brush to gently scrub the intercooler. Once clean, make sure to dry it completely before moving on to the next step.
After cleaning, the next crucial step is to sand the surface. This allows the paint to adhere better and ensures a smooth finish. Start with a coarse sandpaper to remove any imperfections, and then gradually move on to finer grits for a polished look. Don’t rush through this step, as it can greatly impact the final result.
2. Using the Wrong Type of Paint
Choosing the right type of paint is essential for a long-lasting and visually appealing finish. Many people make the mistake of using general-purpose spray paint or household paint, which is not designed to withstand the high temperatures and harsh conditions that intercoolers are exposed to.
Instead, opt for high-temperature paint specifically formulated for automotive applications. This type of paint can handle the heat generated by the intercooler and maintain its color and finish over time. It’s also important to choose a paint that is compatible with the material of your intercooler, whether it’s aluminum, stainless steel, or another metal.
3. Applying Too Many Coats
When it comes to painting your intercooler, less is more. Applying too many coats of paint can lead to a thick and uneven finish, which not only looks unappealing but can also hinder the intercooler’s performance by reducing its heat dissipation capabilities.
Follow the manufacturer’s instructions regarding the number of coats to apply, and make sure to allow sufficient drying time between each coat. This will ensure a smooth and professional-looking finish while maintaining the functionality of the intercooler.
4. Neglecting Proper Curing Time
Proper curing time is often underestimated when it comes to painting an intercooler. Rushing this step can result in paint that is easily scratched or peeled off, compromising the overall appearance of your intercooler.
After the final coat of paint is applied, allow ample time for it to cure. This usually involves letting the paint dry for at least 24 hours, although specific instructions may vary depending on the brand and type of paint you’re using. Avoid touching or manipulating the painted surface until it is fully cured to prevent any damage.
5. Not Protecting the Painted Surface
Once you’ve successfully painted your intercooler, it’s important to take the necessary steps to protect the finish and ensure its longevity. Applying a clear coat or a heat-resistant sealant can help safeguard the paint from chipping, fading, or peeling due to exposure to the elements.
In addition, regular maintenance is crucial to keep your painted intercooler looking its best. Avoid using abrasive cleaners or harsh chemicals, as they can damage the paint. Instead, use a mild soap solution and a soft cloth to clean the surface, and be gentle when handling or installing the intercooler to prevent any accidental scratches.
Summary
Painting your intercooler can be a fun and rewarding project, but it’s important to avoid common mistakes to ensure a successful outcome. Remember to thoroughly clean and prep the surface, choose the right type of paint, apply an appropriate number of coats, allow for proper curing time, and protect the painted surface. By following these guidelines, you can give your intercooler a personalized touch while maintaining its functionality and enhancing the overall appeal of your vehicle.
FAQs
Can you paint an intercooler?
Yes, you can paint an intercooler. However, it is important to use high-temperature paint that can withstand the heat generated by the intercooler. Make sure to clean and prep the surface properly before painting to ensure a long-lasting finish.
Conclusion:
In conclusion, painting an intercooler can be a great way to add a customized touch to your vehicle. The process involves using high-temperature paint to ensure durability and performance. By selecting a color that matches or complements your car’s exterior, you can make your intercooler a standout feature. However, it’s important to note that painting an intercooler may void any warranties, and it’s crucial to follow proper preparation and painting techniques to prevent any negative impact on heat transfer. It’s always recommended to consult with a professional or seek guidance from experienced automotive enthusiasts before proceeding with intercooler painting.