
Many polymer clay artists like to paint their creations with acrylic paint. This can add a new level of color and detail to your work. But how should you go about painting on polymer clay? And what are the best techniques to use?
In this article, we’ll answer these questions and more.
We’ll also give you some tips on how to get the best results when painting on polymer clay.

STEP 1: Choosing a High-Quality Acrylic Paint.
Not all acrylic paints are created equal, and using a lower-quality paint could result in your project looking less than stellar. The two important factors to look out for in acrylic paints are the pigment load and binder quality.
Pigment Load:
The pigment load is the amount of pigment (color) in the paint. A high pigment load means more color in the paint, which will be more vibrant when applied to your project.
A low pigment load means less color in the paint, and it will be more subdued.
When choosing an acrylic paint for your project, you’ll want to select a paint with a high pigment load so that your colors will be bold and beautiful.
Binder:
The binder is what gives the paint its structure and allows it to adhere to surfaces. A high-quality binder will result in a stronger bond between the paint and the clay, making your project more durable.
A low-quality binder will result in a weaker bond, and your project paint job may not be as durable.
When choosing an acrylic paint for your project, you’ll want to select a paint with a high-quality binder so that your project will last.
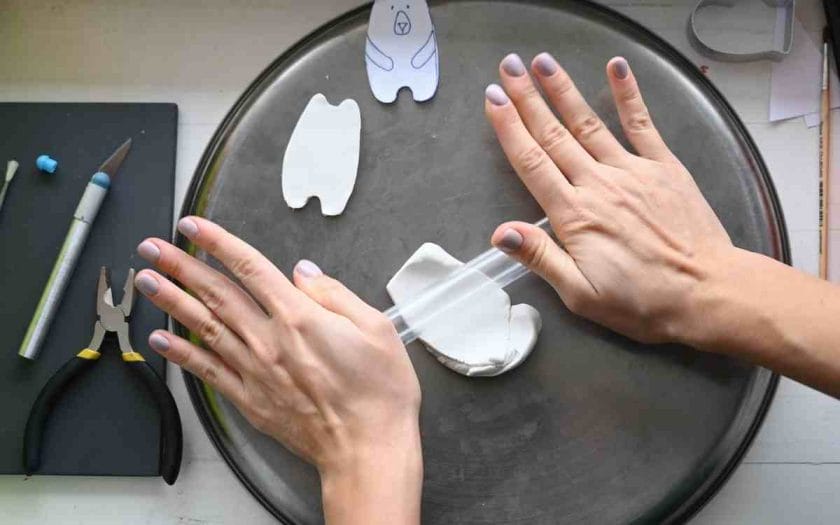
STEP 2: Conditioning the Clay
Conditioning polymer clay is an important step in preparing it for painting. Conditioning helps to make the clay more pliable and easier to work with.
It ensures that the paint adheres properly to the surface of the clay. Conditioning also helps to prevent cracking and other damage to the polymer clay during painting. So, conditioning your polymer clay is an important step in this painting process.
There are a few different ways you can condition polymer clay. You can simply knead it by hand, use a conditioning pasta machine, or roll it out with a rolling pin.
Kneading by hands:
Start by breaking off an ample piece of polymer clay from the block and then begin rolling it between your palms.
Continue doing this until the clay becomes soft and pliable. If the clay starts to feel dry or crumbly, you can add a few drops of water to help soften it up.
Conditioning Pasta Machine:
These machines work by slowly rolling and flattening the clay, which helps to make it more pliable and easier to work with.
Most conditioning machines also have settings that allow you to control the amount of pressure that is applied to the clay, which can help to prevent damage to the clay during conditioning.
If you want to achieve a super-smooth consistency, using a pasta machine is the easiest way. Start by feeding a small piece of clay through the widest setting on the machine.
Fold the clay in half and feed it through again, repeating this process until the clay becomes smooth. You can gradually reduce the width setting on the machine until you achieve the desired consistency.
Using Rolling Pin:
If you don’t have a pasta machine, you can condition polymer clay by hand using a rolling pin. Start by breaking the clay into small pieces and then kneading it until it is soft and pliable.
Then, roll the clay out onto a flat surface with a rolling pin. Continue rolling the clay until it is about 1/8 inch thick.
STEP 3: Carve Out Your Design From the Polymer Clay.
Use a sharp knife or carving tool to create the desired shape.
If you’re working with intricate details, you may want to use a clay sculpting toolkit. You can skip this step if you’re working with pre-made polymer clay designs.
STEP 4: Bake the Polymer Clay Before You Paint.
Since acrylic paint is water-based, you could run into issues with water in the clay if you paint the polymer clay with it before baking.
This is due to the possibility that unpleasant bubbles may emerge on the clay surface if the water in the acrylic paint hasn’t entirely evaporated from it before being baked. In fact, the polymer clay may not fully solidify and become very fragile.
To bake polymer clay, Preheat your oven to 275 degrees Fahrenheit or the recommended temperature by the manufacturer of the polymer clay you’re using.
Place the polymer clay piece(s) on a baking sheet lined with parchment paper and bake for 30 minutes or more, depending on the manufacturer’s instructions.
Remove from the oven and allow to cool completely before moving to the next step.
STEP 5: Prep the Dried Baked Polymer Clay.
Before you start painting the dried polymer clay piece, you need to do some prep work. This will help the paint adhere to the clay better and also prevent it from chipping or flaking off later on.
Start by sanding your polymer clay piece with fine-grit sandpaper. Doing this will create a slightly rougher surface for the paint to grip onto.
Once you’ve sanded your piece, wipe it down with a damp cloth dipped in rubbing oil to remove any dust or debris and oily film that may have built up from baking.
Ensure the rubbing alcohol evaporates completely from the polymer clay surface before moving to the next step.
STEP 6: Painting Your Polymer Clay Piece
Now it’s time to start painting your polymer clay piece! Get the colors you want to use ready in small bowls or cups.
Begin with a light layer of paint. You can always add more paint later if you need to, but it’s much harder to remove excess paint once it’s on the clay.
Work in small sections and use different brush strokes to create interesting texture and depth in your painting. Once you’re happy with the way your piece looks, allow the paint to dry completely before moving on to the next step.
STEP 7: Adding a Clear Coat (Optional)
Once your paint is dry, you may want to add a clear coat to help protect it. This is especially important if your polymer clay piece will be exposed to lots of wear and tear.
To add a clear coat, simply apply a thin layer of clear varnish or sealant to your piece. Allow it to dry completely before using or displaying your polymer clay piece. And that’s it!
You’ve now learned how to use acrylic paint on polymer clay. With a little practice, you’ll be able to create beautiful and unique pieces of art.
How to Get the Best Result When Painting on Polymer Clay?
Now that you know how to use acrylic paint on polymer clay, here are a few tips to help you get the best results:
- Use high-quality polymer clay. This will make a big difference in the overall look and feel of your piece.
- Be sure to sand and finish the polymer clay surface before painting. This will help the paint adhere better and prevent it from chipping or flaking off later on.
- Work in small sections and build up the color gradually. This will give you more control over the final result.
- Allow each layer of paint to dry completely before moving on to the next one unless you have some plan in mind with wet-on-wet acrylic painting.
- Add a clear coat to protect your finished piece. This is especially important if the piece will be exposed to lots of wear and tear.
Conclusion
Acrylic paint can be used on polymer clay to create beautiful and unique pieces of art. However, there are a few things you need to do to get the best results.
Be sure to use high-quality polymer clay, sand and finish the surface before painting, work in small sections, and allow each layer of paint to dry completely before moving on to the next one.
Adding a clear coat will also help protect your finished piece.
With a little practice, you’ll be able to create stunning works of art using acrylic paint and polymer clay.