
People have been painting on wood for centuries.
The process of acrylic painting on wood is not difficult, but it does take a bit of practice to get the desired results.
In this article, we will discuss the basics of how to paint on wood with acrylics and provide some tips to help you create beautiful works of art.
Steps to Acrylic Painting a Wooden Surface
Painting on wood with acrylic is made easier than you think by following these simple steps:
1. Prepare Your Wood
You need to prepare your wood before you can apply acrylic paint to it. Preparing your wood for acrylic painting involves some necessary steps, which I explained extensively in my previous article, “How To Prepare Wood For Acrylic Painting.” However, let’s have a brief review of each step right here.
- Clean the wood: Using a lint-free cloth and/or an air blower/vacuum, get rid of dirt, stains, and grease from the surface and edges of your wood. Your option depends on how dirty or dusty the wood is.
- Smoothen the surface: Use a hand scraper or 140 to 280 grit sandpaper to smoothen the surface of the wood along the grain pattern. Gently wipe off the dust on the wood’s surface with a slightly dampened microfiber towel.
- Apply a sealant: Place the wood on props or a newspaper to easily wipe away dripping colors. Apply the first coat of sealant and allow it to dry properly. Sand the surface of the wood if necessary, especially if there are raised wood grains.
Apply a second coat of sealant and also allow it to dry properly. You may choose to apply another coat of sealant if you want a more even and smoother texture.
- Prime the wood: After sealing the wood surface to your taste, let it dry thoroughly. Then apply a wood primer (base coat) on the wood surface and edges, this prepares the wood surface for painting. Allow the wood to dry completely before moving to the next step.
Now that you’ve prepared your wood, let’s move on to how to paint the wood with acrylic.
2. Choose the Right Acrylic Paint for Your Painting
You can choose from a wide range of acrylic paints but here are a few things I want you to consider. These tips will ensure that you choose the best acrylic paint to achieve the best result.
- Ensure that you choose only acrylic paint for wood. Other types of acrylic may not stick or work well on the wood surface.
- Consider the type of finish you want your artwork to have. Acrylic paint is available in different finishes, which include metallic, stone, satin, matte, shiny, and so on. The type of finish you want will determine the acrylic paint you should purchase.
- Check the consistency of the acrylic paint. If you’re painting a large artwork, choose acrylic paint with a thick consistency. On the other hand, use acrylic paint with a thin consistency for small artwork.
- Lastly, look under the container or bottle of the acrylic paint to check the accurate color. The label doesn’t give the most accurate color and this may be misleading.
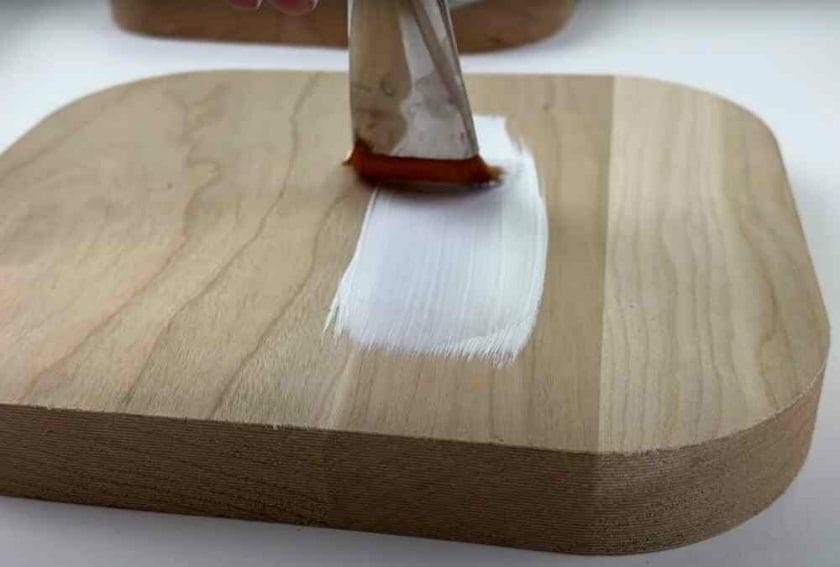
3. Apply the Background Color
Pick any color of your choice and create a background on which your design will be. Using a flat, wide high-quality brush, apply the acrylic background paint to the wood surface and let it dry.
You may apply a second coat if you want a thick background layer and allow it dry before moving to the next step.
4. Create/Recreate Your Design
If you’re creating a new design, use a darker lead pencil to sketch out your design onto the surface of the wood.
However, if you’re recreating an existing picture or design, you’ll require tracing paper and graphite paper. Place the tracing paper on the existing design and trace out the design gently and carefully.
Place the graphite paper face down on the surface of the wood and place the tracing paper on it. Stick the two papers to the surface of the wood using thumb tacks or pins. Use the darker lead pencil to retrace the design to make it appear on the wood surface.
If you’re painting in a solid color, you may skip this step.
5. Start Painting
Using a soft high-quality brush, apply the details of your design with the acrylic, ensuring every detail is well defined. Acrylic paints dry off quickly, so you should pour as little as you need per time into your palette to avoid wasting.
Also, keep a bowl of water beside you and dip the bristles of your paintbrush in water frequently. This keeps the paintbrush wet enough to prevent drying and also to lighten the color. Though acrylic paints are water-based, they become waterproof when dry.
If you’re applying different colors, apply the first color, then wash the brush thoroughly before applying the second color. Be careful not to mix up the colors.
6. Apply a Sealant
Once you’re done painting your design on the wood with acrylic, set it aside for some hours to dry completely. Once the paint is dried, apply a light coat of sealant on it and allow it to dry. You can choose either a spray-on sealant or a brush-on sealant.
The sealant gives your painting a glossy finish and also protects the paint from fading and/or peeling off. You may skip this last step if you’re less concerned about the durability of your artwork.
To Conclude
Painting on wood with acrylic is a great way to unleash your creativity. By following the steps outlined in this article, you’ll be able to create beautiful and long-lasting artworks.
We have also looked at some factors you need to consider before starting your painting and provided tips on how to create/recreate your design, apply colors, and seal the artwork.
With these simple steps, you can create beautiful paintings that will last for a long time. Have fun!