
Interested in creating your own stylish accessories? Discover how to make stunning acrylic earrings with this easy step-by-step tutorial. From choosing the right materials to designing unique shapes and patterns, you’ll learn all the tips and tricks to create eye-catching earrings that reflect your personal style. Whether you’re a beginner or an experienced crafter, this guide will help you unleash your creativity and make beautiful acrylic earrings that are sure to impress.
Are you ready to dive into the world of DIY jewelry making? Get ready to unleash your creativity and learn how to make your own unique acrylic earrings. This comprehensive guide will walk you through the process, from gathering the necessary materials to designing and assembling your earrings. With a wide range of techniques and styles to explore, you’ll be able to create earrings that perfectly complement any outfit or occasion. Get started today and express your personal style with handmade acrylic earrings!
Looking for a fun and fashionable DIY project? Learn how to make stunning acrylic earrings that will turn heads wherever you go. With just a few simple materials and some creative inspiration, you can design and create your own unique earrings that reflect your personal style. From geometric shapes to vibrant colors, the possibilities are endless. Follow our step-by-step tutorial and start making beautiful acrylic earrings that will make a statement.

Techniques for Creating Unique Designs with Acrylic
Acrylic painting is a popular medium that allows artists to create vibrant and expressive artwork. With its versatility and fast-drying properties, acrylic paint offers endless possibilities for creating unique designs. In this section, we will explore some techniques that artists can use to achieve stunning and one-of-a-kind effects with acrylic paint.
1. Pouring Technique
The pouring technique involves mixing acrylic paint with pouring medium to create fluid, flowing designs on a canvas. Artists start by mixing their desired colors with the pouring medium, which helps to thin the paint and create a smooth consistency. The paint is then poured onto the canvas, allowing it to naturally spread and blend. Artists can manipulate the paint by tilting the canvas or using tools to create interesting patterns and textures. The result is a mesmerizing abstract design with beautiful layers of color.
2. Palette Knife Painting
Palette knife painting involves using a palette knife instead of a brush to apply and manipulate acrylic paint. This technique allows artists to create bold, textured designs with thick layers of paint. Artists can use the palette knife to apply paint directly from the tube or to mix colors on the palette. By using different angles and pressures with the palette knife, artists can achieve a variety of textures and create intricate details. Palette knife painting is great for creating impasto effects and adding depth to a painting.
3. Stenciling
Stenciling is a technique that involves using pre-cut stencils to create precise and intricate designs. Artists can create their own stencils or purchase ready-made ones. To use the stencil, artists secure it onto the surface and apply acrylic paint over the cut-out areas using a brush or sponge. Once the paint dries, the stencil is removed to reveal a clean and detailed design. Stenciling is a versatile technique that can be used to add patterns, shapes, or text to a painting, allowing artists to create detailed and visually interesting compositions.
4. Dripping and Splattering
Dripping and splattering techniques involve allowing acrylic paint to drip or splatter onto the canvas to create dynamic and spontaneous designs. Artists can achieve this effect by thinning the paint with water or pouring medium to create a more fluid consistency. By tapping or flicking a brush loaded with paint, artists can create controlled drips or splatters across the surface. This technique adds energy and movement to a painting and can be used to create abstract or expressive designs.
5. Textured Impression
Creating texture in acrylic paintings can add depth and interest to the artwork. Artists can achieve textured impressions by using various tools and materials. One technique is to apply a thick layer of acrylic paint onto the canvas and then press objects, such as bubble wrap, fabric, or leaves, onto the wet paint. Once the paint dries, the objects are removed, leaving behind interesting textures and patterns. Artists can also use modeling paste or gel medium to create raised textures on the canvas. These textured impressions can be incorporated into the overall design or used as a foundation for subsequent layers of paint.
6. Collage and Mixed Media
Combining acrylic paint with other materials, such as paper, fabric, or found objects, can create unique and visually captivating designs. Artists can incorporate collage elements into their acrylic paintings by adhering the materials onto the canvas using acrylic medium or gel. The different textures and patterns of the collaged materials add depth and interest to the artwork. Artists can also experiment with combining acrylic paint with other mediums, such as ink, pastels, or markers, to create mixed media artworks that have a variety of visual and tactile qualities.
In summary, acrylic paint offers a wide range of techniques for creating unique designs. Whether you prefer fluid and abstract compositions or textured and detailed artwork, there is a technique that can help you achieve your desired effects. By experimenting with different techniques and materials, artists can push the boundaries of acrylic painting and create truly original and eye-catching designs.
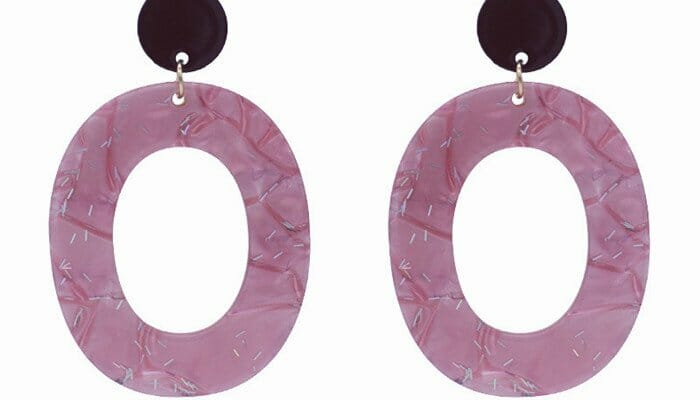
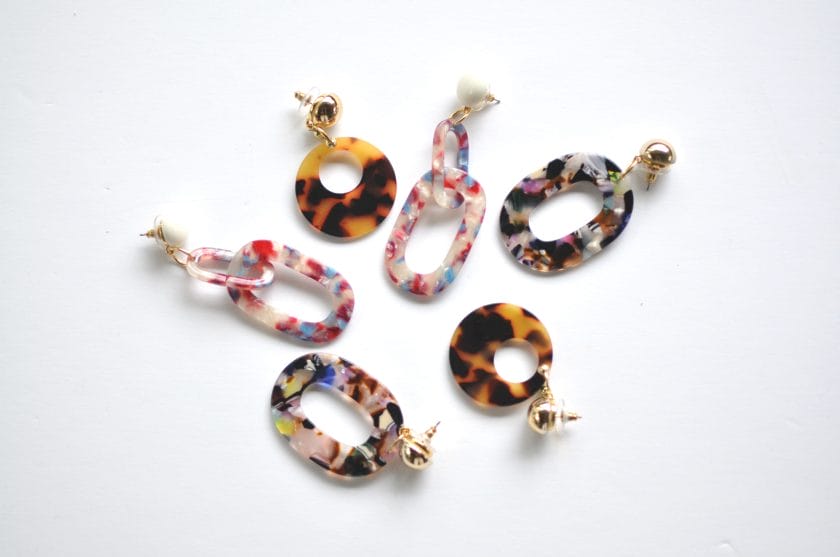
Adding Colors and Patterns to Your Acrylic Earrings
Acrylic earrings are a popular fashion accessory that can add a touch of style and flair to any outfit. While clear acrylic earrings can be chic and minimalist, adding colors and patterns to your acrylic earrings can give them a unique and personalized look. In this section, we will explore different methods for adding colors and patterns to your acrylic earrings.
1. Painting with Acrylic Paint
One of the simplest ways to add color to your acrylic earrings is by painting them with acrylic paint. You can choose any color or combination of colors that match your style and preference. Here’s how you can do it:
- Start by cleaning the surface of the acrylic earrings with a mild soap and water solution. This will help remove any dirt or oils that may interfere with the adhesion of the paint.
- Use a fine-tipped brush to apply the acrylic paint to the earrings. You can create solid colors or experiment with different designs and patterns.
- Allow the paint to dry completely before handling or wearing the earrings.
- If desired, you can apply a clear sealant or varnish to protect the paint and give the earrings a glossy finish.
2. Using Nail Polish
If you have a collection of nail polishes in various colors, you can repurpose them to create colorful designs on your acrylic earrings. Follow these steps to transform your earrings with nail polish:
- Clean the acrylic earrings with soap and water to ensure a clean surface.
- Select your desired nail polish colors and apply them directly to the earrings. You can create patterns, marble effects, or even use a gradient technique.
- Allow the nail polish to dry completely before handling or wearing the earrings.
- For added durability, you can apply a clear top coat of nail polish or a clear sealant to protect the design.
3. Adding Adhesive Vinyl
Another creative way to add patterns and designs to your acrylic earrings is by using adhesive vinyl. This method allows for precise and intricate designs. Here’s how you can do it:
- Clean the surface of the earrings with soap and water to ensure a smooth application.
- Select a piece of adhesive vinyl with the desired pattern or design. You can find adhesive vinyl in various colors and patterns at craft stores or online.
- Cut out the vinyl into the desired shape and size to fit the earrings.
- Carefully peel off the backing of the adhesive vinyl and apply it to the acrylic earrings, pressing down firmly to ensure it adheres properly.
- Trim any excess vinyl and smooth out any air bubbles or wrinkles.
- For added durability, you can apply a clear sealant over the vinyl to protect the design.
4. Using Resin and Pigments
If you want to create a glossy and three-dimensional effect on your acrylic earrings, you can use resin and pigments. Follow these steps to achieve a stunning result:
- Mix the resin according to the manufacturer’s instructions. Make sure to work in a well-ventilated area and wear appropriate protective gear.
- Add a small amount of pigment or colorant to the resin and mix thoroughly until you achieve the desired color.
- Place the acrylic earrings on a clean surface and carefully pour the colored resin over them.
- Use a toothpick or a small brush to spread the resin evenly and create any desired patterns or effects.
- Allow the resin to cure completely according to the manufacturer’s instructions.
- Once the resin is fully cured, you can sand and polish the earrings to achieve a smooth and glossy finish.
Adding colors and patterns to your acrylic earrings is a fun and creative way to make them stand out. Whether you choose to paint, use nail polish, adhesive vinyl, or resin and pigments, the possibilities are endless. Experiment with different techniques and unleash your artistic side to create unique and eye-catching acrylic earrings.
Assembling and Finishing Your Acrylic Earrings
Once you have all the necessary supplies and have designed your acrylic earrings, it’s time to assemble and finish them. Follow these steps to bring your creations to life:
1. Prepare the acrylic pieces
Start by ensuring that all your acrylic pieces are clean and free from any dust or debris. You can use a microfiber cloth or a lint-free cloth to gently wipe the surfaces of the acrylic. This step is important to ensure that your earrings have a polished and professional look.
2. Attach the findings
Take your earring findings, such as ear wires or studs, and attach them to the acrylic pieces. Depending on the style you’ve chosen, you may need to use jump rings or glue to secure the findings. Make sure to position them properly and ensure they are symmetrical if you are making a pair of earrings.
3. Add embellishments
If you want to add any embellishments or decorative elements to your acrylic earrings, now is the time to do so. This could include adding beads, charms, or other small pieces to enhance the overall design. Use jewelry pliers to carefully attach these embellishments to the acrylic pieces, making sure they are securely fastened.
4. Sand and polish the edges
Using a fine-grit sandpaper or a nail buffer, gently sand the edges of the acrylic pieces to smooth out any rough or sharp edges. Be cautious not to apply too much pressure or sand too vigorously, as this could damage the acrylic. Once the edges are smooth, you can use a polishing cloth or a specialized acrylic polish to give them a glossy finish.
5. Check for any imperfections
Take a close look at your assembled acrylic earrings to check for any imperfections. This could include smudges, scratches, or any inconsistencies in the placement of findings or embellishments. If you notice any issues, make the necessary adjustments or touch-ups to ensure your earrings look flawless.
6. Allow the earrings to set and cure
If you used glue during the assembly process, it’s important to allow the earrings to set and cure according to the instructions provided with the adhesive. This will ensure that the findings and embellishments are securely attached and will not come loose over time.
7. Clean and store your finished earrings
Lastly, give your acrylic earrings a final cleaning to remove any fingerprints or residue that may have accumulated during the assembly process. You can use a mild soap and water solution or a specialized jewelry cleaning solution to gently clean the acrylic pieces. Once they are dry, store your finished earrings in a jewelry box or a dedicated earring organizer to prevent any damage.
In summary, assembling and finishing your acrylic earrings involves preparing the acrylic pieces, attaching the findings, adding embellishments, sanding and polishing the edges, checking for imperfections, allowing the earrings to set and cure if glue was used, and finally cleaning and storing the finished earrings. By following these steps, you can create beautiful and wearable acrylic earrings that showcase your unique style and creativity.
Tips for Maintaining and Caring for Your Acrylic Earrings
Acrylic earrings are a trendy and fashionable accessory that can add a pop of color and style to any outfit. However, like any piece of jewelry, they require proper care and maintenance to ensure their longevity and continued beauty. In this section, we will provide you with some useful tips for maintaining and caring for your acrylic earrings.
1. Store them properly
When you’re not wearing your acrylic earrings, it’s important to store them properly to avoid any damage. Keep them in a clean and dry place, away from direct sunlight or heat sources that can cause them to warp or discolor. Consider using a jewelry box or a soft cloth pouch to protect them from scratches and dust.
2. Clean them regularly
Regular cleaning is essential to keep your acrylic earrings looking their best. Use a mild soap or a jewelry cleaner specifically designed for acrylic jewelry. Gently scrub them with a soft-bristled toothbrush to remove any dirt or debris. Rinse them thoroughly with lukewarm water and pat them dry with a soft cloth.
3. Avoid exposure to chemicals
Acrylic earrings should be kept away from harsh chemicals and cleaning agents, as they can cause damage and discoloration. Remove your earrings before applying lotions, perfumes, or hair products, as these can also degrade the acrylic material over time. Additionally, avoid wearing them while swimming or showering, as chlorine and saltwater can be particularly harmful.
4. Handle with care
Acrylic earrings are delicate and can easily break or scratch if mishandled. Always handle them with clean hands and avoid pulling or tugging on them. When taking them off, gently slide them out of your earlobes instead of yanking them. Avoid dropping them on hard surfaces, as this can cause chipping or cracking.
5. Avoid excessive heat and humidity
Extreme heat and humidity can have a negative impact on acrylic earrings. Avoid leaving them in hot cars or exposing them to direct sunlight for prolonged periods. High temperatures can cause the acrylic to warp or lose its shape. Similarly, excessive humidity can lead to moisture buildup, which can promote mold or mildew growth.
6. Regularly inspect for damage
Take a few minutes every now and then to inspect your acrylic earrings for any signs of damage. Look for chipped edges, cracks, or loose fittings. If you notice any issues, it’s best to stop wearing them and have them repaired by a professional jeweler to prevent further damage.
In summary, taking proper care of your acrylic earrings will ensure that they remain in pristine condition and last for years to come. Remember to store them properly, clean them regularly, avoid exposure to chemicals, handle them with care, avoid excessive heat and humidity, and inspect them for damage. By following these simple tips, you can enjoy your acrylic earrings and keep them looking fabulous.
Frequently Asked Questions
Q: How can I make acrylic earrings?
To make acrylic earrings, you will need acrylic sheets, earring findings, a cutting tool, sandpaper, and glue. First, design your desired shape on the acrylic sheet and cut it out using the cutting tool. Then, sand the edges to smooth them out. Attach the earring findings using glue, and allow them to dry completely before wearing.
Conclusion
In conclusion, learning how to make acrylic earrings can be a fun and creative way to express your personal style. By following a few simple steps and using the right tools and materials, you can easily create unique and eye-catching earrings that are sure to impress. Whether you are a beginner or an experienced crafter, acrylic earrings offer endless possibilities for customization and experimentation.
From choosing the perfect acrylic colors and shapes to incorporating other elements like beads or charms, you can truly make these earrings your own. Additionally, with the growing popularity of statement earrings, acrylic earrings provide a budget-friendly option to stay on-trend without breaking the bank.
So why not give it a try? Grab your supplies and let your creativity shine through as you create stunning acrylic earrings that are sure to make a statement!