
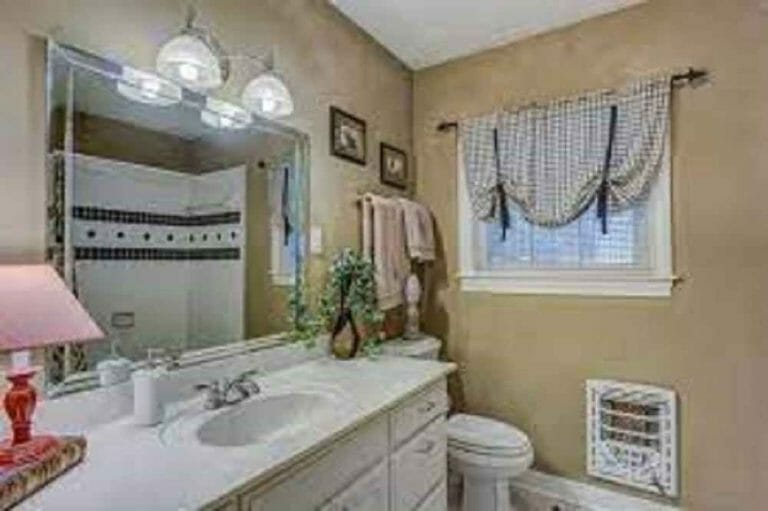
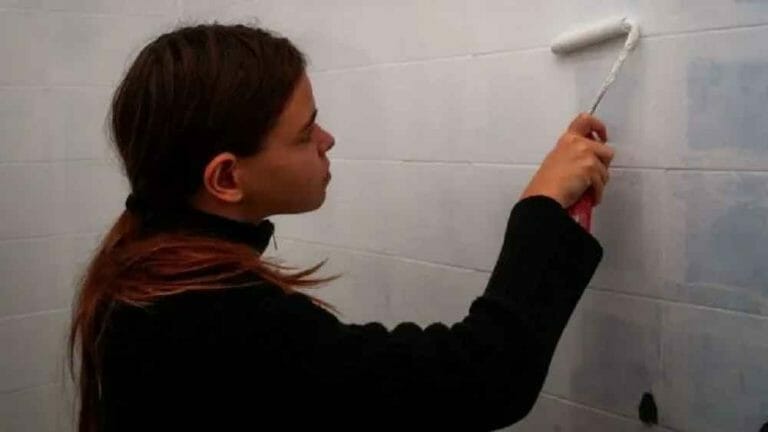
If you have just finished painting your bathroom and you’re wondering whether it’s safe to take a cold shower, you’re in the right place. Taking a cold shower after painting is generally safe, as long as the paint has had enough time to dry and cure. However, there are a few things to consider before you hop in that shower. Read on to find out more about the timing, precautions, and tips for taking a cold shower after painting your bathroom.
Timing is crucial when it comes to taking a cold shower after painting. It’s recommended to wait at least 24 to 48 hours for the paint to fully dry and cure before exposing it to water. This allows the paint to harden and adhere properly to the walls, avoiding any potential damage or streaks that could occur from the water.
Before jumping into a cold shower, it’s important to ensure that the bathroom is well-ventilated. Proper ventilation helps to speed up the drying process by allowing the moisture from the shower to evaporate quickly. Open windows, turn on exhaust fans, or use a dehumidifier to create a well-ventilated environment.
In addition to ventilation, it’s a good idea to inspect the painted surfaces before taking a cold shower. Check for any signs of bubbling, cracking, or peeling paint, as this could indicate that the paint hasn’t fully dried yet. If you notice any issues, it’s best to wait
Best Practices for Maintaining Paint Quality in the Bathroom
The bathroom is one of the most frequently used spaces in any home, and as a result, its walls can be subjected to a lot of wear and tear. One of the primary concerns when it comes to maintaining the paint quality in the bathroom is the constant exposure to moisture, steam, and humidity. These factors can cause the paint to peel, blister, or fade over time. However, with the right maintenance practices, you can prolong the life and appearance of your bathroom paint. Here are some best practices to follow:
1. Choose the Right Paint
When painting your bathroom, it is essential to choose the right type of paint. Opt for a high-quality, moisture-resistant paint specifically designed for bathrooms. Look for paints that have a mold and mildew-resistant formula. This will help prevent the growth of mold and mildew in the damp environment of the bathroom.
2. Prep the Surface
Properly preparing the surface before painting is crucial for achieving long-lasting results. Clean the walls thoroughly to remove any dirt, grease, or soap residue. Patch any cracks or holes with a suitable filler and sand the surface to create a smooth and even base for the paint.
3. Use a Primer
Applying a primer before painting can significantly improve the adherence and durability of the paint. A high-quality primer seals the surface, prevents stains from bleeding through, and provides a better base for the topcoat. Apply the primer evenly and allow it to dry completely before proceeding with the paint.
4. Apply Multiple Coats
To ensure proper coverage and a more durable finish, apply multiple coats of paint. Allow each coat to dry completely before applying the next one. This will help create a solid barrier against moisture and steam, enhancing the longevity of the paint in the bathroom.
5. Use a Satin or Semi-Gloss Finish
Choosing the right finish for your bathroom paint can make a significant difference in its longevity. Satin or semi-gloss finishes are more resistant to moisture and can withstand frequent cleaning without losing their sheen. These finishes also make it easier to wipe away any stains or splatters.
6. Proper Ventilation
Adequate ventilation is essential in maintaining the paint quality in the bathroom. Moisture and steam can accumulate on the walls, leading to peeling or blistering of the paint. Install a ventilation fan or open a window during and after hot showers to allow the excess moisture to escape. This will help keep the bathroom environment drier and reduce the potential for paint damage.
7. Regular Cleaning
Regularly cleaning your bathroom walls can help prevent the buildup of dirt, grime, and soap scum, which can deteriorate the paint over time. Use a mild cleaner and non-abrasive sponge to gently clean the walls. Avoid using harsh chemicals or abrasive scrub brushes that can damage the paint surface.
8. Address Issues Promptly
If you notice any signs of paint damage such as peeling, blistering, or mold growth, address the issues promptly. Remove the damaged paint, treat any underlying moisture issues, and repaint the affected area. Ignoring these problems can lead to further damage and more extensive repairs down the line.
In summary, maintaining the paint quality in the bathroom requires proper preparation, choosing the right type of paint, applying multiple coats, using a suitable finish, ensuring proper ventilation, regular cleaning, and addressing any issues promptly. By following these best practices, you can keep your bathroom walls looking fresh, vibrant, and protected against the effects of moisture and humidity.
Importance of Proper Ventilation After Painting a Bathroom
Painting the bathroom can be a great way to freshen up the space and give it a new look. However, many homeowners overlook the importance of proper ventilation after completing this task. Proper ventilation is essential after painting a bathroom to ensure the health and safety of the occupants, as well as to prevent any potential damage to the newly painted surfaces. In this section, we will discuss the reasons why proper ventilation is crucial and explore some effective methods to achieve it.
1. Preventing Health Issues
One of the most critical reasons to ensure proper ventilation after painting a bathroom is to prevent health issues. Paint fumes contain harmful chemicals, such as volatile organic compounds (VOCs), which can cause dizziness, headaches, nausea, and respiratory problems when inhaled in high concentrations. These fumes can linger in the bathroom for hours or even days after painting if not properly ventilated.
To safeguard the health of individuals using the bathroom, it is essential to provide adequate ventilation to remove these fumes and improve air quality. Proper ventilation helps to circulate fresh air into the bathroom, diluting the concentration of VOCs and reducing the risk of health issues.
2. Minimizing Odor and Smell
Painting a bathroom often results in a strong, lingering odor. The smell can be unpleasant and overpowering, making it uncomfortable for anyone using the bathroom. Proper ventilation plays a crucial role in minimizing the odor and quickly eliminating the smell.
By ensuring proper airflow, ventilation helps to dissipate the paint odor, allowing fresh air from outside to enter the bathroom and replace the stagnant air. This helps to create a more comfortable and pleasant environment for everyone.
3. Preventing Mold and Mildew Growth
Bathrooms are prone to high humidity levels, which can lead to the growth of mold and mildew. When painting a bathroom, the added moisture from the paint can further contribute to these issues if proper ventilation is not in place.
Proper ventilation helps to remove excess moisture from the bathroom, preventing the accumulation of water vapor on the newly painted surfaces. This reduces the risk of mold and mildew growth, which can damage the paint and affect the overall appearance of the bathroom.
4. Preserving the Paint Job
Proper ventilation plays a vital role in preserving the quality and longevity of the paint job in the bathroom. Excessive moisture and humidity can cause the paint to bubble, peel, or crack, resulting in an unsightly and deteriorating finish.
By ensuring proper airflow and maintaining optimal humidity levels, ventilation helps to create an environment that is conducive to the proper curing and drying of the paint. This allows the paint to adhere properly and maintain its integrity, ensuring a long-lasting and beautiful finish in the bathroom.
5. Effective Ventilation Methods
There are several effective methods to achieve proper ventilation in the bathroom after painting:
- Use Exhaust Fans: Install or use exhaust fans in the bathroom to draw out the paint fumes and promote air circulation.
- Open Windows and Doors: Open windows and doors to allow fresh air to enter the bathroom and remove any lingering odors or fumes.
- Utilize Air Purifiers: Use air purifiers with activated carbon filters to help remove the paint fumes and improve air quality.
- Keep Bathroom Ventilated: Ensure the bathroom remains well-ventilated even after painting by using fans or leaving the door open for some time.
In summary, proper ventilation after painting a bathroom is of utmost importance for various reasons, including preventing health issues, minimizing odors, preventing mold and mildew growth, and preserving the paint job. Implementing effective ventilation methods, such as using exhaust fans, opening windows and doors, utilizing air purifiers, and keeping the bathroom ventilated, will help maintain a healthy and pleasant environment while ensuring the longevity of the newly painted surfaces.

How long to wait before taking a shower after painting the bathroom
Painting the bathroom can be quite a task, and once the painting is done, it is only natural to want to start using the bathroom as soon as possible. However, it is important to wait for the paint to fully dry and cure before taking a shower to ensure that the paint job is not ruined. In this section, we will discuss how long you should wait before taking a shower after painting the bathroom.
1. Paint Drying Time
The drying time of paint can vary depending on several factors such as the type of paint used, humidity levels, and temperature. Most paints will dry to the touch within a few hours, but this does not mean that they have fully cured. It is recommended to wait at least 24-48 hours before exposing the painted surface to water or moisture.
2. Curing Time
Curing is the process by which the paint fully hardens and reaches its maximum durability. While the paint may feel dry to the touch after a day or two, it can take several weeks for the paint to fully cure. During this time, it is important to handle the painted surface with care to avoid any scratches or damage.
3. Ventilation and Airflow
Proper ventilation and airflow can help speed up the drying and curing process of the paint. Open windows or use fans to increase the air circulation in the bathroom. This will help remove any lingering moisture and reduce the overall drying time.
4. Paint Type and Manufacturer Instructions
The type of paint you use and the manufacturer’s instructions should always be taken into consideration. Different paints may have different drying and curing times. Always refer to the paint can or consult the manufacturer’s instructions for specific guidelines on when it is safe to expose the painted surface to water.
5. Temperature and Humidity
The temperature and humidity levels in the bathroom can also affect the drying and curing time of the paint. Higher temperatures and lower humidity levels will generally result in faster drying times. On the other hand, colder temperatures and higher humidity levels can cause the paint to take longer to dry. It is important to consider these factors when determining how long to wait before taking a shower.
6. Touch Test
If you are unsure whether the paint has dried enough, you can perform a touch test. Gently press your finger against an inconspicuous area of the painted surface. If the paint feels dry and does not leave any marks on your finger, it is likely safe to take a shower. However, it is still recommended to wait the recommended drying and curing time for optimal results.
In summary, it is best to wait at least 24-48 hours before taking a shower after painting the bathroom. This allows the paint to fully dry and cure, ensuring a long-lasting and durable finish. Factors such as paint type, ventilation, temperature, and humidity can affect the drying time, so it is important to take these into consideration. Always refer to the paint can or manufacturer’s instructions for specific guidelines.
Alternatives to Cold Showers After Painting the Bathroom
Painting a bathroom can be a satisfying home improvement project, but it often leaves you with a strong odor and lingering fumes. After completing the painting process, it is essential to allow the room to dry and ventilate properly. While taking a cold shower is a common recommendation to cool down and minimize exposure to paint fumes, it may not be everyone’s preferred choice. Luckily, there are several alternatives to cold showers that can help you feel refreshed and comfortable after painting your bathroom. Let’s explore them below:
1. Warm Showers
If you want to avoid the shock of a cold shower but still want to rinse off the paint residue, a warm shower can be a great alternative. The warm water will help relax your muscles and wash away any paint particles on your skin. It is important to use a mild soap or shower gel to ensure a thorough clean. Remember to keep the bathroom well-ventilated during and after your shower to minimize the lingering smell of paint.
2. Sponge Bath
If you prefer not to take a full shower, a sponge bath can be an effective option. Fill a basin or sink with warm water and add a gentle soap or body wash. Dip a sponge or washcloth into the soapy water and gently wipe down your body, focusing on areas that may have come into contact with paint. Rinse the sponge or washcloth frequently and continue until you feel refreshed. This method allows you to clean yourself without needing to step into the shower.
3. Wet Towel on Pulse Points
Another alternative to a cold shower is to place a wet towel on your pulse points. Dampen a towel with cool water and apply it to areas such as your wrists, neck, and temples. These pulse points are located where blood vessels are close to the skin’s surface, and the cool towel can help lower your body temperature and provide a refreshing sensation. You can also add a few drops of essential oil to the water for a soothing aroma.
4. Cooling Mist Spray
A cooling mist spray can offer instant relief from the heat and odors after painting. Fill a spray bottle with chilled water and mist it over your face, neck, and body. The fine mist will help cool down your skin and provide a refreshing sensation. You can also add a few drops of essential oil with calming properties for an added relaxation effect. Keep the spray bottle handy for quick refreshers throughout the day.
5. Air Circulation
To speed up the drying process and minimize the presence of paint fumes, ensure that the bathroom has adequate air circulation. Open windows and turn on fans to promote airflow. Consider using a dehumidifier or placing bowls of activated charcoal around the room to absorb any remaining odors. This method, combined with good ventilation, can significantly reduce the time it takes for the paint to dry and for the smell to dissipate.
After painting your bathroom, it is important to find a suitable method to refresh and cleanse yourself without resorting to a cold shower. Whether you choose a warm shower, sponge bath, wet towel on pulse points, cooling mist spray, or focus on air circulation, these alternatives can help you feel comfortable and rejuvenated while minimizing exposure to paint fumes. Remember to prioritize proper ventilation to expedite the drying process and eliminate any lingering odors. With these alternatives, you can enjoy the results of your bathroom painting project without sacrificing your preferred shower temperature.
FAQs
Can I take a cold shower after painting the bathroom?
It is advisable to wait at least 24-48 hours after painting before taking a shower, regardless of the water temperature. This allows the paint to fully dry and cure, ensuring it does not get damaged or stained by the water.
Conclusion
In conclusion, taking a cold shower after painting your bathroom can be a refreshing and invigorating experience. The cold water can help in lowering your body temperature and reducing any potential heat-related effects from painting in a confined space. Additionally, a cold shower can also help in cleansing your skin and removing any paint residue that might have come into contact with your body. However, it is important to note that if you have any sensitive skin or underlying health conditions, it is advisable to consult with a healthcare professional before taking a cold shower after painting.
Overall, a cold shower can be a great way to cool down and freshen up after completing a painting project. Just remember to listen to your body and make sure it is comfortable with the temperature change. Happy painting!