
Prepping wood before applying acrylic paint is crucial for achieving a smooth and long-lasting finish.
First, start by sanding the wood surface with fine-grit sandpaper to remove any roughness or imperfections.
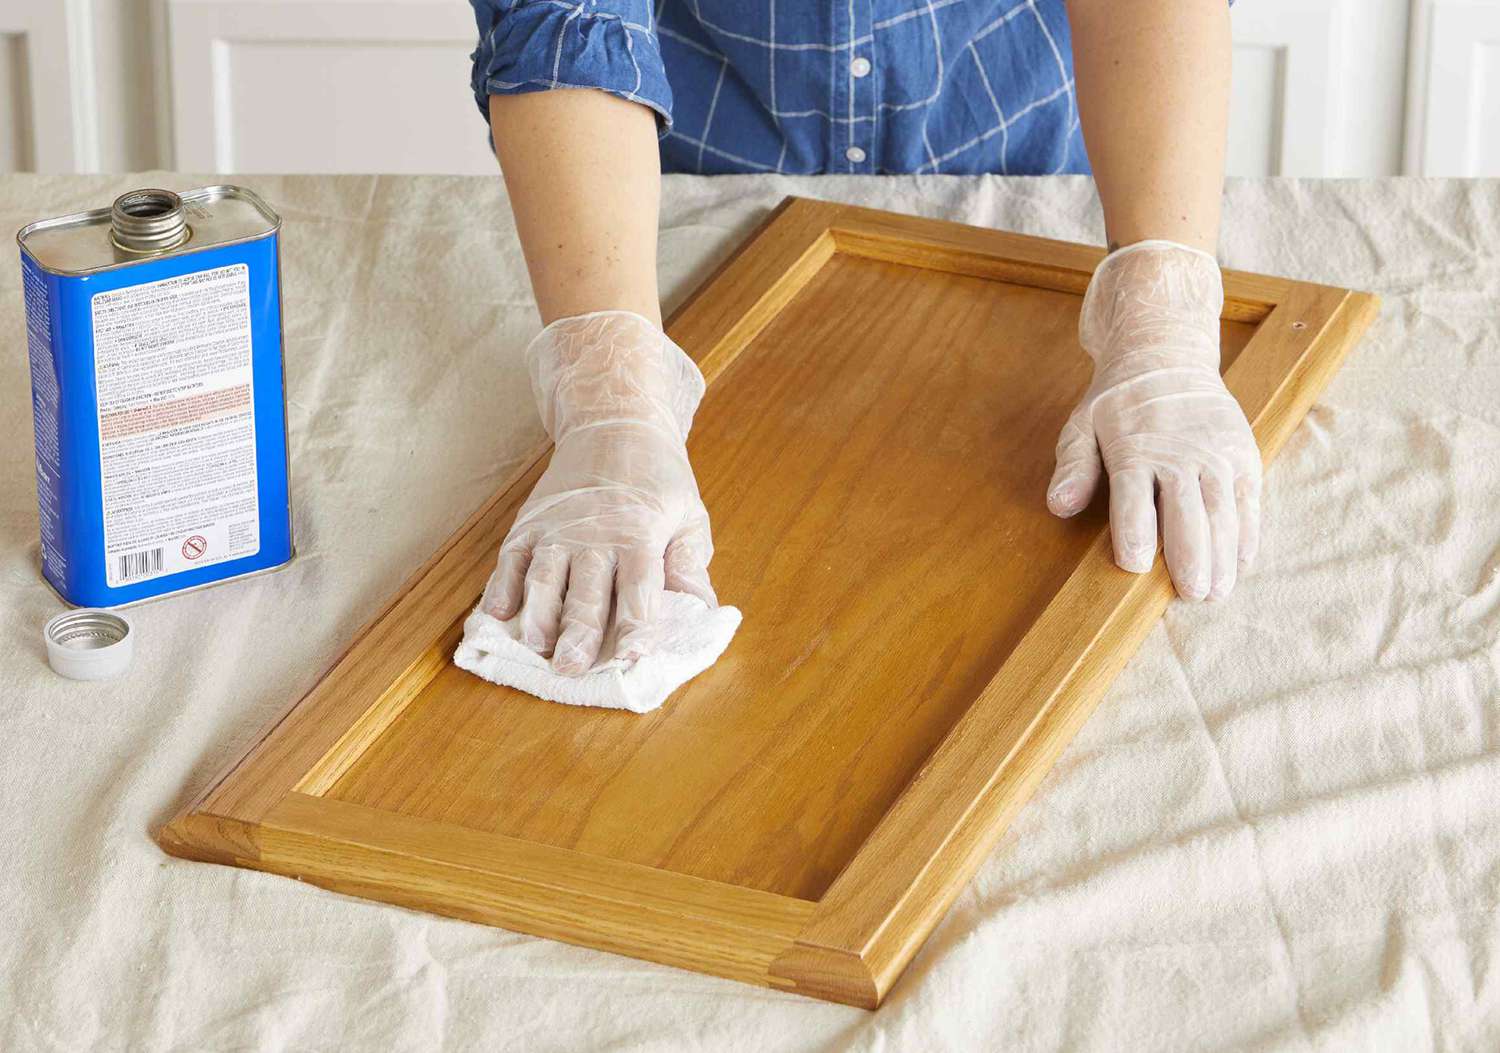
Next, wipe away any sawdust or debris with a clean cloth or tack cloth to ensure a clean painting surface.
Then, apply a primer specifically designed for wood to create a smooth and even base for the acrylic paint.
Allow the primer to dry completely before proceeding with the application of acrylic paint.
By following these steps, you can ensure that your wood surface is properly prepped and ready for acrylic paint, resulting in a beautiful and professional-looking finish.
Remember to always read and follow the instructions provided by the paint manufacturer for the best results.
Cleaning and Sanding Wood Surface for Acrylic Painting
Before starting your acrylic painting on wood, it is essential to prepare the surface properly to ensure a smooth and sturdy foundation for your artwork. Cleaning and sanding the wood surface is a crucial step that helps in removing any dirt, dust, or imperfections and creates a better adhesion for the paint.
1. Gather the necessary tools
Before you begin the cleaning and sanding process, gather all the necessary tools and materials:
- Soft cloth or sponge
- Mild soap or wood cleaner
- Sandpaper (medium grit and fine grit)
- Sandpaper block or sanding sponge
- Dust mask
- Protective gloves
2. Remove the surface dirt
Start by removing any dirt, dust, or debris from the wood surface. Gently wipe the surface with a soft cloth or sponge dampened with water. You can also use a mild soap or wood cleaner to remove any stubborn stains or grime. Ensure that the wood surface is completely dry before proceeding to the next step.
3. Sand the wood surface
Using medium-grit sandpaper, start sanding the wood surface in the direction of the grain. This helps to smooth out any rough areas, bumps, or imperfections on the surface. Be gentle and apply even pressure while sanding. It is recommended to use a sanding block or sanding sponge for better control and to prevent over-sanding in certain areas.
Once you have sanded the entire surface with medium-grit sandpaper, switch to fine-grit sandpaper for a smoother finish. Sand the surface again, following the direction of the grain. This step helps in further refining the surface and preparing it for painting.
4. Remove sanding dust
After sanding, the wood surface will be covered in fine dust particles. It is crucial to remove this dust before proceeding to the painting stage. Use a soft cloth or a vacuum cleaner with a brush attachment to gently remove all the sanding dust. Make sure the surface is completely clean and free from any debris.
5. Protect yourself
Before you start applying any paint or primer, it is important to protect yourself. Wear a dust mask to avoid inhaling any harmful particles, especially during sanding. Additionally, wearing protective gloves can help protect your hands from any chemicals present in cleaning products or paint.
Summary
Cleaning and sanding the wood surface is a crucial step in preparing it for acrylic painting. By removing dirt, dust, and imperfections, and creating a smooth surface, you set the foundation for a successful painting. Remember to gather the necessary tools, remove surface dirt, sand the wood surface, remove sanding dust, and protect yourself. Following these steps will ensure that your acrylic painting on wood turns out beautifully and lasts for a long time.

Applying Primer to Wood for Acrylic Painting
When it comes to painting on wood with acrylics, applying a primer is an essential step to ensure a smooth and long-lasting finish. Priming the wood creates a stable surface that allows the paint to adhere properly and prevents it from seeping into the wood’s pores.
Why Primer is Important
Primer serves multiple purposes when it comes to preparing wood for acrylic painting. Here are some key reasons why you should always apply a primer:
- Seals the Wood: Wood is porous by nature, and applying a primer helps seal the surface, preventing the paint from being absorbed and wasted. Primer creates a barrier that ensures the paint is evenly distributed and adheres well to the wood.
- Promotes Adhesion: Acrylic paint tends to adhere better to a primed surface. By applying a primer, you create a foundation that allows the paint to grip the wood, resulting in a more durable and long-lasting finish.
- Improves Paint Coverage: Priming the wood enhances the coverage of the acrylic paint, reducing the need for multiple coats. This not only saves time but also helps in achieving a more uniform and smooth finish.
- Prevents Staining: Some types of wood, such as pine, can release tannins that may stain the paint over time. Using a primer helps to block these stains and ensures the paint remains vibrant and free from discoloration.
Choosing the Right Primer
When selecting a primer for wood, it is important to choose a product specifically designed for acrylic painting. Look for a water-based primer that is compatible with acrylic paint, as this will provide the best results. Some primers even come with extra features like stain-blocking or mildew resistance, depending on your needs.
Additionally, consider the type of wood you are working with. Some woods, like MDF or plywood, have a higher tendency to absorb moisture, so using a primer with moisture-resistant properties can help prevent warping or damage.
Preparing the Wood Surface
Before applying the primer, it is crucial to properly prepare the wood surface. Follow these steps:
- Clean the Wood: Remove any dust, dirt, or grease from the wood surface using a damp cloth. This ensures that the primer adheres well to the wood.
- Sand the Surface: Lightly sand the wood to create a smoother texture and provide better adhesion for the primer. Use fine-grit sandpaper and sand in the direction of the wood grain.
- Remove Dust: After sanding, wipe away any dust with a clean cloth. This step is essential to achieve a smooth and flawless finish.
Applying the Primer
Now that the wood surface is prepped, it’s time to apply the primer. Follow these guidelines:
- Stir the Primer: Before applying, give the primer a good stir to ensure that all the components are well-mixed.
- Use a Brush or Roller: Depending on the size of the wood surface, choose a suitable brush or roller. For smaller areas, a brush works well, while a roller is more efficient for larger surfaces.
- Apply Thin and Even Coats: Start with a thin coat of primer, ensuring that it is spread evenly across the wood. Avoid applying the primer too thickly, as it can lead to drips or an uneven finish.
- Allow Drying Time: Follow the manufacturer’s instructions for drying time. Typically, it takes around 1 to 2 hours for the primer to dry completely.
- Sand (Optional): If desired, you can lightly sand the primed surface after it has dried to ensure an even smoother finish and remove any imperfections.
Applying a primer to wood before acrylic painting is a crucial step to achieve a professional-looking finish. It seals the wood, promotes paint adhesion, improves coverage, and prevents staining. By choosing the right primer and properly preparing the wood surface, you can ensure that your acrylic paintings on wood will be vibrant and long-lasting.

Sealing Wood Surface for Acrylic Painting
If you are an artist who loves working with acrylic paints on wood, it is essential to properly prepare and seal the wood surface before starting your masterpiece. Sealing the wood surface not only enhances the longevity of your artwork but also ensures that the colors and texture of your acrylic paints adhere smoothly and evenly.
Why Seal the Wood Surface?
Wood is a porous material that can absorb moisture, leading to warping, cracking, and color bleeding. By sealing the wood surface, you create a barrier that prevents any moisture from seeping into the wood, protecting it from damage and preserving its structural integrity.
Choosing the Right Sealant
When selecting a sealant for your wood surface, it is crucial to choose one that is compatible with acrylic paints. Here are a few sealant options commonly used by artists:
- Acrylic Gesso: This is a popular choice as it not only seals the wood surface but also provides a smooth, white base for your acrylic paints. Acrylic gesso comes in both liquid and paste forms and can be easily applied with a brush or a roller.
- Clear Acrylic Sealer: If you prefer to keep the natural look of the wood, a clear acrylic sealer is a great option. It forms a protective layer on the wood surface without altering its appearance.
- Wood Primer: If you are working with unfinished or raw wood, applying a wood primer before sealing is recommended. A wood primer helps to even out the wood’s surface and improves adhesion.
Preparing the Wood Surface
Before applying any sealant, it is essential to prepare the wood surface to ensure proper adhesion and a smooth finish. Here are the steps to follow:
- Sand the Wood: Start by sanding the wood surface using sandpaper with a medium grit. This helps to smoothen any rough patches or imperfections on the wood.
- Clean the Surface: After sanding, wipe the wood surface with a clean, dry cloth to remove any dust or debris.
- Apply a Wood Conditioner (optional): If you are working with a dense or oily wood, consider applying a wood conditioner to ensure better absorption of the sealant.
Applying the Sealant
Now that your wood surface is prepared, it’s time to apply the chosen sealant. Follow these steps:
- Stir the Sealant: If using a liquid sealant, make sure to give it a good stir to mix any settling pigments.
- Apply the First Coat: Using a brush or roller, apply an even layer of the sealant to the wood surface. Follow the manufacturer’s instructions regarding drying time.
- Sand Between Coats (optional): For a smoother finish, you can lightly sand the surface between each coat of sealant using fine-grit sandpaper. This helps to remove any brush marks or imperfections.
- Apply Additional Coats: Depending on the desired level of protection, apply an additional coat or two of sealant, allowing proper drying time between each coat.
In summary, sealing the wood surface before acrylic painting is crucial for preserving your artwork’s longevity and ensuring optimal color vibrancy. Choose a sealant that is compatible with acrylic paints, prepare the wood surface properly, and apply the sealant in thin, even coats. By taking these steps, you can create beautiful acrylic paintings on wood that will stand the test of time.
Prepping the Wood Grain for Acrylic Paint Application
Before applying acrylic paint to wood, it is important to properly prepare the wood surface to ensure the best results. Prepping the wood grain involves several steps that help create a smooth, clean, and durable surface for the paint to adhere to. Here are some key steps to follow:
1. Clean the Wood Surface
The first step in prepping the wood grain is to clean the surface thoroughly. Use a damp cloth or sponge to remove any dirt, dust, or grime that may be present. Make sure to clean all sides of the wood piece, including the edges. This will help the paint to bond better and prevent any debris from affecting the final finish.
2. Sand the Wood
After cleaning, sanding the wood is essential for creating a smooth surface. Use a medium-grit sandpaper to gently sand the entire wood piece, following the direction of the grain. This will help remove any rough patches, imperfections, or old finishes that may be present. Be sure to wipe away any dust or sanding residue with a clean cloth or tack cloth before proceeding.
3. Fill in Imperfections
If there are any noticeable gaps, cracks, or dents in the wood surface, it is important to fill them in before painting. Use a wood filler or putty that is compatible with acrylic paint. Apply the filler to the affected areas, smoothing it out with a putty knife or a spatula. Allow the filler to dry according to the manufacturer’s instructions, and then sand it down to create a smooth and even surface.
4. Prime the Wood
Priming the wood helps create a barrier between the raw wood and the paint, ensuring better adhesion and a more even finish. Apply a coat of wood primer to the entire surface using a brush or a roller. Make sure to choose a primer that is specifically designed for use on wood and is compatible with acrylic paint. Allow the primer to dry completely before moving on to the next step.
5. Sand and Seal Again (Optional)
If you want an ultra-smooth finish or if the wood grain is still visible after priming, you can sand the primer lightly with a fine-grit sandpaper and then apply another coat of primer. This step is optional but can help achieve a more polished look.
6. Apply Acrylic Paint
Once the wood surface is fully prepped, it is ready for acrylic paint application. Use a high-quality acrylic paint and apply it evenly using a brush or a roller. Follow the manufacturer’s instructions regarding drying times and number of coats required. Allow the paint to dry thoroughly between coats for the best results.
By following these steps to prep the wood grain, you can ensure a smooth and professional-looking finish when applying acrylic paint. Take your time and pay attention to detail for the best results. Happy painting!
FAQs
1. How do I prepare wood for acrylic paint?
To prepare wood for acrylic paint, start by sanding the surface to create a smooth and even texture. Remove any dust or debris by wiping the wood with a damp cloth. Apply a primer specifically designed for wood to create a good base for the paint. Once the primer is dry, you can start painting with acrylic colors.
2. Can I paint directly on untreated wood with acrylic paint?
While it is possible to paint directly on untreated wood with acrylic paint, it is generally recommended to prepare the surface first. Untreated wood tends to absorb the paint unevenly, resulting in inconsistent colors. Applying a primer on untreated wood helps the paint adhere better and provides a more even finish.
3. Do I need to seal acrylic paint on wood?
Sealing acrylic paint on wood is not necessary but can be beneficial for protection and longevity. Once your acrylic paint is dry, you can choose to apply a clear varnish or sealer to add a protective layer. This will help prevent the paint from chipping, fading, or getting damaged over time.
Conclusion
In conclusion, prepping wood for acrylic paint is crucial to achieve optimal results in your artwork or DIY projects. By following a few simple steps, you can ensure that the paint adheres well to the wood surface and lasts longer.
First, sand the wood to create a smooth and even surface, removing any roughness or imperfections. Then, clean the wood thoroughly to remove any dust or debris. Next, apply a primer specifically designed for wood surfaces to create a suitable base for the acrylic paint.
Once the primer has dried, you’re ready to apply your acrylic paint. Remember to use thin layers and let each layer dry completely before adding another. Finally, consider sealing your artwork or project with a clear varnish to protect the paint and enhance its longevity.
By properly prepping the wood, you can achieve vibrant and long-lasting results with your acrylic paint on wood projects.