
Are you looking to give your parking space a fresh and vibrant look? Painting a parking space is a simple and effective way to enhance its appearance and organization. With the right materials and techniques, you can easily transform a plain parking area into an eye-catching and well-defined space. Whether you want to repaint an existing parking space or create a new one from scratch, this guide will provide you with step-by-step instructions to help you achieve professional-looking results.
The first step in painting a parking space is to gather all the necessary materials. You will need paint, a measuring tape, a stencil or masking tape, a paint roller or sprayer, and a paintbrush for touch-ups. It’s important to choose a high-quality paint that is specifically designed for outdoor use and can withstand heavy traffic.
Once you have gathered your materials, the next step is to prepare the parking area. Clean the surface thoroughly by removing any dirt, debris, or loose paint using a power washer or a wire brush. Fill in any cracks or potholes with asphalt patching compound and allow it to dry completely. If necessary, apply a primer to ensure better paint adhesion.
Now it’s time to measure and mark the parking space. Use a measuring tape to determine the appropriate dimensions and mark the boundaries with a pencil or chalk. If you’re using a stencil, position it carefully and secure it in place with masking tape. Alternatively, you can create a

Prepping the Surface for a Professional Finish
Before you begin any painting project, whether it’s a small touch-up or a complete makeover, proper surface preparation is key to achieving a professional and long-lasting finish. Taking the time to prepare the surface will ensure that the paint adheres well and that imperfections are minimized. In this section, we will guide you through the steps of prepping the surface for a professional finish.
Gather your materials
The first step in prepping the surface is to gather all the necessary materials. This includes protective gear such as gloves, goggles, and a dust mask, as well as tools like sandpaper, putty knife, painters tape, and cleaning supplies. Having everything you need on hand will save you time and make the process more efficient.
Clean the surface
Start by cleaning the surface thoroughly to remove any dirt, dust, or grease. Use a mild detergent or a specialized cleaner depending on the type of surface you are working on. Scrub gently with a sponge or a soft brush, and rinse with clean water. Make sure to let the surface dry completely before moving on to the next step.
Repair any damage
Inspect the surface for any cracks, holes, or imperfections. Use a putty knife to apply a suitable filler or spackle to repair these areas. Smooth out the filler and let it dry completely. Once dry, sand the repaired areas until they are smooth and level with the surrounding surface. This will ensure a seamless finish when the paint is applied.
Sand the surface
Sanding the surface is essential to create a smooth and even texture. Use sandpaper of the appropriate grit for the type of surface you are working on. Start with a coarser grit to remove any roughness or unevenness, and then move on to a finer grit for a smoother finish. Sand in a circular or back-and-forth motion, applying even pressure. Remember to wipe away any dust with a damp cloth or vacuum cleaner before proceeding.
Protect adjacent areas
Before you start painting, it’s important to protect adjacent areas that you don’t want to get paint on. Use painters tape to cover trim, windows, and fixtures. Lay down drop cloths or plastic sheets to protect the floor and furniture. Taking these precautions will save you time and effort in cleaning up later.
Prime the surface
Priming the surface is an important step that helps the paint adhere better and provides a uniform base for the color. Apply a coat of primer using a brush or roller, following the manufacturer’s instructions. Allow the primer to dry fully before applying the paint.
Inspect and touch up
Once the surface is prepped and primed, take a final look for any imperfections or areas that may need additional touch-ups. Use a fine-tipped brush to fix any small blemishes or inconsistencies. Smooth out any brush marks or drips with light sanding if necessary.
In summary, proper surface preparation is crucial for achieving a professional finish when painting. By following these steps and taking the time to clean, repair, sand, and prime the surface, you will ensure that your paint job looks flawless and lasts for years to come. So, before you pick up that paintbrush, make sure you prep the surface properly for a truly professional result.
Step-by-Step Guide to Painting Parking Lines with Precision
Parking lines are crucial for maintaining order and maximizing parking space efficiency. Whether you are a business owner, property manager, or a handy DIY enthusiast, knowing how to paint parking lines with precision is essential. In this guide, we will walk you through the step-by-step process of painting parking lines to ensure accuracy and professionalism.
1. Gather the necessary materials
Before you start painting, gather all the materials you will need. This includes:
- Measuring tape or long ruler
- Chalk or marking paint
- Straightedge or chalk line
- Paint roller or spray paint machine
- Reflective glass beads (optional for increased visibility)
- Parking line stencil (optional for complex designs)
2. Measure and mark the parking spaces
Using a measuring tape or long ruler, determine the desired width and length of each parking space. Mark the starting and ending points of each space using chalk or marking paint. Ensure that the spaces are evenly spaced and follow local regulations regarding dimensions.
3. Establish the centerline
To maintain symmetry and precision, establish a centerline for the parking spaces. Start from one end of the designated parking area and use a straightedge or chalk line to create a straight line. This will serve as a reference point for painting the parking lines.
4. Paint the base coat
Before painting the actual parking lines, apply a base coat of paint to the designated area. This will help the lines adhere better and provide a solid foundation. Use a paint roller or spray paint machine to evenly apply the base coat. Allow it to dry completely before proceeding to the next step.
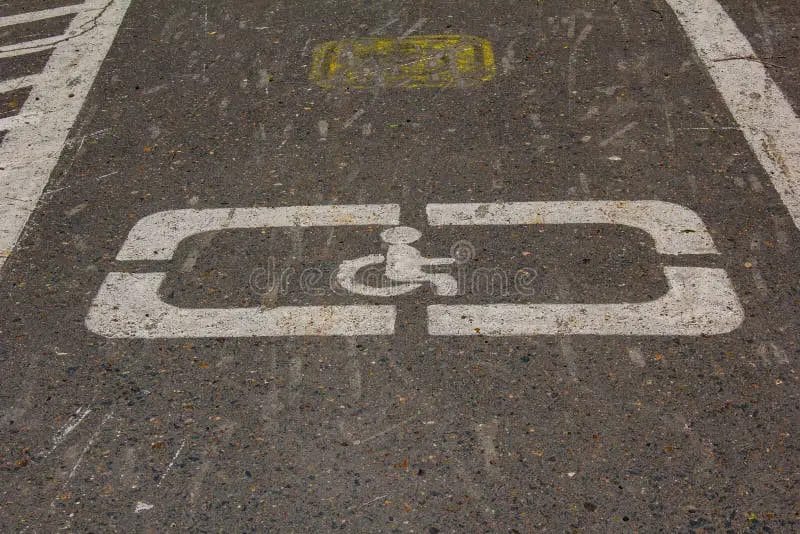
5. Position the stencil (if applicable)
If you are using a parking line stencil for complex designs such as arrows or handicap symbols, position it securely on the designated area. Ensure that it is aligned properly with the centerline and the marked spaces. Use tape or weights to hold the stencil in place.
6. Paint the parking lines
Using a paint roller or spray paint machine, carefully apply the paint to create the parking lines. Start from one end and work your way towards the other end, following the marked spaces and centerline. Use smooth and steady strokes to achieve clean and crisp lines. Remove the stencil if used.
7. Add reflective glass beads (optional)
If you want to enhance the visibility of the parking lines, you can sprinkle reflective glass beads over the wet paint. These beads will reflect light and make the lines more visible, particularly during nighttime or low-light conditions.
8. Allow the paint to dry
After painting the parking lines, allow the paint to dry completely. Avoid parking or allowing any traffic on the freshly painted lines until they are fully cured. This will ensure that the lines maintain their integrity and longevity.
9. Inspect and touch up if necessary
Once the paint has dried, carefully inspect the parking lines for any imperfections or areas that may need touch-ups. Use a small brush or roller to correct any inconsistencies in the lines or fill in any missed spots. A professional and neat finish is essential.
Summary
Painting parking lines with precision requires careful planning and attention to detail. By following this step-by-step guide, you can ensure that your parking lines are accurately painted, visually appealing, and in compliance with local regulations. Remember to gather all the necessary materials, measure and mark the parking spaces, establish a centerline, paint the base coat, use stencils if needed, paint the lines, add reflective glass beads for visibility, allow the paint to dry, and inspect for any touch-ups. With proper execution, your parking lines will contribute to a safe and organized parking area.
Adding Creative Elements to Make Your Parking Space Stand Out
When it comes to parking spaces, most people imagine a dull and mundane area where they leave their vehicles. However, with a little creativity and effort, you can transform your parking space into a unique and eye-catching spot. Adding creative elements not only makes your parking space stand out but also adds a touch of personalization and charm. Here are some ideas to help you make your parking space more appealing:
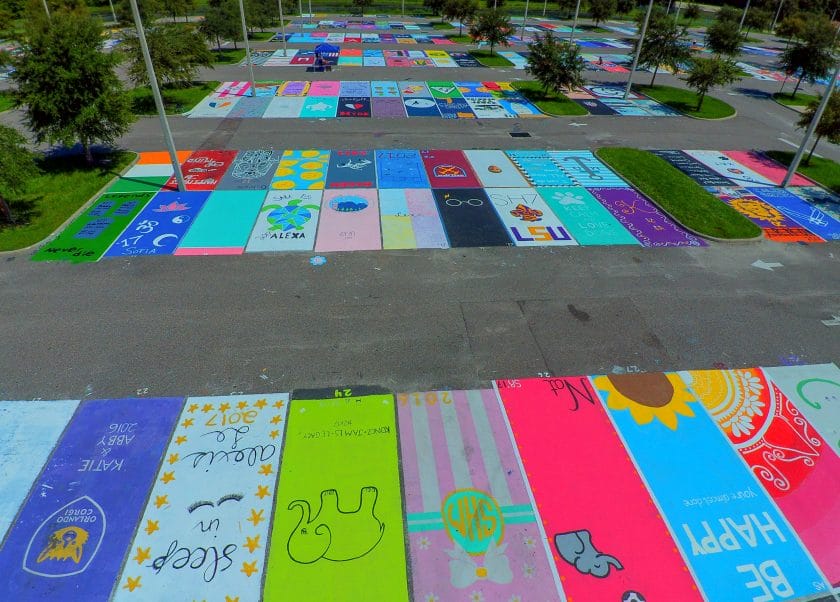
1. Colorful Paint and Patterns
One of the easiest ways to make your parking space visually appealing is by using colorful paint and patterns. Consider using bright and vibrant colors that catch the eye and make your parking space stand out from the rest. You can also incorporate patterns or designs to add a unique touch. For example, you could create a geometric pattern or paint a mural that reflects your personality or interests.
2. Greenery and Plants
Adding some greenery and plants to your parking space can instantly transform it into a more inviting and refreshing environment. Consider placing potted plants or hanging baskets near the entrance or along the sides of your parking space. This not only adds a pop of color but also creates a more natural and welcoming atmosphere.
3. Unique Signage
A creative and unique signage can make your parking space more noticeable and memorable. Instead of using generic signs, consider designing your own sign that reflects your personality or showcases the purpose of the parking space. You can use different materials such as wood, metal, or even recycled materials to create a one-of-a-kind sign.
4. Lighting and Illumination
The right lighting can make a significant difference in enhancing the overall appeal of your parking space. Consider adding decorative string lights, lanterns, or solar-powered pathway lights to create a warm and inviting ambiance. Not only does it make your parking space visually appealing, but it also adds an element of safety and security.
5. Art and Sculptures
Integrating art and sculptures into your parking space can elevate its artistic value and make it a standout feature. You can choose to display sculptures or install art installations that complement the overall theme or design of your parking space. It not only adds visual interest but also creates a talking point for visitors.
6. Seating and Relaxation Area
If you have extra space available, consider adding seating and a relaxation area to make your parking space more functional and enjoyable. Place a bench or some outdoor furniture where people can sit and relax while waiting for their cars. This not only adds a touch of comfort but also encourages social interaction and community bonding.
7. Interactive Elements
Add a touch of interactivity to your parking space by incorporating elements that engage and entertain people. Install a mini-golf putting green, a basketball hoop, or a pinball machine for visitors to enjoy while waiting. This not only makes your parking space unique but also creates a memorable experience for anyone who visits.
In summary, adding creative elements to your parking space can transform it from a dull area into a visually appealing and engaging spot. Whether it’s through colorful paint and patterns, greenery, unique signage, lighting, art, seating, or interactive elements, there are plenty of ways to make your parking space stand out. Get creative, think outside the box, and let your parking space reflect your personality and style.
Maintenance Tips to Keep Your Painted Parking Space Looking Fresh
Once you have invested in a freshly painted parking space, it is important to maintain its appearance to prolong its lifespan and keep it looking fresh. Regular maintenance will not only enhance the aesthetics of your parking space but also prevent any potential damage. Here are some maintenance tips to help you keep your painted parking space in pristine condition:
1. Regular Cleaning
Regular cleaning is essential to remove dirt, debris, and stains from your painted parking space. Use a broom, leaf blower, or pressure washer to sweep away any loose dirt or leaves. For stubborn stains, consider using a gentle cleaning solution and a soft-bristle brush to scrub the area. Avoid using harsh chemicals or abrasive cleaners that could damage the paint.
2. Promptly Address Oil Spills
Oil spills can quickly stain and damage the paint on your parking space. It is crucial to address them promptly to prevent permanent marks. Use a degreaser specifically designed for removing oil stains and follow the manufacturer’s instructions. Apply the degreaser to the affected area, gently scrub with a brush, and rinse thoroughly. Repeat if necessary.
3. Seal Coat Regularly
Seal coating is an effective way to protect and extend the life of your painted parking space. It provides an additional layer of protection against elements such as UV rays, moisture, and chemicals. Consider seal coating your parking space every few years or as recommended by the manufacturer. This will help maintain the integrity of the paint and prevent premature fading or cracking.
4. Repair Cracks and Potholes
Regularly inspect your parking space for any cracks or potholes. These can not only affect the appearance but also pose a safety hazard. Fill in any cracks or potholes promptly using a suitable asphalt repair material. Smooth out the patched areas to ensure a seamless finish. This will prevent further damage and maintain the overall look of your parking space.
5. Provide Clear Signage
In addition to maintaining the paint itself, it is important to provide clear signage to guide users of your parking space. Clearly marked lines, arrows, and symbols will help maximize parking efficiency and prevent confusion. Regularly inspect and touch up any faded or worn-out signage to ensure visibility and effectiveness.
6. Protect from Heavy Vehicles and Equipment
Avoid allowing heavy vehicles or equipment to park on your painted parking space. The excessive weight and movement can cause cracks and damage the paint. If necessary, create designated areas or alternative parking options for heavier vehicles to avoid unnecessary stress on the painted surface.
7. Schedule Regular Inspections
Lastly, schedule regular inspections of your painted parking space to identify any signs of wear, fading, or damage. Early detection and timely repairs can prevent further deterioration and prolong the lifespan of the paint. Consider hiring a professional parking lot maintenance service for comprehensive inspections and maintenance.
In summary, by following these maintenance tips, you can keep your painted parking space looking fresh and vibrant. Regular cleaning, prompt addressing of oil spills, seal coating, crack and pothole repairs, clear signage, protection from heavy vehicles, and regular inspections are key to ensuring the longevity and aesthetic appeal of your parking space.
Frequently Asked Questions
How do I paint a parking space?
To paint a parking space, start by cleaning the area thoroughly and ensuring it is free from debris. Then, measure and mark the boundaries of the space using masking tape or chalk. Apply a suitable primer to the surface before using a paint specifically designed for outdoor use. Use a roller or paint sprayer to apply the paint evenly, and remove the tape or chalk once the paint is dry.
What type of paint should I use for a parking space?
For a parking space, it is recommended to use a high-quality, durable paint that is specifically formulated for outdoor use. Look for paint that is designed for asphalt or concrete surfaces and can withstand heavy traffic and weather conditions. Acrylic or latex-based paints are commonly used for parking spaces due to their durability.
How long does it take for the paint to dry on a parking space?
The drying time of paint on a parking space can vary depending on factors such as temperature and humidity. However, in general, it may take around 24 to 48 hours for the paint to fully dry and cure. It’s important to avoid driving or parking on the freshly painted surface until it is completely dry to prevent any damage or smudging.
Conclusion
In conclusion, learning how to paint a parking space can be a rewarding and practical skill. By following the steps outlined in this guide, you can transform a dull parking area into a well-organized and visually appealing space. Remember to choose the right materials, properly clean and prepare the surface, and use a steady hand to apply the paint. Additionally, ensuring proper measurement and clear markings is essential for maximizing space and promoting safe parking. By taking the time to learn and practice these techniques, you can confidently paint parking spaces and contribute to a more organized and efficient parking environment.