
When it comes to spray painting, one of the biggest challenges is avoiding those dreaded tiger stripes. These unsightly streaks and uneven patterns can ruin the overall finish of your project. However, by following a few simple tips and techniques, you can achieve a smooth and flawless spray paint finish, without any tiger stripes. From proper surface preparation to choosing the right spray paint and applying it in the correct manner, this guide will help you avoid those frustrating tiger stripes and achieve professional-looking results.

Choosing the Right Spray Gun: Key to Avoiding Tiger Stripes
In the world of painting, achieving a smooth and flawless finish is the ultimate goal. However, sometimes unwanted streaks and lines, commonly known as “tiger stripes,” can appear on the painted surface, ruining the desired result. While there can be various reasons behind this issue, one crucial factor that often gets overlooked is the choice of the spray gun. In this section, we will explore the importance of selecting the right spray gun and how it can help you avoid those pesky tiger stripes.
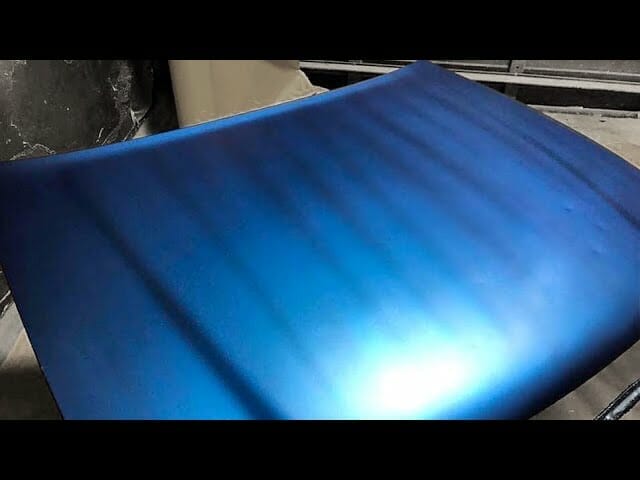
Understanding Tiger Stripes
Tiger stripes are thin, uneven lines or streaks that become noticeable on the painted surface. They are usually caused by inconsistent paint application due to improper atomization of the paint particles. This results in uneven distribution and coverage, leaving behind these undesired marks. Tiger stripes can be frustrating for both professional painters and DIY enthusiasts, as they can dramatically impact the final finish of a project.
The Role of the Spray Gun
The spray gun is a critical tool in the painting process, as it determines how the paint is atomized and delivered onto the surface. Choosing the right spray gun can significantly reduce the occurrence of tiger stripes and ensure a smooth, professional-looking finish. Here are some key factors to consider when selecting a spray gun:
1. Gun Type
There are various types of spray guns available in the market, each designed for specific applications. Gravity-feed spray guns, for example, are ideal for smaller projects and provide better control over the paint flow. On the other hand, conventional or HVLP (High Volume Low Pressure) spray guns are more suitable for larger surfaces and offer better paint transfer efficiency.
2. Nozzle Size
The size of the nozzle plays a vital role in achieving the desired atomization and paint flow. A nozzle that is too small can lead to clogging and uneven distribution of paint, resulting in tiger stripes. On the contrary, a nozzle that is too large may cause excessive paint overspray, leading to wastage and an uneven finish. It is crucial to select a nozzle size that is appropriate for the type of paint and the surface being painted.
3. Air Pressure
The air pressure settings on the spray gun also impact the atomization and paint application. Adjusting the air pressure correctly can help achieve a fine mist of paint particles, minimizing the chances of tiger stripes. It is essential to consult the manufacturer’s guidelines or seek professional advice to determine the optimal air pressure for your specific painting project.
4. Quality and Maintenance
Investing in a high-quality spray gun is essential for achieving consistent and flawless results. Quality spray guns are often crafted with precision and feature better atomization technology, reducing the chances of tiger stripes. Additionally, regular cleaning and maintenance of the spray gun are crucial to ensure proper functioning and prevent any paint buildup that could affect the paint application.
Tips to Avoid Tiger Stripes
In addition to choosing the right spray gun, here are some additional tips to help you avoid tiger stripes:
- Prepare the surface properly by cleaning and sanding it to ensure a smooth base for paint application.
- Practice proper spraying techniques, such as maintaining a consistent distance from the surface and using smooth, overlapping strokes.
- Thin the paint if necessary, following the manufacturer’s recommendations, to achieve the right viscosity for optimal atomization.
- Perform a test spray on a scrap piece of material before starting the actual project to ensure the desired spray pattern and minimize the chance of tiger stripes.
- Pay attention to environmental factors such as temperature and humidity, as they can affect the drying time and paint application.
Summary
Choosing the right spray gun is a crucial step in achieving a flawless finish and avoiding tiger stripes. Consider factors such as the type of gun, nozzle size, air pressure, and overall quality when making your selection. Additionally, follow proper spraying techniques and take necessary precautions to minimize the chances of tiger stripes. By giving due importance to the spray gun and its attributes, you can ensure a smooth and professional-looking paint job every time.
Prepping the Surface: Essential Steps for a Smooth Paint Job
Before you embark on your painting project, it’s important to understand that proper surface preparation plays a vital role in achieving a smooth and flawless finish. Taking the time to prep the surface will not only ensure better adhesion of the paint but also help to prolong the life of your paint job. In this section, we will discuss the essential steps you need to take to prep the surface for a successful paint job.
Clean the Surface
The first step in prepping the surface is to clean it thoroughly. Remove any dirt, dust, grease, or grime from the surface using a mild detergent and water solution. You can use a sponge or a soft brush to scrub the surface gently. Rinse the surface with clean water and allow it to dry completely before moving on to the next step.
Repair Any Damages
Inspect the surface for any damages such as cracks, holes, or peeling paint. Repair these issues before painting to ensure a smooth finish. Use a putty knife to scrape off any loose or peeling paint. Fill the cracks and holes with a suitable filler or patching compound, following the manufacturer’s instructions. Once the repairs are complete, sand the patched areas gently to create a smooth surface.
Sand the Surface
Sanding the surface is an important step to create a smooth and even surface for painting. Start by lightly sanding the entire surface using fine-grit sandpaper. This will help to remove any rough spots, imperfections, or high spots. Sand along the grain of the wood or in a circular motion for other surfaces. After sanding, wipe away any dust with a clean, damp cloth.
Protect Surfaces and Trim
Before you begin painting, it’s essential to protect any surfaces or trim that you don’t want to get paint on. Cover floors, furniture, and fixtures with drop cloths or plastic sheets. Use painter’s tape to mask off trim, windows, and other areas that need protection. This will help to prevent paint splatters and ensure clean lines.
Prime the Surface
Priming the surface is an optional but highly recommended step, particularly for bare or heavily stained surfaces. A primer creates a smooth and uniform base for the paint, improves adhesion, and helps to prevent stains from bleeding through. Apply the primer evenly using a brush or roller, following the manufacturer’s instructions. Allow the primer to dry completely before applying the paint.
Fill Imperfections
Even after thorough cleaning and repairs, some imperfections may still be visible on the surface. To achieve a flawlessly smooth finish, use a fine-grit sandpaper to gently sand the surface again. This will help to further smooth out any remaining imperfections. After sanding, wipe away any dust with a clean, damp cloth before proceeding with the painting process.
In summary, prepping the surface is a crucial step in achieving a smooth and professional-looking paint job. By following these essential steps of cleaning, repairing, sanding, protecting, priming, and filling imperfections, you can ensure that your surface is properly prepared for painting. Taking the time to prep the surface will not only enhance the durability and longevity of your paint job but also result in a more visually appealing finish.

Techniques for Applying Paint: Avoiding Tiger Stripes Like a Pro
When it comes to painting, achieving a smooth and flawless finish is every painter’s goal. However, one common issue that often arises is the appearance of streaks or uneven lines on the painted surface, commonly known as “tiger stripes.” These unsightly marks can ruin the overall look of your paint job and leave you feeling frustrated. But fear not! In this section, we will explore some professional techniques that can help you avoid tiger stripes and achieve a professional-looking paint finish.
1. Preparing the Surface
The first step in avoiding tiger stripes is to ensure that the surface you are painting is properly prepared. Start by cleaning the surface and removing any dirt, dust, or grease. Use a mild detergent and water solution for regular cleaning or specialized cleaners for tougher stains. Next, sand the surface to create a smooth and even texture, removing any imperfections or rough areas. Finally, apply a primer to create a uniform base for the paint and improve its adhesion to the surface.
2. Choosing the Right Tools
The tools you use for applying paint can greatly impact the occurrence of tiger stripes. Opt for high-quality brushes or rollers that are specifically designed for the type of paint you are using and the surface you are painting. Cheap or worn-out brushes can leave behind streaks and uneven coverage, so investing in good-quality tools is essential. Additionally, consider using a paint sprayer for larger surfaces, as it can provide a more even application and reduce the risk of tiger stripes.
3. Proper Technique
The way you apply the paint plays a crucial role in preventing tiger stripes. Here are some techniques to keep in mind:
- Use long, smooth strokes: Instead of applying the paint in short, choppy strokes, use long and even strokes. This helps distribute the paint evenly and reduces the chances of visible lines.
- Avoid overloading the brush or roller: Excess paint can lead to drips and streaks. Dip your brush or roller into the paint and then remove any excess by tapping it on the side of the container.
- Blend wet and previously painted areas: When working on larger surfaces, it’s important to blend wet and previously painted areas seamlessly. This can be achieved by slightly overlapping each stroke to create a smooth transition from one section to another.
- Work in small sections: Instead of trying to paint the entire surface at once, break it down into smaller sections. This allows you to maintain control over the paint application and ensures a more even finish.
4. Paint Application Tips
Consider the following additional tips to further prevent tiger stripes:
- Thin the paint if necessary: Thick paint can be more prone to leaving streaks. If your paint is too thick, you can thin it using a compatible thinner or consult the manufacturer’s instructions.
- Allow sufficient drying time: Rushing the drying process can lead to smudges and streaks. Follow the recommended drying time specified by the paint manufacturer before applying additional coats or handling the painted surface.
- Inspect and touch up: Once you have completed the paint job, carefully inspect the surface for any visible tiger stripes or imperfections. If necessary, touch up those areas with a small brush or roller to achieve a seamless finish.
Summary
Avoiding tiger stripes during the paint application process requires proper preparation, choosing the right tools, employing the correct techniques, and following additional tips. By implementing these professional techniques, you can achieve a smooth and flawless paint finish, leaving your surfaces looking like they were done by a pro. Remember to take your time, work in small sections, and always strive for even and consistent strokes. With practice and attention to detail, you can say goodbye to tiger stripes and hello to a beautifully painted space.
Troubleshooting Tiger Stripes: Common Mistakes and How to Fix Them
Tiger stripes are a common issue that many people encounter when performing various tasks, such as painting, print production, or even cleaning surfaces. These unsightly streaks can ruin the final result and leave you feeling frustrated. In this section, we will discuss some common mistakes that lead to tiger stripes and provide you with effective solutions to fix them.
1. Inadequate Surface Preparation
One of the primary culprits behind tiger stripes is inadequate surface preparation. When you fail to properly clean or remove debris from the surface before applying a coating, it can result in uneven application and streaks. To avoid this, make sure to thoroughly clean the surface using an appropriate cleaner or solvent. Remove any loose paint, dirt, or other contaminants that may interfere with the coating’s adhesion.
2. Poor Application Technique
The way you apply a coating or paint can significantly affect the appearance of tiger stripes. Using an improper technique, such as using too much pressure, applying uneven coats, or not maintaining a consistent stroke, can lead to streaks. To achieve a smooth and even finish, follow these tips:
- Use light, even pressure while applying the coating.
- Apply thin, consistent coats instead of thick layers.
- Maintain a consistent stroke throughout the application process.
- Ensure proper drying time between each coat.
3. Low-Quality Tools or Materials
The tools and materials you use can also contribute to tiger stripes. Low-quality brushes, rollers, or sprayers may not distribute the coating evenly, resulting in streaks. Additionally, using expired or improperly stored paint or coating products can lead to uneven application. Invest in high-quality tools and materials and ensure they are properly maintained and stored to achieve a smooth finish.
4. Inadequate Lighting
Lighting plays a crucial role in identifying and eliminating tiger stripes. Insufficient or improper lighting conditions can make it difficult to spot streaks during the application process. To avoid this, make sure you have sufficient lighting in your workspace. Natural daylight or bright, white artificial light is ideal for accurately assessing the coating’s appearance and identifying any streaks or imperfections.
5. Insufficient Drying Time
Rushing the drying process can also result in tiger stripes. If you apply a new coat or layer before the previous one has fully dried, it can cause uneven drying and streaks. Always follow the manufacturer’s recommended drying time before applying additional coats. This will ensure proper adhesion and a smooth finish.
Summary
Tiger stripes can be a frustrating issue, but by addressing common mistakes and following the appropriate solutions, you can achieve a flawless finish. Remember to adequately prepare the surface, use proper application techniques, invest in high-quality tools and materials, ensure adequate lighting, and allow sufficient drying time between coats. By implementing these tips, you can troubleshoot and fix tiger stripes effectively, resulting in a professional-looking outcome.
FAQs
How can I avoid tiger stripes when spray painting?
To avoid tiger stripes when spray painting, make sure to hold the spray can at a consistent distance from the surface and use smooth, even strokes. Start spraying off the surface and then move across it in a steady motion. Avoid applying too much paint at once and allow each coat to dry before applying the next one.
Conclusion
In conclusion, preventing tiger stripes when spray painting requires a combination of proper technique and equipment. Firstly, ensure that the surface is clean and adequately prepared before painting. This includes sanding, priming, and filling any imperfections. Additionally, using high-quality spray paints and a compatible nozzle size can help achieve a smooth and even finish. Applying thin coats and maintaining the recommended distance between the nozzle and the surface is crucial to avoid buildup and streaks.
Furthermore, practicing a consistent and steady sweeping motion while spraying reduces the chances of tiger stripes. It is essential to keep the can or gun moving continuously to distribute the paint evenly. Lastly, taking breaks between coats and allowing sufficient drying time can also contribute to a flawless paint job. By following these tips, you can effectively avoid tiger stripes and achieve professional-looking results.