
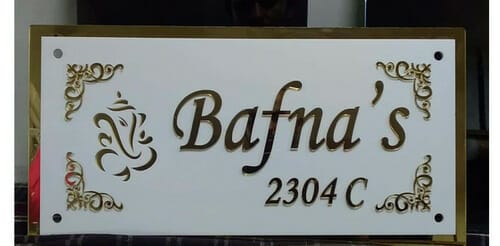
If you’re looking for a unique and stylish way to personalize your space, look no further than acrylic name plates. These versatile and customizable name plates can add a modern touch to any home or office. In this guide, we will show you step-by-step how to make your own acrylic name plates, from choosing the right materials to adding the finishing touches. With a few simple tools and a bit of creativity, you’ll have beautiful name plates that are sure to impress.
First, you’ll need to gather your materials. Acrylic sheets, available in various sizes and colors, will be the base of your name plates. You’ll also need a cutting tool, such as a laser cutter or a handsaw, to shape the acrylic. In addition, you’ll need adhesive or double-sided tape to attach any embellishments or accessories to the name plates.
Next, measure and cut the acrylic sheets to your desired size and shape. If you’re using a laser cutter, follow the manufacturer’s instructions for proper setup and safety precautions. If you’re using a handsaw, make sure to use a blade specifically designed for cutting acrylic to achieve smooth, clean edges.
Once you have your acrylic pieces cut, it’s time to get creative with customization. Consider using vinyl decals, stickers, or colored adhesive letters to spell out names or messages on the name plates. You can also add decorative elements such as gems, beads, or metallic accents for an
Essential Tools and Equipment for Making Acrylic Name Plates
Creating acrylic name plates can be a fun and creative way to personalize your space or add a touch of elegance to your business. Whether you are a DIY enthusiast or a professional in the signage industry, having the right tools and equipment is essential to achieve the best results. In this section, we will discuss the must-have tools and equipment for making acrylic name plates.
1. Acrylic Sheets
Of course, the main material you will need for making acrylic name plates is acrylic sheets. These sheets come in various sizes and thicknesses, so it is important to choose the right one based on your project requirements. Acrylic sheets are available in different colors as well, allowing you to create unique and eye-catching name plates.
2. Laser Cutter or CNC Machine
To achieve precise and intricate designs on your acrylic name plates, you will need a laser cutter or a CNC (Computer Numerical Control) machine. These machines use advanced technology to cut or engrave the acrylic sheets with high precision and accuracy. Depending on your budget and requirements, you can choose between a laser cutter or a CNC machine.
3. Design Software
Before you can cut or engrave the acrylic sheets, you will need to create the design for your name plates. Design software such as Adobe Illustrator or CorelDRAW can help you create professional-looking designs with ease. These software programs allow you to experiment with different fonts, sizes, and shapes to create visually appealing name plates.
4. Safety Equipment
Working with acrylic sheets and cutting machines can be potentially hazardous, so it is important to prioritize safety. Make sure you have the necessary safety equipment, including safety glasses, gloves, and a dust mask. These safety gears will protect you from any potential injuries or harmful fumes during the fabrication process.
5. Adhesive and Mounting Options
Once you have cut and engraved the acrylic sheets, you will need adhesive and mounting options to secure the name plates. Double-sided adhesive tapes or adhesives specifically designed for acrylic materials are ideal for mounting the name plates on walls or doors. Additionally, you can consider using standoffs or other mounting hardware for a more professional and elevated look.
6. Cleaning Supplies
Lastly, don’t forget to have cleaning supplies on hand to keep your acrylic name plates looking pristine. Acrylic sheets are prone to scratches and smudges, so having a microfiber cloth and a mild acrylic cleaner can help you maintain the clarity and shine of your name plates.
In summary, creating acrylic name plates requires a set of essential tools and equipment. Make sure you have acrylic sheets in the right size and thickness, a laser cutter or CNC machine for precision cutting or engraving, design software for creating captivating designs, safety equipment for protection, adhesive and mounting options for securing the name plates, and cleaning supplies to keep them looking their best. With these tools and equipment, you can embark on your acrylic name plate making journey and unleash your creativity.
Step-by-Step Guide to Designing and Cutting Acrylic Name Plates
Acrylic name plates offer a sleek and professional look for offices, cubicles, and other workspaces. Whether you want to create nameplates for your employees or simply add a personal touch to your own workspace, designing and cutting acrylic name plates can be a fun and rewarding DIY project. In this section, we will provide a step-by-step guide to help you create custom acrylic name plates.
Materials You Will Need:
- Acrylic sheet
- Design software
- Laser cutter or acrylic cutting tool
- Masking tape
- Transfer tape or adhesive
- Scissors
- Cloth or sponge
Step 1: Designing Your Name Plate
The first step in creating your acrylic name plate is to design it. You can use design software such as Adobe Illustrator or CorelDRAW to create your desired design. Consider the overall size and shape of the name plate, as well as the font and any additional graphics or logos you want to include. Once you have finalized your design, save it in a format that is compatible with your laser cutter or acrylic cutting tool.
Step 2: Preparing the Acrylic Sheet
Next, prepare the acrylic sheet for cutting. Start by measuring and marking the desired size of your name plate on the sheet. Use a ruler or measuring tape to ensure accuracy. Then, secure the acrylic sheet to your work surface using masking tape to prevent it from moving during the cutting process.
Step 3: Cutting the Acrylic
If you have access to a laser cutter, follow the manufacturer’s instructions to set up the machine and load your design file. Adjust the settings for speed and power according to the thickness of your acrylic sheet. Once everything is set, start the cutting process, and let the laser cutter do its job. Be sure to wear appropriate safety goggles and follow all safety precautions.
If you don’t have access to a laser cutter, you can use an acrylic cutting tool. Score along the marked lines on the acrylic sheet using a sharp blade or scoring tool. Once the lines are scored, carefully snap the acrylic along the scored lines to create your desired shape. Use sandpaper or a file to smooth any rough edges.
Step 4: Applying Transfer Tape or Adhesive
After cutting the acrylic, you may want to apply transfer tape or adhesive to the surface of the name plate. This will protect the acrylic and give it a polished look. Cut a piece of transfer tape or adhesive slightly larger than your name plate and carefully apply it to the surface, smoothing out any bubbles or wrinkles.
Step 5: Adding Personalization
If you want to add personalized information such as names or job titles to your name plate, you can do so using vinyl lettering or decals. Cut the vinyl lettering or decal to the desired size and carefully apply it to the surface of the name plate, following the manufacturer’s instructions. Use a cloth or sponge to press down firmly and ensure proper adhesion.
Step 6: Final Touches
Once you have added all the desired elements to your acrylic name plate, give it a final inspection to make sure everything is aligned and secure. Clean the surface of the name plate using a cloth or sponge to remove any dust or fingerprints. Your custom acrylic name plate is now ready to be displayed in your workspace!
In summary, designing and cutting acrylic name plates is a straightforward process that can be accomplished with the right materials and tools. By following this step-by-step guide, you can create personalized name plates that add a professional touch to any workspace.

Adding Personalized Touches with Paint and Decorative Elements
When it comes to making a house feel like a home, adding personalized touches can truly transform the space. One of the most effective and versatile ways to achieve this is through the use of paint and decorative elements. Whether you’re looking to add a pop of color, create a focal point, or enhance the overall aesthetic, these simple yet impactful techniques can help bring your unique style and personality into every corner of your living space.
1. Paint: A Palette of Possibilities
Paint is a powerful tool that can completely change the look and feel of a room. It allows you to express your individuality and set the mood for each space. Here are some ideas to consider:
- Accent Wall: Choose a bold color or pattern to create a focal point in a room. This can be achieved by painting just one wall, which instantly adds visual interest and depth.
- Color Blocking: Experiment with different colors by dividing your walls into sections using painter’s tape. This technique adds a modern and artistic touch to any space.
- Ombre Effect: Create a gradient effect by blending different shades of the same color. This technique adds a subtle and elegant touch to walls, furniture, or even ceilings.
- Mural or Stencil: Channel your inner artist by painting a mural or using stencils to create intricate designs on your walls. This is a fantastic way to showcase your creativity and make a statement.
2. Decorative Elements: Small Details, Big Impact
Decorative elements can instantly elevate a room and add a personal touch to your living space. Consider the following ideas:
- Wall Art: Hang paintings, prints, or photographs that resonate with your style and reflect your interests. This not only adds visual appeal but also serves as a conversation starter.
- Gallery Wall: Create a curated display of artwork or photographs by arranging them in a stylish grid or asymmetrical layout. This adds a sense of depth and personalization to your walls.
- Textiles: Incorporate cushions, throws, rugs, and curtains in fabrics that reflect your taste and bring warmth to the space. Mixing patterns, textures, and colors can add visual interest and create a cozy ambiance.
- Plants and Greenery: Introduce indoor plants and flowers to breathe life into your home. Not only do they add a touch of nature, but they also purify the air and create a calming atmosphere.
- Personal Collections: Display your favorite books, vintage finds, or cherished heirlooms on shelves or in cabinets. This showcases your individuality and brings a sense of nostalgia to the space.
- Statement Lighting: Choose unique light fixtures or lamps that make a statement and complement your overall design aesthetic. Lighting can create ambiance and serve as a focal point in any room.
By incorporating these personalized elements into your home, you can create a space that not only reflects your style but also evokes a sense of comfort and belonging. Remember, the key is to be true to yourself and have fun while adding these touches. Experiment with different colors, textures, and patterns until you find what resonates with you. Your home should be a reflection of your personality and a place where you feel truly at ease.
Tips and Tricks for Finishing and Mounting Acrylic Name Plates
Acrylic name plates are a popular choice for office spaces, conferences, and events due to their sleek and professional appearance. However, to ensure that your acrylic name plates look their best and are securely mounted, there are some tips and tricks to keep in mind. In this section, we will discuss the key steps for finishing and mounting acrylic name plates.
1. Cleaning and Preparation
Before you begin the finishing process, it is essential to clean the surface of the acrylic name plates thoroughly. Use a soft, lint-free cloth and a mild cleaning solution to remove any dirt, dust, or fingerprints. Avoid using harsh chemicals or abrasive materials that could damage the acrylic surface.
Once the name plates are clean, inspect them for any scratches or imperfections. If you notice any, you can use a polishing compound specifically designed for acrylic surfaces to buff out the blemishes. This step will ensure that your name plates have a flawless finish.
2. Applying Adhesive
Mounting acrylic name plates requires the use of a suitable adhesive. Depending on your preference and the surface you are mounting the name plates on, there are different options available. One popular choice is double-sided adhesive tape.
To apply the adhesive tape, carefully measure and cut it to fit the back of the name plate. Remove the backing from one side of the tape and press it firmly onto the back of the name plate. Once the tape is in place, remove the remaining backing to expose the adhesive.
If you prefer a more permanent mounting solution, you can use an acrylic adhesive. Apply a small amount of the adhesive to the back of the name plate and press it firmly onto the mounting surface. Follow the manufacturer’s instructions for the drying and curing time of the adhesive.
3. Mounting Options
When it comes to mounting acrylic name plates, there are various options to choose from. The most common methods include:
- Wall Mounting: If you plan to mount the name plates on a wall, use screws or nails to secure them in place. Drill small pilot holes to prevent the acrylic from cracking.
- Desk or Tabletop Mounting: For name plates that will be placed on desks or tabletops, consider using a name plate holder or stand. These holders provide stability and make it easy to change the name plates when needed.
- Adhesive Mounting: As mentioned earlier, double-sided adhesive tape or acrylic adhesive can be used for a more straightforward and non-intrusive mounting option. This method works well for smooth surfaces like glass or metal.
4. Maintenance and Cleaning
Once your acrylic name plates are securely mounted, proper maintenance is essential to keep them looking their best. Regularly clean the surface with a mild cleaning solution and a soft cloth to remove any smudges or fingerprints. Avoid using abrasive materials or harsh chemicals that can scratch or damage the acrylic.
Additionally, be mindful of the environment where the name plates are displayed. Direct sunlight or excessive heat can cause the acrylic to become discolored or warp over time. If possible, position the name plates away from direct sunlight or use UV-protective coatings.
Summary
Finishing and mounting acrylic name plates require careful attention to detail to ensure a clean and professional appearance. Start by cleaning and preparing the name plates, then use adhesive tape or acrylic adhesive for mounting. Choose the appropriate mounting option based on your needs, and regularly maintain and clean the name plates to prolong their lifespan.
By following these tips and tricks, you can confidently finish and mount your acrylic name plates, creating a polished and visually appealing display for any setting.
FAQs
1. How can I make acrylic name plates?
To make acrylic name plates, start by cutting a piece of acrylic to your desired size and shape. Then, use an adhesive or double-sided tape to attach vinyl letters or designs to the acrylic. Alternatively, you can use stencils and acrylic paint to create your desired design. Once the design is attached or painted, allow it to dry completely before displaying the acrylic name plate.
2. What materials do I need to make acrylic name plates?
To make acrylic name plates, you will need acrylic sheets, a cutting tool (such as a saw or laser cutter), adhesive or double-sided tape, vinyl letters or stencils, acrylic paint (if desired), and a paintbrush. Additionally, you may need sandpaper or a file to smooth the edges of the acrylic.
3. Can I personalize acrylic name plates?
Yes, you can personalize acrylic name plates by using different fonts, colors, and designs. You can also add additional elements, such as logos or symbols, to make the name plates more unique. Customized acrylic name plates can be a great way to showcase individuality or represent brands, organizations, or events.
Conclusion
In conclusion, creating personalized acrylic name plates can be a fun and rewarding DIY project. By following a few simple steps, you can design and make unique name plates that add a touch of personalization to any space.
Remember to gather all the necessary materials and tools, such as acrylic sheets, cutting tools, adhesive, and any decorative elements you want to incorporate. Take your time in planning and designing the layout of the name plates to ensure a polished and professional look.
Whether you’re making acrylic name plates for your office, home, or as a gift, the possibilities are endless. Let your creativity shine and enjoy the process of making beautiful and customized name plates that are sure to impress.