
Looking for a stunning way to display your photos? Consider face mounting them to acrylic for a modern and sleek look. This process involves sandwiching your image between a sheet of acrylic and a sturdy backing, resulting in a frameless, vibrant display that brings your photos to life.
Face mounting photos to acrylic not only enhances the colors and details of your images, but it also provides protection against UV light, moisture, and scratches, ensuring the longevity of your prints. With its glossy finish and depth, this technique creates a gallery-worthy presentation that will surely captivate viewers.
Don’t worry if you’re not a professional photographer or a DIY expert. Face mounting photos to acrylic can be done with the help of professional printing services or by following step-by-step tutorials online. So, why settle for standard frames when you can elevate your photography to a whole new level with acrylic face mounting?
Preparing Your Photo for Face Mounting
In this section, we will discuss the important steps involved in preparing your photo for face mounting. Face mounting is a popular technique used to enhance the appearance of photographs by mounting them directly onto acrylic or glass surfaces. This process not only protects the image but also gives it a sleek and modern look. To achieve the best results, it is crucial to prepare your photo properly before the face mounting process. Let’s dive into the details:
1. Image Selection and Resolution
The first step in preparing your photo for face mounting is selecting the right image. Choose a photograph that has high resolution and captures the desired level of detail and clarity. Higher resolution images ensure that the final output is sharp and visually appealing. It is recommended to use a photo with a minimum resolution of 300 pixels per inch (PPI).
2. Retouching and Editing
Before proceeding with face mounting, it is essential to retouch and edit your photo to enhance its overall appearance. This includes adjusting brightness, contrast, color balance, and removing any imperfections or distractions. Professional photo editing software such as Adobe Photoshop can be used to make these adjustments. Take the time to carefully retouch and edit your photo to achieve the desired result.
3. Print Quality and Medium
The quality of the print plays a significant role in the final outcome of face mounting. Choose a reputable printing service that specializes in high-quality prints. Opt for archival-grade prints that use pigment-based inks, as they provide longevity and better color accuracy. Additionally, select the appropriate print medium, such as matte or glossy, depending on the desired effect.
4. Mounting Substrate
When face mounting, the choice of mounting substrate is crucial. Acrylic and glass are commonly used substrates for this process. Acrylic offers a lightweight and shatter-resistant option, while glass provides a more premium and reflective finish. Consider the aesthetic you wish to achieve and select the appropriate mounting substrate accordingly.
5. Cleaning and Dust Removal
Before mounting your photo, ensure that the surface of the acrylic or glass substrate is clean and free from dust particles. Use a lint-free microfiber cloth or a specialized cleaning solution to gently clean the surface. This step is crucial to avoid any imperfections or debris getting trapped between the photo and the mounting material.
6. Application of Adhesive
The final step in preparing your photo for face mounting is applying the adhesive. It is recommended to use an optically clear adhesive specifically designed for face mounting applications. Apply a thin and even layer of adhesive to the substrate, ensuring that it covers the entire surface uniformly. Take care to avoid any air bubbles or smudges during this process.
Remember, the preparation process is crucial to achieve a flawless face-mounted photo. By following these steps and paying attention to detail, you can ensure that your photo looks stunning when displayed through face mounting.
Applying Adhesive for Face Mounting
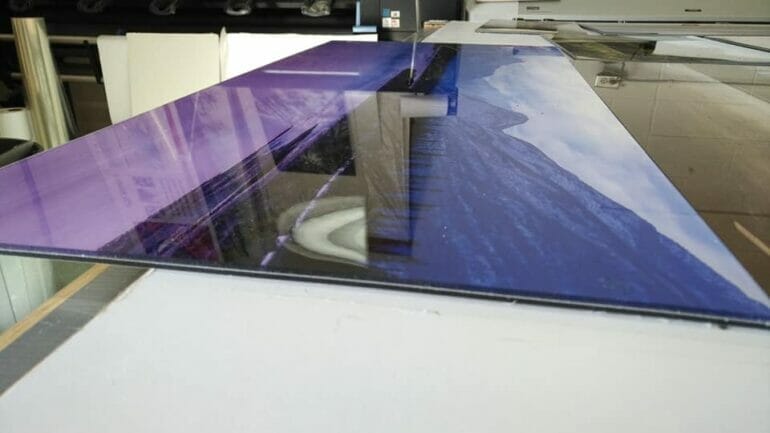
Face mounting is a popular technique used in the art and photography world to display images. This process involves mounting a print onto a substrate, such as acrylic or glass, with the adhesive applied directly to the front of the print. The result is a sleek and modern display that enhances the depth and vibrancy of the image.
When it comes to applying adhesive for face mounting, there are a few important steps to follow to ensure a successful and professional result. Let’s take a closer look at the process:
1. Prepare Your Workspace
Before you begin, make sure you have a clean and well-organized workspace. Dust and debris can easily get trapped between the print and the substrate, so it’s crucial to keep the area as dust-free as possible. Wipe down the surface of the substrate with a lint-free cloth to remove any particles.
2. Choose the Right Adhesive
There are different types of adhesives available for face mounting, including liquid adhesives and adhesive films. It’s important to choose an adhesive that is specifically designed for this purpose and compatible with the materials you are using. Read the manufacturer’s instructions carefully and follow their recommendations.
3. Apply the Adhesive
Begin by applying the adhesive to the print. If you are using a liquid adhesive, pour a small amount onto a clean, lint-free cloth or roller. Start at one corner of the print and work your way across, applying the adhesive evenly in a thin layer. Be careful not to use too much adhesive, as it can cause bubbles or distortions in the final result.
If you are using an adhesive film, carefully remove the backing and align it with one edge of the print. Slowly roll the adhesive film onto the print, smoothing it out as you go to ensure a secure bond.
4. Position the Print on the Substrate
Once the adhesive is applied to the print, carefully position it onto the substrate. Start at one corner and slowly lower the print onto the surface, making sure it aligns properly. Take your time to avoid any air bubbles or misalignment.
5. Smooth Out the Print
Using a roller or squeegee, gently smooth out the print from the center towards the edges to remove any air bubbles or wrinkles. Work in small sections, applying even pressure to ensure a tight bond between the print and the substrate. Take care not to press too hard, as this can damage the print.
6. Allow Time for Drying
After the print is mounted, it’s important to allow sufficient time for the adhesive to dry and cure. Follow the manufacturer’s instructions for recommended drying time. Keep the print in a dust-free environment during this process to avoid any imperfections.
In summary, applying adhesive for face mounting requires careful preparation, the right choice of adhesive, and a precise technique. By following these steps, you can achieve a professional and visually stunning display for your artwork or photographs.
Mounting Your Photo to Acrylic
Mounting your photo to acrylic is a popular choice for both home decor and professional displays. Acrylic offers a sleek and modern look, while also protecting your photo from damage. Whether you’re a photographer looking to showcase your work or a homeowner wanting to add a personal touch to your space, mounting your photo to acrylic can elevate the visual impact of your image. In this section, we will guide you through the process of mounting your photo to acrylic, step by step.
Materials Needed
Before you begin, make sure you have the following materials:
- Photo print: Make sure your photo is printed on high-quality, archival paper for the best results.
- Acrylic sheet: Choose a clear, high-quality acrylic sheet that is the same size as your photo or slightly larger.
- Mounting adhesive: Look for an adhesive specifically designed for mounting photos to acrylic.
- Clean cloth: Use a lint-free cloth to clean the acrylic sheet and remove any dust or fingerprints.
- Hanging hardware: Depending on how you plan to display your mounted photo, you may need hanging hardware such as hooks or wire.
Step-by-Step Guide
Follow these steps to mount your photo to acrylic:
- Clean the acrylic sheet: Use a clean cloth to wipe the acrylic sheet and remove any dust or fingerprints. Make sure the surface is completely clean and dry.
- Apply adhesive: Apply a thin, even layer of mounting adhesive to the back of your photo. Make sure to cover the entire surface, paying extra attention to the corners and edges.
- Position the photo: Carefully place the adhesive-coated side of your photo onto the acrylic sheet. Start by aligning one edge and then slowly press down, smoothing out any air bubbles or wrinkles as you go.
- Apply pressure: Use a clean cloth or roller to apply even pressure to the entire surface of the photo. This will ensure a strong bond between the photo and the acrylic sheet.
- Trim if necessary: If the acrylic sheet is slightly larger than your photo, use a sharp knife or acrylic cutter to trim the excess edges. Take your time and make precise cuts to maintain a clean and professional finish.
- Let it dry: Allow the adhesive to dry completely according to the manufacturer’s instructions. This can take a few hours or overnight, depending on the type of adhesive used.
- Add hanging hardware: If you plan to hang your mounted photo, attach the appropriate hanging hardware to the back of the acrylic sheet. Follow the instructions provided with the hardware for proper installation.
Tips and Considerations
Here are a few tips and considerations to keep in mind when mounting your photo to acrylic:
- Handle with care: Acrylic is prone to scratches, so handle the sheet with clean hands or gloves to avoid leaving fingerprints or other marks.
- Protect from direct sunlight: Acrylic can be susceptible to UV damage, so avoid hanging your mounted photo in direct sunlight. If necessary, use UV-protective coatings or display it in a shaded area.
- Choose the right adhesive: Make sure to use an adhesive that is specifically designed for mounting photos to acrylic. This will ensure a secure and long-lasting bond.
- Consider professional printing: For the best results, consider having your photo professionally printed on archival paper before mounting it to acrylic. This will enhance the clarity and color accuracy of your image.
In Summary
Mounting your photo to acrylic is a great way to enhance the visual appeal of your image. By following the steps outlined in this guide and taking the necessary precautions, you can create a stunning display that will preserve and showcase your photo for years to come. Remember to handle the acrylic with care, choose the right adhesive, and protect your mounted photo from direct sunlight. With a little patience and attention to detail, you can achieve professional-looking results and enjoy your mounted photo in all its glory.
Finishing Touches for a Professional Look
When it comes to presenting oneself professionally, it’s not just about dressing the part or having a polished resume. Attention to detail is key when it comes to creating a lasting impression. In this section, we will explore some essential finishing touches that can elevate your professional image.
1. Personal Grooming
Personal grooming plays a significant role in projecting a professional image. Pay attention to your hair, nails, and overall hygiene. Ensure that your hair is well-groomed and styled appropriately for the workplace. Keep your nails clean and neatly trimmed. Maintaining good personal hygiene is essential, as it reflects your attention to detail and professionalism.
2. Dress Appropriately
Choosing the right attire for the workplace is crucial in portraying a professional image. Dress according to the company’s dress code or adhere to industry standards. Make sure your clothes are clean, well-fitted, and wrinkle-free. Pay attention to the small details like ironing collars, polishing shoes, and selecting appropriate accessories. A well-dressed individual exudes confidence and commands respect.
3. Attention to Accessories
Accessories can significantly enhance your professional look. Opt for classic and minimalistic pieces that complement your attire. For men, a tasteful watch, a tie clip, and cufflinks can add a touch of sophistication. Women can accessorize with subtle jewelry, a quality handbag, and well-maintained shoes. Remember, the goal is to appear polished and put-together without appearing flashy or distracting.
4. Good Posture
Body language is a powerful tool in projecting professionalism. Maintaining good posture conveys confidence and self-assurance. Stand tall with your shoulders back, and avoid slouching or hunching. When seated, sit upright with your back against the chair and your feet flat on the floor. Good posture not only helps you appear more professional but also contributes to your overall well-being.
5. Effective Communication
Clear and effective communication skills are essential in any professional setting. Pay attention to your tone, diction, and body language when interacting with others. Speak clearly and confidently, while also being attentive to the needs of your audience. Active listening and maintaining eye contact are important aspects of effective communication. Practice expressing your thoughts concisely and eloquently to convey professionalism.
6. Attention to Detail in Work
Excellence is in the details, and paying attention to them can set you apart as a professional. Ensure your work is accurate, well-organized, and error-free. Double-check spelling and grammar in written communications. Review documents and presentations for consistency and formatting. Going the extra mile to produce high-quality work demonstrates your commitment to professionalism.
7. Time Management
Time management skills are crucial in maintaining a professional image. Plan and prioritize your tasks effectively to meet deadlines and avoid last-minute rushes. Arrive on time for meetings and appointments, and be respectful of others’ time. Being punctual and efficient demonstrates professionalism and respect for the value of time.
8. Cultivate a Positive Attitude
A positive attitude can make a significant difference in how you are perceived professionally. Maintain a professional demeanor even in challenging situations. Stay positive, solution-oriented, and approachable. Displaying a positive attitude not only influences your own productivity but also contributes to a positive work environment.
In summary, paying attention to these finishing touches can help you project a professional image. From personal grooming to effective communication and attention to detail, these small yet significant elements can make a big difference in how you are perceived in the workplace. Incorporate these finishing touches into your professional routine and witness the positive impact they can have on your career.
FAQs
Q: How do I face mount photos to acrylic?
To face mount photos to acrylic, first, make sure your photo is printed on a high-quality, archival photo paper. Then, apply a double-sided adhesive to the back of the photo, ensuring it is evenly spread. Carefully place the adhesive side of the photo onto the acrylic, pressing firmly to remove any air bubbles. Finally, trim any excess photo paper and seal the edges for a professional finish.
Q: What type of adhesive should I use for face mounting photos to acrylic?
For face mounting photos to acrylic, it is recommended to use a high-quality, optically clear adhesive specifically designed for this purpose. The adhesive should provide strong bonding while maintaining the clarity and transparency of both the photo and acrylic.
Q: Can I face mount photos to acrylic myself, or should I seek professional help?
While it is possible to face mount photos to acrylic yourself, it requires precision and attention to detail. If you are not confident in your abilities or want a flawless result, it is recommended to seek professional help. Professional printing and framing services have the expertise and equipment to ensure a high-quality face mount that enhances the visual impact of your photos.
Wrapping Up
In conclusion, learning how to face mount photos to acrylic can add a stunning and professional touch to your photography. By following the proper steps, you can achieve a sleek and modern look that enhances the colors and details of your images.
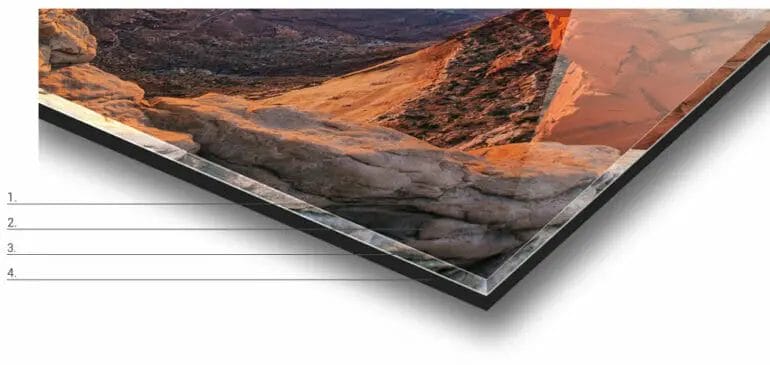
Face mounting creates a unique optical effect by sandwiching your photo between the acrylic and a sturdy backing material, resulting in a floating-like appearance. This technique not only protects your photos but also adds depth and vibrancy to your artwork.
Remember to carefully clean and prepare the acrylic, use quality adhesive, and handle the materials with care to ensure a flawless finish. With some practice and attention to detail, you’ll be able to showcase your photos in a breathtaking way.