
Paint correction and ceramic coating are two essential services that can greatly enhance the appearance and protection of your vehicle’s paintwork. Paint correction involves removing imperfections like scratches, swirl marks, and oxidation, restoring the paint to a flawless, showroom finish. On the other hand, ceramic coating is a protective layer that is applied to the paint surface, providing long-lasting protection against UV rays, chemicals, and contaminants. This innovative coating also creates a hydrophobic surface, making it easier to clean and maintain your vehicle’s shine. Together, paint correction and ceramic coating can give your car a stunning, showroom-quality finish that lasts.
The Process of Paint Correction
Paint correction is a meticulous process that involves restoring the paintwork of a vehicle to its original, flawless condition. It requires skill, precision, and the right tools to achieve the desired results. In this section, we will explore the step-by-step process of paint correction and how it can transform the appearance of your vehicle.
Step 1: Inspection and Evaluation
The first step in paint correction is to inspect the condition of the vehicle’s paintwork. This involves carefully examining the surface for imperfections such as swirl marks, scratches, oxidation, and other defects. By assessing the extent of the damage, a professional paint correction specialist can determine the best course of action.
Step 2: Washing and Decontamination
Before the actual correction process begins, it is essential to thoroughly wash the vehicle to remove any dirt, grime, or contaminants that may interfere with the correction process. This step typically involves using a high-quality car shampoo, microfiber wash mitts, and a pressure washer. Once the vehicle is clean, a decontamination process is carried out to remove any embedded particles using a clay bar or chemical decontamination products.
Step 3: Paint Correction
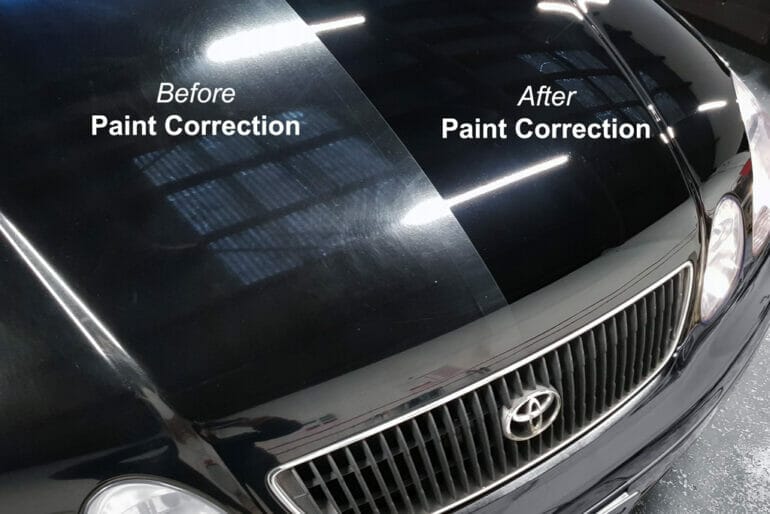
The paint correction process involves removing imperfections from the vehicle’s paintwork. This is done by carefully polishing the surface using specialized machines, polishing pads, and abrasive compounds. The goal is to level the paint surface, removing swirl marks, scratches, and other defects, and restore a smooth, glossy finish.
Depending on the severity of the imperfections, multiple polishing steps may be required. A professional paint correction specialist will assess the paintwork and determine the appropriate level of correction needed for each area. They will use a combination of cutting, polishing, and finishing compounds to gradually refine the surface and achieve the desired results.
Step 4: Finishing and Protection
Once the paint correction process is complete, it is essential to protect the newly restored finish. This involves applying a layer of high-quality paint sealant or wax to provide long-lasting protection against UV rays, oxidation, and environmental contaminants. The chosen protective product will enhance the gloss and depth of the paintwork, ensuring it remains in optimal condition for an extended period.
Step 5: Final Inspection
After the finishing and protection process, a final inspection is conducted to ensure that all imperfections have been corrected, and the paintwork is flawless. The vehicle is carefully inspected under different lighting conditions to reveal any remaining defects that may have been missed during the correction process. If necessary, additional touch-ups or corrections are made to achieve the desired results.
Summary
The process of paint correction is a detailed and intricate procedure that involves multiple steps to restore the paintwork of a vehicle to its original, flawless condition. From inspecting and evaluating the paintwork to washing, decontamination, and the actual correction process, each step is crucial in achieving exceptional results. Finishing and protecting the paintwork, followed by a thorough final inspection, ensure that the desired level of perfection is attained. By entrusting your vehicle to a professional paint correction specialist, you can transform its appearance and bring back its showroom shine.

Choosing the Right Paint Correction Tools
When it comes to paint correction, having the right tools is crucial for achieving professional results. Whether you’re a professional detailer or a car enthusiast looking to enhance the appearance of your vehicle, having the right tools and products can make all the difference. In this section, we will explore the essential tools and products needed for effective paint correction.
1. Dual Action Polisher
A dual action polisher is an essential tool for paint correction. Unlike rotary polishers, which can be difficult to control and may cause damage if not used properly, dual action polishers are much more user-friendly and beginner-friendly. They have a random orbital motion that helps prevent swirl marks and holograms, making them ideal for correcting paint imperfections.
When choosing a dual action polisher, look for one with variable speed settings, a soft start feature, and an ergonomic handle for comfortable use. Additionally, consider the size of the backing plate, as this will affect the coverage area and efficiency of the polisher.
2. Polishing Pads
Polishing pads are used in conjunction with the dual action polisher to apply compounds or polishes to the paint surface. They come in different levels of aggressiveness, from heavy cutting pads to fine finishing pads. The type of pad you choose will depend on the severity of the paint imperfections and the desired level of correction.
It’s important to use the correct pad for each step of the paint correction process. For heavy defects, such as deep scratches or oxidation, a cutting pad paired with a compound will be necessary. For lighter defects or enhancing gloss, a polishing pad paired with a polish or finishing compound will suffice.
3. Compounds and Polishes
Compounds and polishes are used to remove imperfections and restore the clarity and gloss of the paint surface. Compounds are more aggressive and are used for heavy defect removal, while polishes are milder and are used for fine-tuning the finish.
When selecting compounds and polishes, consider the paint type and condition. Different paint systems may require specific products, so it’s important to choose those that are compatible with the paint on your vehicle. Additionally, opt for products that are user-friendly and offer long working times, as this will make the correction process easier and more efficient.
4. Paint Thickness Gauge
A paint thickness gauge is a handy tool for measuring the thickness of the paint coating. This is important because excessive paint removal can compromise the integrity of the finish. By measuring the paint thickness before and after correction, you can ensure that you’re removing enough material to address the imperfections without going too far.
There are different types of paint thickness gauges available, including magnetic and electronic gauges. Choose one that suits your needs and budget, and ensure that it provides accurate readings for reliable paint thickness measurements.
5. Cleaners and Degreasers
Prior to paint correction, it’s essential to thoroughly clean and degrease the paint surface. This helps remove any contaminants, such as dirt, oils, or wax, that may interfere with the correction process. Look for high-quality cleaners and degreasers that are specifically formulated for automotive use.
It’s important to follow the manufacturer’s instructions when using cleaners and degreasers, as improper use can cause damage to the paint. Additionally, ensure that the surface is completely dry before proceeding with paint correction to avoid any water spots or streaking.
6. Microfiber Towels
Microfiber towels are an indispensable tool for paint correction. They are highly absorbent, lint-free, and soft, making them ideal for removing polishes, compounds, and residue from the paint surface. Opt for high-quality microfiber towels that are designed specifically for automotive use to avoid any potential scratching or marring.
It’s important to use separate towels for different steps of the correction process to prevent cross-contamination. Label or color-code your towels accordingly to ensure that you’re using the appropriate towel for each product or step.
7. Personal Protective Equipment (PPE)
Lastly, don’t forget to prioritize your safety while performing paint correction. Personal protective equipment (PPE) such as gloves, safety glasses, and a dust mask should be worn to protect yourself from any potential hazards, including chemicals, dust, and debris.
Investing in quality PPE is essential for your well-being, so make sure to choose products that are comfortable, provide adequate protection, and meet safety standards.
In summary,

Understanding Ceramic Coating
Ceramic coating has gained significant popularity in the automotive industry due to its exceptional protective properties and long-lasting benefits. This advanced coating technology provides a high-gloss finish and acts as a shield against various environmental elements.
So, what exactly is ceramic coating, and why is it so effective in protecting your vehicle’s surface? In this section, we will delve into the details of ceramic coating and uncover its remarkable features.
What is Ceramic Coating?
Ceramic coating, also known as nano-ceramic coating, is a liquid polymer that is applied to the exterior surface of a vehicle. It forms a strong bond with the paintwork, creating a protective layer that acts as a barrier against dirt, UV rays, chemical contaminants, and other damaging elements.
The ceramic coating utilizes nanotechnology, which allows the nanoparticles in the coating to fill the microscopic pores in the paintwork, resulting in a smooth and hydrophobic surface. This hydrophobic property ensures that water, dirt, and grime slide off the surface easily, making it easier to maintain the cleanliness of your vehicle.
Protective Properties of Ceramic Coating
The protective properties of ceramic coating make it an excellent choice for preserving the aesthetic appeal and longevity of your vehicle’s paintwork. Here are some key benefits of ceramic coating:
- Scratch Resistance: Ceramic coating provides a strong protective layer that helps guard against scratches and swirl marks caused by everyday wear and tear.
- UV Protection: The ceramic coating acts as a barrier against harmful UV rays, preventing paint fading and oxidation caused by prolonged sun exposure.
- Chemical Resistance: The chemical resistance of ceramic coating shields your vehicle’s surface from damage caused by bird droppings, tree sap, acid rain, and other harsh chemicals.
- Heat Resistance: Ceramic coating can withstand high temperatures, protecting your vehicle’s paintwork from damage due to intense heat.
Long-Lasting Benefits of Ceramic Coating
One of the significant advantages of ceramic coating is its long-lasting effect. Unlike traditional wax or sealants that require frequent reapplication, ceramic coating provides a durable protective layer that can last for years. This means you can enjoy the benefits of enhanced protection and a glossy finish for an extended period without the need for constant maintenance.
Furthermore, ceramic coating is resistant to washing detergents and can withstand multiple car washes without degrading its protective properties. This ensures that your vehicle remains protected even after regular cleaning routines.
In summary, ceramic coating is a revolutionary technology that offers superior protection and longevity for your vehicle’s paintwork. By forming a strong bond with the surface, it acts as a shield against scratches, UV rays, chemical contaminants, and heat. With its long-lasting benefits and easy maintenance, ceramic coating provides an excellent solution for preserving your vehicle’s aesthetic appeal and value.
Applying Ceramic Coating
When it comes to protecting your vehicle’s paint and enhancing its shine, ceramic coating is a popular choice among car enthusiasts. This innovative coating creates a protective layer on the surface of your vehicle, shielding it from various environmental factors like UV rays, dirt, and chemical contaminants. However, the effectiveness of ceramic coating largely depends on how it is applied. In this section, we will discuss the proper steps to apply ceramic coating to ensure maximum effectiveness.
Step 1: Preparing the Surface
Before applying ceramic coating, it is crucial to prepare the surface of your vehicle properly. Start by washing your car thoroughly to remove any dirt, grime, or residue. Use a gentle car shampoo and a microfiber wash mitt to avoid scratching the paint. Rinse the car thoroughly and dry it using a clean microfiber towel.
Once the car is dry, inspect the paint for any imperfections like swirl marks or scratches. If necessary, use a paint correction kit or seek professional help to restore the paint’s condition. It is important to have a smooth and flawless surface for the ceramic coating to adhere properly.
Step 2: Applying the Ceramic Coating
Now that the surface is prepared, it’s time to apply the ceramic coating. Follow these steps for a successful application:
- Choose a suitable ceramic coating product. There are various brands available in the market, so ensure you select a high-quality and reputable product.
- Wear protective gloves and a mask to avoid direct contact with the coating.
- Apply a small amount of ceramic coating to a foam applicator pad or microfiber applicator cloth.
- Work on one panel of the vehicle at a time. Start from the top and move downwards.
- Apply the coating in straight lines or overlapping motions, ensuring even coverage.
- Allow the coating to sit on the surface for the recommended time mentioned by the manufacturer.
- Use a clean microfiber cloth to gently buff off the excess coating. Be careful not to apply excessive pressure.
- Proceed to the next panel and repeat the process until the entire vehicle is coated.
Step 3: Curing and Maintenance
After applying the ceramic coating, it is essential to allow it to cure properly to achieve optimal results. Curing times may vary depending on the product, so make sure to follow the manufacturer’s instructions. During the curing process, avoid exposing your vehicle to water or extreme weather conditions.
To maintain the effectiveness of the ceramic coating, follow these maintenance tips:
- Regularly wash your vehicle using a pH-neutral car shampoo to prevent the buildup of dirt and contaminants.
- Avoid using abrasive or harsh cleaning materials that can damage the coating.
- Apply a ceramic coating booster or spray sealant periodically to enhance the coating’s longevity.
- Consider scheduling professional ceramic coating maintenance services to keep your coating in top condition.
Summary
Properly applying ceramic coating is crucial for its maximum effectiveness in protecting your vehicle’s paint. Start by preparing the surface through thorough washing and paint correction if necessary. Follow the steps mentioned by the manufacturer for applying the coating, ensuring even coverage and proper curing. Finally, maintain the coating by regular washing and using compatible products. By following these guidelines, you can enjoy the long-lasting benefits of ceramic coating and keep your vehicle looking its best.
FAQs
What is paint correction?
Paint correction is a process that involves removing imperfections and restoring the paintwork of a vehicle to its original condition. It removes swirl marks, scratches, and other defects to improve the appearance and restore the shine of the paint.
What is ceramic coating?
Ceramic coating is a liquid polymer that is applied to the exterior of a vehicle. It acts as a protective layer, providing long-lasting shine and protection against UV rays, chemicals, and contaminants. It creates a hydrophobic surface, making it easier to clean and maintain the paint.
Can paint correction be done on any vehicle?
Yes, paint correction can be done on any vehicle, regardless of its age or condition. However, the extent of correction needed may vary based on the severity of the paint defects. It is recommended to consult with a professional detailing service to assess the requirements and provide the best solution.
Conclusion
In conclusion, paint correction and ceramic coating are two essential processes for enhancing the appearance and protection of your vehicle. Paint correction is a meticulous technique that involves removing imperfections such as swirl marks, scratches, and oxidation, resulting in a flawless and glossy finish. On the other hand, ceramic coating provides long-lasting protection by forming a protective layer on the paint surface, shielding it from harmful elements like UV rays, dirt, and contaminants.
By combining paint correction and ceramic coating, you can achieve a showroom-worthy shine and prolong the life of your vehicle’s paintwork. Investing in these treatments not only enhances the aesthetics but also adds value to your car. So, whether you are a car enthusiast or someone who values their investment, paint correction and ceramic coating are the ideal solutions to keep your vehicle looking its best for years to come.