
Acrylic cake discs are versatile tools that can elevate the presentation of your cakes. With their clear, durable construction, they provide a beautiful and sturdy base for displaying and serving your creations.
Using acrylic cake discs is simple and straightforward. Begin by ensuring that your cake is evenly leveled and perfectly sized to fit the disc. Place the disc on a flat surface and carefully slide your cake onto it, ensuring a secure fit.
These discs are great for creating multi-tiered cakes. Simply stack your cakes on top of each other, using the discs as support layers between each tier. This not only adds stability but also creates an elegant visual effect.
To add an extra touch of sophistication, consider using decorative liners or wraps around the edge of the acrylic disc. This will further enhance the overall presentation of your cake.
When it comes time to serve your cake, you can easily lift it off the disc without worrying about it collapsing or losing its shape. The acrylic disc provides a sturdy and reliable platform that keeps your cake intact.
Overall, acrylic cake discs are a practical and stylish addition to any baker’s toolkit. They offer a simple yet effective way to elevate the look and presentation of your cakes, making them perfect for any occasion.

Preparing the Cake for Acrylic Cake Disc Placement
When it comes to decorating cakes, one popular trend is the use of acrylic cake discs. These transparent discs can add a touch of elegance and sophistication to any cake. However, before you can place the acrylic cake disc on your cake, you need to properly prepare the cake. In this section, we will outline the steps to prepare the cake for acrylic cake disc placement.
Gather the Necessary Tools and Ingredients
Before you begin, make sure you have all the tools and ingredients needed for the cake preparation. This includes:
- A fully baked cake
- A serrated knife or cake leveler
- A revolving cake stand
- A cake board or cake drum
- Cake filling or frosting
- A palette knife or offset spatula
Level and Trim the Cake Layers
The first step is to level and trim the cake layers. This ensures that the cake layers are even and will stack properly. Use a serrated knife or cake leveler to remove any uneven or domed tops of the cake layers. Trim the sides of the cake layers if necessary to create clean edges.
Apply a Crumb Coat
To prevent any loose crumbs from appearing on the final cake, it is important to apply a crumb coat. This is a thin layer of frosting or filling that seals in the crumbs. Use a palette knife or offset spatula to spread a thin layer of frosting or filling over the entire cake, ensuring that all sides and edges are covered.
Chill the Cake
After applying the crumb coat, place the cake in the refrigerator to chill. This helps the frosting or filling to set and creates a stable base for the acrylic cake disc placement.
Final Frosting or Filling
Once the crumb coat has chilled, you can apply the final layer of frosting or filling. Use the palette knife or offset spatula to spread the frosting or filling evenly over the cake, making sure to cover all sides and edges.
Prepare the Acrylic Cake Disc
While the final layer of frosting or filling is still wet, prepare the acrylic cake disc. Make sure it is clean and dry, and gently place it on top of the cake. Press it down slightly to secure it in place.
Decorate as Desired
Now that the acrylic cake disc is in place, you can proceed to decorate the cake as desired. Whether you choose to add buttercream flowers, fondant accents, or edible decorations, the acrylic cake disc will provide a beautiful backdrop for your design.
Summary
Preparing the cake for acrylic cake disc placement involves leveling and trimming the cake layers, applying a crumb coat, chilling the cake, adding the final layer of frosting or filling, placing the acrylic cake disc, and decorating the cake. By following these steps, you can achieve a professional-looking cake with a stunning acrylic cake disc.

Step-by-Step Guide to Applying and Using Acrylic Cake Discs
Acrylic cake discs are a popular choice for cake decorators as they provide a smooth and sturdy surface for decorating cakes. Whether you’re a professional baker or a home baker looking to elevate your cake decorating skills, using acrylic cake discs can help you achieve professional-looking results. In this guide, we’ll walk you through the step-by-step process of applying and using acrylic cake discs to create beautiful and flawless cakes.
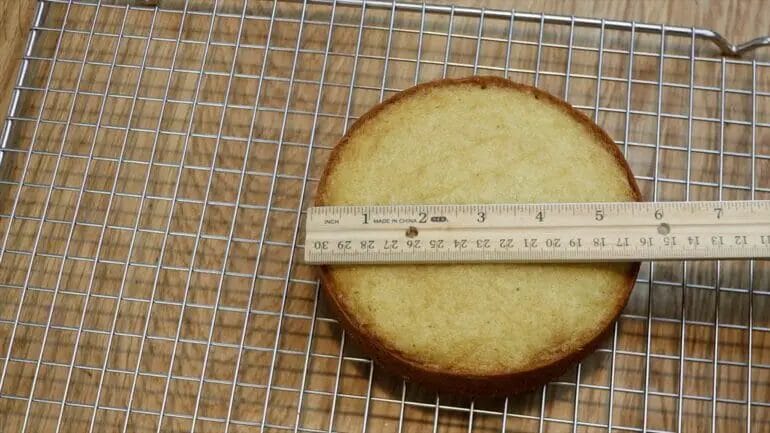
Step 1: Choose the Right Size Acrylic Cake Disc
Before you begin, it’s important to choose the right size acrylic cake disc for your cake. Measure the diameter of your cake tiers and select a disc that matches the size. Acrylic cake discs are available in various sizes, so make sure to choose one that fits your specific cake.
Step 2: Prepare Your Cake Tiers
Start by preparing your cake tiers. Level and torte each cake layer to create an even surface. Stack and fill your cake layers with your desired filling and crumb coat the outside of the cake with a thin layer of frosting. Chill the cake in the refrigerator for about 15 minutes to allow the frosting to set.
Step 3: Apply the Acrylic Cake Disc
Once the cake is chilled, it’s time to apply the acrylic cake disc. Place the disc on top of the chilled cake and gently press it down to ensure it is secure. The disc should be centered and level on the cake. The disc will provide a stable foundation for your cake decorating and prevent the cake from sagging or collapsing.
Step 4: Continue Decorating Your Cake
Now that the acrylic cake disc is in place, you can continue decorating your cake. Use your favorite frosting techniques, such as piping, fondant, or buttercream flowers, to create a stunning design on the cake’s surface. The smooth and level surface of the disc will allow you to achieve clean lines and precise details.
Step 5: Serve and Enjoy
Once you’ve finished decorating your cake, it’s time to serve and enjoy! Carefully transfer the cake to a serving plate or cake stand, making sure to support the bottom of the cake as you lift it. The acrylic cake disc will help maintain the stability of the cake during the transfer process.
In summary, acrylic cake discs are a valuable tool for cake decorators looking to create professional-looking cakes. By following this step-by-step guide, you can easily apply and use acrylic cake discs to enhance your cake decorating skills and create flawless cakes. Remember to choose the right size disc, prepare your cake tiers, apply the disc securely, and continue decorating with precision. With acrylic cake discs, you can take your cake decorating to the next level and impress your family, friends, and customers with beautiful and visually appealing cakes.
Tips and Tricks for a Perfectly Smooth Finish with Acrylic Cake Discs
Acrylic cake discs have become increasingly popular in the world of cake decorating due to their versatility and ability to create a flawless finish. Whether you’re a professional baker or just a passionate home baker, using acrylic cake discs can help you achieve a beautifully smooth surface on your cakes. In this section, we will discuss some valuable tips and tricks to ensure that you achieve the perfect finish every time.
1. Clean and Level Surface
Before placing the acrylic cake disc on your cake, it’s important to make sure that the surface is clean and level. Any crumbs or unevenness can affect the final outcome. Use a sharp knife or cake leveler to trim the top of the cake, ensuring it is perfectly flat. Clean the surface by gently brushing away any loose crumbs or debris.
2. Apply a Crumb Coat
A crumb coat is a thin layer of icing applied to the cake before the final coating. It helps to seal in any loose crumbs and create a smooth base for the acrylic cake disc. Use a spatula to spread a thin layer of buttercream or ganache all over the cake. Make sure to cover the entire surface, including the sides.
3. Chill the Cake
After applying the crumb coat, it’s essential to chill the cake in the refrigerator for at least 20-30 minutes. This step allows the crumb coat to set and firm up, making it easier to apply the final layer of icing without disturbing the cake’s surface.
4. Roll Out Fondant or Buttercream
One of the key advantages of using acrylic cake discs is that they provide a smooth and even surface for rolling out fondant or buttercream. Dust the surface of the cake disc with powdered sugar or cornstarch to prevent sticking. Roll out the fondant or buttercream to the desired thickness using a rolling pin.
5. Smooth onto the Cake
Gently lift the rolled-out fondant or buttercream and place it onto the chilled cake. Smooth it gently with your hands, starting from the center and working your way outwards. Use a fondant smoother or a cake decorating tool to ensure that the surface is even and free from any air bubbles or wrinkles.
6. Trim the Excess
Once the fondant or buttercream is smoothly applied to the cake, use a sharp knife or a pizza cutter to trim off any excess around the edges. This will give your cake a clean and professional finish.
7. Allow to Set
After trimming off the excess fondant or buttercream, allow the cake to set for some time. This will give the icing a chance to firm up and create a smooth, flawless finish. Avoid touching or moving the cake during this time.
8. Decorate as Desired
Once the icing has set and the cake is completely smooth, you can proceed to decorate it as desired. Add colorful fondant accents, piped buttercream designs, or any other decorations that suit your theme or occasion.
9. Care and Storage
After completing your cake decoration, it’s important to handle it with care. Acrylic cake discs are sturdy, but they can still be prone to scratches or damage. Store the cake in a cool, dry place away from direct sunlight and extreme temperatures to maintain its freshness and appearance.
In summary, achieving a perfectly smooth finish with acrylic cake discs requires attention to detail and a few essential tips and tricks. By following the steps outlined above, you can confidently create beautiful, professional-looking cakes that will impress your friends, family, and customers.
Cleaning and Maintaining Acrylic Cake Discs for Longevity
Acrylic cake discs are a popular choice for cake decorators and bakers as they provide a sturdy and durable base for creating beautiful cake designs. To ensure the longevity of your acrylic cake discs, it is important to properly clean and maintain them. In this section, we will discuss some tips and techniques for cleaning and caring for your acrylic cake discs.
1. Gentle Hand Washing
One of the best ways to clean your acrylic cake discs is by hand washing them. Fill a sink or basin with warm water and add a mild dish soap. Gently place the disc in the soapy water and use a soft sponge or cloth to clean the surface. Avoid using any abrasive materials or scrub brushes, as they can scratch the acrylic. Rinse the disc thoroughly with clean water and pat dry with a soft towel.
2. Avoid Harsh Chemicals
When cleaning your acrylic cake discs, it is crucial to avoid using harsh chemicals or abrasive cleaners. These can damage the surface of the acrylic and cause it to become cloudy or discolored. Stick to mild dish soaps or specialized acrylic cleaners that are specifically designed for use on delicate surfaces.
3. Buffing for Shine
If your acrylic cake disc has become dull or scratched over time, you can restore its shine by using a buffing compound. Apply a small amount of the compound to a soft, lint-free cloth and gently buff the surface in a circular motion. This will help to smooth out any imperfections and bring back the glossy finish of the acrylic.
4. Store Properly
When not in use, it is important to store your acrylic cake discs properly to prevent damage. Avoid stacking them on top of each other, as this can lead to scratches or cracks. Instead, store them in a dedicated container or wrap them individually in soft cloth or tissue paper to protect them from dust and scratches.
5. Handle with Care
While acrylic cake discs are durable, they can still be susceptible to damage if not handled with care. Avoid dropping or banging the discs against hard surfaces, as this can cause cracks or chips. When transporting your cakes on the discs, make sure to support the bottom properly and avoid applying excessive pressure.
6. Regular Inspections
To ensure the longevity of your acrylic cake discs, it is important to regularly inspect them for any signs of damage or wear. Check for cracks, chips, or scratches, and replace any discs that show significant damage. By catching and addressing issues early on, you can prevent further damage and extend the lifespan of your acrylic cake discs.
In summary, proper cleaning and maintenance are essential for the longevity of your acrylic cake discs. Remember to always hand wash them using gentle methods, avoid harsh chemicals, and store them properly. Handle with care and regularly inspect for any damage. By following these tips, you can ensure that your acrylic cake discs will continue to provide a sturdy and beautiful base for your cake creations.
Frequently Asked Questions (FAQs)
1. How do I use acrylic cake discs?
To use acrylic cake discs, simply place them on top of your cake before decorating. These discs provide a smooth and sturdy surface for icing and decorations. They can also be used to separate cake tiers for a multi-tiered cake. Make sure to clean and dry the discs properly before and after use for best results.
2. Can acrylic cake discs be reused?
Yes, acrylic cake discs can be reused if they are properly cleaned and cared for. After each use, wash them gently with warm soapy water and a soft cloth or sponge. Avoid using abrasive cleaners or scrubbing brushes as they can scratch the surface. Dry the discs completely before storing them to prevent any damage.
3. Are acrylic cake discs safe for food contact?
Yes, acrylic cake discs are safe for food contact. They are made from food-grade acrylic material that is non-toxic and BPA-free. However, it is recommended to place a layer of parchment or wax paper between the disc and the cake if you have any concerns about direct contact. This will ensure an extra layer of hygiene and safety.
Conclusion
In conclusion, acrylic cake discs are a versatile and essential tool in the world of cake decorating. They provide a smooth and sturdy surface for creating flawless cake designs. Whether you’re a beginner or a professional baker, these discs offer ease of use and precise measurements for creating stunning cake decorations.
With acrylic cake discs, you can easily create multi-tiered cakes with perfect alignment. The transparent nature of these discs allows you to see through the layers and ensure even spacing and level stacking. Additionally, they are reusable and easy to clean, making them a cost-effective choice for cake decorators.
So, if you’re looking to elevate your cake decorating skills and achieve professional-looking results, don’t hesitate to incorporate acrylic cake discs into your baking arsenal. They will undoubtedly become your go-to tool for creating beautiful and visually appealing cakes.