
If you’re looking to seal acrylic paint on rocks, you’ve come to the right place. Sealing your artwork not only protects it from wear and tear but also enhances its longevity and vibrancy.
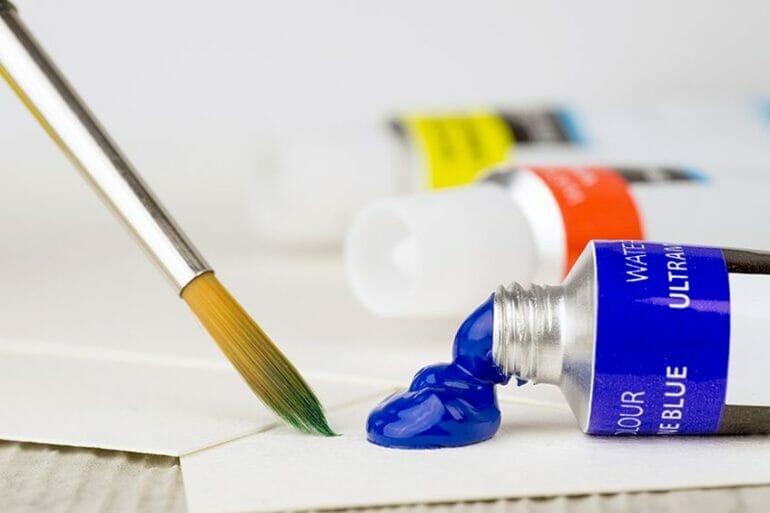
There are a few different options to consider when it comes to sealing acrylic paint on rocks. One popular choice is using a clear acrylic sealer spray, which creates a protective barrier and adds a glossy finish to your rocks.
Alternatively, you can also use a brush-on sealer for more precise application. Make sure to choose a sealer that is compatible with acrylic paint and suitable for outdoor use if you plan on displaying your rocks outside.
Before sealing, it’s important to let your acrylic paint fully dry on the rocks. This ensures that the sealant won’t smudge or mix with the paint. Once dry, apply the sealer in thin, even coats, allowing sufficient drying time between each layer.
Finally, keep in mind that proper sealing not only protects your artwork but also makes it easier to clean and maintain. So, don’t forget to seal your acrylic paint on rocks for a beautiful and long-lasting finish!
Step-by-step guide to sealing acrylic paint on rocks
Painting rocks has become a popular hobby and art form. Whether you are creating vibrant designs, intricate patterns, or beautiful landscapes, sealing your acrylic paint on rocks is essential to protect your artwork from fading, chipping, and weather damage. In this section, we will provide you with a step-by-step guide on how to seal acrylic paint on rocks effectively.
Step 1: Gather your materials
Before you start sealing your acrylic paint on rocks, make sure you have all the necessary materials. You will need:
- Acrylic paint
- Paintbrushes or paint markers
- Sealer (varnish or clear acrylic spray)
- Protective gloves
- Old newspaper or a drop cloth
- Water for cleaning brushes
Step 2: Clean the rocks
Begin by thoroughly cleaning the rocks you will be painting. Remove any dirt, debris, or loose particles using water and a scrub brush. Allow the rocks to dry completely before proceeding to the next step.
Step 3: Paint your design
Now it’s time to unleash your creativity! Use acrylic paint or paint markers to create your desired design on the rocks. Allow the paint to dry completely before moving on to the next step. Depending on the complexity of your design, you may need to apply multiple layers of paint for better coverage.
Step 4: Choose the right sealer
There are two common types of sealers used for sealing acrylic paint on rocks: varnish and clear acrylic spray. Varnish provides a glossy finish and is suitable for both indoor and outdoor use. Clear acrylic spray, on the other hand, offers a matte or satin finish and is more suitable for indoor decorations. Choose the sealer according to your preference and the intended use of your painted rocks.
Step 5: Apply the sealer
Before applying the sealer, make sure to protect your work area by laying down old newspaper or a drop cloth. Put on protective gloves to keep your hands clean. Shake the sealer can or stir the varnish thoroughly before use.
- Varnish: Use a soft-bristle brush to apply an even coat of varnish over the entire surface of the painted rock. Be careful not to leave any streaks or bubbles. Allow the varnish to dry completely before considering additional coats. Repeat this step if necessary, applying multiple thin coats for better protection.
- Clear acrylic spray: Hold the can 6-8 inches away from the painted rock and spray an even layer of clear acrylic spray over the entire surface. Apply multiple thin coats, allowing each coat to dry completely before applying the next one. This will ensure better protection and durability for your painted rock.
Step 6: Let it dry and cure
Once you have applied the sealer, allow the rocks to dry in a well-ventilated area. The drying time will vary depending on the type of sealer used, so refer to the product instructions for specific guidance. After the initial drying period, it is recommended to let the sealed rocks cure for at least 24-48 hours before handling or displaying them.
Step 7: Enjoy and protect your artwork
Now that your acrylic paint on rocks is sealed, you can proudly display your artwork indoors or outdoors. However, keep in mind that even with proper sealing, exposure to harsh weather conditions may still affect the longevity of your painted rocks. It is advisable to bring them indoors during extreme weather or consider applying an additional layer of sealer periodically for added protection.
In summary, sealing acrylic paint on rocks is essential to preserve the vibrant colors and intricate details of your artwork. By following this step-by-step guide, you can ensure that your painted rocks will remain protected and continue to bring joy and beauty for years to come.

Top Tips for Sealing Acrylic Paint on Rocks
Rock painting has become a popular art form that allows individuals to express their creativity while adding a touch of color to their surroundings. One of the most crucial steps in rock painting is sealing the acrylic paint to ensure durability and longevity. If you’re looking for some top tips on how to seal acrylic paint on rocks effectively, you’ve come to the right place.
1. Clean and Prepare the Surface
Prior to sealing the acrylic paint, it is essential to thoroughly clean and prepare the surface of the rock. Use a damp cloth to remove any dirt, dust, or debris that may be present. This will help the sealant adhere better and provide a smooth finish.
2. Choose the Right Sealant
When it comes to selecting a sealant for your painted rocks, there are a few options to consider. One popular choice is a clear acrylic sealer, which provides a protective coat and enhances the vibrancy of the colors. Another option is a clear polyurethane spray, which also offers excellent protection against the elements.
3. Apply Thin and Even Coats
When applying the sealant, it is crucial to use thin and even coats. This will prevent the paint from smearing or running, ensuring a professional-looking finish. Allow each coat to dry completely before applying the next layer, as this will help prevent any bubbling or uneven texture.
4. Consider UV Protection
If your painted rocks will be exposed to sunlight or outdoor elements, it is advisable to choose a sealant that offers UV protection. This will help prevent the colors from fading over time, allowing your artwork to stay vibrant and beautiful for longer.
5. Use a Brush or Spray
There are two primary methods for applying the sealant: using a brush or using a spray. Brushing on the sealant allows for better control and precision, especially when working on smaller details. On the other hand, using a spray can provide a more even and consistent coverage, making it ideal for larger rocks or when working on multiple pieces at once.
6. Allow Ample Drying Time
After applying the final coat of sealant, it is crucial to allow ample drying time. This will ensure that the sealant cures properly and provides maximum protection. Follow the manufacturer’s instructions for recommended drying times, as they may vary depending on the specific sealant you choose.
7. Consider Multiple Layers
If you want to achieve a more robust and long-lasting seal, consider applying multiple layers of sealant. This can provide extra protection against scratches, fading, and weather damage. Just remember to follow the drying time guidelines between each layer.
8. Handle with Care
Once the sealant has completely dried, handle your painted rocks with care to avoid scratching or damaging the surface. While the sealant provides a protective barrier, it is still important to treat your artwork gently to ensure its longevity.
9. Reapply as Needed
Over time, the sealant on your painted rocks may wear off due to exposure to the elements or general wear and tear. If you notice any signs of fading or damage, it may be necessary to reapply the sealant to maintain the beauty and protection of your artwork.
10. Enjoy Your Sealed Rocks
Finally, once you have sealed your painted rocks, it’s time to display and enjoy them. Whether you place them in your garden, use them as paperweights, or give them as gifts, your sealed rocks will surely bring joy and color to any space.
In summary, sealing acrylic paint on rocks is an essential step to protect your artwork and ensure its longevity. By following these top tips, you can achieve a professional-looking finish and enjoy your painted rocks for years to come.

Common Mistakes to Avoid When Sealing Acrylic Paint on Rocks
Painting rocks with acrylics has become a popular craft activity that allows people to get creative and add a personal touch to their surroundings. Whether you’re creating a simple design or an intricate masterpiece, sealing the acrylic paint is essential to protect your artwork and ensure its longevity. However, there are some common mistakes that people often make when sealing acrylic paint on rocks. In this section, we will discuss these mistakes and provide you with tips on how to avoid them.
1. Not Cleaning the Surface Properly
One of the most common mistakes people make is not cleaning the surface of the rocks before painting. Any dirt, dust, or grease on the surface can prevent the paint from adhering properly and lead to peeling or flaking. To avoid this, make sure to thoroughly clean the rocks with soap and water and remove any debris or residue. You can also use a scrub brush or toothbrush to scrub away stubborn dirt.
2. Using the Wrong Type of Sealant
Choosing the right sealant is crucial for preserving the vibrancy and durability of your painted rocks. Many people make the mistake of using the wrong type of sealant, which can result in a cloudy or sticky finish. It’s important to select a sealant specifically designed for outdoor use and compatible with acrylic paint. Look for a spray or brush-on sealant that offers UV protection and is water-resistant. Test the sealant on a small area of the rock first to ensure it doesn’t react negatively with the paint.
3. Applying Too Many Coats
While sealing your painted rocks is important, applying too many coats of sealant can have unintended consequences. Excessive layers of sealant can cause the colors to become dull or muddy, and the surface may become uneven or textured. It’s recommended to apply two to three thin coats of sealant, allowing each coat to dry completely before applying the next. This will provide adequate protection without compromising the appearance of your artwork.
4. Not Allowing Sufficient Drying Time
Another common mistake is not allowing sufficient drying time between painting and sealing. Acrylic paint may feel dry to the touch within minutes, but it can take several days or even weeks for the paint to fully cure. If you seal the paint too soon, the solvents in the sealant can react with the paint and cause it to smudge or bubble. Always refer to the manufacturer’s instructions for the recommended drying time before applying the sealant.
5. Neglecting to Protect the Back of the Rock
While the front of the rock is the main focus of your artwork, it’s important not to neglect the back. Many people make the mistake of not sealing or protecting the back of the rock, leaving it vulnerable to moisture and environmental factors. Sealing the entire surface of the rock, including the back, will help prevent moisture absorption and prolong the life of your painted creation.
6. Rushing the Sealing Process
Patience is key when it comes to sealing acrylic paint on rocks. Rushing the sealing process can lead to smudging, streaking, or uneven coverage. Take your time and apply the sealant in thin, even layers, allowing each coat to dry fully before applying the next. This will ensure a smooth and professional-looking finish.
7. Not Reapplying Sealant Periodically
Even with proper sealing, outdoor elements such as sun, rain, and temperature changes can take a toll on your painted rocks over time. It’s important to periodically reapply sealant to maintain the integrity of your artwork. Check the rocks regularly for any signs of fading or damage, and apply a fresh coat of sealant as needed.
In Summary
When sealing acrylic paint on rocks, it’s important to avoid common mistakes to ensure the longevity and quality of your artwork. Make sure to clean the surface properly before painting, choose a suitable sealant, apply a moderate number of thin coats, allow sufficient drying time, protect the back of the rock, take your time during the sealing process, and periodically reapply sealant as needed. By following these tips, you can create beautiful and long-lasting painted rocks that will bring joy and creativity to your surroundings.
FAQs
1. How can I seal acrylic paint on rocks?
You can seal acrylic paint on rocks by using a clear acrylic sealer. Make sure the paint is completely dry before applying the sealer. Spray or brush on multiple thin coats, allowing each coat to dry before applying the next one. This will help protect the paint and make it more durable.
2. Can I use Mod Podge to seal acrylic paint on rocks?
Yes, you can use Mod Podge to seal acrylic paint on rocks. Apply a thin, even layer of Mod Podge over the painted surface of the rock, using a brush or sponge. Allow it to dry completely before handling. Mod Podge will provide a protective barrier and give a glossy finish to your painted rocks.
3. Do I need to bake acrylic painted rocks to seal them?
No, baking is not necessary to seal acrylic painted rocks. Once the paint is completely dry, you can seal it using a clear acrylic sealer or Mod Podge as mentioned earlier. Baking is typically done for certain types of paint on specific surfaces, but it is not required for acrylic paint on rocks.
Conclusion:
In conclusion, sealing your acrylic paint on rocks is an essential step to ensure its longevity and protection against the elements. By applying a sealant, such as a clear acrylic spray or outdoor varnish, you can safeguard your artwork from fading, cracking, or peeling. Additionally, the sealant will provide a glossy or matte finish, enhancing the vibrancy and overall appearance of your painted rocks. It’s crucial to follow the manufacturer’s instructions while sealing to achieve optimal results. Remember to let your painted rocks dry completely before applying the sealant, and handle them with care to avoid any smudging or damage. So, take the necessary steps to seal your acrylic paint on rocks and preserve your beautiful creations for years to come!