If you want to give your vehicle a fresh and updated look, painting the side mirrors is a great option.
Not only does it enhance the overall appearance, but it also allows you to add a personal touch.
Painting side mirrors is a relatively simple process that can be done at home with the right tools and materials.
By following a few easy steps, you can achieve professional-looking results and transform the look of your side mirrors.
So, let’s dive into the step-by-step process of how to paint side mirrors.

Prepping for Painting: Essential Steps to Prepare Your Side Mirrors for a Flawless Paint Job
When it comes to giving your vehicle a fresh new look, painting the side mirrors can make a big difference. Whether you’re restoring an old car or simply want to update its appearance, prepping the side mirrors properly is essential for achieving a flawless paint job. Here are the essential steps you need to follow:
Gather the necessary tools and materials
Before you begin prepping your side mirrors, gather all the tools and materials you’ll need for the job. This may include:
- Masking tape
- Sandpaper (various grits, ranging from coarse to fine)
- Primer
- High-quality automotive paint (matching the color of your vehicle)
- Clean microfiber cloth
- Wax and grease remover
- Plastic sheets or newspaper (to protect surrounding areas from overspray)
- Spray gun or aerosol can (depending on your preference)
- Clear coat (for added protection and shine)
Remove the side mirrors
Begin by removing the side mirrors from your vehicle. This step is crucial to ensure that you have easy and complete access to the mirror housing. Refer to your vehicle’s manual or look for online tutorials specific to your car model for guidance on mirror removal.
Clean the mirror surface
Once the side mirrors are removed, it’s important to thoroughly clean the mirror surface. Use a wax and grease remover along with a clean microfiber cloth to remove any dirt, grime, or grease that may be present. Cleaning the surface ensures better adhesion of the paint and helps achieve a smooth finish.
Sand the mirror housing
To create a smooth and even surface for the paint, use sandpaper to sand the mirror housing. Start with coarse-grit sandpaper to remove any imperfections or old paint. Gradually progress to finer-grit sandpaper to smoothen the surface further. Be sure to sand in even, circular motions and pay attention to any hard-to-reach areas.
Apply primer
Priming the mirror housing is crucial for enhancing paint adhesion and ensuring a long-lasting finish. Apply a thin and even coat of automotive primer to the sanded surface, following the manufacturer’s instructions. Allow the primer to dry completely before moving on to the next step.
Mask off surrounding areas
To protect the surrounding areas from overspray, use masking tape to carefully mask off any sections that should not be painted. This includes the mirror glass and any adjacent trim or bodywork. Ensure that the tape is applied securely to prevent any paint from seeping underneath.
Apply paint
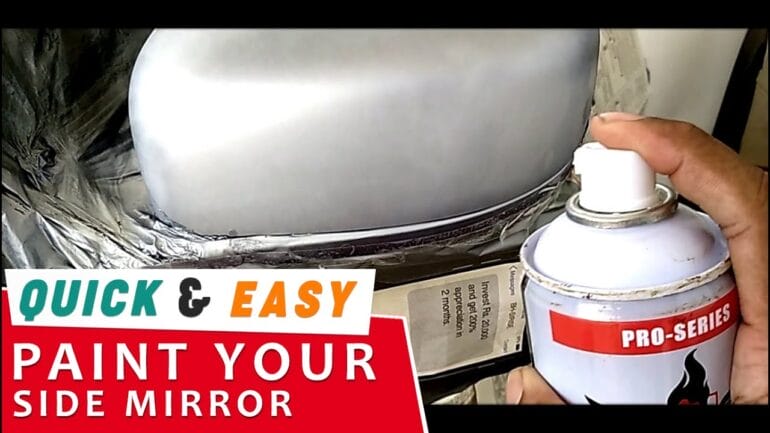
Now it’s time to apply the paint to your side mirrors. Using a spray gun or aerosol can, apply multiple thin coats of high-quality automotive paint to achieve a smooth and even finish. Allow each coat to dry before applying the next. Be sure to follow the manufacturer’s instructions regarding drying times and recommended number of coats.
Apply clear coat
To provide added protection and a glossy finish to your newly painted side mirrors, apply a clear coat. Clear coat not only enhances the durability of the paint but also gives it a professional look. Apply multiple thin coats of clear coat, allowing each coat to dry before applying the next.
Reinstall the side mirrors
Once the paint and clear coat have dried completely, reattach the side mirrors to your vehicle. Follow the reverse process of mirror removal to reinstall them securely. Ensure that all connections and fasteners are properly tightened.
Final touch-ups
Inspect the painted side mirrors for any imperfections or uneven areas. If needed, lightly sand any rough spots and apply touch-up paint or clear coat as necessary. Take your time to ensure a flawless and professional finish.
In summary, prepping your side mirrors properly is crucial for achieving a flawless paint job. By following the essential steps outlined above, you can ensure that your side mirrors look as good as new. Remember to gather all the necessary tools and materials, remove the side mirrors, clean and sand the mirror housing, apply primer, mask off surrounding areas, apply paint and clear coat, reinstall the side mirrors, and perform any final touch-ups.

Choosing the Right Paint: A guide to selecting the perfect paint for your side mirrors
When it comes to enhancing the overall appearance of your vehicle, little details can make a big difference. One such detail that often gets overlooked is the paint on your side mirrors. While they may seem like a minor component, properly painted side mirrors can contribute to the overall sleek and polished look of your car.
Whether you are looking to match the existing color of your side mirrors or create a custom and unique look, choosing the right paint is essential. In this guide, we will discuss the factors you should consider when selecting paint for your side mirrors.
1. Color Match:
The first and most important consideration when choosing paint for your side mirrors is color match. You want the paint to seamlessly blend with the existing color of your vehicle. This will create a cohesive and professional appearance. If you are unsure about the exact color code of your vehicle, consult your car’s manual or contact the manufacturer for assistance.
2. Paint Type:
There are different types of paint available in the market, each with its own unique characteristics. The most common types of paint for automotive applications are spray paint and touch-up paint. Spray paint provides a smooth and even finish, making it perfect for larger surfaces like side mirrors. On the other hand, touch-up paint is ideal for minor scratches or small areas that require spot painting.
3. Finish:
The finish of the paint will greatly impact the overall look of your side mirrors. Some popular finishes include gloss, matte, metallic, and pearl. Gloss finishes are shiny and provide a sleek appearance, while matte finishes are non-reflective and give a more muted look. Metallic and pearl finishes add depth and dimension to the paint, giving your side mirrors a unique and eye-catching appeal.
4. Durability:
When selecting paint for your side mirrors, it is important to choose a durable option that can withstand the elements. Side mirrors are exposed to harsh weather conditions, including sunlight, rain, and dirt. Look for paint that offers UV protection and is resistant to fading and chipping. This will ensure that your side mirrors maintain their pristine condition for a longer period of time.
5. Application Method:
The method of application is another factor to consider when choosing paint for your side mirrors. Spray cans are convenient and easy to use, especially if you are a DIY enthusiast. However, if you are looking for a flawless and professional finish, consider using an airbrush or hiring a professional painter to ensure an even and precise application.
6. Budget:
Last but not least, your budget will play a role in your paint selection. Different brands and types of paint vary in price, so it is important to set a budget and find a paint that fits within your financial constraints. Remember, quality paint may be more expensive upfront, but it will save you money in the long run by lasting longer and requiring fewer touch-ups.
Summary:
Choosing the right paint for your side mirrors is a crucial step in enhancing the overall look of your vehicle. Consider factors such as color match, paint type, finish, durability, application method, and budget to make an informed decision. Taking the time to select the perfect paint will ensure that your side mirrors seamlessly blend with your car’s aesthetics, leaving you with a polished and eye-catching result.

Painting Techniques: Pro tips for achieving a professional finish on your side mirrors
When it comes to giving your car a fresh new look, painting the side mirrors can make a big difference. However, achieving a professional finish requires more than just a can of spray paint. In this section, we will discuss some pro tips and techniques that will help you achieve a flawless paint job on your side mirrors.
1. Preparation is key
Before you start painting, it is important to prepare the surface properly. Start by thoroughly cleaning the side mirrors to remove any dirt, grime, or grease. Next, sand the surface using fine-grit sandpaper to create a smooth and even surface for the paint to adhere to. Finally, apply a primer to the side mirrors to ensure proper adhesion and improve the longevity of the paint job.
2. Choose the right paint
Using high-quality automotive paint is essential for achieving a professional finish. Look for paint specifically designed for exterior use and that matches the color of your car. Additionally, consider using a clear coat to provide an extra layer of protection and enhance the shine of the paint.
3. Practice proper spraying technique
Spray painting requires a steady hand and proper technique. Start by holding the spray can approximately 6-8 inches away from the side mirror and use smooth, even strokes to apply the paint. Avoid spraying too much paint at once, as it can lead to drips and uneven coverage. It is better to apply multiple thin coats rather than one thick coat to achieve a smooth and professional finish.
4. Use a paint booth or create a controlled environment
Painting in a clean and controlled environment can significantly improve the quality of the paint job. If possible, use a paint booth or create a makeshift booth by covering the surrounding area with plastic sheets to prevent dust, debris, and other contaminants from landing on the wet paint. This will help you achieve a flawless finish without any imperfections.
5. Allow proper drying and curing time
After you have finished painting, allow the side mirrors to dry and cure properly before reinstalling them on your car. Follow the manufacturer’s instructions regarding the drying time, as it can vary depending on the type of paint used. Rushing the drying process can result in smudges, fingerprints, or even damage to the paint job.
6. Finishing touches
Once the paint has dried and cured, you can give your side mirrors a final touch to achieve a truly professional finish. Use a fine-grit sandpaper to gently buff the surface, making it smooth and removing any imperfections. Finally, apply a high-quality automotive wax or polish to enhance the shine and protect the paint from UV rays and other environmental factors.
In summary, achieving a professional finish on your side mirrors requires proper preparation, choosing the right paint, practicing good spraying technique, creating a controlled environment, allowing sufficient drying and curing time, and giving attention to finishing touches. By following these pro tips and techniques, you can transform your side mirrors and give your car a sleek and polished look.
Finishing Touches
Once you have completed the painting process, it’s time to give your project that final touch. Applying a clear coat and polishing the surface will not only protect the paint but also enhance its appearance, giving it a long-lasting, glossy finish.
1. Clear Coat Application
Before applying the clear coat, make sure the painted surface is completely dry and free of any dust or debris. You can use a clean, lint-free cloth or a tack cloth to wipe away any particles. Once the surface is clean, follow these steps to apply the clear coat:
- Choose a high-quality clear coat that is compatible with the type of paint you used. Check the manufacturer’s instructions for the recommended clear coat.
- Prepare your workspace by covering the surrounding area with drop cloths or newspapers to protect it from overspray.
- Shake the clear coat can vigorously for a few minutes to ensure the contents are well-mixed.
- Hold the can about 8-12 inches away from the painted surface and apply a thin, even coat in smooth, overlapping motions. Avoid spraying too much, as it can lead to drips or runs.
- Allow the clear coat to dry according to the manufacturer’s instructions. This usually takes about 24 hours, but it’s important to check the specific drying time for the product you are using.
- If desired, you can apply additional coats of clear coat for added protection and a deeper shine. Make sure to follow the recommended drying time between coats.
Remember to work in a well-ventilated area and wear appropriate safety gear, such as gloves and a mask, when applying the clear coat.
2. Polishing for a Glossy Finish
After the clear coat has fully dried, you can proceed with polishing to achieve a glossy look. Polishing helps smooth out any imperfections and enhances the shine of the clear coat. Here’s how you can polish your painted surface:
- Start by cleaning the surface with a mild soap and water solution to remove any dirt or residue. Rinse thoroughly and allow it to dry completely.
- Choose a polishing compound that is suitable for your clear coat. There are various types available, such as rubbing compounds or polishing pastes.
- Apply a small amount of the polishing compound onto a clean, soft cloth or a buffing pad. Work in small sections, applying gentle pressure and using circular motions.
- Continue polishing until you achieve the desired level of shine. If necessary, you can repeat the process or switch to a finer polishing compound for a higher level of gloss.
- Once you are satisfied with the shine, use a clean cloth to remove any excess polishing compound from the surface.
It’s important to note that the polishing process can cause heat buildup, so it’s recommended to work in small areas and take breaks if needed to prevent damage to the clear coat.
3. Maintenance and Care
To maintain the glossy finish and protect your painted surface, it’s essential to follow proper maintenance and care practices. Here are some tips:
- Avoid using abrasive cleaners or harsh chemicals that can damage the clear coat.
- Regularly wash the painted surface with a gentle car wash soap and a soft sponge or cloth.
- Apply a coat of wax or a paint sealant periodically to provide additional protection and enhance the shine.
- Keep your vehicle or project parked in a shaded area or use a cover to protect it from harsh sunlight and environmental elements.
By following these steps and taking care of your clear coat finish, you can enjoy a long-lasting, glossy look for your painted project.
Frequently Asked Questions (FAQs)
Q: How do I paint a side mirror?
To paint a side mirror, start by cleaning the mirror surface thoroughly. Then, sand the mirror to create a smooth surface for the paint to adhere to. Apply a primer to the mirror, and once it’s dry, apply several thin coats of paint, allowing each coat to dry before applying the next. Finish off with a clear coat for added protection.
Q: What type of paint should I use for a side mirror?
It is recommended to use automotive spray paint that is specifically designed for exterior use. Look for paint that is labeled as suitable for plastic surfaces and provides a durable finish. This will ensure the paint adheres well and withstands outdoor conditions.
Q: Can I paint a side mirror without removing it?
While it is possible to paint a side mirror without removing it, it is generally more challenging to achieve a professional-looking finish. It is highly recommended to remove the mirror from the vehicle before painting to ensure better access and control during the painting process.
Conclusion:
In conclusion, learning how to paint your side mirror can be a rewarding and cost-effective way to refresh the overall look of your vehicle. By following the step-by-step instructions and using the right materials and techniques, you can achieve professional-looking results. Remember to properly prepare the surface, apply multiple thin coats of paint, and allow sufficient drying time between each coat. Additionally, it’s important to choose high-quality automotive paint that is compatible with your mirror’s material. With patience and attention to detail, you can transform your side mirror into a stylish and personalized addition to your car.
