
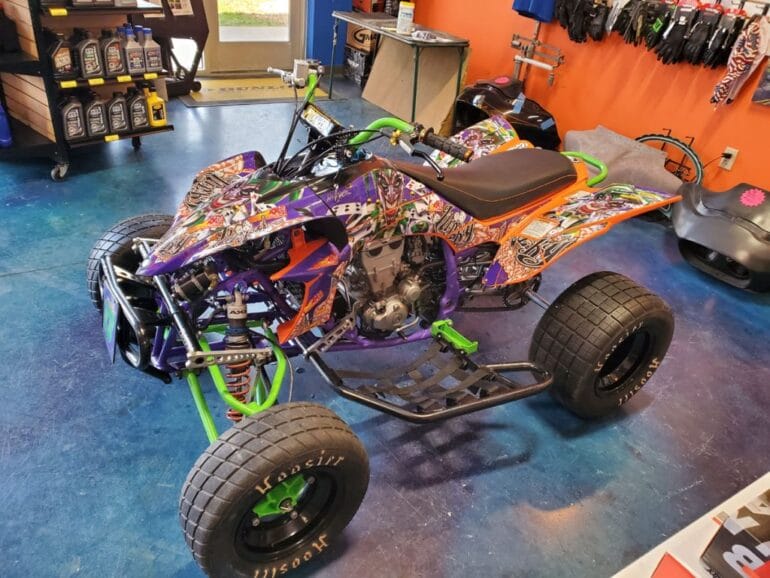
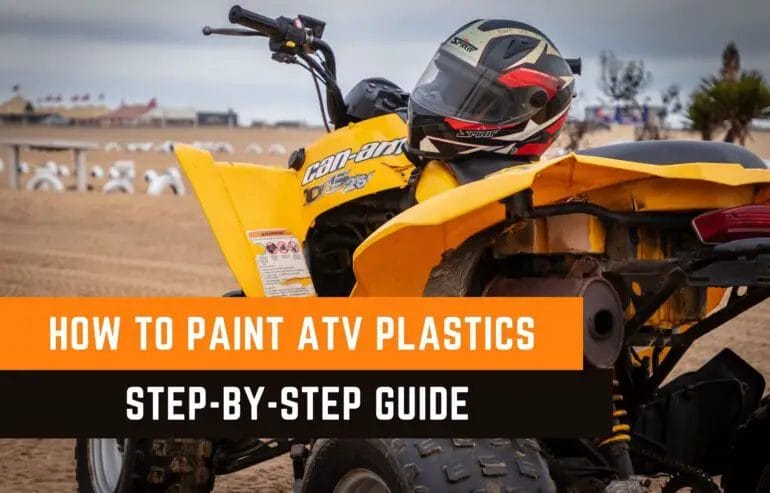
If you want to give your ATV a fresh new look and protect its plastics from wear and tear, painting them is a great option. Whether you are looking to add a personal touch or restore the faded or damaged plastics, painting can make a significant difference. However, it’s essential to follow the right steps to ensure a long-lasting and professional finish. In this guide, we will walk you through the process of painting plastics on an ATV, from preparation to application and finishing touches.
Preparing ATV Plastics for Painting
When it comes to customizing your ATV, one of the most popular options is to paint the plastics. By giving your ATV a fresh coat of paint, you can completely transform its appearance and make it stand out from the crowd. However, before you dive into the painting process, it’s important to properly prepare the ATV plastics to ensure the best results. In this section, we will discuss the steps involved in preparing ATV plastics for painting.
Gather the necessary materials
Before you start the preparation process, make sure you have all the necessary materials on hand. Here’s a list of items you will need:
- Sandpaper (120, 220, and 400 grit)
- Clean cloth or towel
- Plastic cleaner or degreaser
- Masking tape
- Primer
- Paint suitable for plastic surfaces
- Clear coat
- Spray gun or paintbrush
- Respirator mask
Clean the ATV plastics
The first step in preparing ATV plastics for painting is to thoroughly clean them. Remove any dirt, grime, or grease from the surfaces using a plastic cleaner or degreaser. Wipe the plastics down with a clean cloth or towel to ensure they are free from any residue. This step is crucial as it will help the paint adhere to the surface more effectively.
Sand the plastics
Next, you will need to sand the ATV plastics to create a smooth surface for the paint. Start with a coarse sandpaper (120 grit) to remove any existing paint or imperfections. Follow up with a medium-grit sandpaper (220 grit) to further smooth the surface. Finally, use a fine-grit sandpaper (400 grit) to achieve a silky-smooth finish.
Mask off the areas
Before you apply any paint, it’s important to protect certain areas of the ATV that you do not want to paint. Use masking tape to cover any parts that should remain unpainted, such as headlights, decals, or emblems. Take your time to ensure that the tape is securely in place, as this will prevent any overspray or accidental paint application.
Apply primer
Priming the ATV plastics is essential for achieving a long-lasting and professional-looking paint job. Choose a primer specifically designed for use on plastic surfaces. Apply a thin and even coat of primer to the sanded plastics, following the manufacturer’s instructions. Allow the primer to dry completely before moving on to the next step.
Paint the plastics
Once the primer is fully dry, it’s time to apply the paint. Use a paint that is suitable for plastic surfaces and matches your desired color. Depending on your preference, you can use a spray gun or a paintbrush to apply the paint. Apply multiple thin coats, allowing each coat to dry before applying the next. This will help prevent runs or drips and ensure a smooth and even finish.
Apply clear coat
To protect the newly painted ATV plastics and give them a glossy finish, apply a clear coat. This will help seal the paint and provide added durability. Follow the instructions on the clear coat product for application. Apply thin and even coats, allowing each coat to dry completely before applying the next.
With these steps, you can effectively prepare your ATV plastics for painting. Remember to take your time, follow the proper techniques, and use high-quality materials to achieve the best results. Once the paint and clear coat have cured completely, you can enjoy your freshly customized ATV and ride in style.
Step 1: Preparing the Surface
The first step in spray painting ATV plastics is to properly prepare the surface. This involves thoroughly cleaning the plastics to remove any dirt, grease, or other contaminants. Start by washing the plastics with soap and water, and then use a degreaser to remove any stubborn grease or oil. Once the plastics are clean, wipe them dry with a clean cloth.
After cleaning, it’s important to lightly sand the surface of the plastics to create a rough texture that will help the paint adhere better. Use a fine-grit sandpaper and gently sand the entire surface in a circular motion. Be careful not to apply too much pressure or sand too aggressively, as this can cause damage to the plastics.
Step 2: Masking Off Areas
Before you start spraying, it’s important to mask off any areas that you don’t want to be painted. Use high-quality painter’s tape and plastic sheeting to cover any parts of the ATV that should not be painted, such as the engine, handles, or seat. This will ensure that the paint is applied only to the desired areas and helps to create clean, crisp lines.
Step 3: Applying Primer
Priming the ATV plastics is an essential step to ensure proper adhesion and durability of the paint. Choose a high-quality plastic primer that is specifically designed for use on ATV plastics. Shake the primer can well and then apply a thin, even layer of primer to the plastics. Hold the can approximately 8-12 inches away from the surface and spray in a sweeping motion. Allow the primer to dry completely according to the manufacturer’s instructions.
Step 4: Applying the Base Coat
After the primer has dried, it’s time to apply the base coat. Choose a high-quality spray paint that is formulated for use on plastics and is compatible with the primer you used. Shake the paint can well and then apply a thin, even layer of paint to the plastics. Hold the can at the same distance as before and use smooth, sweeping motions to cover the surface. Allow the base coat to dry completely before moving on to the next step.
Step 5: Applying Clear Coat
To protect the base coat and give the plastics a glossy finish, it’s important to apply a clear coat. Choose a clear coat spray paint that is specifically designed for use on automotive plastics. Shake the can well and then apply a thin, even layer of clear coat to the plastics. Use the same spraying technique as before and allow the clear coat to dry completely.
Step 6: Finishing Touches
Once the clear coat is dry, carefully remove the masking tape and plastic sheeting from the ATV. Inspect the painted plastics for any imperfections or areas that may need touch-ups. If necessary, lightly sand any rough spots and reapply the base coat or clear coat as needed. Finally, allow the paint to fully cure according to the manufacturer’s instructions before using or handling the ATV.
In summary, spray painting ATV plastics can be a great way to give your ATV a fresh new look. By following these step-by-step instructions and using the right products, you can achieve professional-looking results. Remember to properly prepare the surface, mask off areas, apply primer, base coat, and clear coat, and finish with any necessary touch-ups. With a little time and effort, you can transform the appearance of your ATV and protect the plastics for years to come.

Tips and Tricks for a Long-Lasting ATV Plastic Paint Job
If you own an ATV, you know that its appearance is just as important as its performance. One way to give your ATV a fresh new look is by painting its plastic parts. However, painting ATV plastic can be a bit tricky, as the paint needs to adhere properly to the surface and withstand the rigors of off-road riding. In this section, we will provide you with some valuable tips and tricks to ensure a long-lasting ATV plastic paint job.
1. Clean and Prepare the Surface
Before you start painting, it is essential to clean the plastic surface thoroughly. Use a mild detergent or plastic cleaner to remove any dirt, grease, or wax buildup. Scrub the surface gently with a soft brush or sponge, and rinse it off with water. Once the surface is clean and dry, sand it lightly with fine-grit sandpaper to create a rough texture that will help the paint adhere better.
2. Use a High-Quality Plastic Primer
A plastic primer is a crucial step in ensuring a durable paint job. Look for a high-quality plastic primer specifically designed for automotive applications. Apply the primer evenly over the sanded surface, following the manufacturer’s instructions. Allow the primer to dry completely before moving on to the next step.
3. Choose the Right Type of Paint
When it comes to painting ATV plastic, not all paints are created equal. It is essential to choose a paint that is specifically formulated for use on plastic surfaces. Look for paints labeled as “plastic paint” or “plastic adhesion promoter.” These paints have special additives that help them adhere to plastic and provide long-lasting protection against UV rays and other environmental factors.
4. Apply Thin and Even Coats
When applying the paint, it is crucial to use thin and even coats. Start with a light mist coat as a base layer, and then apply additional coats as needed to achieve full coverage. Avoid applying thick layers of paint, as this can lead to drips, runs, and an uneven finish. Allow each coat to dry completely before applying the next one.
5. Protect the Paint with a Clear Coat
To ensure the longevity of your ATV plastic paint job, consider applying a clear coat as a protective layer. Clear coats add an extra barrier against scratches, UV rays, and other elements that can damage the paint. Choose a clear coat designed for use on automotive plastics and follow the manufacturer’s instructions for application.
6. Allow Sufficient Drying Time
Patience is key when it comes to painting ATV plastic. Allow each coat of paint and clear coat to dry fully before exposing your ATV to any harsh conditions or touching the painted surface. This will help prevent smudging or damaging the fresh paint job.
7. Regularly Clean and Maintain the Painted Surface
After completing your ATV plastic paint job, it is essential to regularly clean and maintain the painted surface. Use a mild soap and water solution to remove dirt and grime, and avoid using harsh chemicals or abrasive cleaners that can damage the paint. Additionally, periodically inspect the painted surface for any signs of wear or damage and address them promptly to prevent further deterioration.
In summary, achieving a long-lasting ATV plastic paint job requires proper surface preparation, the use of high-quality materials, and careful application techniques. By following these tips and tricks, you can give your ATV a fresh new look that will withstand the demands of off-road riding and keep it looking its best for years to come.
Maintenance and Care for Painted ATV Plastics
ATVs are built to withstand tough terrains and challenging conditions, but over time, their painted plastics can become faded, scratched, or damaged. Proper maintenance and care for your ATV’s painted plastics can help preserve their appearance and extend their lifespan. In this section, we will discuss some essential tips and techniques to keep your ATV’s painted plastics looking their best.
1. Regular Cleaning
Regular cleaning is crucial to prevent dirt, mud, and debris from accumulating on your ATV’s painted plastics. Use a mild detergent or ATV-specific cleaner mixed with water to remove any dirt or grime. Gently scrub the painted surfaces with a soft sponge or cloth, and rinse thoroughly with water. Avoid using abrasive cleaners or brushes that can scratch or damage the paint.
2. Protective Coating
Applying a protective coating to your ATV’s painted plastics can provide an extra layer of defense against UV rays, oxidation, and scratches. There are various protective coatings available specifically designed for ATV plastics. These coatings form a barrier that helps prevent fading and cracking, while also making it easier to clean off mud and dirt.
3. Waxing
Waxing your ATV’s painted plastics can enhance their shine and provide additional protection. Choose a high-quality automotive wax that is safe for use on plastic surfaces. Apply the wax using a clean, soft cloth in circular motions, and then buff it off to reveal a glossy finish. Waxing not only adds a layer of protection but also makes it easier to remove dirt and debris.
4. Avoid Harsh Chemicals
When cleaning or maintaining your ATV’s painted plastics, it is essential to avoid harsh chemicals that can damage the paint. Avoid using solvents, gasoline, or abrasive cleaners as they can strip away the protective coating and cause discoloration or peeling. Stick to gentle, non-abrasive cleaners specifically formulated for ATV plastics.
5. Protection from the Elements
Exposure to the elements can take a toll on your ATV’s painted plastics. Whenever possible, park your ATV in a covered area or use a protective cover to shield it from direct sunlight, rain, and extreme temperatures. UV rays can cause the paint to fade and oxidize over time, while moisture can lead to corrosion and damage.
6. Repairing Scratches
If your ATV’s painted plastics have minor scratches or scuffs, you can repair them to restore the appearance. Start by cleaning the area with mild soap and water. Apply a small amount of touch-up paint that matches the color of your ATV’s plastics, using a fine brush or applicator. Allow the paint to dry completely, and then gently sand the repaired area with fine-grit sandpaper. Finally, apply a clear coat to blend the repaired area with the surrounding paint.
7. Regular Inspection
Regularly inspect your ATV’s painted plastics for any signs of damage or wear. Look out for cracks, chips, or fading. Catching these issues early can help prevent further damage and allow for timely repairs. Address any damage promptly to maintain the overall appearance and integrity of your ATV’s painted plastics.
Maintaining and caring for your ATV’s painted plastics is essential to keep them looking their best. Regular cleaning, the application of protective coatings, and avoiding harsh chemicals can help prevent fading, scratches, and damage. Additionally, protecting your ATV from the elements and addressing any minor repairs promptly can extend the lifespan of your painted plastics. By following these tips, you can ensure that your ATV’s painted plastics remain in top condition for years to come.
Frequently Asked Questions
How can I paint plastics on my ATV?
To paint the plastics on your ATV, start by cleaning the surface with soap and water. Then, sand the plastics to create a rough surface. Apply a plastic primer and let it dry. Finally, use a spray paint designed for plastics and apply multiple layers, allowing each layer to dry before adding the next one.
Can I use regular paint on ATV plastics?
No, regular paint is not suitable for painting ATV plastics. It will not adhere properly and may peel or crack quickly. It is important to use a spray paint specifically formulated for plastics to ensure durability and a long-lasting finish.
Is it necessary to remove the plastics from my ATV before painting?
It is not necessary to remove the plastics from your ATV before painting, but it is recommended for better results. If you choose to paint the plastics while they are still on the ATV, make sure to cover all other parts to protect them from overspray.
Conclusion
In conclusion, painting plastics on an ATV can transform its appearance and give it a fresh, customized look. By following the right steps and using the appropriate materials, you can achieve a professional and long-lasting finish. Proper surface preparation, including cleaning and sanding, is essential to ensure good adhesion of the paint. Applying a primer specifically designed for plastics will help improve paint adhesion and durability. Additionally, using high-quality automotive-grade paint and clear coat will provide a smooth and glossy finish. Regular maintenance and care of the painted plastics will help prolong their lifespan and keep them looking great for years to come.