
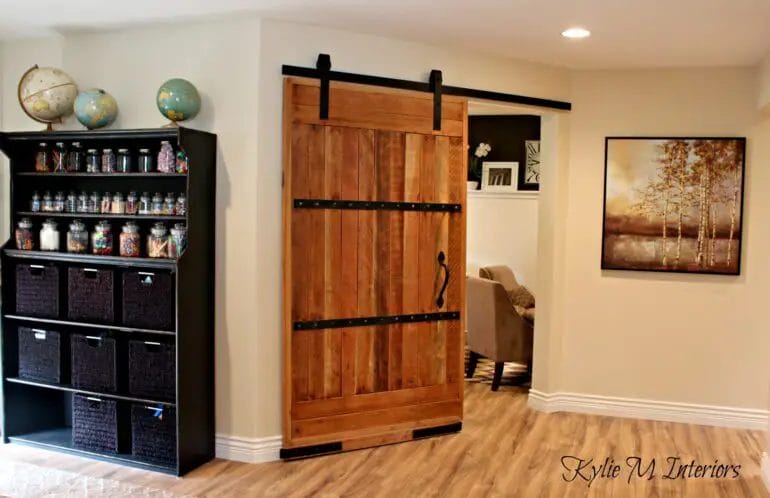
If you want to give your space a rustic and charming touch, painting a barn door can be the perfect DIY project. Whether you have an actual barn door or a regular door that you want to transform, this guide will show you how to achieve a beautifully painted finish that will add character to any room.
First, start by preparing the door surface. Clean it thoroughly and remove any existing paint or varnish. Sand the surface to create a smooth and even base for the paint to adhere to. Fill in any cracks or holes with wood filler and let it dry.
Next, choose the right paint for your barn door. Opt for a durable and weather-resistant paint, such as an exterior latex or an enamel paint. These types of paint will ensure that your door maintains its vibrant color and withstands the test of time.
Before you start painting, make sure to prime the door. Primer helps the paint adhere better and creates a uniform surface. Apply the primer evenly with a paintbrush or roller and let it dry completely.
Once the primer is dry, it’s time to apply the paint. Start by painting the edges and corners of the door with a paintbrush, then switch to a roller to cover the larger areas. Apply thin coats of paint, allowing each coat to dry before applying the next one.
After you’ve achieved the desired color and coverage, let the door dry completely. Then,
Preparing and Priming Your Barn Door for Painting
Before you can start painting your barn door, it is important to properly prepare and prime the surface to ensure a smooth and long-lasting finish. Follow these steps to get your barn door ready for painting:
Clean the Surface
The first step in preparing your barn door for painting is to clean the surface thoroughly. Remove any dirt, dust, or debris using a mild detergent and water solution. Scrub the door gently with a soft brush or sponge, making sure to reach all the nooks and crannies. Rinse the door thoroughly with clean water and allow it to dry completely before moving on to the next step.
Remove any Existing Paint or Finish
If your barn door has a previous paint or finish, it is important to remove it completely before applying a new coat. Use a paint stripper or sander to strip off the old paint or finish. Follow the instructions on the paint stripper or use a medium-grit sandpaper to sand away the old finish. Make sure to wear protective goggles and a respiratory mask to avoid inhaling any dust or fumes.
Repair any Damaged Areas
Inspect your barn door for any cracks, dents, or holes. Use a wood filler or epoxy putty to fill in any damaged areas. Smooth out the filler with a putty knife and let it dry completely. Once dry, sand the repaired areas with fine-grit sandpaper to ensure a seamless finish.
Sand the Surface
To ensure a smooth and even paint application, sand the entire surface of the barn door. Use a fine-grit sandpaper and sand in the direction of the wood grain. This will help to remove any imperfections and create a smooth surface for the primer and paint to adhere to. Wipe away any dust with a clean cloth after sanding.
Apply Primer
Priming the barn door is an essential step to ensure proper adhesion and durability of the paint. Choose a high-quality wood primer that is suitable for your barn door. Apply the primer evenly using a paintbrush or roller, following the manufacturer’s instructions. Allow the primer to dry completely before moving on to the next step.
Sand the Primed Surface
After the primer has dried, gently sand the primed surface with fine-grit sandpaper. This will help to smooth out any brush or roller marks and create a better surface for the final coat of paint. Wipe away any dust with a clean cloth after sanding.
Inspect for Imperfections
Take a close look at the primed surface and inspect for any imperfections. If you notice any bumps, drips, or uneven areas, use sandpaper to smooth them out. Make sure the surface is clean and smooth before proceeding with the paint application.
In summary, preparing and priming your barn door is a crucial step in achieving a professional-looking paint finish. By cleaning, removing any existing paint or finish, repairing damaged areas, sanding the surface, applying primer, and inspecting for imperfections, you will ensure that your barn door is ready to be painted and will have a long-lasting and beautiful finish.

Step-by-Step Guide to Painting Your Barn Door
A barn door can be a charming addition to any home decor, providing a rustic and unique touch. If you have a barn door that needs a fresh coat of paint or if you want to customize a new barn door, painting it yourself is a relatively simple and cost-effective solution. In this section, we will walk you through a step-by-step guide to painting your barn door.
Materials You Will Need:
Before you begin painting your barn door, gather the necessary materials. Here’s a list of items you will need:
- Paint (choose a color that complements your interior or exterior)
- Primer (if your barn door has never been painted before or needs a color base)
- Paintbrushes (different sizes for different areas of the door)
- Painter’s tape (to protect hinges, handles, and other hardware)
- Sanding block or sandpaper (to smooth the surface if needed)
- Cloth or sponge (for cleaning the door before painting)
- Drop cloth or plastic sheeting (to protect the surrounding area from paint splatter)
- Paint tray or bucket (to hold the paint)
- Stir stick or paint mixer (to mix the paint thoroughly)
Step 1: Prepare the Surface
Start by preparing the surface of your barn door. If there is any existing paint or varnish, you may need to sand it down to create a smooth base. Use a sanding block or sandpaper to gently remove any imperfections or rough spots. After sanding, wipe the door with a damp cloth or sponge to remove dust and debris.
Step 2: Apply Primer (Optional)
If your barn door has never been painted before or if you want to change the color drastically, applying a primer is recommended. Primer helps the paint adhere better and provides a base for the new color. Use a paintbrush to apply an even coat of primer to the entire door. Let it dry according to the manufacturer’s instructions.
Step 3: Protect the Hardware
To ensure a neat and professional-looking finish, use painter’s tape to protect the hinges, handles, and any other hardware on the door. Apply the tape carefully, making sure it adheres securely and covers the areas you don’t want to paint.
Step 4: Apply the Paint
Now it’s time to apply the paint to your barn door. Pour some paint into a paint tray or bucket and stir it thoroughly with a stir stick or paint mixer. Start by using a small paintbrush to cut-in the edges and corners of the door. Then, use a larger brush or a roller to paint the larger areas. Apply the paint in thin, even coats, working from top to bottom and following the wood grain.
Step 5: Allow the Paint to Dry
After you have painted the entire door, allow the paint to dry completely. The drying time will depend on the type of paint and environmental conditions. Refer to the paint manufacturer’s instructions for the recommended drying time. It’s crucial not to rush this step to avoid smudges or fingerprints on the freshly painted surface.
Step 6: Apply Additional Coats (If Needed)
Depending on the desired color and finish, you may need to apply additional coats of paint. Allow each coat to dry before applying the next one, following the same techniques as in Step 4. Applying multiple thin coats will result in a more professional and durable finish.
Step 7: Remove the Tape and Finishing Touches
Once the final coat of paint is dry, carefully remove the painter’s tape from the hardware. Check for any touch-ups or areas that need additional paint. Use a small brush or a cotton swab to fix any imperfections. Once you are satisfied with the result, step back and admire your beautifully painted barn door.
In summary, painting your barn door is a straightforward process that can transform the look and feel of your space. By following this step-by-step guide and using the right materials, you can achieve a professional-looking finish that will enhance the overall aesthetic of your barn door.
Adding a Weather-Resistant Finish to Your Painted Barn Door
If you have a beautiful barn door that you’ve recently painted, it’s important to protect your hard work from the elements. A weather-resistant finish can not only enhance the longevity of your painted barn door but also add an extra layer of protection against moisture, UV rays, and other outdoor elements. In this section, we will guide you through the process of adding a weather-resistant finish to your painted barn door, ensuring that it stays looking great for years to come.
1. Clean and Prepare the Surface
Before applying any finish, it’s essential to thoroughly clean and prepare the surface of your barn door. Remove any dust, dirt, or debris using a soft cloth or brush. For stubborn stains, you can use a mild detergent mixed with water. Once the door is clean, allow it to dry completely before proceeding to the next step.
2. Sand the Surface
To ensure that the finish adheres properly and evenly to your barn door, it’s recommended to lightly sand the surface. Use a fine-grit sandpaper and gently sand the entire door in the direction of the wood grain. This will create a smooth surface and remove any rough spots or imperfections. After sanding, wipe away any dust with a clean cloth.
3. Choose a Weather-Resistant Finish
There are several types of weather-resistant finishes available for exterior wood surfaces. The most common options include polyurethane, varnish, and exterior paint with built-in weather resistance. Consider the specific needs of your barn door, such as the level of exposure to sunlight and moisture, when selecting a finish. Read the product labels and choose a finish that is specially designed for outdoor use.
4. Apply the Finish
Before applying the finish, make sure that the barn door is placed in a well-ventilated area. Stir the finish thoroughly to ensure an even consistency. Using a high-quality brush or roller, apply a thin, even coat of finish to the entire surface of the door. Follow the manufacturer’s instructions for application techniques and drying times. Multiple coats may be necessary for optimal protection.
5. Allow Sufficient Drying Time
After applying the first coat of finish, allow sufficient drying time before applying additional coats or subjecting the door to any outdoor conditions. This will ensure that the finish properly adheres to the surface and provides the desired level of protection. Follow the manufacturer’s guidelines for recommended drying times, as they may vary depending on the specific finish.
6. Maintain and Reapply as Needed
Over time, the weather-resistant finish on your barn door may start to wear off due to exposure to the elements. To maintain the protection and appearance of your door, it’s important to periodically inspect the finish and reapply as needed. Follow the manufacturer’s recommendations for maintenance and reapplication intervals to ensure the longevity of your weather-resistant finish.
Summary
Adding a weather-resistant finish to your painted barn door is a crucial step in preserving its appearance and protecting it from outdoor elements. By thoroughly cleaning and preparing the surface, selecting an appropriate weather-resistant finish, and applying it correctly, you can ensure that your barn door remains beautiful and durable for years to come. Regular maintenance and reapplication of the finish will further extend its lifespan, allowing you to enjoy your painted barn door for a long time.
5. Maintenance Tips for Keeping Your Barn Door Looking Fresh and Beautiful
No matter how stunning your barn door is, its beauty will fade over time if you don’t properly maintain it. To ensure that your barn door remains fresh and beautiful for years to come, here are some essential maintenance tips:
1. Regular Cleaning
Regular cleaning is key to keeping your barn door looking its best. Dust and dirt can accumulate on the surface, making it appear dull and worn. To clean your barn door, start by removing any loose dirt or debris with a soft brush or lint-free cloth. Then, use a mild detergent mixed with warm water to gently wipe down the door’s surface. Avoid using harsh chemicals or abrasive cleaners, as they can damage the finish.
2. Protective Finish
To protect your barn door from moisture, sun damage, and scratches, it’s important to apply a protective finish. Choose a finish that is suitable for the material of your barn door, whether it’s wood or metal. A clear polyurethane or varnish can help seal the surface and provide a protective barrier against the elements. Apply the finish according to the manufacturer’s instructions and reapply as needed to maintain its effectiveness.
3. Lubrication
Proper lubrication is essential to keep your barn door functioning smoothly. Over time, the rollers, hinges, and track may accumulate dirt and debris, causing the door to become stiff or squeaky. Regularly inspect these components and clean them with a soft cloth. Apply a silicone-based lubricant to the rollers and hinges to ensure smooth operation. Avoid using oil-based lubricants, as they can attract more dirt and cause buildup.
4. Preventing Warping
Wooden barn doors are susceptible to warping due to changes in humidity and temperature. To prevent warping, it’s important to keep your barn door in a stable environment. Avoid installing your barn door in areas with high humidity or direct sunlight. If you notice any signs of warping, such as sticking or gaps between the door and frame, consider using a dehumidifier in the area or consulting a professional for guidance.
5. Regular Inspections
Make it a habit to regularly inspect your barn door for any signs of damage or wear. Check for loose screws, cracked panels, or any other issues that may compromise the door’s integrity. Address any problems promptly to prevent further damage and ensure the longevity of your barn door.
By following these maintenance tips, you can keep your barn door looking fresh and beautiful for years to come. Regular cleaning, applying a protective finish, proper lubrication, preventing warping, and regular inspections are all key to maintaining the beauty and functionality of your barn door. Remember, a well-maintained barn door not only enhances the aesthetic appeal of your space but also adds value to your property.
FAQs
Q: How to paint a barn door?
To paint a barn door, start by cleaning the door thoroughly and sanding any rough areas. Apply a primer to help the paint adhere, then choose your desired paint color and apply it with a brush or roller. Allow the paint to dry completely before applying a second coat if necessary. Finish by sealing the paint with a clear topcoat for added durability.
Conclusion
In conclusion, painting a barn door can be a fun and rewarding DIY project that can transform the look of your space. By following the steps outlined in this guide, you can achieve a professional-looking finish that will enhance the beauty and durability of your barn door. Remember to start by preparing the surface properly, using high-quality paint and tools, and applying multiple thin coats for a smooth and even coverage. Whether you choose a classic or bold color, a freshly painted barn door will add a touch of charm and style to your home or barn.