
Looking to create a striking and durable acrylic sign? Look no further! In this guide, we will provide you with all the essential steps and tips on how to make an acrylic sign that will grab attention and leave a lasting impression. From choosing the right materials to designing, cutting, and assembling, we’ll cover everything you need to know to create a professional-looking acrylic sign that suits your unique style and purpose. So, let’s dive in and bring your signage ideas to life!

Essential Tools and Supplies for Making an Acrylic Sign
Creating an acrylic sign can be a fun and rewarding project that allows you to showcase your creativity and add a personalized touch to your space. Whether you’re making a sign for your business, event, or home decor, having the right tools and supplies at your disposal is essential to ensure a successful outcome. In this section, we will discuss the key tools and supplies you’ll need to make an acrylic sign.
1. Acrylic Sheet
The first and most important item you’ll need is an acrylic sheet. Acrylic, also known as plexiglass, is a versatile material that is transparent, durable, and easy to work with. It comes in various sizes and thicknesses, so choose the one that suits your project requirements. Make sure to clean the surface of the acrylic sheet before starting your design.
2. Cutting Tools
To shape and cut the acrylic sheet, you’ll need specific cutting tools. One commonly used tool is a fine-toothed saw designed for acrylic. It allows you to make precise cuts without causing any cracks or chips. Alternatively, you can also use a laser cutter if you have access to one. Always measure and mark your desired dimensions before cutting.
3. Sanding Materials
To smooth out the edges of your acrylic sign and give it a professional finish, you’ll need sanding materials. Sandpaper with different grits, ranging from coarse to fine, will help you achieve a smooth surface. Start with a coarser grit to remove any rough edges, and gradually work your way up to a finer grit for a polished look.
4. Adhesive
Depending on how you plan to display your acrylic sign, you’ll need a suitable adhesive. If you’re mounting it on a wall or board, consider using a strong adhesive tape or adhesive-backed hooks for a secure attachment. If you prefer a freestanding sign, an adhesive designed specifically for bonding acrylic can provide the necessary stability.
5. Primer and Paint
If you want to add color or a design to your acrylic sign, you’ll need primer and paint suitable for acrylic surfaces. Applying a primer before painting helps the paint adhere better and ensures a smooth, even finish. Choose acrylic paints that are specifically formulated for use on nonporous surfaces like acrylic sheets.
6. Brushes and Rollers
To apply the primer and paint to your acrylic sign, you’ll need brushes and rollers. Use brushes with synthetic bristles that are suitable for acrylic paint. Fine brushes can be used for detailed work, while rollers are great for covering larger areas quickly. Make sure to clean your brushes and rollers thoroughly after each use to maintain their longevity.
7. Masking Tape
Masking tape is an essential tool for creating clean lines and protecting areas you don’t want to paint. Use it to cover any parts of the acrylic sheet that you want to keep clear or separate from the paint. Make sure the tape is firmly adhered to prevent any bleeding of the paint.
8. Ruler and Level
Accurate measurements and straight lines are crucial for a professional-looking acrylic sign. Use a ruler or measuring tape to mark your desired dimensions and ensure consistency. A level can help you position your sign correctly and ensure it is straight when mounting or displaying.
9. Safety Equipment
When working with acrylic and other materials, it’s important to prioritize safety. Wear protective gloves to prevent any cuts or scratches. Use safety goggles to shield your eyes from any flying debris while cutting or sanding the acrylic. If you’re working in a well-ventilated area, wearing a mask can protect you from inhaling any dust particles.
With these essential tools and supplies, you’ll be well-equipped to create your own acrylic sign. Remember to plan your design, take accurate measurements, and work in a well-ventilated area for the best results. Enjoy the process and let your creativity shine through your beautifully crafted acrylic sign!
Step-by-Step Guide to Designing and Cutting Your Acrylic Sign
Acrylic signs are a popular and versatile option for businesses and individuals looking to create eye-catching signage. Whether you need a sign for your storefront, office, or event, designing and cutting your acrylic sign is a great way to customize it to your specific needs. In this guide, we will take you through the step-by-step process of designing and cutting your acrylic sign.
1. Plan Your Design
The first step in creating your acrylic sign is to plan your design. Consider the purpose of your sign and the message you want to convey. Think about the colors, fonts, and graphics that will best represent your brand or message. Sketch out your ideas or use design software to create a digital mockup.
2. Choose Your Acrylic Sheet
Next, you’ll need to choose the right acrylic sheet for your sign. Consider the size, thickness, and color of the acrylic. Clear acrylic is a popular choice, but colored or frosted options can add a unique touch. Measure the dimensions of your sign and select a sheet that will accommodate your design.
3. Prepare Your Design File
Once you have your design finalized, you’ll need to prepare it for cutting. Convert your design file into a format that can be read by a laser cutting machine. Common file formats include SVG, DXF, and AI. Make sure your file is properly scaled to match the dimensions of your acrylic sheet.
4. Set Up the Laser Cutter
Now it’s time to set up the laser cutter. Make sure you have the necessary safety equipment, such as goggles and gloves. Open the laser cutter software and import your design file. Set the appropriate cutting parameters, such as power and speed, based on the thickness of your acrylic sheet.
5. Load and Secure the Acrylic Sheet
Carefully load your acrylic sheet into the laser cutter. Ensure that it is securely positioned and that there is enough space for the laser to move across the sheet without obstruction. Use clamps or other securing methods if necessary.
6. Start the Cutting Process
Double-check all settings and safety precautions before starting the cutting process. Once everything is ready, initiate the laser cutting process. The laser cutter will follow the path defined in your design file, cutting through the acrylic sheet with precision.
7. Remove the Cut Acrylic Sign
Once the cutting process is complete, carefully remove the cut acrylic sign from the laser cutter. Take care not to touch the freshly cut edges, as they may still be hot. Use a soft cloth or gloves to handle the sign.
8. Clean and Finish the Sign
After removing the sign, inspect it for any residual debris or imperfections. Gently clean the surface using a mild cleaner and a soft cloth. If desired, you can further enhance the sign by adding vinyl lettering, graphics, or other embellishments.
9. Mount or Display Your Acrylic Sign
Finally, decide on the best way to mount or display your acrylic sign. Depending on its size and intended location, you may choose to use standoffs, adhesive strips, or other mounting methods. Consider the aesthetics and functionality of the sign when determining the most suitable installation method.
In summary, designing and cutting your acrylic sign involves careful planning, choosing the right materials, preparing your design file, setting up the laser cutter, and executing the cutting process. With the right tools and techniques, you can create a customized acrylic sign that effectively communicates your message and captures attention.

Techniques and Tips for Painting and Adding Graphics to Your Acrylic Sign
Acrylic signs are a popular choice for businesses and individuals looking for a durable and versatile signage option. One of the key advantages of acrylic signs is that they can be easily customized with paint and graphics to create eye-catching and unique displays. Whether you are a seasoned artist or new to painting, this article will provide you with techniques and tips to help you achieve professional-looking results when painting and adding graphics to your acrylic sign.
1. Prepare Your Surface
Before you start painting, it is crucial to prepare your acrylic sign surface properly. Begin by cleaning the surface with a mild detergent and water to remove any dust, dirt, or oils. Once clean, dry the sign thoroughly before proceeding. Sanding the surface with fine-grit sandpaper can also help create a better adhesion for the paint.
2. Choose the Right Paint
When it comes to painting acrylic signs, there are various paint options available. Acrylic paints are a popular choice as they are water-based, quick-drying, and offer excellent color saturation. They also adhere well to acrylic surfaces. Make sure to select high-quality acrylic paints in vibrant colors that suit your design.
Additionally, you may consider using specialty paints such as metallic or fluorescent colors to add visual interest and make your sign stand out. These paints can add a touch of uniqueness to your design and capture attention.
3. Test Your Colors
Before applying the paint directly onto your sign, it is advisable to test your colors on a small section of the acrylic surface or a spare piece of acrylic. This will help you determine if the colors are what you envisioned and if any adjustments are necessary. It is better to make any changes during the testing phase rather than regretting it after the entire sign is painted.
4. Use Thin Layers
When painting your acrylic sign, it is best to apply thin layers of paint rather than thick coats. Thin layers dry faster and allow for better control over the color intensity. Also, it reduces the risk of creating globs, drips, or unevenness on your sign. If you need to intensify the color, you can always add additional thin layers once the previous layer has dried completely.
5. Use Brushes and Tools
Choosing the right brushes and tools is vital to achieving the desired results. For painting acrylic signs, synthetic brushes are recommended as they are durable and work well with acrylic paints. Flat brushes are suitable for filling in large areas, while round brushes are ideal for details and outlining. Experiment with different brush sizes to find the ones that suit your painting style and the scale of your design.
In addition to brushes, you can also explore other tools to create various textures and effects. Sponges, palette knives, and even toothbrushes can be utilized to add depth and visual interest to your acrylic sign.
6. Allow Proper Drying Time
Patience is key when it comes to painting and adding graphics to your acrylic sign. Allow each layer of paint to dry completely before moving on to the next step. This will prevent smudging or blending of colors and ensure a crisp and professional finish. Refer to the paint manufacturer’s instructions for recommended drying times.
7. Adding Graphics
To add graphics to your acrylic sign, you have several options. You can use stencils for precise designs or freehand your graphics for a more organic and artistic look. If you choose to freehand, it can be helpful to sketch your design lightly with a pencil before applying the paint.
If you prefer a more complex graphic or have a specific logo or image in mind, you may consider using vinyl decals or adhesive vinyl cutouts. These can be easily applied to the acrylic surface and offer a professional finish.
8. Seal and Protect Your Sign
Once you are satisfied with the painting and graphic application, it is crucial to seal and protect your acrylic sign. Apply a clear acrylic sealing spray or a gloss varnish designed for acrylic surfaces. This will protect your sign from UV damage, fading, and moisture, ensuring its longevity and durability.
Remember to follow the manufacturer’s instructions when using sealants or varnishes and allow adequate drying time before handling or displaying your finished acrylic sign.
Summary
Painting and adding graphics to your acrylic sign can be an enjoyable and rewarding process. By following these techniques and tips, you can achieve professional-looking results that enhance the visual appeal of your sign. Remember to
Finishing Touches: Mounting and Displaying Your Acrylic Sign
After designing and ordering your beautiful acrylic sign, it’s time to think about the finishing touches that will truly make it stand out. Mounting and displaying your sign properly is essential to maximize its visibility and ensure that it catches the attention of your target audience. In this section, we will discuss various options for mounting and displaying your acrylic sign.
1. Standoff Mounts
A popular choice for mounting acrylic signs is the use of standoff mounts. These are small metal hardware pieces that hold the sign away from the wall, creating a floating effect. Standoff mounts not only provide a sleek and modern look but also make your sign more visible from a distance.
Installation is relatively simple. First, mark the desired location on the wall. Then, drill holes that match the size of the standoff mounts. Insert the mounts into the holes and secure them tightly. Finally, place your acrylic sign onto the mounts and tighten the caps to hold it in place. Standoff mounts are available in various finishes, such as chrome, brushed nickel, or gold, allowing you to customize the look to match your branding.
2. Wall Mounts
If you prefer a more minimalist approach, wall mounts are an excellent option for displaying your acrylic sign. These mounts are typically hidden behind the sign, leaving only the clean lines of the sign visible.
Similar to standoff mounts, the installation process involves marking the location, drilling holes, and securing the mounts to the wall. However, instead of using caps, you will use screws to attach your acrylic sign directly to the wall mounts. This method gives the illusion that your sign is seamlessly integrated into the wall.
3. Ceiling Suspension
For a unique and eye-catching display, consider suspending your acrylic sign from the ceiling. This method is commonly used in large open spaces, such as retail stores or exhibition halls, where wall space may be limited.
To suspend your sign from the ceiling, you will need to use wire ropes or cables. Attach the cables to the corners or sides of the sign using hooks or clamps. Make sure to measure the desired height and adjust the length of the cables accordingly. Finally, secure the other end of the cables to ceiling hooks or beams. This creates a visually striking display that attracts attention from all angles.
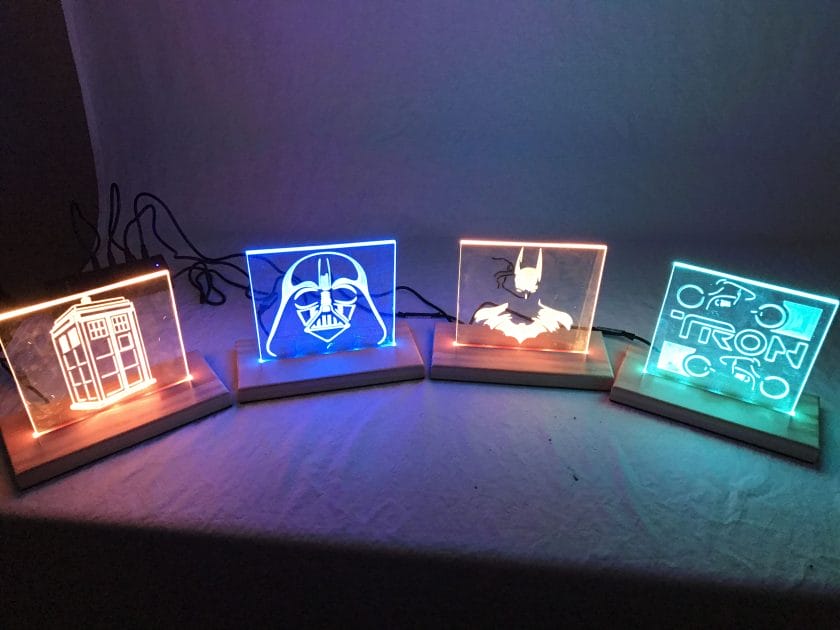
4. Tabletop Stands
If you have a smaller acrylic sign that you want to display on a table or countertop, tabletop stands are an ideal solution. These stands come in a variety of styles, including easel stands, L-shaped holders, or adjustable frames.
Simply place your acrylic sign into the designated slot or clip of the tabletop stand, and it will securely hold your sign in an upright position. This option is great for showcasing promotional messages, menus, or directional signs in retail spaces, restaurants, or events.
Summary
Mounting and displaying your acrylic sign is the final step in bringing your design to life. Whether you choose standoff mounts for a modern look, wall mounts for a clean and seamless appearance, ceiling suspension for a dramatic display, or tabletop stands for smaller signs, the right mounting option will enhance the visibility and impact of your acrylic sign. Consider your space, branding, and intended message when selecting the best method of display. With the finishing touches in place, your acrylic sign is ready to make a lasting impression on your audience.
FAQs
1. How do I make an acrylic sign?
To make an acrylic sign, start by designing your sign using software like Adobe Illustrator. Then, print your design onto vinyl adhesive material. Next, apply the vinyl to your acrylic sheet and trim off any excess. Finally, attach standoffs or drill holes for mounting the sign.
2. What tools do I need to make an acrylic sign?
You will need an acrylic sheet, a printer, vinyl adhesive material, a cutting tool (such as a utility knife or a vinyl cutter), a ruler or straight edge for trimming, and either standoffs or a drill for mounting your sign.
3. Can I use a regular printer to print my sign onto vinyl?
No, a regular printer is not suitable for printing onto vinyl. You will need a printer that is specifically designed for printing on adhesive vinyl material, such as a large format or wide-format printer. These printers use special inks that adhere well to the vinyl material.
Conclusion:
In conclusion, learning how to make an acrylic sign is a creative and rewarding process. By following the step-by-step instructions and using the right tools and materials, anyone can create a stunning sign for various purposes. Whether it’s for personal use or a business venture, acrylic signs offer durability, versatility, and a professional look.
Not only can you showcase your creativity and artistic skills, but you can also customize your acrylic sign to match your style and branding. Whether you prefer a sleek and modern design or a bold and colorful one, acrylic signs can be easily personalized to meet your needs.
So, get started on your acrylic sign project today and make a lasting impression with your unique and eye-catching creation!