
Looking to add a touch of elegance to your event? Learn how to create stunning acrylic table numbers that are sure to impress your guests. Whether you’re planning a wedding, a party, or any other special occasion, acrylic table numbers offer a modern and stylish look. In this guide, we’ll walk you through the step-by-step process of making your own acrylic table numbers, from choosing the right materials to adding personalized details. Let’s get started!
The first step in making acrylic table numbers is to gather all the necessary materials. You’ll need acrylic sheets, a cutting tool, a ruler or straight edge, and adhesive. You can choose clear acrylic for a minimalist look, or opt for colored acrylic to match your event’s theme or decor.
Next, measure and mark the desired size and shape of your table numbers on the acrylic sheet. Use a ruler or straight edge to ensure straight and accurate lines. If you’re looking to add a unique touch, consider using stencils or templates to create different shapes or typography.
Once you’ve marked the design, carefully cut out the table numbers using a cutting tool. Make sure to follow the marked lines closely to achieve clean and precise cuts. It’s a good idea to practice on a scrap piece of acrylic first to get comfortable with the cutting process.
After cutting out the table numbers, remove any rough edges or burrs by lightly sanding the acrylic. This will
Step-by-Step Guide to Making Acrylic Table Numbers
If you’re looking for a unique and stylish way to display table numbers at your next event or wedding, acrylic table numbers are a great choice. These modern and elegant table numbers can be made easily with just a few simple materials. In this guide, we’ll walk you through the step-by-step process of making your own acrylic table numbers.
Materials Needed:
- Acrylic sheets
- Acrylic paint
- Paintbrushes
- Number stencils
- X-Acto knife
- Ruler
- Scissors
- Masking tape
- Clear adhesive dots
Step 1: Prepare the Acrylic Sheets
Start by measuring and cutting your acrylic sheets into the desired size for your table numbers. You can use a ruler and an X-Acto knife to ensure clean and precise cuts. It’s recommended to choose a thickness that is sturdy enough to stand on its own.
Step 2: Apply the Base Coat
Next, lay your acrylic sheets on a protected surface and apply a base coat of acrylic paint using a paintbrush. Choose a color that complements your event’s theme or décor. Allow the paint to dry completely before proceeding to the next step.
Step 3: Add the Numbers
Using number stencils, position them on top of the painted acrylic sheet. Secure the stencils in place with masking tape to prevent any movement. Dip your paintbrush into the desired color of acrylic paint and carefully fill in the stencil with paint. Remove the stencil and allow the paint to dry.
Step 4: Finishing Touches
Once the paint is dry, you can add any additional design elements or embellishments to your acrylic table numbers. This could include metallic accents, glitter, or even decals. Get creative and make the table numbers uniquely yours.
Step 5: Display the Table Numbers
To display the acrylic table numbers, attach clear adhesive dots to the bottom corners of each number. This will allow the numbers to stand upright on tables without toppling over. You can also consider placing them in decorative holders or stands for added elegance.
In summary, making acrylic table numbers is a simple and fun DIY project that adds a touch of sophistication to any event or wedding. With just a few materials and some creativity, you can create personalized and eye-catching table numbers that will impress your guests. So why not give it a try and make your next event even more memorable with these stylish acrylic table numbers?
Creative Ideas for Designing Acrylic Table Numbers
When it comes to planning a wedding or any special event, attention to detail is key. One aspect that often gets overlooked but can make a big impact is the design of table numbers. Gone are the days of plain, boring table numbers. Now, couples and event planners are getting creative and opting for unique and eye-catching designs. One material that has become increasingly popular for table numbers is acrylic. Its sleek and modern look adds a touch of elegance to any table. If you’re looking for some creative ideas for designing acrylic table numbers, look no further. We’ve compiled a list of unique and stylish options that will surely impress your guests.
1. Calligraphy
Calligraphy is a timeless art form that adds an elegant touch to any wedding or event. Consider hiring a calligrapher to handwrite each table number onto a piece of acrylic. The delicate and intricate strokes of the calligraphy will create a stunning visual effect. You can choose to have the numbers written in a classic script or go for a more modern and whimsical style. Either way, calligraphy is sure to make a statement.
2. Laser Cut Designs
Laser cutting is a technique that allows for intricate and detailed designs to be etched onto acrylic. This opens up endless possibilities for unique table number designs. From intricate lace patterns to geometric shapes, laser cutting can create a one-of-a-kind look. Consider incorporating elements that tie into your overall wedding theme, such as flowers, vines, or even the couple’s initials. Laser cut acrylic table numbers will surely wow your guests.
3. Transparent Acrylic with Printed Overlay
If you want a more subtle and understated look, you can opt for transparent acrylic table numbers with a printed overlay. This allows you to incorporate your wedding colors or theme into the design. You can choose a floral pattern, a geometric design, or even a custom monogram. The overlay can be printed on cardstock or vellum and attached to the acrylic using adhesive or ribbon. This design option offers a delicate and romantic look.
4. Acrylic with Embedded Elements
To add a touch of whimsy and dimension to your table numbers, consider using acrylic with embedded elements. This can include dried flowers, leaves, or even small trinkets. The acrylic acts as a protective casing for the embedded elements, creating a unique and eye-catching design. This option works particularly well for outdoor or garden-themed weddings.
5. Backlit Acrylic
If you want to create a truly stunning visual effect, consider using backlit acrylic table numbers. This involves placing LED lights behind the acrylic, which illuminates the numbers and creates a soft and romantic glow. Backlit acrylic table numbers are perfect for evening weddings or events with a modern and glamorous theme.
In summary, designing acrylic table numbers provides a great opportunity to get creative and add a unique touch to your wedding or event. Whether you opt for calligraphy, laser cut designs, transparent overlays, embedded elements, or backlit acrylic, your table numbers are sure to make a statement. Choose a design that reflects your personal style and ties into your overall theme. Remember, the table numbers are not just functional but also serve as a decorative element that can enhance the overall ambiance of your celebration.
Tips for painting and lettering acrylic table numbers
Painting and lettering acrylic table numbers can be a fun and creative way to add a personalized touch to your event decor. Whether you’re planning a wedding, a birthday party, or a corporate event, acrylic table numbers can elevate the overall aesthetic and make your tables stand out. Here are some tips to help you achieve professional-looking results:
- Choose the right acrylic: When selecting acrylic sheets for your table numbers, opt for a smooth and clear surface. This will ensure that the paint adheres well and gives you a clean and crisp finish. Matte or frosted acrylic can also add a unique touch if you prefer a more subtle look.
- Prepare the surface: Before you start painting, it’s important to clean the acrylic sheets thoroughly. Use a non-abrasive cleaner or mild soap and water to remove any dust or fingerprints. Once the surface is clean, dry it with a lint-free cloth to avoid any water spots.
- Use the right brushes: When it comes to painting and lettering on acrylic, using the right brushes is crucial. Synthetic brushes with firm bristles, such as nylon or taklon, work well for acrylic paint. Choose brushes with a fine tip for lettering and smaller details, and wider brushes for filling in larger areas.
- Practice your lettering: If you’re planning to add hand-lettering to your table numbers, it’s a good idea to practice beforehand. Use a pencil to sketch out your design on paper or practice on a spare piece of acrylic first. This will help you refine your technique and ensure that your lettering looks polished and consistent.
- Use a stencil: If you’re not confident in your hand-lettering skills, using a stencil can be a great way to achieve professional-looking results. There are plenty of pre-made stencils available in different fonts and styles. Simply secure the stencil to the acrylic sheet with painter’s tape and carefully fill in the letters with your chosen paint.
- Layer your paint: To achieve a vibrant and opaque finish, it’s often necessary to apply multiple layers of paint. Allow each layer to dry completely before adding the next one. This will prevent smudging and ensure that the colors pop. Use thin, even coats to minimize brushstrokes and achieve a smooth and professional look.
- Seal and protect: Once you’ve finished painting and lettering your acrylic table numbers, it’s essential to seal them to protect the design. Use a clear acrylic sealer or varnish that is specifically formulated for use on acrylic surfaces. Apply a thin, even coat and allow it to dry according to the manufacturer’s instructions.
- Display with care: Lastly, when it comes to displaying your acrylic table numbers, handle them with care to avoid scratching or smudging the paint. Consider using table number holders or easels to showcase them at your event. These can be found in various styles and materials to complement your overall decor.
In summary, painting and lettering acrylic table numbers can be a creative and rewarding DIY project. By following these tips, you can achieve professional-looking results that will enhance the visual appeal of your event tables. Remember to choose the right acrylic, prepare the surface properly, use the right brushes, practice your lettering, consider using stencils, layer your paint, seal and protect the design, and display the table numbers with care. With a little bit of patience and creativity, your acrylic table numbers will be a beautiful addition to your event decor.
Displaying and Using Acrylic Table Numbers at Events and Weddings
Acrylic table numbers have become a popular choice for event and wedding decor. These elegant and modern table numbers add a touch of sophistication to any occasion. In this section, we will explore the benefits of using acrylic table numbers and provide tips for effectively displaying them at events and weddings.
The Benefits of Acrylic Table Numbers
Acrylic table numbers offer several advantages over traditional paper or wooden table numbers. Here are some key benefits:
- Durability: Acrylic table numbers are made from a sturdy material that is resistant to breakage. Unlike paper table numbers that can easily tear or wooden table numbers that may splinter, acrylic table numbers are built to last.
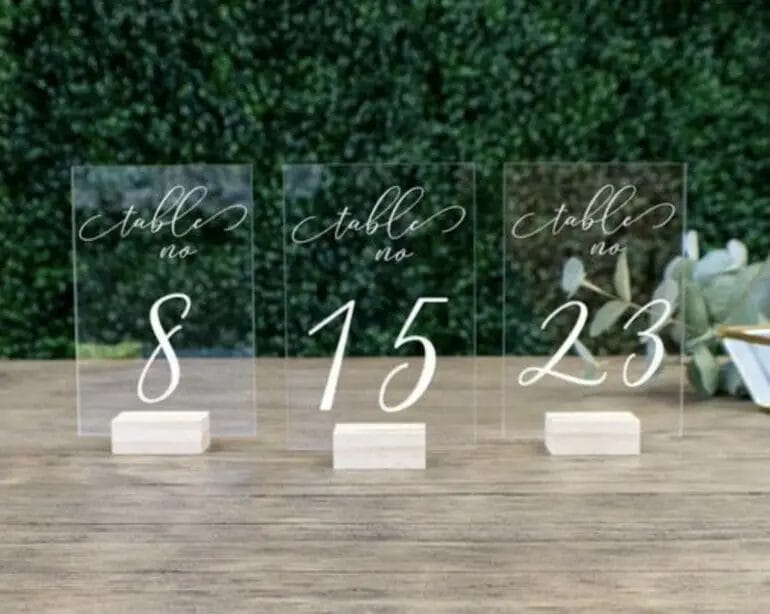
- Elegance: The transparent and sleek design of acrylic table numbers adds a touch of elegance to any table setting. They can easily complement a variety of decor styles, from modern to classic.
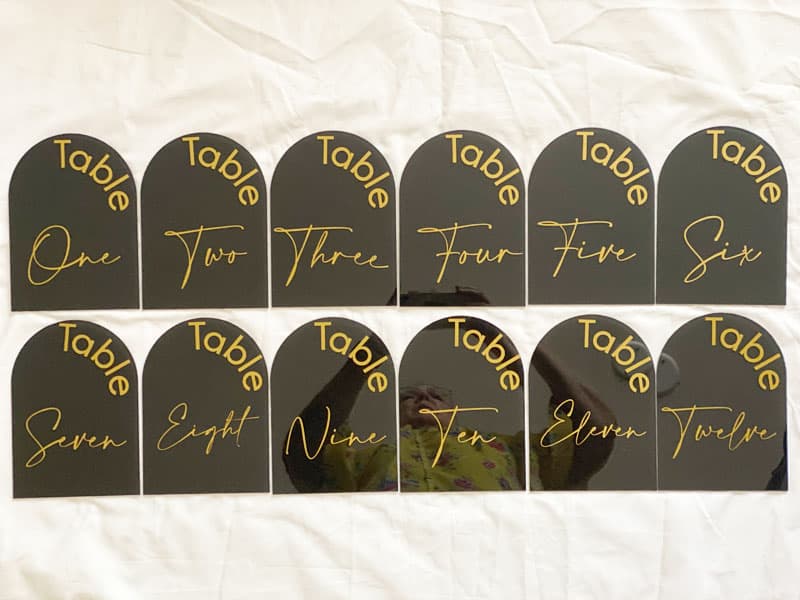
- Customizability: Acrylic table numbers can be customized to match the theme or color scheme of the event or wedding. They can be engraved or printed with different fonts and designs, allowing for a personalized touch.
- Visibility: Acrylic table numbers are designed to be highly visible, making it easier for guests to locate their assigned tables. The clear acrylic material ensures that the numbers stand out without obstructing the view of the table centerpiece.
- Reusable: Unlike disposable paper table numbers, acrylic table numbers can be reused for multiple events or weddings. This makes them a cost-effective choice in the long run.
Tips for Displaying Acrylic Table Numbers
Once you have chosen acrylic table numbers for your event or wedding, it’s important to display them in a way that enhances the overall aesthetic. Here are some tips to effectively showcase your acrylic table numbers:
- Placement: Position your acrylic table numbers in a prominent location on each table. It is recommended to place them in the center or towards the front of the table, where they are easily visible to guests.
- Table Stands: Utilize table stands or holders to elevate the acrylic table numbers. This not only adds dimension to the table setting but also ensures that the numbers are at an optimal height for guests to read.
- Lighting: Consider incorporating lighting elements to highlight the acrylic table numbers. LED lights or candles can be placed strategically to create a soft glow around the numbers, enhancing their visibility.
- Table Placement: Coordinate the placement of the acrylic table numbers with the overall seating arrangement. Ensure that each table number corresponds accurately with the assigned seating plan.
- Table Decor: Incorporate additional decor elements that complement the acrylic table numbers. This could include floral arrangements, table runners, or other decorative accents that enhance the overall visual appeal.
In summary, acrylic table numbers are a versatile and stylish choice for events and weddings. Their durability, elegance, and customizability make them an ideal option for various themes and settings. By following the tips provided for displaying acrylic table numbers, you can create a visually stunning and organized table arrangement that will impress your guests.
Frequently Asked Questions
1. How can I make acrylic table numbers?
To make acrylic table numbers, you’ll need acrylic sheets, a stencil or template of the numbers, a craft knife, and acrylic paint. Trace the stencil onto the acrylic sheet and carefully cut out the numbers using the craft knife. Paint the numbers with acrylic paint in your desired color, and allow them to dry. Once dry, you can place them on the tables as elegant and stylish table numbers.
2. What type of acrylic sheet should I use for making table numbers?
For making acrylic table numbers, it’s best to use a transparent or clear acrylic sheet with a thickness of around 1/8 inch. This will provide a clean and professional look to your table numbers and allow them to blend seamlessly with any tabletop decor.
3. Can I add additional embellishments to my acrylic table numbers?
Absolutely! You can personalize your acrylic table numbers by adding additional embellishments such as glitter, rhinestones, or metallic accents. Simply apply these embellishments using a strong adhesive or consider using vinyl decals for a more detailed design. Just remember to keep the overall design simple and legible for easy table identification.
Conclusion
In conclusion, creating your own acrylic table numbers is a fun and creative project that adds a unique touch to any event or celebration. By following the step-by-step instructions and using the right materials, you can easily make beautiful and personalized table numbers that will impress your guests. Whether you’re planning a wedding, a party, or any other special occasion, acrylic table numbers are a great way to add style and elegance to your decor. So don’t hesitate to give it a try and showcase your creativity with these eye-catching and customized table numbers. Get ready to wow your guests with your DIY skills!