
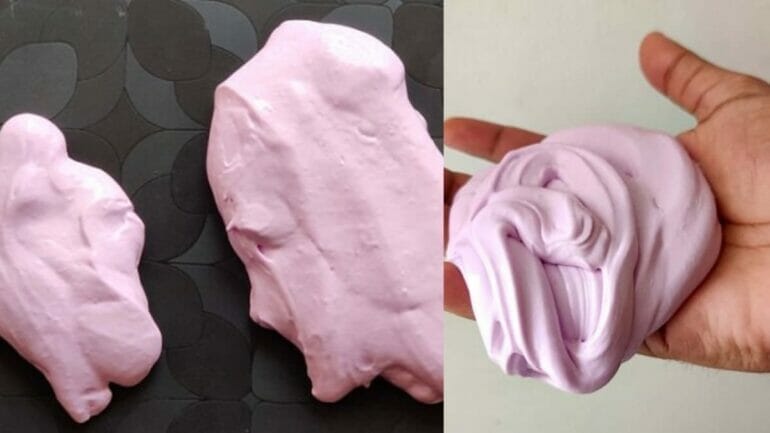
If you’ve ever encountered rubbery acrylic paint, you know how frustrating it can be. But fear not! With a few simple steps, you can easily fix this common issue and bring your paint back to its desired consistency. In this guide, we’ll explore the causes of rubbery acrylic paint and provide effective solutions to restore its smoothness. So, let’s dive in and learn how to fix rubbery acrylic paint in no time!
Easy Solutions to Restore Acrylic Paint’s Smoothness
Acrylic paint is a versatile medium used by artists and crafters alike. It offers vibrant colors, quick drying time, and ease of use. However, over time, acrylic paint can become thick and clumpy, making it difficult to achieve a smooth finish. If you find yourself facing this issue, don’t worry! There are several easy solutions to restore the smoothness of acrylic paint.
1. Thinning with Water
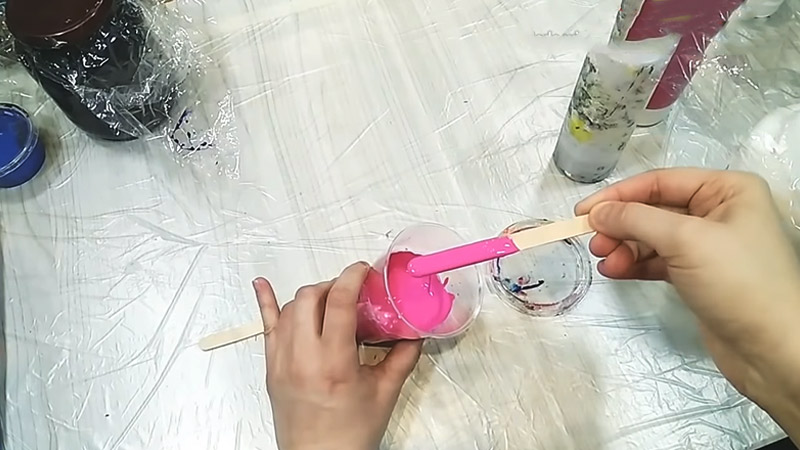
One of the simplest ways to restore the smoothness of acrylic paint is by thinning it with water. Start by adding a few drops of water to the dried-out paint and mix it thoroughly with a palette knife or brush. Gradually add more water until you achieve the desired consistency. Be cautious not to add too much water, as it can dilute the intensity of the color.
2. Using Acrylic Medium
If adding water doesn’t give you the desired result, try using an acrylic medium. Acrylic mediums are specifically designed to thin and extend the drying time of acrylic paint while maintaining its color intensity. There are different types of mediums available, such as gloss, matte, and gel mediums. Choose the one that suits your project and follow the instructions on the product for the correct ratio of medium to paint.
3. Mixing with Extenders
Another effective method to restore the smoothness of acrylic paint is by mixing it with extenders. Extenders are additives that increase the drying time of acrylic paint and improve its flow. They also reduce the risk of the paint drying too quickly, allowing you more time to work with it. Mix the extender with the clumpy paint using a palette knife or brush until you achieve a smooth consistency.
4. Straining the Paint
If your acrylic paint has dried out and formed lumps or clumps, you can strain it to remove any impurities. Place a fine mesh sieve or a nylon stocking over a clean container and slowly pour the clumpy paint through it. This will help remove any dried paint particles or debris and restore the smoothness of the paint. Once strained, you can proceed to thin it with water or mix it with mediums or extenders as needed.
5. Using a Paint Conditioner
If you frequently encounter issues with clumpy acrylic paint, consider using a paint conditioner. Paint conditioners are specially formulated products that improve the flow and workability of acrylic paint. Simply add a few drops of the conditioner to the paint, mix it well, and see the magic happen as the paint becomes smoother and easier to work with.
6. Proper Storage
Prevention is always better than cure, so proper paint storage is essential to maintain the smoothness of acrylic paint. Make sure to close the paint containers tightly after use to prevent air exposure and keep them in a cool, dry place. Avoid storing paint in extreme temperatures, as it can affect the consistency and quality of the paint.
In summary, if your acrylic paint has lost its smoothness, there are several easy solutions to restore it. Thinning with water, using acrylic mediums or extenders, straining the paint, using a paint conditioner, and proper storage are all effective methods to revive clumpy acrylic paint. By following these steps, you can ensure that your acrylic paint remains smooth and easy to work with, allowing you to create beautiful artworks with ease.
Expert Tips for Fixing Rubbery Acrylic Paint
Acrylic paint is a popular choice among artists due to its versatility and fast-drying properties. However, sometimes acrylic paint can become rubbery and lose its desired consistency. This can be frustrating for artists who want to achieve a smooth and even finish. Fortunately, there are several expert tips and techniques that can help you fix rubbery acrylic paint and restore its original texture. In this section, we will explore some of these helpful tips.
1. Add Water or Acrylic Medium
If your acrylic paint has become rubbery, one of the first things you can try is to add water or acrylic medium to the paint. Start by adding a small amount of water or medium to the paint and mix it thoroughly. Gradually add more water or medium until you achieve the desired consistency. Remember to mix well after each addition to ensure that the paint is properly blended.
Adding water or acrylic medium can help to soften the rubbery paint and make it more workable. However, it is important to note that adding too much water or medium can cause the paint to become too thin and lose its opacity. Therefore, it is recommended to add small amounts at a time and test the consistency as you go.
2. Use a Hairdryer
If you are in a hurry and need to fix rubbery acrylic paint quickly, you can use a hairdryer to speed up the drying process. Set your hairdryer to a low or medium heat setting and hold it at a safe distance from the painted surface. Move the hairdryer back and forth over the paint, making sure to keep it constantly moving to avoid overheating or causing any damage.
The heat from the hairdryer will help to soften the rubbery paint and make it more pliable. As the paint softens, you can manipulate it with a brush or palette knife to achieve the desired texture. However, be cautious not to apply too much heat or hold the hairdryer too close to the paint, as this can cause the paint to bubble or burn.
3. Use a Palette Knife
If your rubbery acrylic paint is too thick to work with a brush, you can try using a palette knife to manipulate the paint. A palette knife has a flat, flexible blade that can be used to scrape, lift, and spread paint. Start by gently scraping off any rubbery or uneven areas of the paint using the palette knife. Then, use the flat side of the palette knife to spread and blend the paint until you achieve a smoother consistency.
Using a palette knife can give you more control over the paint and allow you to create interesting textures and effects. It is important to work slowly and carefully when using a palette knife to avoid damaging the underlying layers of paint or creating excessive texture.
4. Store Paint Properly
Prevention is always better than cure when it comes to maintaining the quality of acrylic paint. To prevent your acrylic paint from becoming rubbery in the first place, it is essential to store it properly. Make sure to tightly seal the paint containers to prevent air from entering and drying out the paint. Store the containers in a cool and dry place, away from direct sunlight and extreme temperature fluctuations.
Additionally, it is helpful to periodically stir the paint in the container to ensure that the pigments and binders are well mixed. This will help to prevent separation and maintain the consistency of the paint over time.
5. Experiment with Retarders or Extenders
If you frequently encounter issues with rubbery acrylic paint, you can try using retarders or extenders. These additives are specifically designed to slow down the drying time of acrylic paint and keep it in a workable state for longer periods. By adding a small amount of retarder or extender to your paint, you can extend the drying time and reduce the chances of the paint becoming rubbery.
Retarders and extenders can be mixed directly into the paint or applied over the painted surface. Follow the manufacturer’s instructions and guidelines when using these additives to ensure the best results.
Summary
Rubbery acrylic paint can be a frustrating issue for artists, but with the right techniques, it can be fixed. Adding water or acrylic medium, using a hairdryer, employing a palette knife, storing paint properly, and experimenting with retarders or extenders are all effective ways to address rubbery acrylic paint. Remember to always test these techniques on a small area before applying them to your entire painting. With a little patience and experimentation, you can restore the desired consistency to your acrylic paint

Effective Techniques to Revive Dry and Rubbery Acrylic Paint
Acrylic paint is a versatile and popular medium used by artists across various disciplines. It dries quickly, allowing artists to work efficiently, but sometimes it can dry out and become rubbery or unusable. However, there are several effective techniques that can help revive dry and rubbery acrylic paint, saving you time and money.
1. Adding Water
One of the simplest ways to revive dry acrylic paint is by adding water to it. Start by spritzing a fine mist of water onto the dried paint and gently mix it with a palette knife or brush. Gradually add more water if needed until the paint reaches the desired consistency. Be cautious not to add too much water, as it can dilute the pigment and affect the color intensity.
2. Using Acrylic Mediums
Acrylic mediums are specially formulated to enhance the properties of acrylic paint. They come in various types, such as flow improvers, extenders, and retarders. Adding a small amount of the appropriate medium to dry acrylic paint can help restore its flow and workability. Simply mix the medium into the paint until it reaches a smooth consistency.
3. Mixing with Fresh Paint
If your dry acrylic paint is too far gone to be revived on its own, you can try mixing it with fresh paint. Squeeze out a small amount of fresh paint onto your palette and gradually mix in the dry paint. Keep blending until the mixture becomes homogeneous and reaches the desired consistency. This technique can help salvage partially dried paint and prevent waste.
4. Using a Moist Palette
A moist palette is an excellent tool to prevent acrylic paint from drying out during your painting session. It consists of a palette with a lid or cover and a sponge or paper towel underneath. The sponge or paper towel is soaked in water, creating a humid environment that keeps the paint moist for an extended period. By using a moist palette, you can minimize paint wastage and maintain the workability of your acrylics.
5. Storing Paint Properly
Prevention is always better than cure. To avoid your acrylic paint from drying out and becoming rubbery, it’s essential to store it properly. Ensure that the paint tubes or containers are tightly sealed after each use. Store them in a cool, dry place, away from direct sunlight and extreme temperatures. Additionally, periodically check your paint collection for any dried-up tubes and discard them to prevent contamination.
6. Softening with Heat
In some cases, when acrylic paint has dried completely, you can soften it by applying heat. Use a hairdryer on a low setting or a heat gun at a safe distance to gently warm the surface of the paint. The heat softens the dried acrylic, making it more malleable and workable. However, be cautious not to overheat the paint, as it can lead to bubbling or burning.
In summary, if you find yourself with dry and rubbery acrylic paint, there are several effective techniques you can use to revive it. Adding water, using acrylic mediums, mixing with fresh paint, utilizing a moist palette, storing paint properly, and softening with heat are all viable methods to restore the paint’s workability. By employing these techniques, you can save your paint and continue creating beautiful art.
Step-by-Step Guide to Salvage Rubbery Acrylic Paint
Acrylic paint is a versatile and popular medium used by artists and hobbyists alike. However, there may be times when the paint becomes rubbery and difficult to work with. This can be frustrating, but fear not! With the right techniques, you can salvage your rubbery acrylic paint and bring it back to its original, usable form. In this guide, we will take you through a step-by-step process to help you salvage your rubbery acrylic paint effectively.
Step 1: Identify the Problem
The first step in salvaging your rubbery acrylic paint is to assess the extent of the issue. Is the entire container of paint rubbery, or is it only a small section? This will help determine the best course of action for revival.
Step 2: Soften the Paint
Once you have identified the problem areas, the next step is to soften the rubbery paint. There are a few methods you can use:
- Method 1: Add Water – Gradually add a small amount of water to the paint. Use a palette knife or stirring stick to mix the water into the paint until it reaches a smoother consistency. Be cautious not to add too much water, as this can dilute the paint and affect its color vibrancy.
- Method 2: Use Acrylic Medium – Another option is to use an acrylic medium, such as a paint thinner or flow improver. Follow the instructions on the medium’s packaging, as different products may have different ratios for mixing with paint.
- Method 3: Heat the Paint – If the rubbery paint is only a small section, you can try heating it to soften it. Use a hairdryer on low heat or a heat gun at a safe distance to gently warm the affected area. Be cautious not to overheat the paint, as this can cause it to dry out or become brittle.
Step 3: Mix Thoroughly
Once you have softened the rubbery paint, it is essential to mix it thoroughly to ensure a consistent texture. Use a palette knife or stirring stick to blend the paint, making sure to incorporate any added water or acrylic medium evenly.
Step 4: Test and Adjust
After mixing the paint, it is crucial to test its consistency and quality. Apply a small amount of the paint to a test surface, such as a scrap piece of canvas or paper. Observe how the paint spreads and adheres. If it is still too rubbery or unusable, repeat steps 2 and 3 until you achieve the desired results.
Step 5: Store Properly
Once you have successfully salvaged your rubbery acrylic paint, it is essential to store it properly to prevent future issues. Ensure the paint container is tightly sealed to minimize air exposure, as this can lead to the paint drying out or becoming rubbery again. Store the paint in a cool, dry place away from direct sunlight.
In summary, salvaging rubbery acrylic paint is a manageable task with the right techniques. By identifying the problem, softening the paint, mixing thoroughly, testing, and storing properly, you can bring your rubbery acrylic paint back to life and continue creating beautiful artwork.
FAQs
How can I fix rubbery acrylic paint?
If your acrylic paint has become rubbery, you can try adding a small amount of water or acrylic medium to it to restore its consistency. Mix it well and test on a small area before applying it to your artwork.
What causes acrylic paint to become rubbery?
Acrylic paint can become rubbery due to factors like exposure to extreme temperatures, improper storage, or the use of expired or low-quality paint. It can also happen if the paint has been over-thinned or if too much water has been added to it.
How can I prevent acrylic paint from becoming rubbery?
To prevent acrylic paint from becoming rubbery, ensure proper storage by tightly sealing the paint containers and keeping them in a cool, dry place. Avoid adding excessive amounts of water or acrylic medium to the paint, and use high-quality, fresh paint to ensure the best results.
Conclusion
In conclusion, fixing rubbery acrylic paint can be a straightforward process with a few simple steps. By identifying the cause of the rubbery texture, whether it’s due to excessive water content, improper paint mixture, or environmental factors, you can effectively address the issue. Adjusting the paint consistency by adding more water or using a medium can help achieve the desired texture. Additionally, ensuring proper ventilation and temperature control during painting and drying can prevent future rubbery paint problems. Remember, practice and experimentation are key when working with acrylic paint to achieve the desired results. With these tips, you’ll be able to transform your rubbery acrylic paint into a smooth and professional finish.