
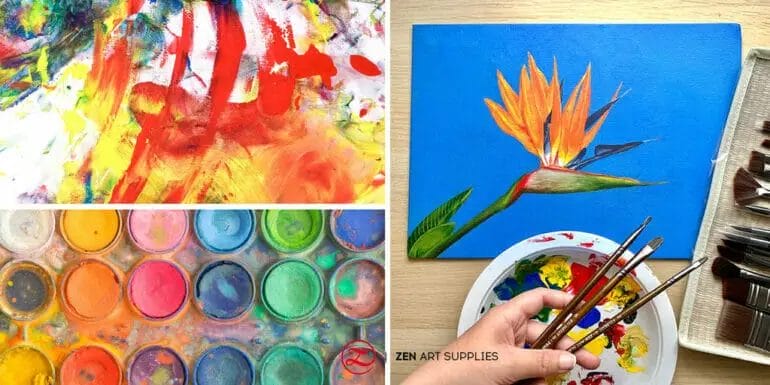
Looking to transform your tempera paint into acrylic? Look no further! Whether you want to enhance the durability and longevity of your work or simply experiment with a new medium, converting tempera paint into acrylic is a great option. By following a few simple steps, you can achieve the desired consistency and properties of acrylic paint while retaining the vibrant colors of tempera. Let’s dive in and discover how to make this creative transformation!

Benefits of Converting Tempera Paint into Acrylic
Acrylic paint is a versatile and popular medium for artists. It offers a wide range of benefits that make it a preferred choice over other types of paint, including tempera. While tempera paint has its own advantages, converting it into acrylic can enhance its properties and open up new creative possibilities. In this section, we will explore the benefits of converting tempera paint into acrylic.
1. Improved Durability
One of the main advantages of acrylic paint is its durability. Acrylic paints are known for their long-lasting nature and resistance to cracking, peeling, and fading. By converting tempera paint into acrylic, you can enhance the durability of your artwork, making it more resistant to damage over time.
2. Versatility
Acrylic paint offers greater versatility compared to tempera. It can be used on a wide variety of surfaces, including canvas, wood, paper, and even glass. This opens up a whole new range of possibilities for artists, allowing them to experiment with different techniques and create diverse artworks.
3. Quick Drying Time
Unlike tempera paint, which can take a while to dry, acrylic paint dries quickly. This fast drying time allows artists to work more efficiently and layer their colors without waiting for extended periods. It also reduces the risk of smudging or smearing the artwork during the creative process.
4. Transparency and Opacity
Acrylic paint offers the advantage of being both transparent and opaque, depending on the artist’s preference. It can be thinned with water to create transparent washes or used straight from the tube for opaque coverage. This flexibility adds depth and dimension to the artwork.
5. Color Vibrancy
Acrylic paint is known for its vibrant and intense colors. By converting tempera paint into acrylic, artists can achieve richer and more vibrant hues. Acrylics also retain their color over time, ensuring that your artwork stays as vibrant as the day it was created.
6. Water Resistance
Once dried, acrylic paint becomes water-resistant, making it an ideal choice for outdoor or mixed media artworks. It can withstand light exposure to moisture without losing its integrity, making it suitable for a wide range of applications.
7. Mixing and Layering
Acrylic paint allows for easy mixing and layering of colors. Artists can blend different shades together to create custom colors or layer multiple coats for added depth and texture. This versatility gives artists greater control over their artwork and allows for more creative experimentation.
In summary, converting tempera paint into acrylic offers a range of benefits for artists. It improves the durability of the artwork, provides greater versatility in terms of surfaces, offers a quick drying time, allows for transparency and opacity, enhances color vibrancy, provides water resistance, and enables easy mixing and layering of colors. By leveraging these advantages, artists can take their artwork to new heights and explore new possibilities in their creative journey.
Step-by-step Guide to Turning Tempera Paint into Acrylic
Tempera paint is a popular choice for many artists due to its vibrant colors and smooth finish. However, if you’re looking for a more durable and long-lasting option, you might consider turning your tempera paint into acrylic paint. Acrylic paint is known for its versatility and ability to adhere to various surfaces. In this guide, we will walk you through the step-by-step process of transforming your tempera paint into acrylic paint.
Materials You’ll Need:
- Tempera paint
- Acrylic medium
- Palette knife
- Mixing palette or container
- Brushes
- Water
Step 1: Prepare Your Workspace
Before you begin the process, it’s important to set up a clean and organized workspace. Lay down a protective covering on your table to prevent any paint spills or stains. Gather all the materials you’ll need and arrange them within easy reach.
Step 2: Mix the Tempera Paint and Acrylic Medium
Take your tempera paint and squeeze out a small amount onto your mixing palette or container. Next, add an equal amount of acrylic medium to the paint. The acrylic medium will act as a binder, giving the paint a more acrylic-like consistency and enhancing its adhesive properties. Use a palette knife to thoroughly mix the paint and medium together. Make sure the mixture is well blended and free of any lumps.
Step 3: Adjust the Consistency
Once the tempera paint and acrylic medium are mixed, you may notice that the consistency is still too thick or thin for your liking. To adjust the consistency, you can add a small amount of water to thin the mixture or additional acrylic medium to thicken it. Gradually add these additives while continuously mixing until you achieve your desired consistency.
Step 4: Test the Paint
Before using the transformed paint on your artwork, it’s a good idea to conduct a small test. Apply a small amount of the paint onto a piece of scrap paper or canvas and allow it to dry. This will give you a sense of how the paint behaves and dries. If needed, you can make further adjustments to the consistency or color by repeating steps 2 and 3.
Step 5: Apply the Transformed Paint
Now that your transformed paint is ready, you can begin using it in your artwork. Apply the paint onto your chosen surface using brushes or other preferred tools. You’ll find that the acrylic properties of the paint allow for easier layering and blending. Remember to clean your brushes promptly to prevent the paint from drying and damaging the bristles.
Step 6: Allow the Artwork to Dry
After completing your artwork, allow it to fully dry before applying any additional layers or varnishing. Acrylic paint typically dries faster than tempera paint, so be mindful of the drying time and avoid smudging the paint. Once the artwork is dry, you can further enhance its durability and finish by applying a protective varnish.
In summary, turning tempera paint into acrylic paint is a simple process that can enhance the durability and versatility of your artwork. By following these step-by-step instructions, you’ll be able to transform your tempera paint into a more adhesive and long-lasting acrylic paint.
Tips for Achieving the Best Results when Converting Tempera Paint into Acrylic
Converting tempera paint into acrylic can be a great way to expand your artistic capabilities. Acrylic paint offers a wide range of possibilities, including vibrant colors, versatility, and durability. If you are looking to convert your tempera paint into acrylic, here are some tips to help you achieve the best results:
1. Start with High-Quality Tempera Paint
The first step in converting tempera paint into acrylic is to ensure that you are starting with high-quality tempera paint. Look for paints that have a smooth consistency, rich pigmentation, and good coverage. This will make the conversion process much easier and ensure that you achieve the desired results.
2. Gather the Necessary Supplies
Before you begin the conversion process, gather all the necessary supplies. You will need acrylic medium, a palette knife, a mixing palette, and brushes. The acrylic medium is essential as it helps to bind the tempera paint and give it the properties of acrylic paint.
3. Mix the Tempera Paint with Acrylic Medium
To convert tempera paint into acrylic, start by squeezing some tempera paint onto a mixing palette. Use a palette knife to mix a small amount of acrylic medium with the tempera paint. The ratio of tempera paint to acrylic medium can vary depending on the desired consistency and opacity. Experiment with different ratios to find the one that works best for your needs.
4. Test the Mixture
Once you have mixed the tempera paint with the acrylic medium, it’s important to test the mixture before using it on your artwork. Apply a small amount of the mixture onto a scrap piece of paper or canvas and observe how it behaves. Look for qualities such as drying time, coverage, and color intensity. Make any necessary adjustments to the mixture until you are satisfied with the results.
5. Apply the Mixture to Your Artwork
Once you have achieved the desired mixture, you can start applying it to your artwork. Use brushes or other painting tools to apply the converted paint onto the surface. Acrylic paint dries quickly, so work in small sections to ensure that the paint doesn’t dry before you have finished applying it.
6. Allow Sufficient Drying Time
After you have finished applying the converted paint, allow sufficient drying time. Acrylic paint dries faster than tempera paint, so it’s important to give it enough time to fully dry. This will help prevent smudging or damage to your artwork.
7. Clean Your Brushes and Tools
After you have completed your artwork, don’t forget to clean your brushes and tools. Acrylic paint can dry quickly and become difficult to remove once it dries. Use soap and water to clean your brushes thoroughly, ensuring that all the paint is removed.
8. Experiment and Have Fun
Converting tempera paint into acrylic is a creative process that allows you to explore new possibilities. Don’t be afraid to experiment with different techniques, ratios, and colors. Have fun and enjoy the journey of converting and creating with your newly transformed acrylic paint.
In summary, converting tempera paint into acrylic can open up a world of artistic possibilities. By starting with high-quality tempera paint, using the right supplies, and experimenting with different ratios, you can achieve the best results. Remember to test the mixture, apply it to your artwork, allow sufficient drying time, and clean your brushes properly. Most importantly, have fun and enjoy the process of converting and creating with your transformed acrylic paint.
Recommended Tools and Materials for Converting Tempera Paint into Acrylic
Converting tempera paint into acrylic allows artists to enjoy the benefits of acrylic paint without having to invest in a new set of paints. This process involves adding certain materials to tempera paint to give it the properties of acrylic. If you’re interested in exploring this technique, here are the recommended tools and materials you’ll need:
1. Tempera Paint
Start with a good quality tempera paint set. Look for one that offers a wide range of colors and is known for its vibrant pigments. This will serve as the base for your acrylic conversion.
2. Acrylic Polymer Medium
An acrylic polymer medium is a crucial ingredient for converting tempera paint into acrylic. This medium helps bind the pigments together and provides the necessary adhesive properties. Choose a medium that is compatible with both tempera and acrylic paints.
3. Palette Knife
A palette knife is a handy tool for mixing the tempera paint and acrylic polymer medium together. Its flat, flexible blade allows for easy blending and ensures a smooth and consistent texture.
4. Mixing Palette or Surface
You’ll need a suitable surface to mix your tempera and acrylic medium. A palette made of glass, acrylic, or ceramic works well, as these materials are easy to clean and won’t absorb the paint.
5. Brushes
Acrylic brushes are recommended for applying the converted paint. These brushes have synthetic bristles that are durable and can withstand the more viscous nature of acrylic paint. Make sure to have a variety of brush sizes for different painting techniques.
6. Water
Water is essential for diluting the tempera paint and achieving the desired consistency. Use water sparingly to avoid over-thinning the paint, as this may affect its adhesive properties. A spray bottle can be helpful for adding small amounts of water as needed.
7. Sealant or Varnish
Once your artwork is complete, it’s important to apply a sealant or varnish to protect the paint and give it a glossy or matte finish. Choose a sealant that is compatible with acrylic paints to ensure proper adhesion and longevity.
8. Protective Gear
When working with any type of paint, it’s important to protect yourself. Wear gloves to prevent direct contact with the paint and use a smock or apron to shield your clothing. Additionally, work in a well-ventilated area to minimize exposure to fumes.
By gathering these recommended tools and materials, you’ll have everything you need to successfully convert your tempera paint into acrylic. Remember to follow the manufacturer’s instructions for the specific products you choose and experiment with different ratios of tempera paint to acrylic medium to achieve the desired consistency and finish. Happy painting!
Creative Techniques to Try with Converted Tempera Paint Acrylics
Acrylic paints are known for their versatility and vibrant colors. They are considered a staple in any artist’s toolbox. However, if you’re looking to experiment with different techniques and textures, consider trying out converted tempera paint acrylics. This unique medium offers a whole new world of creative possibilities. In this section, we will explore some exciting techniques that you can try with converted tempera paint acrylics.
1. Sgraffito
Sgraffito is a technique that involves scratching away layers of paint to reveal the underlying colors or create intricate designs. With converted tempera paint acrylics, you can achieve stunning sgraffito effects due to their creamy consistency. Apply a thick layer of paint on your canvas or surface, and let it dry completely. Then, using a sharp tool like a palette knife or a toothpick, gently scrape away the top layers of paint to create lines, patterns, or textures. Experiment with different pressure and angles to achieve unique results.
2. Pouring and Dripping
Converted tempera paint acrylics can be used to create mesmerizing pouring and dripping effects. Mix your paint with a pouring medium or water to achieve a fluid consistency. Pour the paint directly onto your canvas or surface and let it move and blend organically. Tilt the canvas or use a palette knife to guide the paint’s flow. You can also create dripping effects by applying the paint at the top of the canvas and allowing it to drip down naturally. This technique creates dynamic and abstract compositions.
3. Textured Impasto
If you enjoy working with thick, textured surfaces, converted tempera paint acrylics are perfect for creating impasto effects. Build up layers of paint using a palette knife or a brush, applying it in a thick and chunky manner. As the paint dries, it will retain its raised texture, adding depth and dimension to your artwork. You can also experiment with mixing different colors to create interesting color combinations and visual interest.
4. Collage and Mixed Media
Converted tempera paint acrylics can be combined with other materials to create collages and mixed media artworks. Use a gel medium to adhere various elements such as paper, fabric, or found objects onto your canvas or surface. Then, apply the converted tempera paint acrylics over the collage, allowing the different textures and layers to interact with the paint. This technique adds depth and complexity to your artwork, creating a visually captivating piece.
5. Monoprinting
Monoprinting is a printmaking technique that allows for unique, one-of-a-kind prints. With converted tempera paint acrylics, you can easily create monoprints without the need for a printing press. Start by applying a layer of paint onto a smooth surface, such as a glass or acrylic sheet. Place a piece of paper on top of the painted surface and gently press down. Peel the paper off to reveal a beautiful, textured print. Experiment with different colors and layering techniques to achieve captivating results.
6. Stenciling
Stenciling is a technique that allows you to create precise and intricate designs. With converted tempera paint acrylics, you can achieve crisp and vibrant stenciled patterns. Start by cutting out a stencil design from a stencil sheet or cardboard. Secure the stencil onto your canvas or surface and apply the paint using a sponge or brush. Peel off the stencil to reveal the design. You can layer multiple stencils or combine them with other techniques to create visually stunning compositions.
These are just a few of the many creative techniques you can try with converted tempera paint acrylics. Don’t be afraid to experiment and push the boundaries of your artistic expression. With this unique medium, you can create truly captivating and vibrant artworks that will stand out.
FAQs
Q: How can I turn tempera paint into acrylic paint?
To turn tempera paint into acrylic paint, you can mix the tempera paint with a little bit of acrylic medium or acrylic binder. This will help the paint become more durable and have a longer-lasting finish. Adjust the consistency and properties to your desired results.
Q: Can I use tempera paint on canvas?
Tempera paint is not typically recommended for canvas as it is water-based and may not adhere well to the surface. It is better suited for paper, cardboard, or wood. If you want to use tempera paint on canvas, it is advisable to prime the canvas with a suitable primer or gesso beforehand.
Q: How do I clean tempera paint brushes?
To clean tempera paint brushes, rinse them with warm water immediately after use. Use a mild soap or brush cleaner to remove any remaining paint. Gently reshape the bristles and let the brushes air dry. Avoid leaving them submerged in water for too long as it may damage the bristles.
Conclusion:
In conclusion, transforming tempera paint into acrylic is a simple process that can enhance your artistic capabilities. By adding a few key ingredients such as acrylic medium and a binder like gel medium, you can achieve the desired consistency and durability of acrylic paint. Experimenting with different ratios and layers will help you achieve vibrant and long-lasting artworks. Additionally, utilizing acrylic varnish as a final protective layer will ensure the longevity of your creations. With this transformation, you will have the versatility and vibrancy of acrylic paint while still retaining the ease of use and affordability of tempera. So go ahead and unleash your creativity with this innovative technique.