
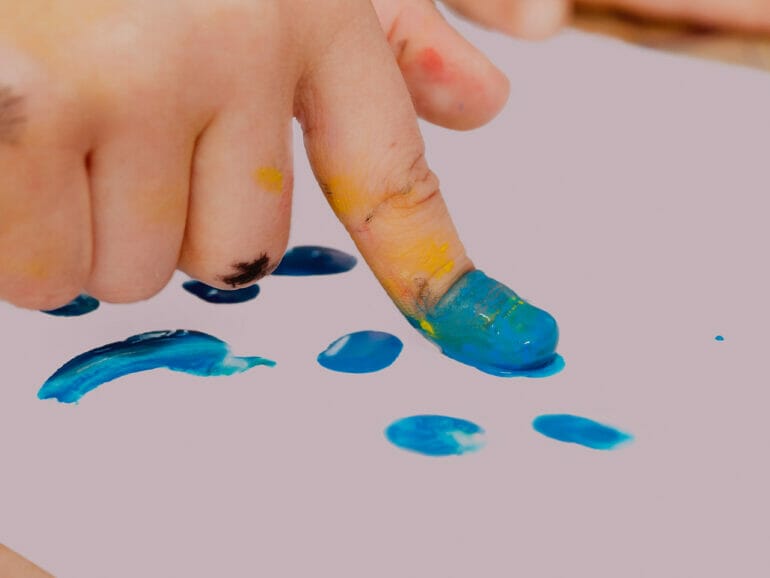
Yes, you can definitely finger paint with acrylic paint! Acrylic paint is a versatile medium that can be used with various painting techniques, including finger painting. It offers vibrant colors, dries quickly, and has a smooth consistency that makes it easy to apply with your fingers. Whether you’re a beginner or an experienced artist, finger painting with acrylics adds a fun and tactile element to your creative process. So go ahead, get your hands dirty, and unleash your artistic expression with acrylic finger painting!
Exploring the Creative Potential of Finger Painting with Acrylics
Finger painting is often associated with children and messy play, but it can also be a highly creative and expressive technique for artists of all ages. When combined with the vibrant and versatile medium of acrylic paint, finger painting can produce stunning and unique artworks. In this section, we will explore the creative potential of finger painting with acrylics, discussing various techniques, materials, and inspiration to help you unleash your creativity.
Materials for Finger Painting with Acrylics
Before diving into the world of finger painting with acrylics, it is essential to gather the right materials. Here are some key supplies you will need:
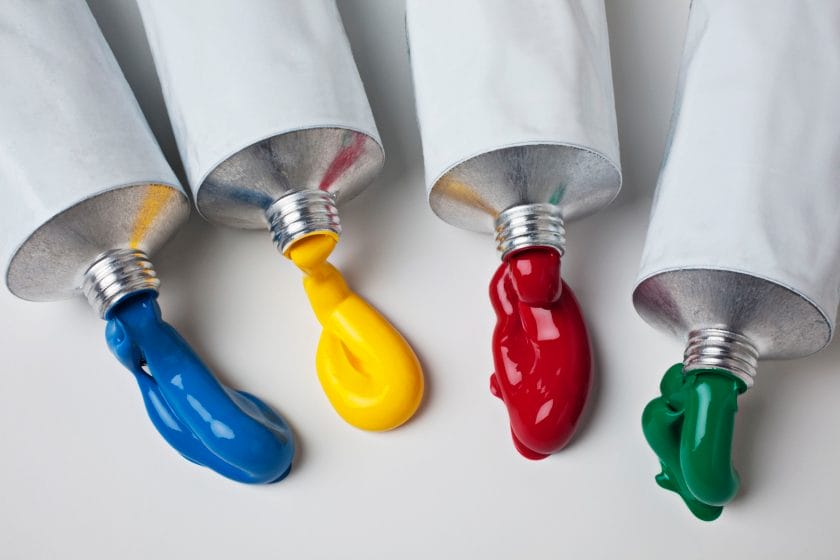
- Acrylic paints: Choose a selection of colors that inspire you. Acrylic paints are available in a wide range of hues and finishes, allowing for endless possibilities.
- Canvas or paper: Select a surface to paint on. Canvas is a popular choice for its durability, while paper provides a more affordable option.
- Palette or paint tray: Use a palette or paint tray to mix and blend your acrylic paints.
- Brushes and sponges: Although finger painting primarily involves using your hands, brushes and sponges can be handy for adding details or creating specific effects.
- Water and rag: Keep a container of water and a rag nearby to clean your hands and tools as needed.
Techniques for Finger Painting with Acrylics
Once you have gathered your materials, it’s time to explore various techniques for finger painting with acrylics. Here are some techniques to consider:
- Direct application: This technique involves applying acrylic paint directly to the canvas or paper using your fingers. Experiment with different pressures, strokes, and gestures to create texture and movement.
- Blending and layering: Acrylic paints can be easily blended and layered to achieve depth and dimension in your finger paintings. Use your fingers to blend colors together or apply multiple layers for a rich and complex composition.
- Impasto effects: Acrylics are known for their ability to create impasto effects, where paint is applied in thick, textured layers. Use your fingers to build up areas of texture and add tactile interest to your artwork.
- Mixed media approach: Combine finger painting with other art mediums, such as collage, stencils, or even traditional brushwork. This allows for even more creative possibilities and adds depth to your artwork.
Inspiration for Finger Painting with Acrylics
Looking for inspiration to kickstart your finger painting journey with acrylics? Here are some ideas:
- Nature: Capture the beauty of landscapes, flowers, or animals using your fingers to create organic shapes and textures.
- Abstract expressionism: Embrace the freedom of finger painting by exploring abstract compositions with bold colors and expressive strokes.
- Portraiture: Challenge yourself to create portraits using only your fingers, experimenting with different techniques to capture the essence of the subject.
- Emotions and moods: Use finger painting as a way to express your emotions and moods, using colors and gestures to convey feelings.
Remember, finger painting with acrylics is all about embracing spontaneity, experimenting with techniques, and enjoying the tactile nature of the medium. Don’t be afraid to get messy and let your creativity flow!
Tips and Tricks for Finger Painting with Acrylics
Finger painting with acrylics is a fun and creative way to explore your artistic side. Whether you are a beginner or an experienced artist, using your fingers to apply paint can add a unique texture and depth to your artwork. Here are some tips and tricks to help you get the most out of your finger painting experience with acrylics:
1. Start with a Proper Setup
Before you begin finger painting with acrylics, it’s important to set up your workspace properly. Cover your work surface with protective plastic or newspaper to prevent any accidental spills or stains. Have a water basin and paper towels nearby to clean your fingers and wipe off excess paint.
2. Choose the Right Acrylic Paints
When selecting acrylic paints for finger painting, choose ones that have a thick consistency. These paints will offer better coverage and allow you to create bold and textured strokes. You can also experiment with different brands and colors to achieve the desired effects in your artwork.
3. Prepare Your Canvas or Paper
Before applying the acrylic paint, make sure your canvas or paper is properly primed. Apply a layer of gesso or acrylic primer to create a smooth and even surface for your artwork. This will help the paint adhere better and prevent it from seeping through the paper.
4. Use Light Colors as a Base
Start your finger painting by applying a base layer of light colors to your canvas or paper. This will serve as a foundation for your artwork and help enhance the vibrancy of the subsequent layers. Light colors also allow you to easily adjust and blend other colors as you work.
5. Experiment with Techniques
One of the joys of finger painting with acrylics is the freedom to experiment with different techniques. Use your fingers to create various strokes, textures, and patterns on the canvas. You can try blending colors, smudging, stippling, or even scraping the paint with your fingertips for different effects.
6. Don’t Be Afraid to Mix Colors
Acrylic paints can be easily mixed to create new colors and shades. Use your fingers to blend different colors directly on the canvas or on a palette. This allows you to achieve unique color variations and create a sense of depth in your artwork.
7. Add Details with Brushes or Tools
While finger painting is primarily done using your fingers, you can also incorporate brushes or other tools to add finer details to your artwork. Use a small brush or a palette knife to create intricate lines, textures, or highlights that cannot be achieved with finger painting alone.
8. Experiment with Different Surfaces
Acrylic paints work well on various surfaces, not just canvas or paper. You can try finger painting on wood, fabric, or even rocks to create unique and textured art pieces. Each surface will offer different challenges and possibilities for your finger painting technique.
9. Layer and Build Texture
To create depth and texture in your finger painting, consider layering multiple coats of paint. Allow each layer to dry before applying the next one. This technique will add dimension and complexity to your artwork and make it visually interesting.
10. Have Fun and Be Open to Mistakes
Most importantly, remember to have fun and embrace the process of finger painting with acrylics. Don’t be afraid to make mistakes or try out new ideas. Sometimes the most unexpected results can lead to the most amazing artworks. Enjoy the tactile experience of finger painting and let your creativity flow.
By following these tips and tricks, you can enhance your finger painting skills and create beautiful and expressive artworks with acrylics. So, grab your paints, prepare your workspace, and let your fingers do the painting!
Creating Texture and Depth in Finger Paintings with Acrylics
When it comes to finger paintings, many people think of them as simple and flat. However, with the use of acrylic paints, you can bring texture and depth to your finger paintings, elevating them to a whole new level. In this section, we will explore various techniques and tips for creating texture and depth in finger paintings using acrylics.
1. Building Layers
One of the key techniques for adding texture and depth to your finger paintings is by building layers. Start with a base layer of paint and let it dry completely. Once dry, apply additional layers of paint, using your fingers to blend and mix the colors. This layering technique creates a sense of depth and visual interest in your painting.
2. Impasto Technique
The impasto technique involves applying thick layers of paint to the canvas, creating a textured surface. To achieve this technique in your finger paintings, use a generous amount of paint and apply it with bold strokes using your fingers. Experiment with different pressures and angles to create varying levels of texture and depth.
3. Palette Knife
Incorporating a palette knife into your finger painting process can help enhance texture and add dimension. Use the palette knife to apply paint directly to the canvas, or to create textured effects by scraping the paint already on the canvas. Combine the palette knife technique with finger blending for even more texture and depth.
4. Adding Textured Materials
To further enhance the texture in your finger paintings, consider incorporating textured materials into your artwork. This can include using materials such as sand, crushed shells, or even fabric to create interesting textures and patterns. Apply these materials onto the canvas using acrylic gel medium or a strong adhesive.
5. Experiment with Different Tools
Don’t limit yourself to just using your fingers. Experiment with different tools to create texture and depth in your finger paintings. This can include using brushes, sponges, or even unconventional objects like toothbrushes or combs. Each tool will create a unique texture and visual effect, allowing you to explore new possibilities in your artwork.
6. Layering Translucent Colors
Another technique to add depth to your finger paintings is by layering translucent colors. Start by applying a thin layer of paint and let it dry. Then, apply a second layer of a different color on top. The translucent layer will allow the underlying color to show through, creating a sense of depth and dimension in your artwork.
7. Incorporating Shadows and Highlights
To create depth in your finger paintings, pay attention to the play of light and shadows. Add highlights to areas that catch the light and shadows to areas that are in shade. This technique will give your artwork a three-dimensional appearance, making it visually engaging and captivating.
8. Experiment and Have Fun
Remember, the key to creating texture and depth in finger paintings with acrylics is to experiment and have fun. Don’t be afraid to try new techniques, mix colors, and explore different materials. The more you experiment, the more you will discover your unique style and create stunning finger paintings with texture and depth.
In summary, by using techniques such as building layers, impasto, palette knife, adding textured materials, experimenting with different tools, layering translucent colors, and incorporating shadows and highlights, you can bring texture and depth to your finger paintings with acrylics. So grab your paints, unleash your creativity, and let your fingers do the talking!
How to Seal and Preserve Your Finger Paintings Created with Acrylics
Finger painting with acrylics can be a fun and creative way to express yourself artistically. Whether you’re a professional artist or just enjoying the hobby, it’s important to know how to properly seal and preserve your finger paintings. This will help protect your artwork from damage and ensure its longevity.
1. Allow Sufficient Drying Time
Before sealing your finger paintings, it’s crucial to allow them to fully dry. Acrylic paints typically dry quickly, but thicker layers or multiple layers may require more drying time. Check the manufacturer’s instructions for the specific drying time of your acrylic paints.
2. Choose the Right Sealer
There are various sealers available in the market, but it’s essential to choose the one that is compatible with acrylic paints. Look for a sealer specifically designed for acrylic paintings, preferably one that is archival and non-yellowing. You can find these sealers in art supply stores or online.
3. Prepare Your Work Area
Before applying the sealer, make sure to prepare your work area. Lay down a protective covering to prevent any spills or stains on your working surface. It’s also advisable to work in a well-ventilated area or use a respirator mask to avoid inhaling harmful fumes.
4. Apply the Sealer
Using a soft brush or a foam brush, carefully apply the sealer to your finger painting. Start from one corner and work your way across the canvas, ensuring even coverage. Be gentle to avoid smudging or damaging the paint. Follow the manufacturer’s instructions for the recommended number of coats and drying time in between.
5. Consider Varnishing
If you want to add an extra layer of protection to your finger painting, consider applying a varnish. Varnishes are available in gloss, satin, or matte finishes, allowing you to choose the desired look for your artwork. Like the sealer, use a soft brush and apply the varnish in thin, even coats, following the manufacturer’s instructions.
6. Store and Display Properly
Once your finger painting is sealed and varnished, it’s important to store and display it properly to maintain its condition. Keep your artwork away from direct sunlight, excessive heat, and moisture, as these can cause damage over time. Consider framing your finger painting behind glass or using acid-free storage sleeves to protect it from dust and other environmental factors.
7. Regular Maintenance
To ensure the longevity of your finger painting, it’s recommended to perform regular maintenance. Dust the surface gently using a soft, dry brush or microfiber cloth to remove any accumulated dust or dirt. Avoid using harsh cleaning agents or abrasive materials that can damage the paint or varnish.
Summary
Sealing and preserving your finger paintings created with acrylics is crucial to protect your artwork and ensure its longevity. Allow sufficient drying time, choose a suitable sealer, prepare your work area, apply the sealer and consider varnishing for extra protection. Store and display your artwork properly, perform regular maintenance, and enjoy your finger paintings for years to come.
FAQs
Can you finger paint with acrylic paint?
Yes, you can finger paint with acrylic paint. Acrylic paint is water-based and non-toxic, making it safe to use with your fingers. However, keep in mind that acrylic paint can stain your skin, so you may want to wear gloves or protect your fingers with petroleum jelly before finger painting.
Conclusion
In conclusion, while acrylic paint is primarily designed for use on canvas and other traditional surfaces, it is possible to experiment with finger painting using this versatile medium. The quick-drying nature of acrylics allows for layering and blending, creating unique textures and effects on your artwork. However, it’s essential to consider the potential challenges of using acrylic paints for finger painting, such as their viscosity and potential staining of the skin. It’s recommended to dilute the paint with water or a medium to achieve a more fluid consistency for easier application. Overall, acrylic paint offers an exciting opportunity for artists to explore their creative boundaries and engage in a tactile painting experience.