
Yes, Brother Scan and Cut can indeed cut acrylic. With its advanced cutting technology and precision, it allows you to cut acrylic sheets with ease and accuracy. Whether you need to cut intricate shapes or straight lines, this versatile machine can handle it all. Say goodbye to manual cutting methods and let Brother Scan and Cut make your acrylic cutting projects faster and more efficient.
Step-by-Step Guide: How to Use the Brother Scan and Cut for Acrylic Cutting
Acrylic cutting is a popular technique used by crafters and DIY enthusiasts to create intricate designs and shapes. The Brother Scan and Cut is a versatile cutting machine that can be used for various materials, including acrylic. In this section, we will provide a step-by-step guide on how to use the Brother Scan and Cut for acrylic cutting.
Step 1: Prepare Your Materials
Before you begin cutting acrylic with the Brother Scan and Cut, you will need to gather the necessary materials. This includes acrylic sheets, the Brother Scan and Cut machine, a cutting mat, and any design files or templates you wish to use.
Step 2: Set Up the Machine
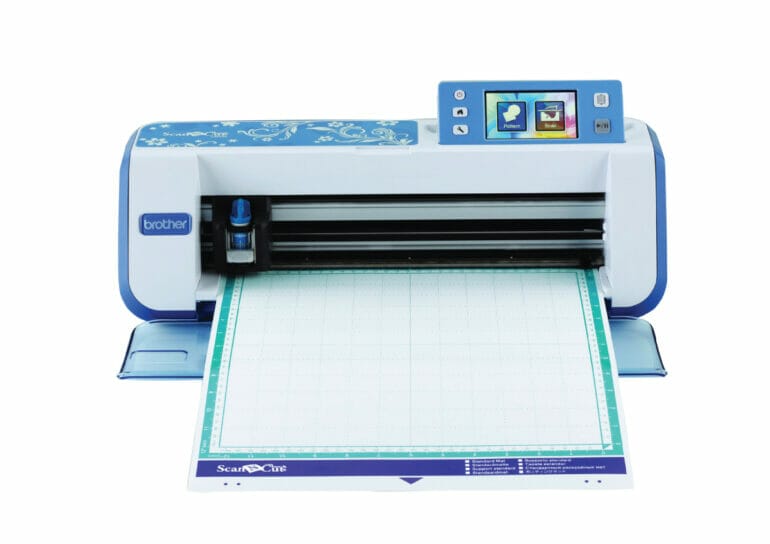
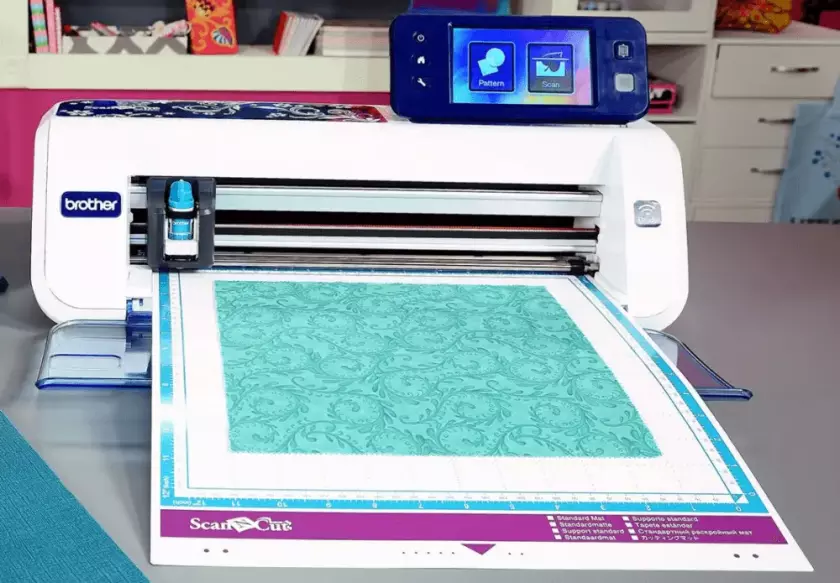
Once you have your materials ready, it’s time to set up the Brother Scan and Cut machine. Follow the manufacturer’s instructions to assemble the machine and ensure it is properly calibrated. Make sure the cutting mat is securely in place on the machine’s scanning area.
Step 3: Prepare Your Design
If you have a design file or template for your acrylic cutting project, you can either import it into the Brother Scan and Cut machine or create a new design using the built-in software. Follow the instructions provided with the machine to load or create your design.
Step 4: Scan Your Acrylic
Place your acrylic sheet onto the scanning area of the Brother Scan and Cut machine. Use the machine’s scanning function to scan the acrylic sheet and create a digital image of your design. This will allow the machine to accurately cut the acrylic.
Step 5: Edit and Customize
Once the machine has scanned your acrylic, you can use the built-in software to edit and customize your design. This includes resizing, rotating, or adding additional elements to your design. Take your time to perfect your design before moving on to the cutting stage.
Step 6: Set Cutting Parameters
Before you start cutting the acrylic, you will need to set the cutting parameters on the Brother Scan and Cut machine. This includes selecting the appropriate cutting depth, speed, and pressure for your specific material. Refer to the machine’s user manual for guidance on choosing the correct settings.
Step 7: Start Cutting
Once you have set the cutting parameters, it’s time to start cutting your acrylic. Place the acrylic sheet onto the cutting mat, ensuring it is securely in place. Follow the instructions provided with the machine to start the cutting process. The Brother Scan and Cut machine will accurately cut your design into the acrylic.
Step 8: Finishing Touches
After the cutting process is complete, carefully remove the acrylic sheet from the cutting mat. Use a sharp tool, such as an X-Acto knife, to remove any excess material or clean up any rough edges. Take your time to ensure your acrylic cutting project looks clean and professional.
Step 9: Clean Up
Once you have finished cutting your acrylic, it’s important to clean up your workspace. Remove any leftover scraps or debris from the cutting area and properly store your materials and the Brother Scan and Cut machine. This will help keep your workspace organized and ready for future projects.
In summary, the Brother Scan and Cut is a powerful tool for acrylic cutting. By following this step-by-step guide, you can confidently use the machine to create intricate and precise designs on acrylic sheets. Whether you’re a seasoned crafter or a beginner, the Brother Scan and Cut makes acrylic cutting accessible and enjoyable. So gather your materials, set up the machine, and let your creativity shine through acrylic cutting projects.
Tips and Tricks for Achieving Precise Acrylic Cuts with the Brother Scan and Cut
Acrylic cutting can be a challenging task, especially when you are looking for precise cuts. However, with the help of the Brother Scan and Cut machine, you can achieve professional-level acrylic cuts with ease. In this section, we will share some valuable tips and tricks to help you get the most out of your Brother Scan and Cut machine when working with acrylic materials.
1. Choose the Right Blade
When working with acrylic, it is essential to use the right blade for the job. The Brother Scan and Cut machine offers different types of blades, including the standard cut blade, deep cut blade, and fabric blade. For acrylic cutting, we recommend using the deep cut blade. It has a sturdier construction and is specifically designed to handle thick materials like acrylic.
2. Adjust the Blade Depth
To achieve precise acrylic cuts, it is crucial to adjust the blade depth according to the thickness of your acrylic material. The Brother Scan and Cut machine allows you to adjust the blade depth easily. Start with a shallow blade depth and gradually increase it until you achieve the desired cut depth. Make sure not to set the blade depth too deep, as it can cause the acrylic to crack or chip.
3. Test Cut First
Before cutting your final design on the acrylic, it is recommended to perform a test cut on a scrap piece of acrylic. This will help you ensure that the blade depth and settings are correct. Additionally, it allows you to make any necessary adjustments before cutting your actual design, saving you time and materials.
4. Use a Cutting Mat
When cutting acrylic with the Brother Scan and Cut machine, it is essential to use a cutting mat. The cutting mat provides stability and helps to prevent the acrylic from shifting during the cutting process. Make sure to choose a mat that is compatible with the thickness of your acrylic material.
5. Slow Down the Cutting Speed
Acrylic cutting requires precision, and slowing down the cutting speed can help achieve better results. The Brother Scan and Cut machine allows you to adjust the cutting speed. We recommend reducing the speed when cutting acrylic to ensure cleaner and more precise cuts.
6. Clean the Acrylic Surface
Before placing the acrylic material on the cutting mat, make sure to clean the surface. Dust and debris on the acrylic can interfere with the cutting process and affect the quality of the cuts. Use a soft cloth or microfiber cloth to wipe the surface clean.
7. Secure the Acrylic Material
To prevent the acrylic material from shifting during the cutting process, it is essential to secure it firmly on the cutting mat. You can use painter’s tape or adhesive spray to hold the material in place. Ensure that the acrylic is flat and evenly positioned on the cutting mat for accurate cuts.
8. Optimize the Design
When designing your project for acrylic cutting, keep in mind that intricate and complex designs may require more time and precision. Simplifying the design by reducing the number of small details can help achieve cleaner cuts. Additionally, try to avoid sharp angles and tight curves, as they can be challenging to cut accurately.
9. Practice and Experiment
Acrylic cutting with the Brother Scan and Cut machine requires practice and experimentation. Take the time to familiarize yourself with the machine’s settings and capabilities. Experiment with different blade depths, cutting speeds, and designs to find the optimal settings for your specific acrylic material.
By following these tips and tricks, you can achieve precise acrylic cuts with your Brother Scan and Cut machine. Remember to take your time, test your settings, and practice to master the art of acrylic cutting. With patience and persistence, you will be able to create stunning acrylic projects with professional-level precision.
Choosing the Right Acrylic for Scan and Cut Projects with Brother
When it comes to creating intricate designs and precise cuts for your crafting projects, Brother’s Scan and Cut machine is a game-changer. This innovative and versatile cutting machine allows you to scan your own designs or choose from a wide range of pre-loaded patterns, making it easier than ever to bring your creative visions to life.
However, to get the best results with your Scan and Cut projects, it’s important to choose the right acrylic material. Acrylic is a popular choice for crafting due to its durability, flexibility, and clarity. It’s available in various thicknesses and finishes, allowing you to customize your projects to suit your unique style.
1. Consider the Thickness
One of the first factors to consider when choosing acrylic for your Scan and Cut projects is the thickness of the material. Thicker acrylic sheets are more rigid and sturdy, making them ideal for projects that require structural integrity, such as 3D designs or intricate embellishments.
On the other hand, thinner acrylic sheets are more flexible and easier to cut, which makes them perfect for projects that require intricate detailing or delicate designs. If you’re planning to create intricate lace patterns, fine lettering, or intricate shapes, choosing a thinner acrylic sheet will ensure clean and precise cuts.
2. Opt for Transparent or Colored Acrylic
Brother’s Scan and Cut machine works best with transparent or colored acrylic sheets. Transparent acrylic allows you to see the design clearly, making it easier to position and align your cut lines accurately. It’s perfect for projects that require precise placement or layering of different elements.
Alternatively, colored acrylic sheets can add a pop of color and vibrancy to your projects. Whether you’re creating personalized signs, decorative embellishments, or unique home decor items, choosing colored acrylic can make your designs stand out. Just ensure that the color doesn’t interfere with the visibility of your cutting lines.
3. Consider the Finish
The finish of your acrylic sheet can also impact your Scan and Cut results. There are various finishes available, including glossy, matte, and frosted. Each finish offers a different aesthetic and can affect how the light interacts with your design.
Glossy finishes are reflective and can give your projects a polished and shiny look. Matte finishes, on the other hand, diffuse light and create a more subdued and elegant appearance. Frosted finishes have a textured surface that adds a unique and artistic touch to your designs.
4. Test Before Cutting
Before diving into a complex project, it’s always a good idea to test the acrylic sheet with your Scan and Cut machine. By doing a test run, you can ensure that the settings are correctly calibrated for the thickness and type of acrylic you’re using. This will help you avoid any mishaps or wasted materials.
Additionally, testing different settings can help you determine the ideal cutting speed and pressure for the specific acrylic sheet you’re working with. Different acrylic brands or finishes may require slight adjustments to achieve the best results.
Choosing the right acrylic material for your Scan and Cut projects with Brother is crucial for achieving clean and precise cuts. Consider the thickness, transparency or color, finish, and always do a test run before starting your project. With the right acrylic, you’ll be able to unleash your creativity and take your crafting to the next level.
Enhancing Your Acrylic Cutting Skills with Brother Scan and Cut: Advanced Techniques and Ideas
If you’re an avid crafter or DIY enthusiast, you’ve probably heard of the Brother Scan and Cut machine. This innovative tool has revolutionized the way we cut various materials, including acrylic. With its precision cutting abilities and endless design possibilities, the Brother Scan and Cut is a must-have for any creative individual.
In this section, we will explore some advanced techniques and ideas to enhance your acrylic cutting skills using the Brother Scan and Cut. Whether you’re a beginner or a seasoned user, these tips and tricks will take your projects to the next level.
1. Creating Intricate Designs
One of the advantages of the Brother Scan and Cut machine is its ability to create intricate designs with ease. When working with acrylic, you can utilize this feature to add intricate details and patterns to your projects. By utilizing the built-in scanner, you can scan any design or image and then precisely cut it from a sheet of acrylic.
To create intricate designs, ensure that you have a high-quality image or design to scan. Clean lines and sharp edges will result in better cutting accuracy. Once you have scanned the image, use the machine’s software to adjust the settings and ensure that the blade cuts through the acrylic effectively.
2. Layering Acrylic for Dimension
Another advanced technique that can add depth and dimension to your acrylic projects is layering. By cutting multiple layers of acrylic and stacking them on top of each other, you can create a three-dimensional effect.
To achieve this, start by designing your desired shape or pattern in the software. Cut each layer separately, making sure that the dimensions match perfectly. Once all the layers are cut, use a strong adhesive to glue them together, ensuring that each layer is aligned correctly.
Layering can be particularly effective when creating intricate designs such as flowers, animals, or complex geometric shapes. Experiment with different color combinations and layering techniques to achieve stunning results.
3. Etching and Engraving on Acrylic
While the Brother Scan and Cut machine is primarily known for its cutting capabilities, it can also be used for etching and engraving on acrylic surfaces. This feature allows you to add personalized messages, intricate patterns, or decorative elements to your acrylic projects.
To etch or engrave on acrylic, you will need to use a specific blade designed for this purpose. Adjust the settings in the software to control the depth and intensity of the etching. It’s important to note that the etching process may take longer than cutting, so be patient and allow the machine to work its magic.
4. Combining Acrylic with Other Materials
If you want to take your acrylic cutting skills to the next level, consider combining acrylic with other materials. The Brother Scan and Cut machine can cut a wide range of materials, including paper, fabric, felt, and vinyl. By combining these materials with acrylic, you can create unique and visually appealing projects.
For example, you can cut intricate paper designs and adhere them to acrylic sheets for a layered effect. Alternatively, you can cut vinyl decals and apply them to acrylic surfaces to create personalized signs or decorations.
5. Exploring Advanced Software Features
The Brother Scan and Cut machine comes with advanced software that allows you to customize and manipulate your designs. Take some time to explore these features and experiment with different settings to unlock the full potential of your machine.
Some advanced software features include:
- Vectorization: Convert raster images into scalable vector files for precise cutting.
- Pattern creation: Design your own patterns and motifs to cut from acrylic.
- Welding and overlapping: Combine multiple shapes to create unique designs.
- Editing tools: Adjust size, position, and orientation of designs with ease.
By mastering these advanced software features, you can create intricate and customized designs that truly reflect your creativity.
Summary
The Brother Scan and Cut machine opens up a world of possibilities for acrylic cutting. With these advanced techniques and ideas, you can elevate your acrylic projects and create stunning designs with ease. Experiment with different materials, layering techniques, and software features to unleash your creativity and enhance your acrylic cutting skills.
FAQs
Can the Brother Scan and Cut cut acrylic?
No, the Brother Scan and Cut is not designed to cut acrylic. It is primarily used for cutting paper, fabric, and other thin materials. For cutting acrylic, it is recommended to use a laser cutter or a CNC machine specifically designed for acrylic cutting.
Conclusion
In conclusion, the Brother Scan and Cut machine is an excellent tool for cutting various materials, including acrylic. Its advanced scanning capabilities allow for precise and accurate cuts, ensuring clean and professional results.
Whether you’re a DIY enthusiast or a professional designer, the Brother Scan and Cut machine offers a convenient and efficient solution for acrylic cutting projects. Its user-friendly interface and versatile features make it suitable for both beginners and experienced users.
With the ability to scan and cut acrylic, this machine opens up endless possibilities for creative projects. From intricate designs to personalized crafts, the Brother Scan and Cut machine delivers exceptional performance and quality, making it a must-have tool for any crafting or design enthusiast.