
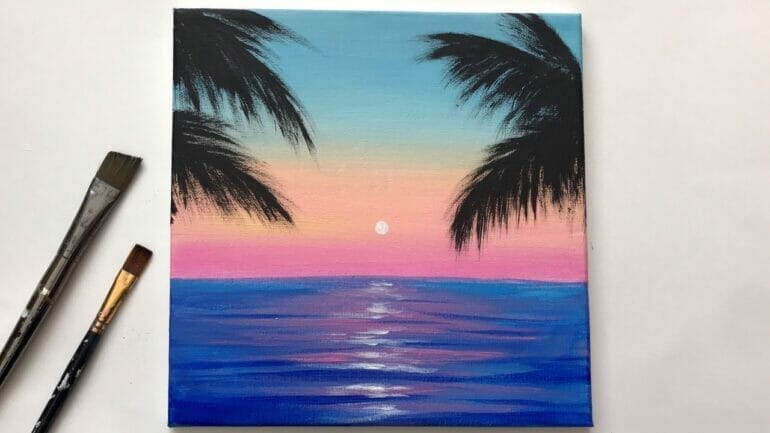
Are you wondering if acrylic paint can effectively cover pencil marks on canvas? The answer is yes! Acrylic paint is known for its opacity and ability to provide excellent coverage. With its vibrant colors and quick drying time, acrylic paint can easily conceal pencil marks and create a smooth, professional finish on your canvas artworks.
Whether you’re a beginner or an experienced artist, using acrylic paint over pencil sketches allows you to make adjustments and add depth to your artwork. The versatile nature of acrylic paint makes it perfect for layering and building up colors, ensuring that your pencil marks won’t be visible once painted over.
Using a few coats of acrylic paint will ensure that any underlying pencil marks are completely covered. Additionally, you can also use acrylic mediums like gesso to create a blank canvas surface before starting your artwork, eliminating the need to worry about pencil marks showing through.
Overall, acrylic paint is a reliable and effective medium when it comes to covering pencil marks on canvas. Its opaque pigments and versatility make it a popular choice for artists looking to achieve a flawless and professional finish.
Enhancing the vibrancy: Techniques to make acrylic paint effectively cover pencil marks on canvas
When creating artwork with acrylic paint on canvas, it is common to sketch out the design or composition using a pencil. However, sometimes those pencil marks can be visible even after applying layers of acrylic paint. In order to achieve a vibrant and seamless finish, there are several techniques that can be used to effectively cover pencil marks on canvas.
1. Erase and seal
The first step to ensure that pencil marks do not show through the layers of acrylic paint is to erase them as much as possible. Use a good quality eraser and gently rub over the pencil marks until they are barely visible. It is important not to press too hard, as this might damage the canvas surface.
After erasing, it is recommended to seal the canvas with a layer of clear gesso or medium. This creates a barrier between the pencil marks and the acrylic paint, preventing the marks from bleeding through.
2. Build up layers
One effective technique to cover pencil marks is to build up multiple layers of acrylic paint. Start with a thin layer of paint and allow it to dry completely. Then, apply additional layers, gradually increasing the opacity and thickness of the paint.
As you layer the paint, make sure to use a brush or palette knife to evenly distribute the paint over the canvas surface. This helps to fill in any remaining pencil marks and create a smooth and vibrant finish.
3. Use opaque colors
When choosing colors for your acrylic painting, opt for opaque or semi-opaque colors rather than transparent ones. Transparent colors tend to allow more of the underlying pencil marks to show through. By using opaque colors, you can achieve better coverage and minimize the visibility of pencil marks.
For areas where pencil marks are more pronounced, consider using a heavier body acrylic paint. These paints have a thicker consistency and provide better coverage for areas that need to be completely opaque.
4. Incorporate texture
If you are still struggling to cover pencil marks, you can incorporate texture into your painting to distract the eye from any remaining marks. Using a palette knife or other textured tools, create interesting patterns or add impasto techniques to certain areas of your artwork. The added texture can help to minimize the visibility of pencil marks and create a more dynamic and expressive painting.
5. Finish with a final varnish
Once your acrylic painting is complete, it is recommended to finish it with a final varnish. This not only protects the painting from dust and UV damage but also enhances the overall vibrancy of the colors and further helps to camouflage any remaining pencil marks.
Choose a varnish that is compatible with acrylic paint and follow the instructions for application. The varnish will provide a glossy or matte finish, depending on your preference, while also evening out the appearance of the painting and giving it a professional touch.
Summary
When working with acrylic paint on canvas, covering pencil marks effectively is essential to achieving vibrant and seamless artwork. By erasing and sealing the canvas, building up layers of acrylic paint, using opaque colors, incorporating texture, and finishing with a varnish, you can ensure that pencil marks are not visible in the final piece. These techniques will help you create professional-looking acrylic paintings with a smooth and flawless finish.
Preparing the Canvas for Better Coverage of Pencil Sketches with Acrylic Paint
When working on a painting project, it is important to properly prepare the canvas to ensure a better coverage of pencil sketches with acrylic paint. This preparation process involves a few steps that can significantly enhance the final result of your artwork. In this section, we will discuss these steps in detail.
Clean the Canvas
The first step in preparing the canvas is to ensure that it is clean and free from any dust, dirt, or debris. Use a soft brush or a lint-free cloth to gently wipe the surface of the canvas, removing any loose particles. This will create a smooth and even surface for your pencil sketches and acrylic paint.
Apply a Primer
Next, applying a primer to the canvas will help create a better surface for the pencil sketches and acrylic paint to adhere to. Primers come in various types, such as gesso or acrylic-based primers. Choose a primer that is suitable for your specific project.
To apply the primer, use a wide brush or a roller to evenly coat the entire canvas. Make sure to cover the surface in smooth strokes, avoiding any drips or uneven application. Allow the primer to dry completely before proceeding to the next step.
Create a Pencil Sketch
Once the canvas is clean and primed, it is time to create a pencil sketch of your desired artwork. Using a light hand, sketch the outlines and details of your composition. This step is crucial as it serves as a guide for your acrylic paint application.
Take your time during this stage and ensure that the pencil sketch accurately represents your vision. If needed, make adjustments or corrections until you are satisfied with the overall composition.
Seal the Pencil Sketch
To prevent the pencil sketch from smudging or mixing with the acrylic paint, it is important to seal it. This can be done by applying a thin layer of fixative spray over the sketch. The fixative spray acts as a protective barrier, ensuring that the pencil lines remain intact during the painting process.
When applying the fixative spray, make sure to follow the manufacturer’s instructions. Hold the can at a distance and spray in a well-ventilated area. Allow the fixative to dry completely before moving on to the next step.
Start Painting with Acrylics
Now that your canvas is prepared and the pencil sketch is sealed, it’s time to start painting with acrylics. Begin by mixing your desired colors on a palette and applying them to the canvas using a brush or palette knife.
Work from the background to the foreground, gradually building up layers of paint. Pay attention to the instructions on the acrylic paint tubes regarding drying time and layering techniques. This will help you achieve a better coverage and depth in your artwork.
Final Touches and Finishing
Once you have completed your painting, take a step back and evaluate the overall composition. Make any necessary adjustments or add final touches to enhance the details and bring your artwork to life.
Allow the acrylic paint to dry completely before applying any varnish or protective coating to seal the finished piece. This will ensure the longevity and preservation of your artwork.
Summary
Preparing the canvas for better coverage of pencil sketches with acrylic paint involves a series of steps that are essential to achieving a successful artwork. By cleaning the canvas, applying a primer, creating a pencil sketch, sealing it, and then proceeding with the acrylic paint application, you can ensure a smoother and more professional result. Remember to take your time, follow the necessary precautions, and have fun expressing your creativity through this versatile medium.
Layering techniques: Creating depth and opacity when covering pencil marks with acrylic paint on canvas
When working with acrylic paints on canvas, one common challenge artists face is covering up pencil marks. Pencil marks may be faint or resistant to paint, leading to frustration and an unfinished look. However, by employing layering techniques, artists can achieve the desired depth and opacity, effectively concealing pencil marks and creating a flawless finish. In this section, we will explore some effective layering techniques to help you overcome this hurdle and enhance your acrylic painting skills.
1. Apply a base layer of gesso:
Prior to starting your painting, it is essential to apply a base layer of gesso to your canvas. Gesso acts as a primer, creating a smooth and adhesive surface for your acrylic paints. This layer will help the paint adhere better to the canvas and reduce the visibility of pencil marks. Use a wide brush to apply the gesso in even strokes, covering the entire surface of the canvas. Allow it to dry completely before proceeding to the next step.
2. Build up layers of paint:
Once the gesso is dry, you can begin layering your paint to cover the pencil marks. Start with a thin layer of paint and gradually build up thickness and opacity as needed. Use a small brush for intricate details and a larger brush for broader areas. Applying multiple thin layers allows the paint to dry faster and reduces the risk of cracking or clumping. Each layer should be allowed to dry completely before adding the next, ensuring a smooth and even finish.
3. Use glazing techniques:
Glazing is a technique that involves applying transparent or translucent layers of paint over dried layers. This method can help in achieving depth and richness of color while minimizing the visibility of pencil marks. Mix your desired color with a glazing medium or acrylic medium for transparency, and lightly brush it over the areas with pencil marks. The transparency of the glaze will allow the pencil marks to blend into the layers, creating a seamless look.
4. Dry brushing:
Dry brushing is a technique used to create texture and add highlights to a painting. To cover pencil marks, you can use this technique by loading a small amount of paint on a dry brush and gently brushing it over the affected areas. This will create a subtle layer of paint that can help conceal the marks while adding dimension to your artwork. Take care not to apply too much pressure, as it can disturb the layers underneath.
5. Experiment with different opacities:
Acrylic paints come in various opacities, ranging from transparent to opaque. By experimenting with different opacities, you can find the ideal combination to effectively cover pencil marks. Transparent paints can be used to layer over pencil marks, allowing them to blend seamlessly with the surrounding colors. Opaque paints, on the other hand, provide excellent coverage and can be used to create solid layers over the marks.
6. Finishing touches:
Once you have achieved the desired coverage of pencil marks, don’t forget to add the finishing touches to your painting. This may include adding highlights, shadows, and details to bring your artwork to life. Use a fine brush for precise work and take your time to ensure the final result is cohesive and visually appealing.
In summary, covering pencil marks with acrylic paint on canvas requires a strategic layering approach. By applying a base layer of gesso, building up layers of paint, using glazing techniques, employing dry brushing, experimenting with different opacities, and adding finishing touches, you can successfully achieve depth and opacity while concealing pencil marks. With practice and patience, these layering techniques will become valuable tools in your artistic repertoire, allowing you to create stunning acrylic paintings with a flawless finish.
Troubleshooting: Solutions for common challenges in covering pencil sketches with acrylic paint on canvas
When it comes to creating artwork, many artists rely on pencil sketches as a foundation before applying acrylic paint on canvas. However, there can be some challenges in covering pencil sketches with acrylic paint. In this section, we will discuss some common issues that artists face and provide solutions to overcome them.
1. Smudging and smearing:
One of the most common challenges when covering pencil sketches with acrylic paint is the risk of smudging and smearing the pencil lines. This can happen when the paint is applied too heavily or when the artist doesn’t allow enough drying time for the pencil lines.
To avoid smudging, it is important to apply the acrylic paint with a light touch and in thin layers. Allow each layer to dry completely before adding the next one. If the pencil lines are still smudging, you can try applying a thin layer of clear gesso over the pencil sketch before starting with the paint. The gesso will provide a barrier between the pencil lines and the paint, preventing smudging.
2. Transparency of the paint:
Acrylic paint can sometimes appear transparent, especially when applied thinly over a pencil sketch. This can result in the pencil lines showing through the paint, which may not be the desired effect.
To overcome this challenge, you can use an opaque white acrylic paint as a base layer to cover the pencil lines. Apply a thin layer of white paint over the entire sketch and allow it to dry completely. This will create a solid base and prevent the pencil lines from showing through. Once the white base layer is dry, you can continue painting with your desired colors on top.
3. Blending difficulties:
Blending colors seamlessly can be more challenging when working over a pencil sketch. The graphite from the pencil lines can mix with the paint, creating unwanted textures or muddy colors.
To achieve smooth blending, it is important to use clean brushes and palette knives for each color. Avoid dragging the paint over the pencil lines, as this can result in smudging. Instead, gently blend the colors next to the pencil lines, working in small sections and using light strokes. If you encounter any areas where the paint is not blending well, you can try adding a small amount of water or acrylic medium to the paint to improve its flow.
4. Erasing pencil lines:
Sometimes, artists may want to completely remove the pencil lines after painting over them with acrylic. However, erasing pencil lines can be challenging as the paint might adhere to the graphite and make it difficult to remove.
To erase pencil lines, it is best to wait until the paint is fully dry. Using a clean eraser, gently rub the pencil lines, taking care not to damage the painted areas. If the eraser is not effective, you can try using a kneaded eraser or a soft cloth to lightly lift off the pencil lines. It’s important to be cautious and test the eraser on a small, inconspicuous area first to ensure it doesn’t remove any paint.
5. Protecting the artwork:
Once you have successfully covered the pencil sketch with acrylic paint, it is important to protect your artwork to ensure its longevity. Acrylic paint is prone to damage from UV light, dust, and moisture.
To protect your artwork, you can apply a varnish specifically designed for acrylic paintings. Varnishes come in different finishes, such as glossy, matte, or satin, and provide a protective layer that helps to prevent color fading and protects the painting from dirt and moisture. Follow the manufacturer’s instructions for application and ensure that your painting is fully dry before varnishing.
In summary, covering pencil sketches with acrylic paint on canvas may present some challenges, but with the right techniques and precautions, you can achieve a successful and vibrant artwork. Remember to avoid smudging by applying the paint lightly and allowing sufficient drying time. Use a white base layer to prevent transparency and blend colors carefully to avoid mixing with graphite. Take caution when erasing pencil lines and protect your finished artwork with a suitable varnish. With practice and patience, you can effectively overcome these challenges and create stunning acrylic paintings over pencil sketches.
FAQs
Will acrylic paint cover pencil on canvas?
Yes, acrylic paint can cover pencil on canvas. Acrylic paint is opaque and has good coverage, so it can easily cover pencil lines. It is recommended to lightly erase any pencil marks before painting, but even if some pencil lines remain, they can be easily covered with acrylic paint.
Conclusion:
In conclusion, acrylic paint can effectively cover pencil marks on canvas, making it an ideal medium for artists who want to correct or enhance their pencil sketches. With its opaque nature and quick-drying properties, acrylic paint can provide excellent coverage over pencil lines, allowing artists to create vibrant and professional-looking artwork. Additionally, acrylic paint offers a wide range of colors and can be easily layered, blended, or thinned to achieve various effects. So, whether you are a beginner or an experienced artist, acrylic paint can be a versatile and reliable option to transform your pencil sketches into stunning paintings on canvas.